Shanty Sideboard
Build your own farmhouse style sideboard with doors! We love it paired with our matching hutch plans. include detailed diagrams, shopping and cut list, and lots of reader submitted photos. Build yours today and save hundreds off retail.
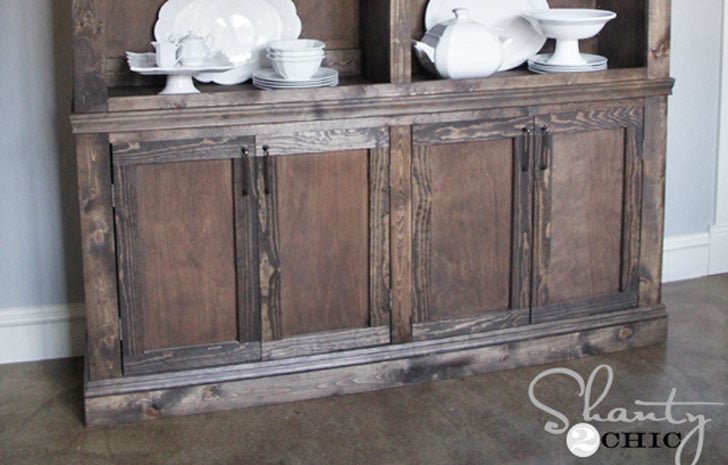
Specifications
| Project type | Buffet, Sideboard and Credenza Plans |
|---|---|
| Room | Storage Solutions |
| Style | Farmhouse Furniture |
| Difficulty | Advanced |
Dimensions
Use the size-specific shopping and cut lists below.
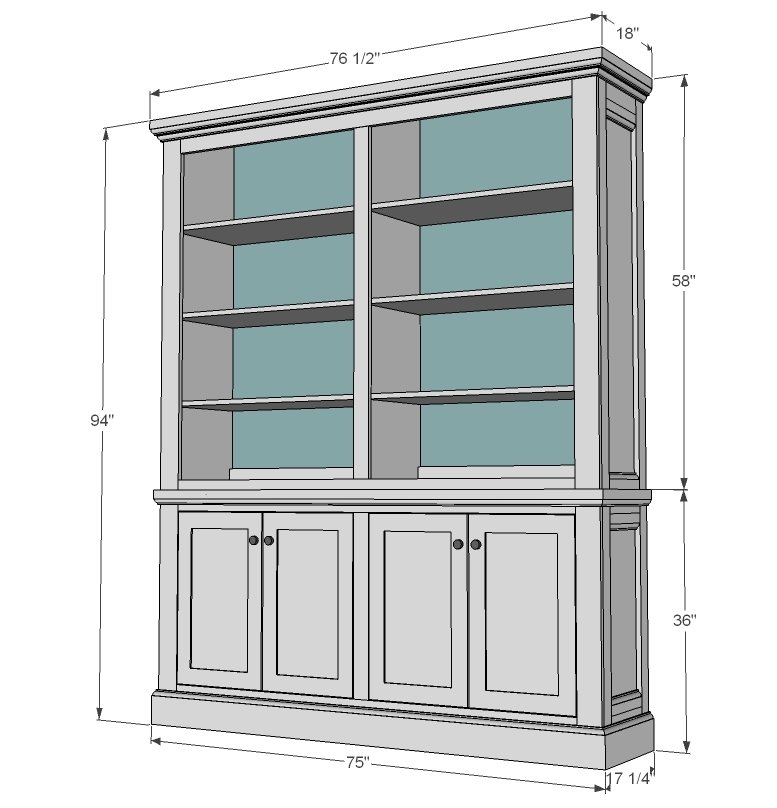
Shopping List
- 1 – 10’ stick moulding for top
- 1 – 10’ stick 5 1/4” base moulding
- 1 – 4’ stick 2 1/4” base moulding
- 3 – 1x3 @ 8 feet long
- 1 – 1x4 @ 8 feet long
- 1 – 1x4 @ 6 feet long Additional
- 1x3s for doors if desired
- 1 and a 1/2” sheets of 3/4” plywood, ripped into strips 15 3/4” wide (referred to as 1x16s in this plan)
- 1 – 1/4” plywood full sheet for the back
- 4 sets hinges
- 4 knobs or handles
Cut List
- 4 – 1x3 @ 10 3/4”
- 4 – 1x3 @ 35 1/4”
- 2 – 1x16 @ 35 1/4”
- 1 – 1x16 @ 73 1/2”
- 1 – 1x16 @ 30”
- 1 – 1x16 @ 70 1/2”
- 2 – 1x4 @ 32 1/2”
- 1 – 1x4 @ 73 1/2”
- 1 – 1x3 @ 26 1/4”
- 1 – 1x3 @ 66 1/2”
CUT DOORS IN PLANS
Tools
- measuring tape
- square
- pencil
- safety glasses
- hearing protection
- kreg-jig
- drill
- circular saw
- compound miter saw
- nailer
- sander
- level
- countersink drill bit
Step-by-step Instructions
Step 1
Start by adding trim to ends first. Also add 2 1/4" base moulding to insides of end outsides (see ends in next diagram). TIP: Drill 3/4" PHs facing upward on inside of plywood ends before attaching trim for attaching top in next step.
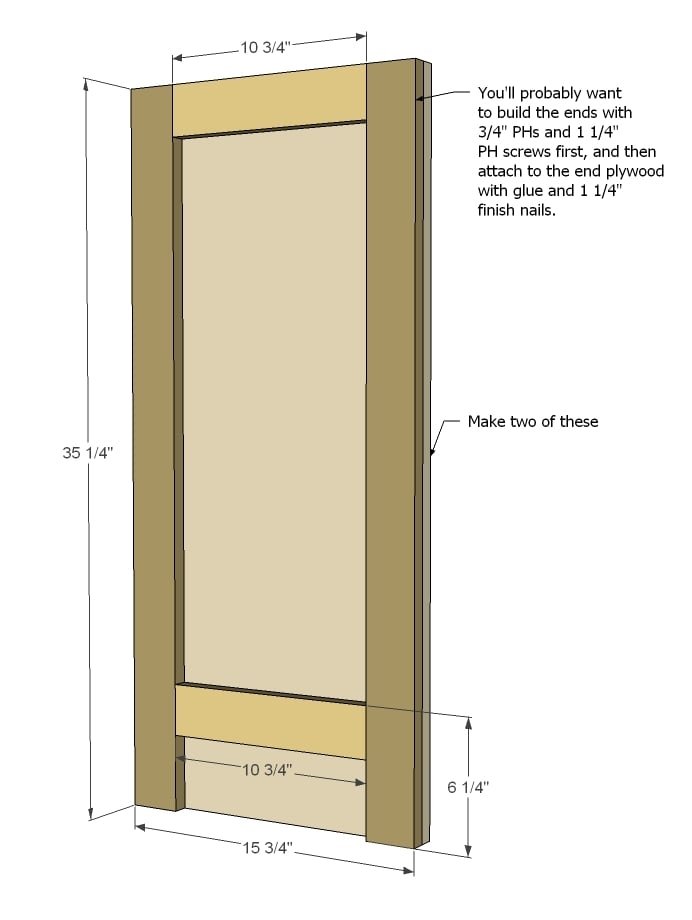
Step 2
Now it's time to join it all together! Attach the plywood to the sides and add center partition.
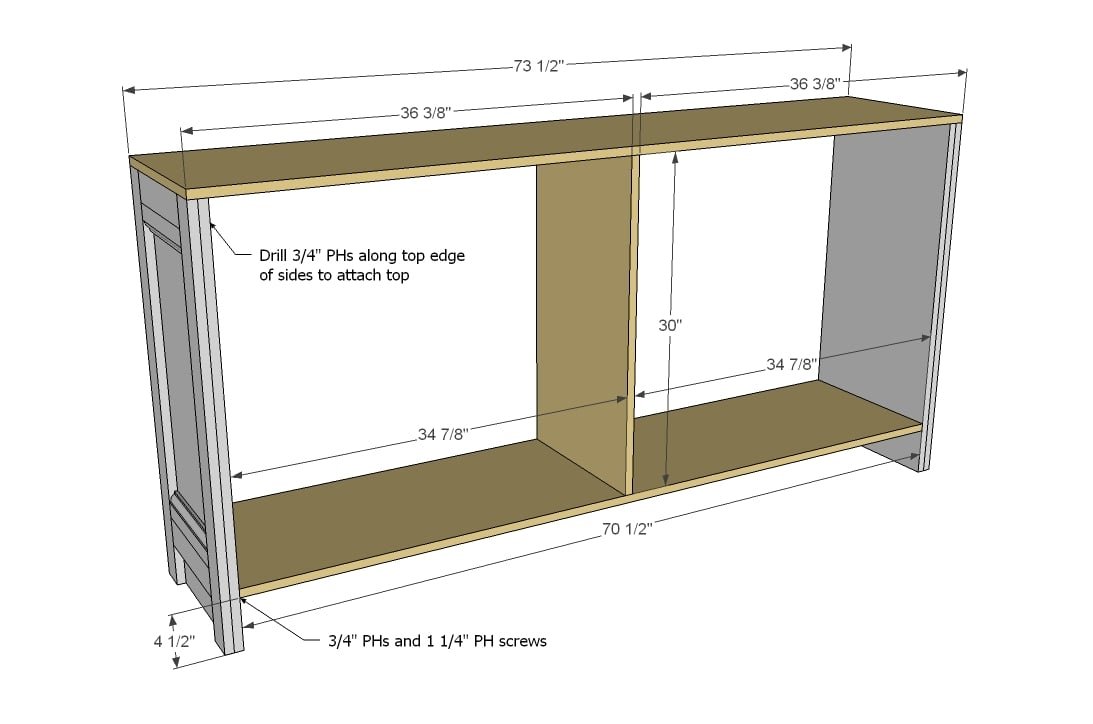
Step 3
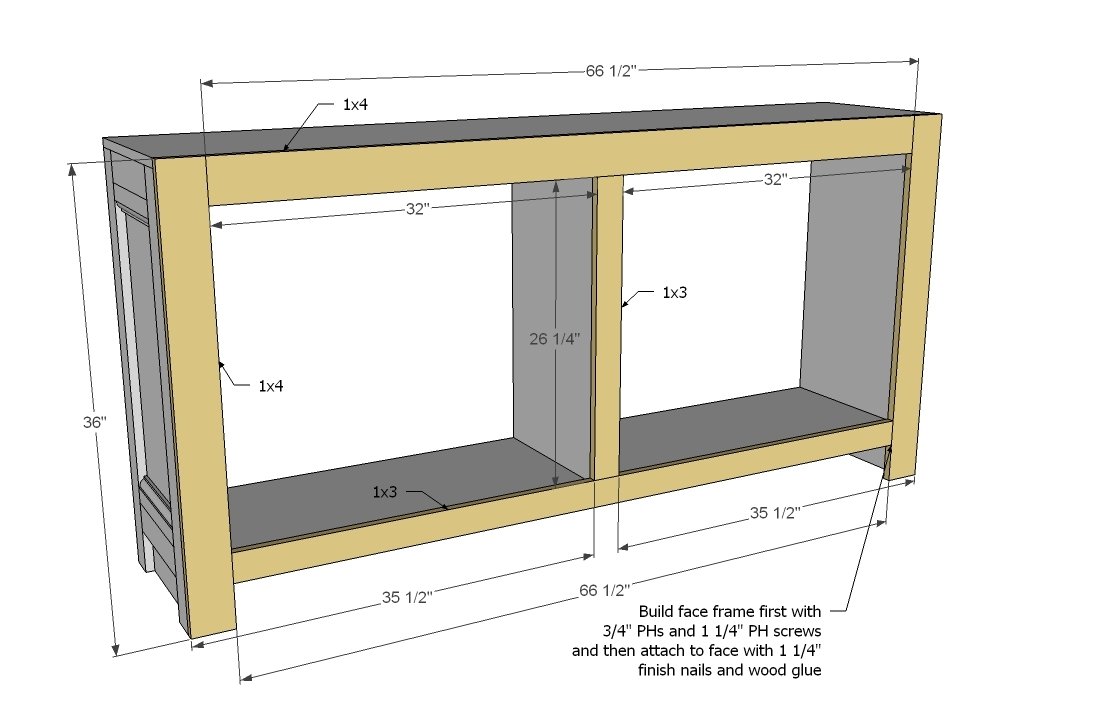
Build your front face frame first and then attach to front of sideboard.
Step 4
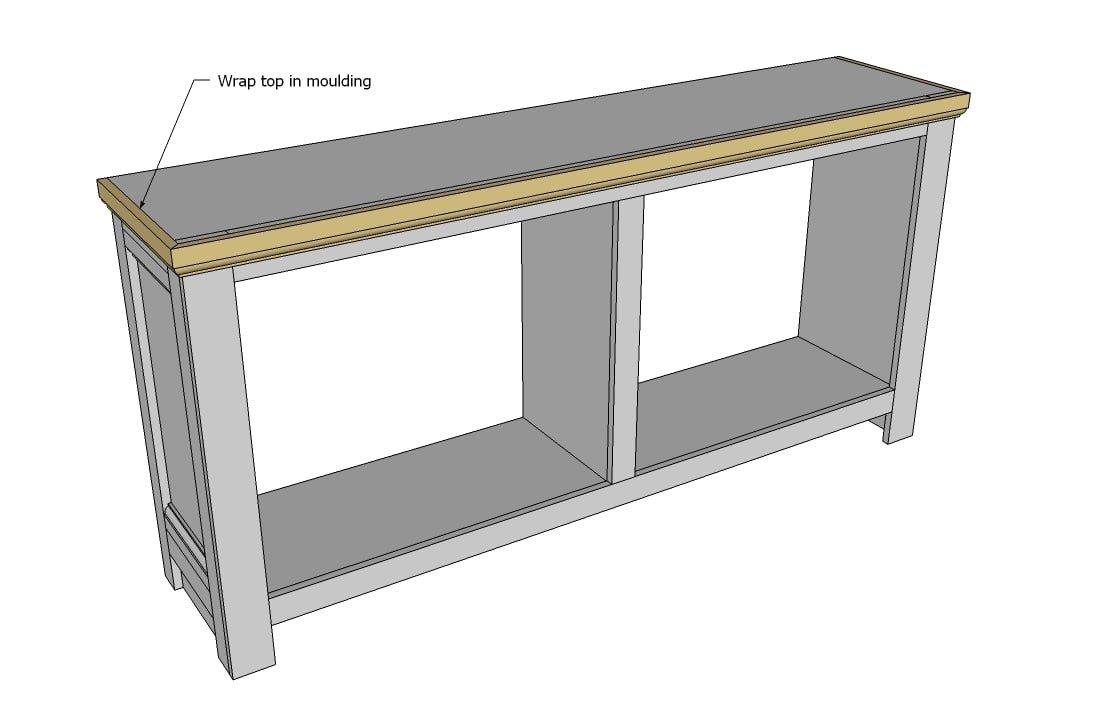
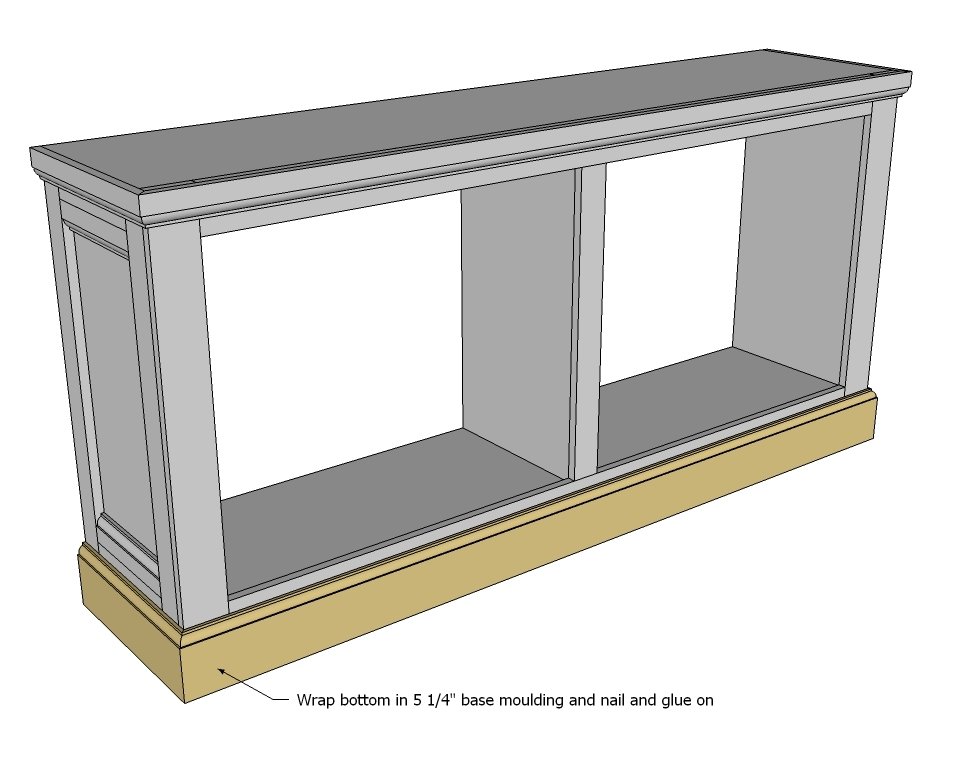
Cut moulding to fit and attach with finish nails and glue.
Step 5
Step 6
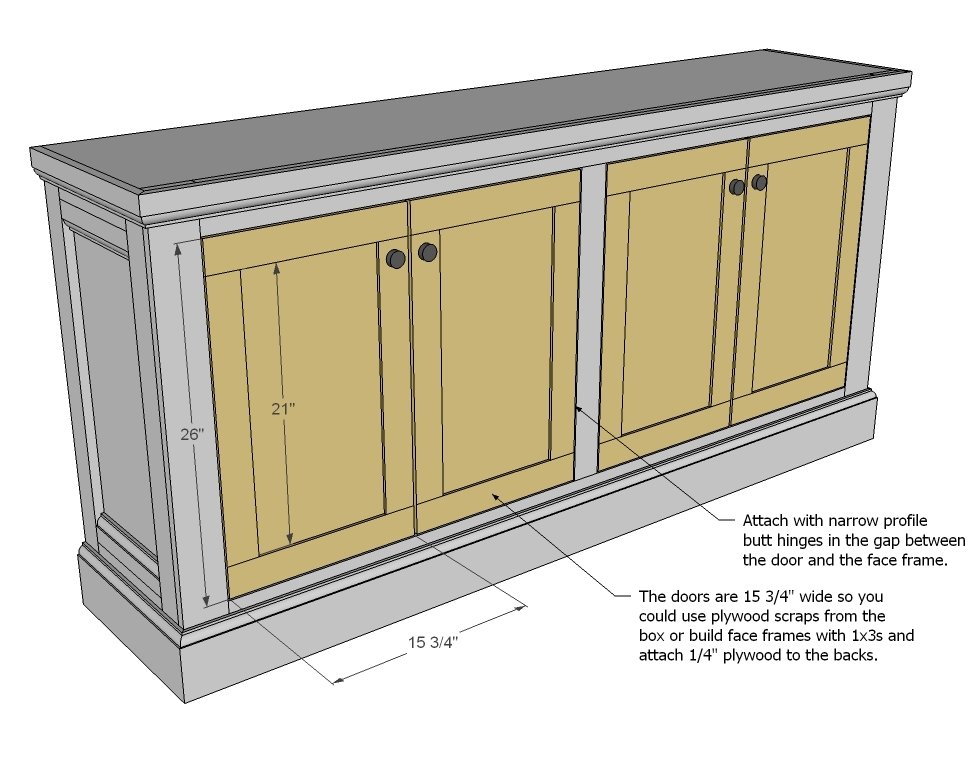
Build doors to fit openings - leaving approximately 1/8" gap around all sides, including bottom. Attach with either butt hinges that are installed in the gap between door and face frame, or use euro style full insets - you may need to add blocking for these to work.
Step 7
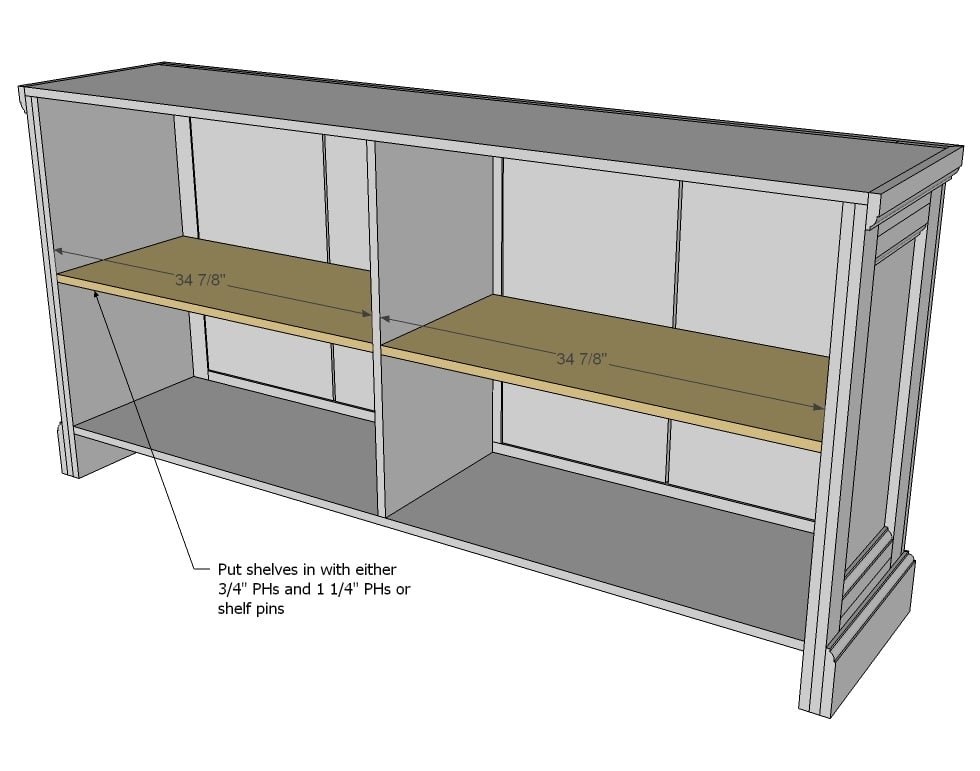
Shelves can be added at any height, either fixed or with shelf pins.
Step 8
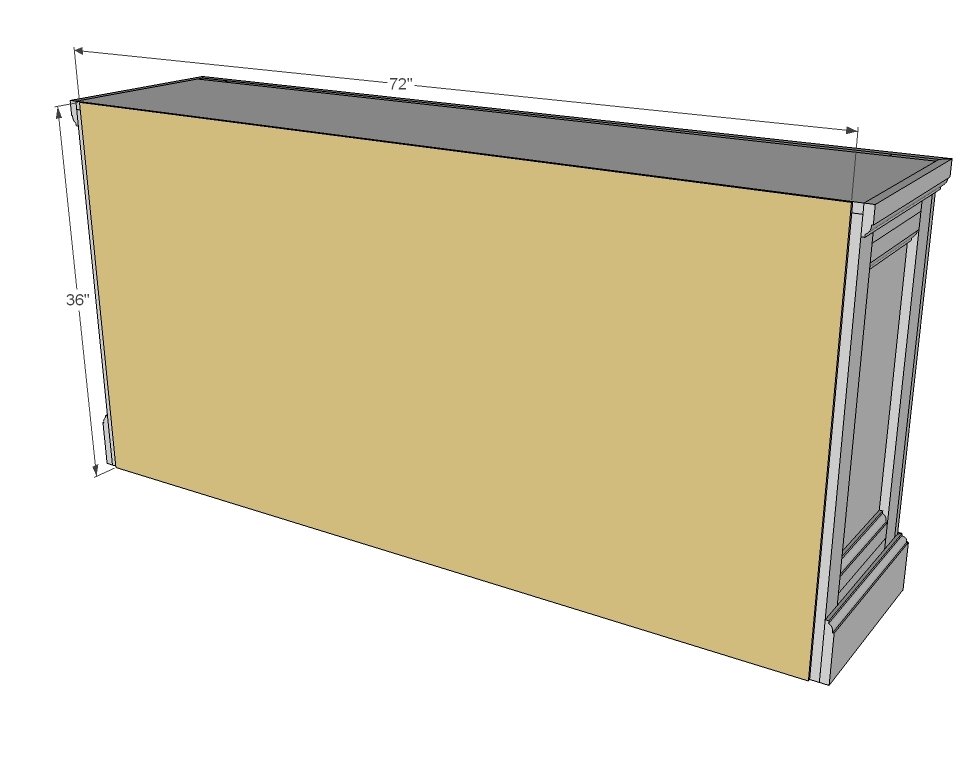
Attach back with 1 1/4" finish nails and glue.
Finishing
Sand all surfaces, starting with a medium grit and finishing with fine. Wipe off the dust, fill any holes or gaps with wood filler, and sand smooth once dry. Apply primer if you're painting, then finish with your choice of paint or stain and seal with a durable clear topcoat. For outdoor projects, use exterior-rated primer, paint or stain, and sealer so the piece stands up to the weather.
Source (temporary): https://www.ana-white.com/woodworking-projects/shanty-sideboard