Shiplap Fireplace TV Stand
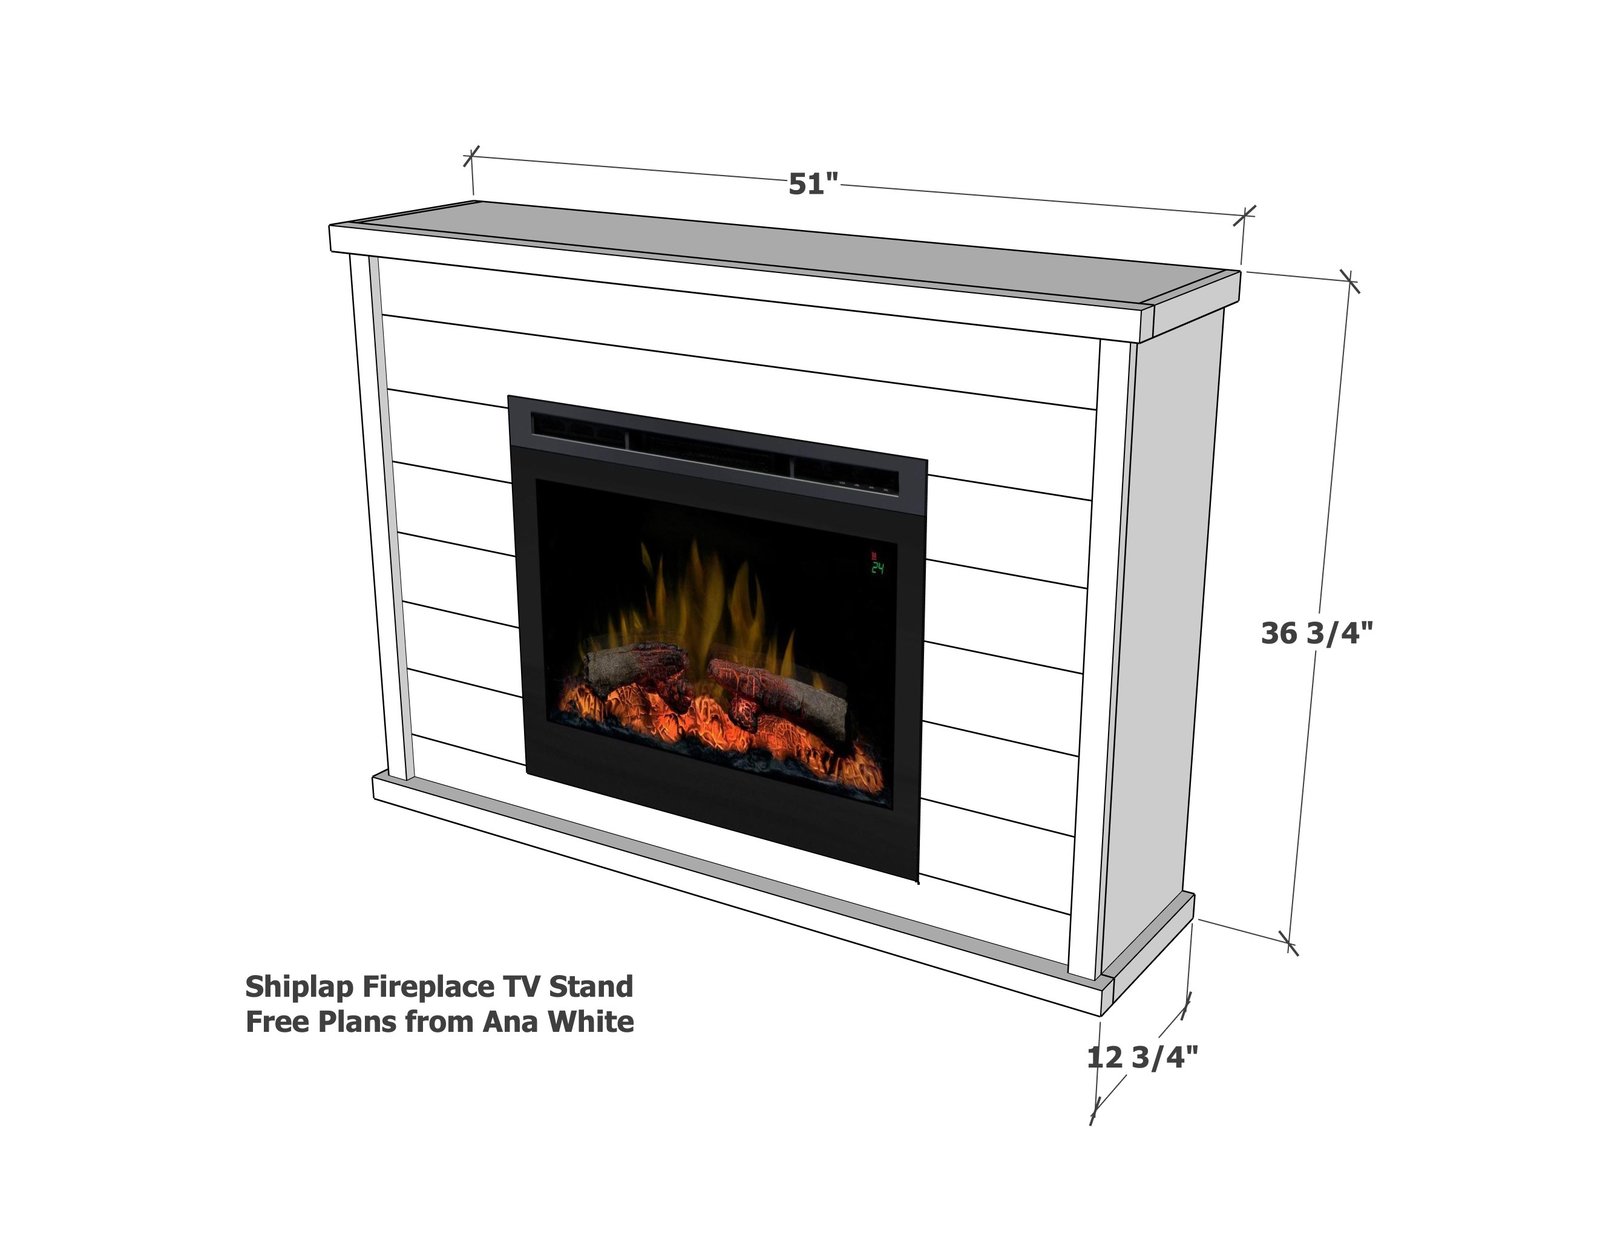
to build your own fireplace tv stand. This plan is easy to customize to fit just about any size insert. With a front face of shiplap, this fireplace tv stand will give you the look of a shiplap fireplace bump out, with much less work and cost. Can be installed permanently or freestanding in a room. This is a free project plan, with step by step diagrams, instructions, shopping list and cut list. This project plan is suitable for beginning to intermediate builders. Shown with top wood mantle (optional)

Specifications
| Project type | Home DIY |
|---|---|
| Room | Bedroom |
| Difficulty | Intermediate |
Dimensions
Use the size-specific shopping and cut lists below.
Shopping List
- Fireplace insert, this plan uses a 30" x 24" insert, but can be customized to fit 28-36" inserts with minimal changes, and for 40" or larger inserts, it is simple to adjust the plans, instructions detailed in the plans
- 4 - 2x4 @ 8 feet long
- 4 - 5-1/2" wide x 8 feet long shiplap pieces - this is approximate, depending on size of insert
- 1 - 1x12 @ 12" long
- 2 - 1x2 @ 8' long
- 2 - 2x2 @ 8' long
- Brad nails in 1-1/4" and 2" lengths
- 2-1/2" long self tapping star bit screws (about 30)
- wood glue
Boards are for common lumber, is using select pine, the shopping list can be reduced to reduce costs
Finger Joined 1x12 and MDF boards can be used for a more refined look.
Cut List
- 4 - 2x4 @ 48" - framing, horizontal
- 4 - 2x4 @ 33" - framing, vertical
- Shiplap pieces cut to fit
- 2 - 1x12 @ 36" - sides
- 1 - 1x12 @ 49-1/2" - top
- 4 - 1x2 @ 11-1/4" - side trim
- 2 - 2x2 @ 51" - front trim
- 2 - 1x2 @ 33-3/4" - front trim
Tools
- measuring tape
- square
- pencil
- safety glasses
- drill
- circular saw
- jigsaw
- compound miter saw
- nailer
- sander
Step-by-step Instructions
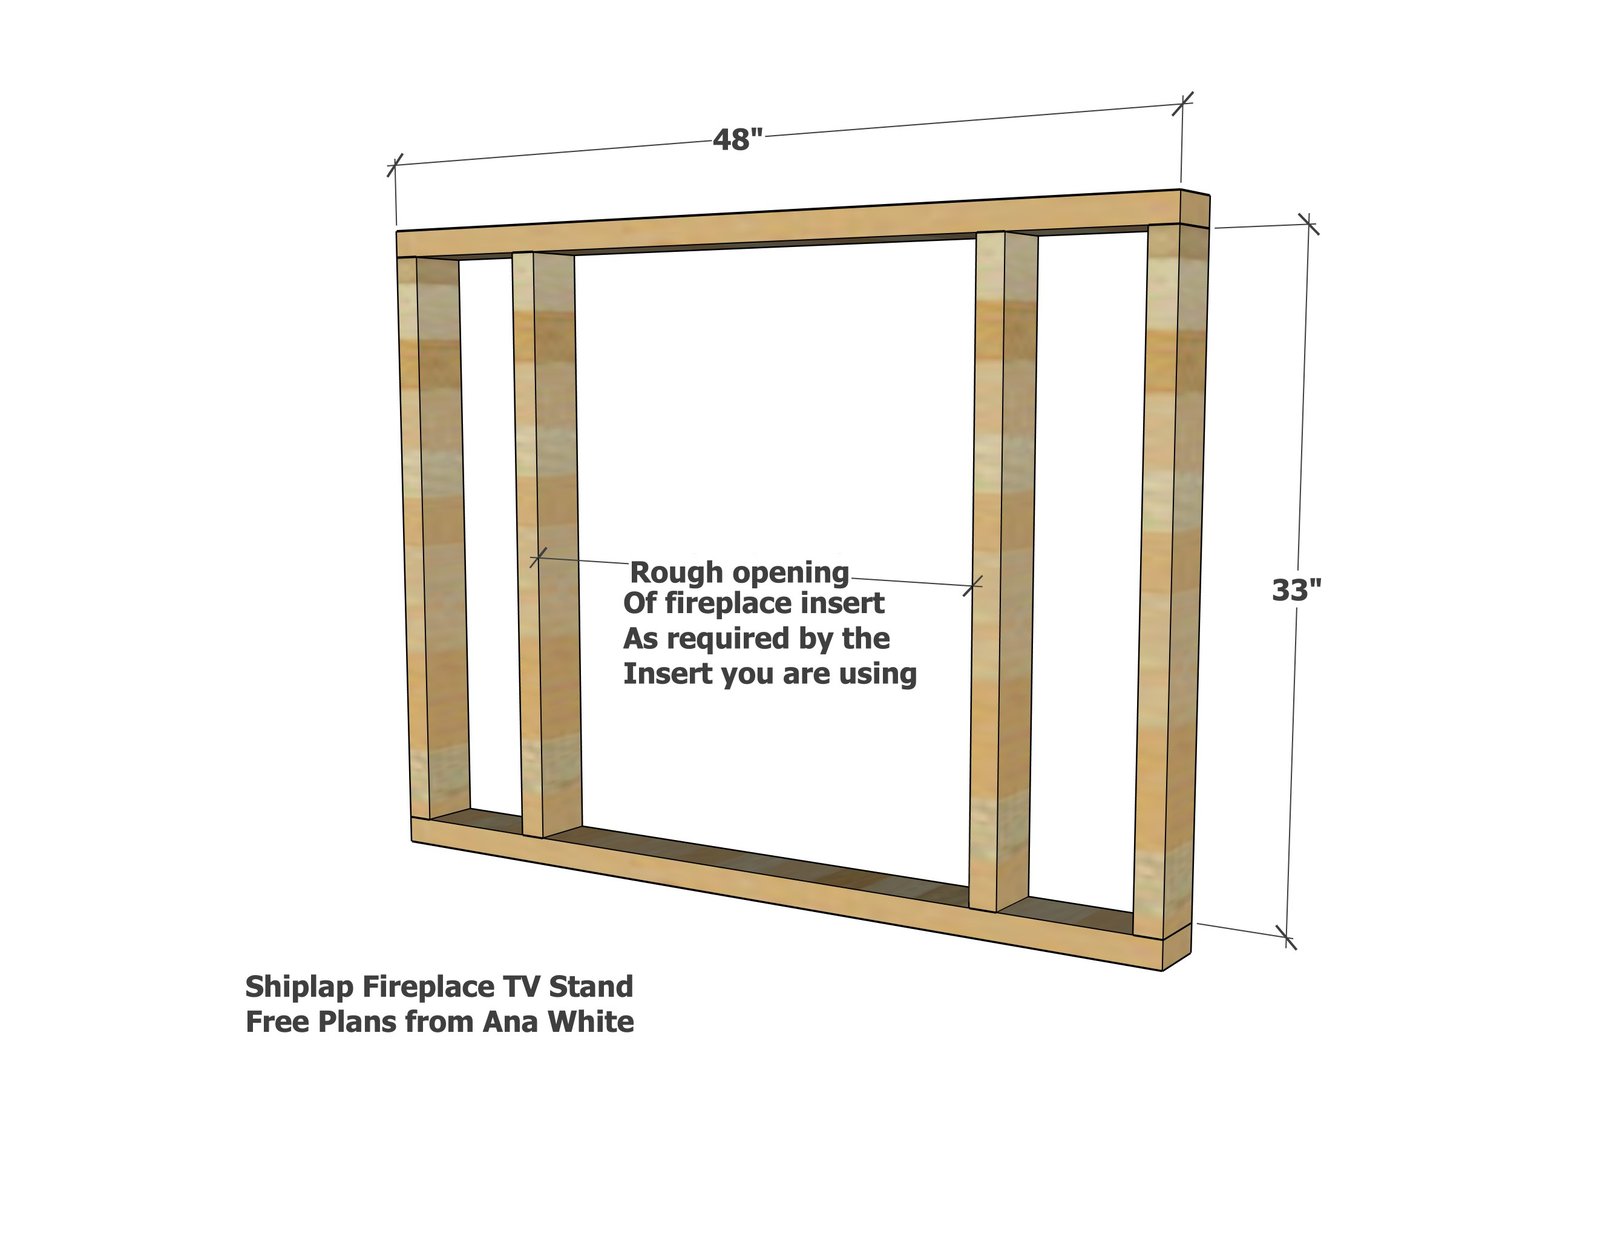
Start by cutting and building the front framing with 2x4s. Use the 2-1/2" screws to attach.
The inner 2x4 studs are spaced to match the rough opening requirements of your fireplace insert. For a different sized fireplace tv stand, simply adjust the cut lengths of these 2x4s to fit your modification design.
Step 2
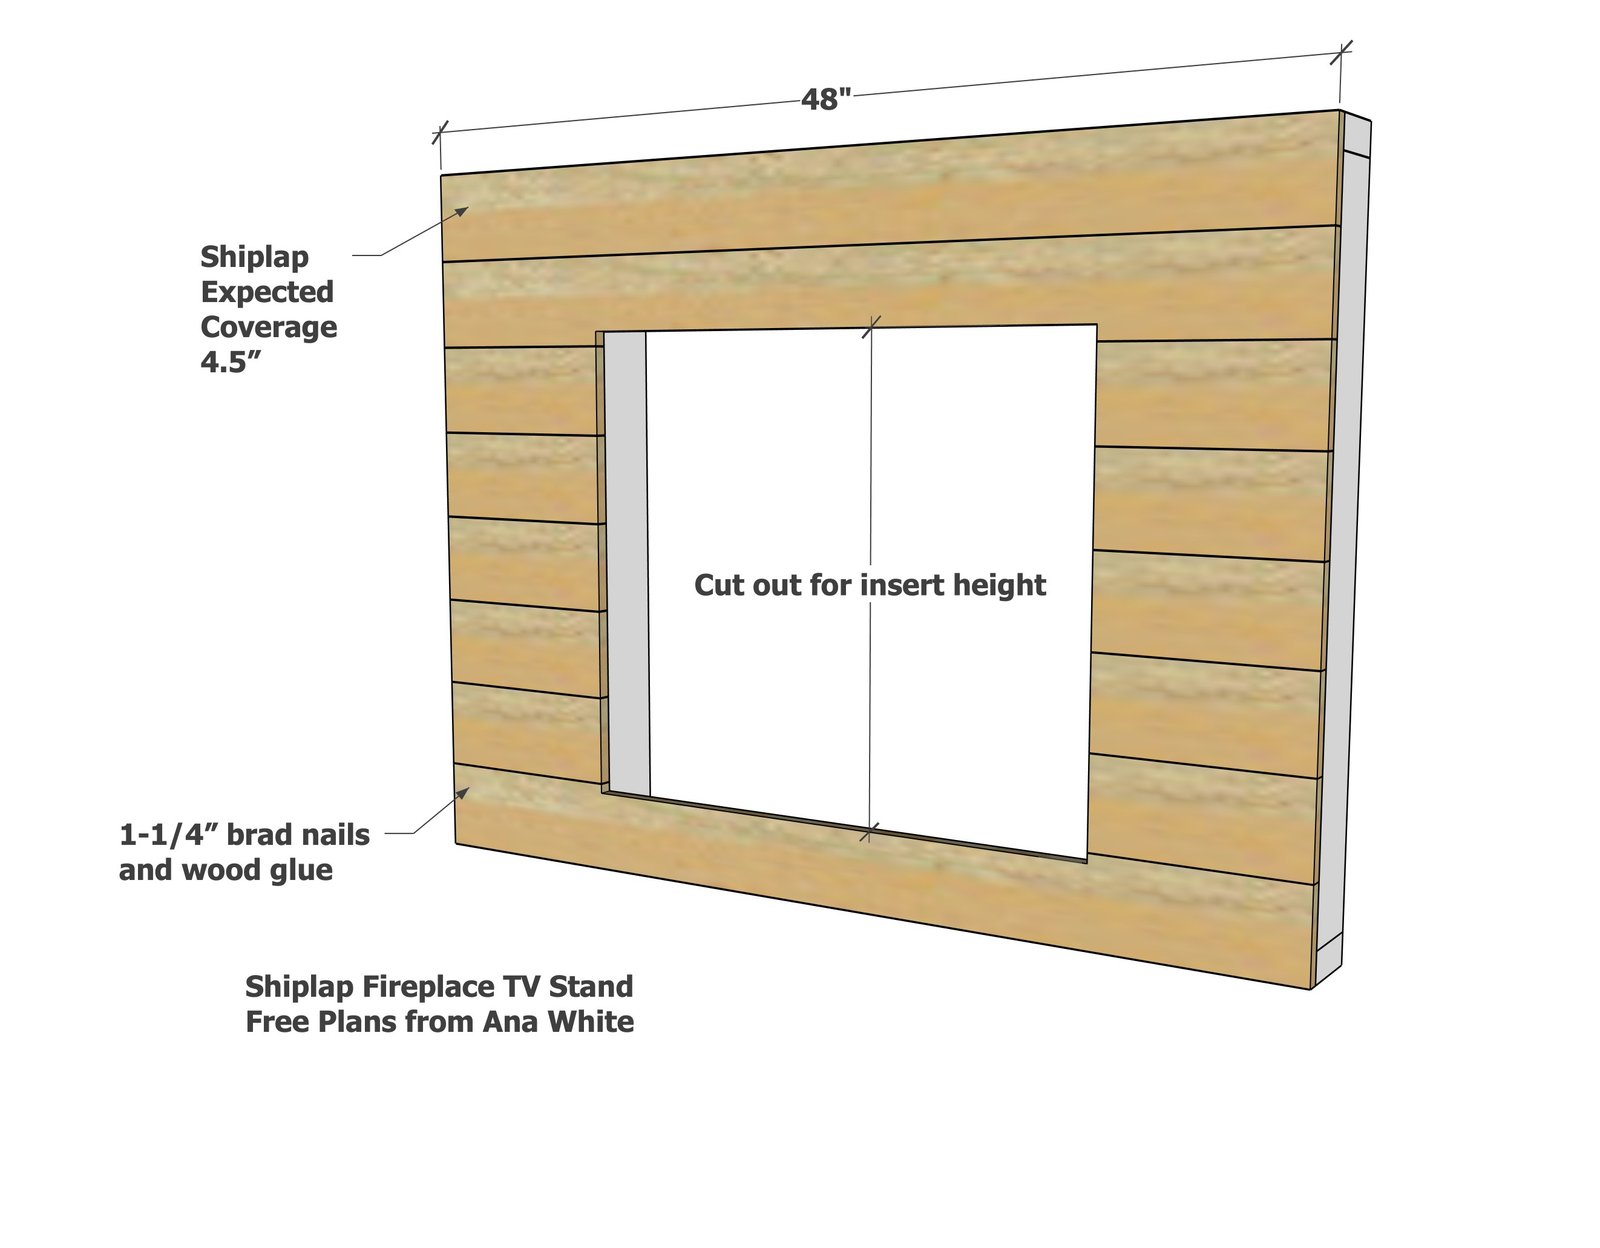
Carefully adjust the framing for square by taking opposite diagonal measurements and adjusting until the diagonals match. Cover the front with shiplap using glue and 1-1/4" brad nails. Cut out the shiplap as required by your fireplace insert. NOTE: Try to center the opening on the horizontal shiplap joints, so the insert looks balanced, as shown in the diagram.
Step 3
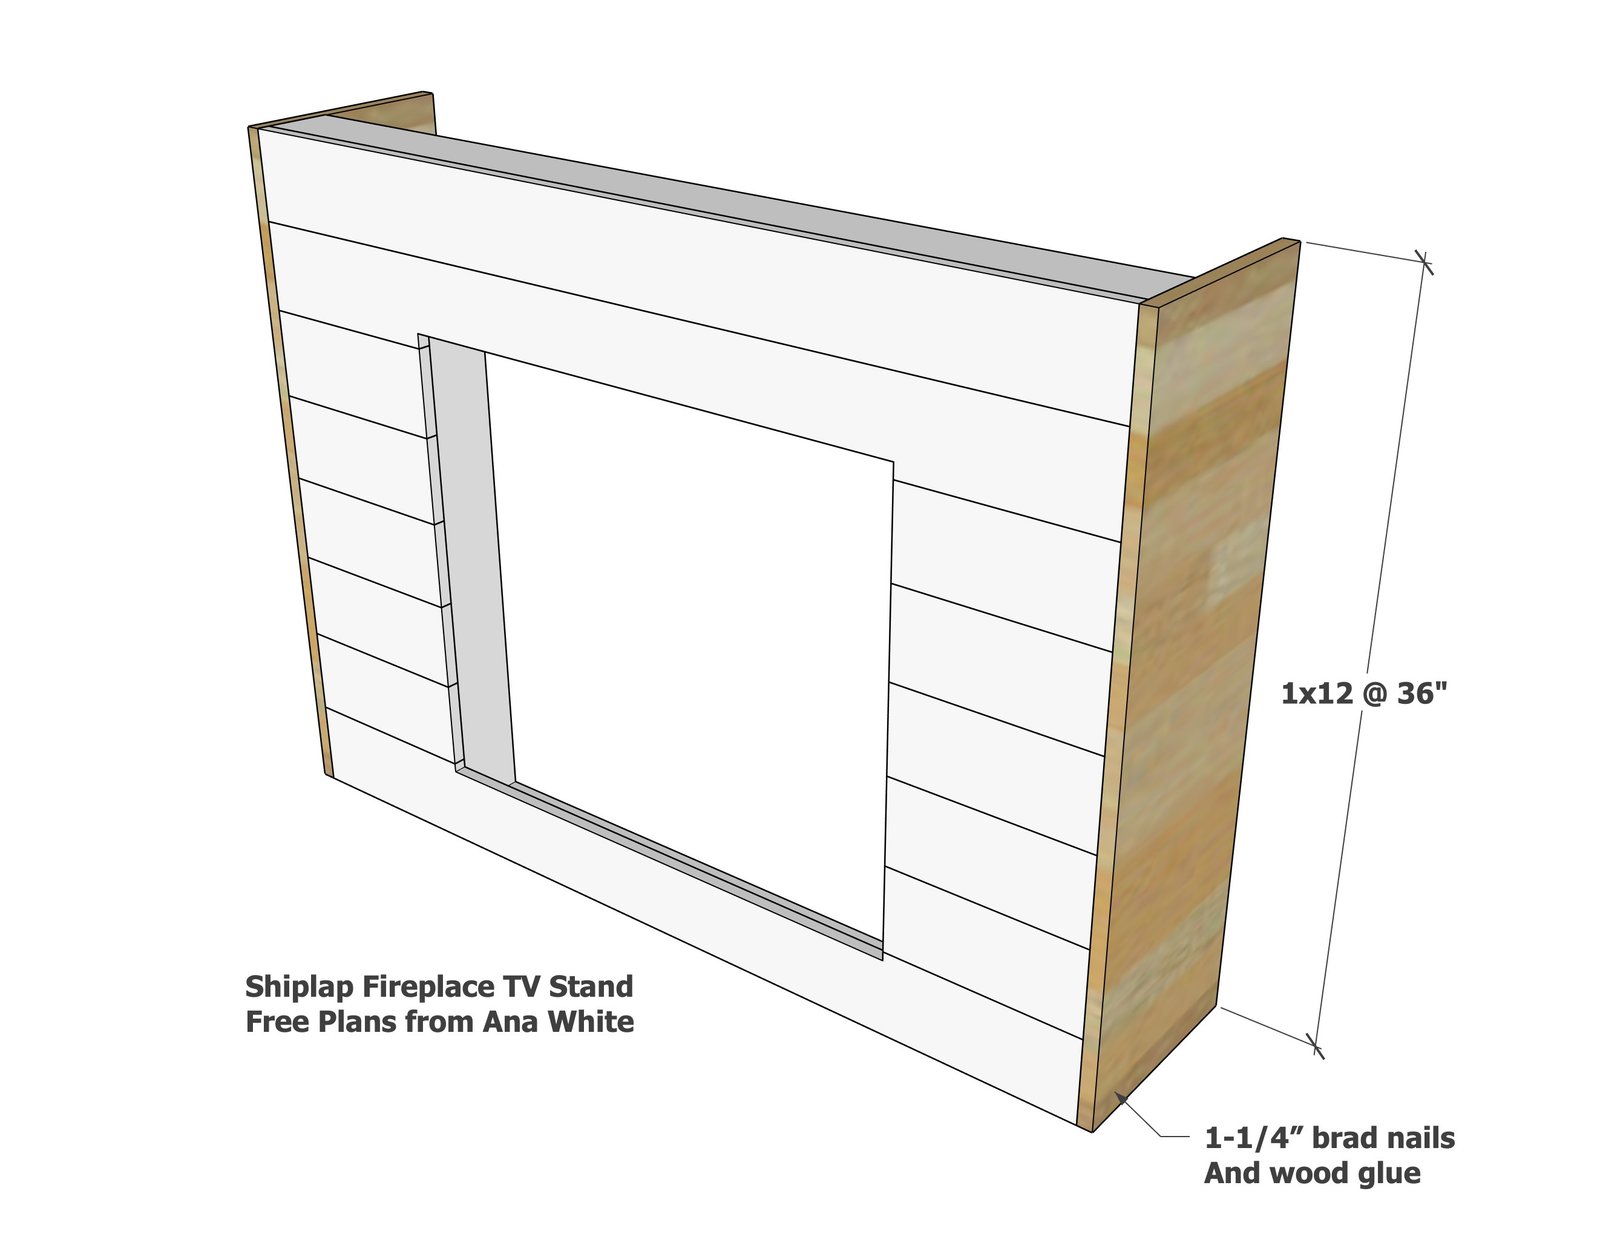
Attach to the sides the 1x12s with glue and 1-1/4" brad nails. If needed, add screws to further secure.
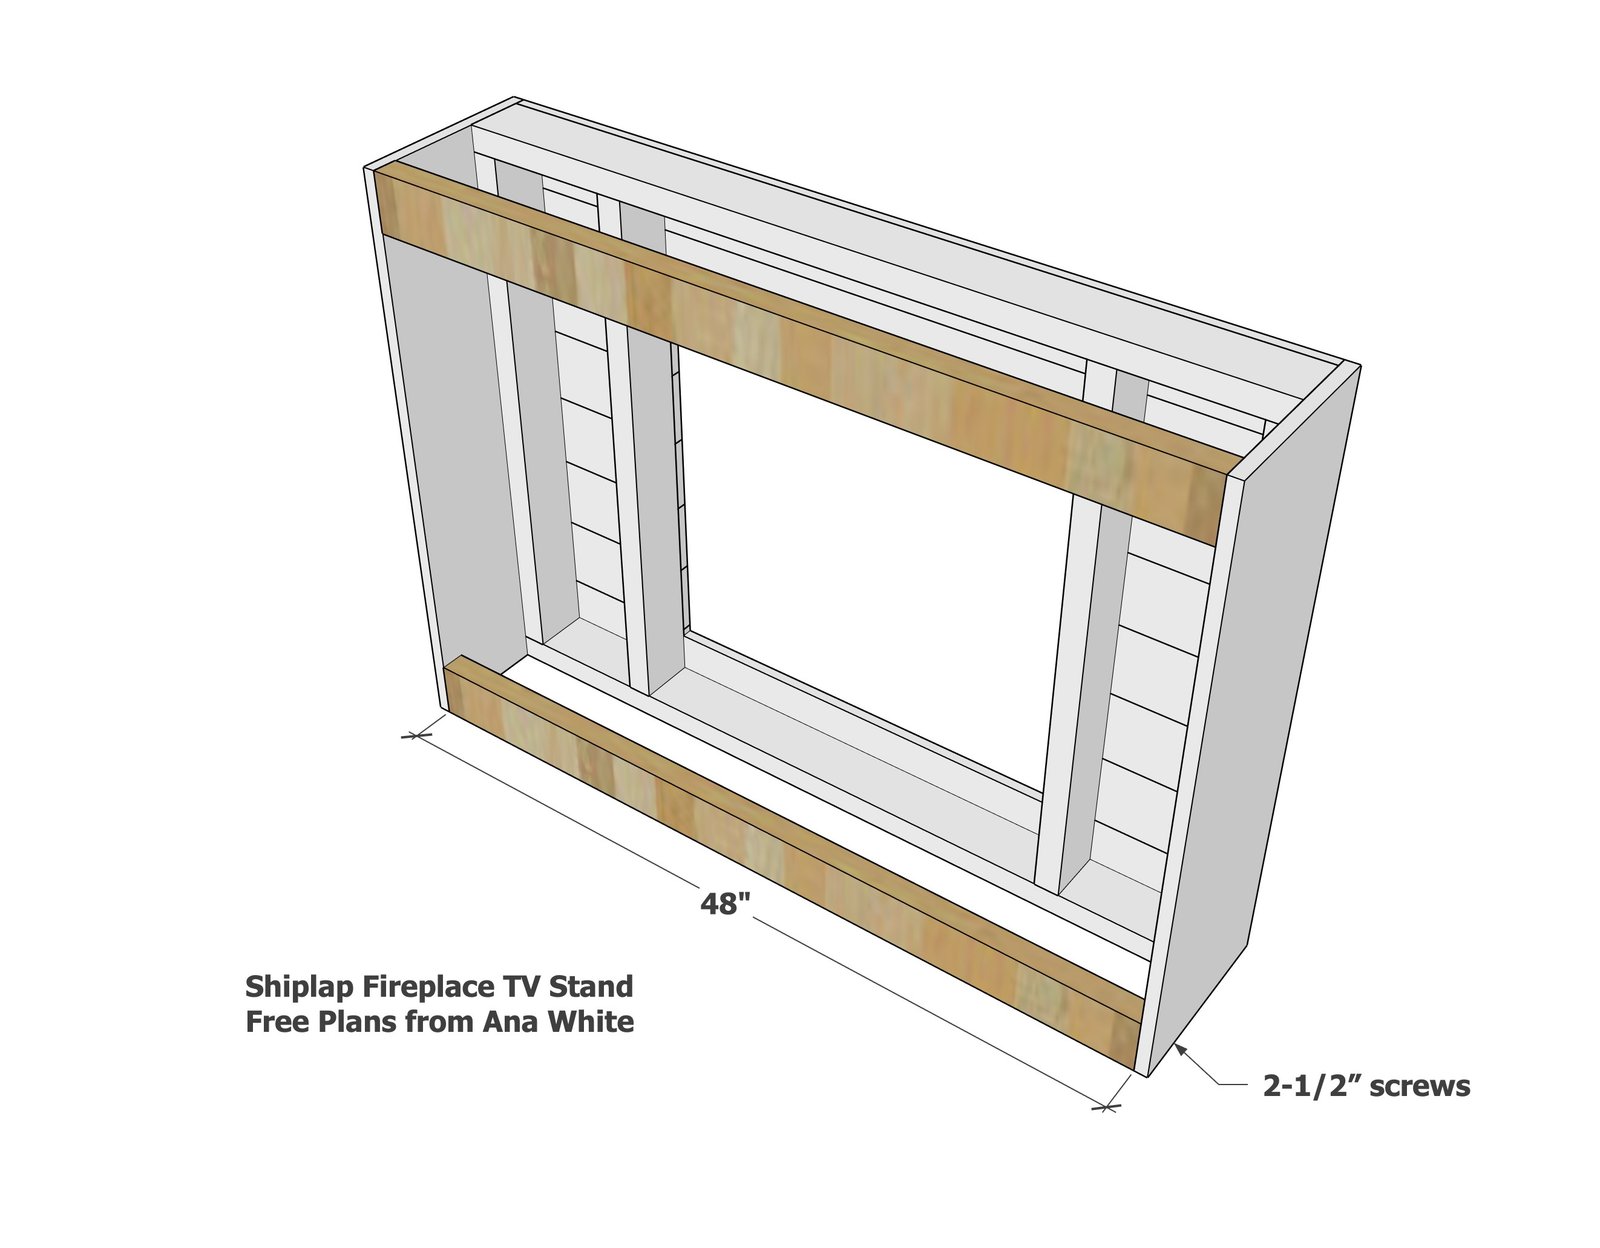
Add the 2x4 back framing as shown with screws.
You can use these 2x4 boards to attach the fireplace tv stand to the wall if a fixed install is the goal.
Step 5
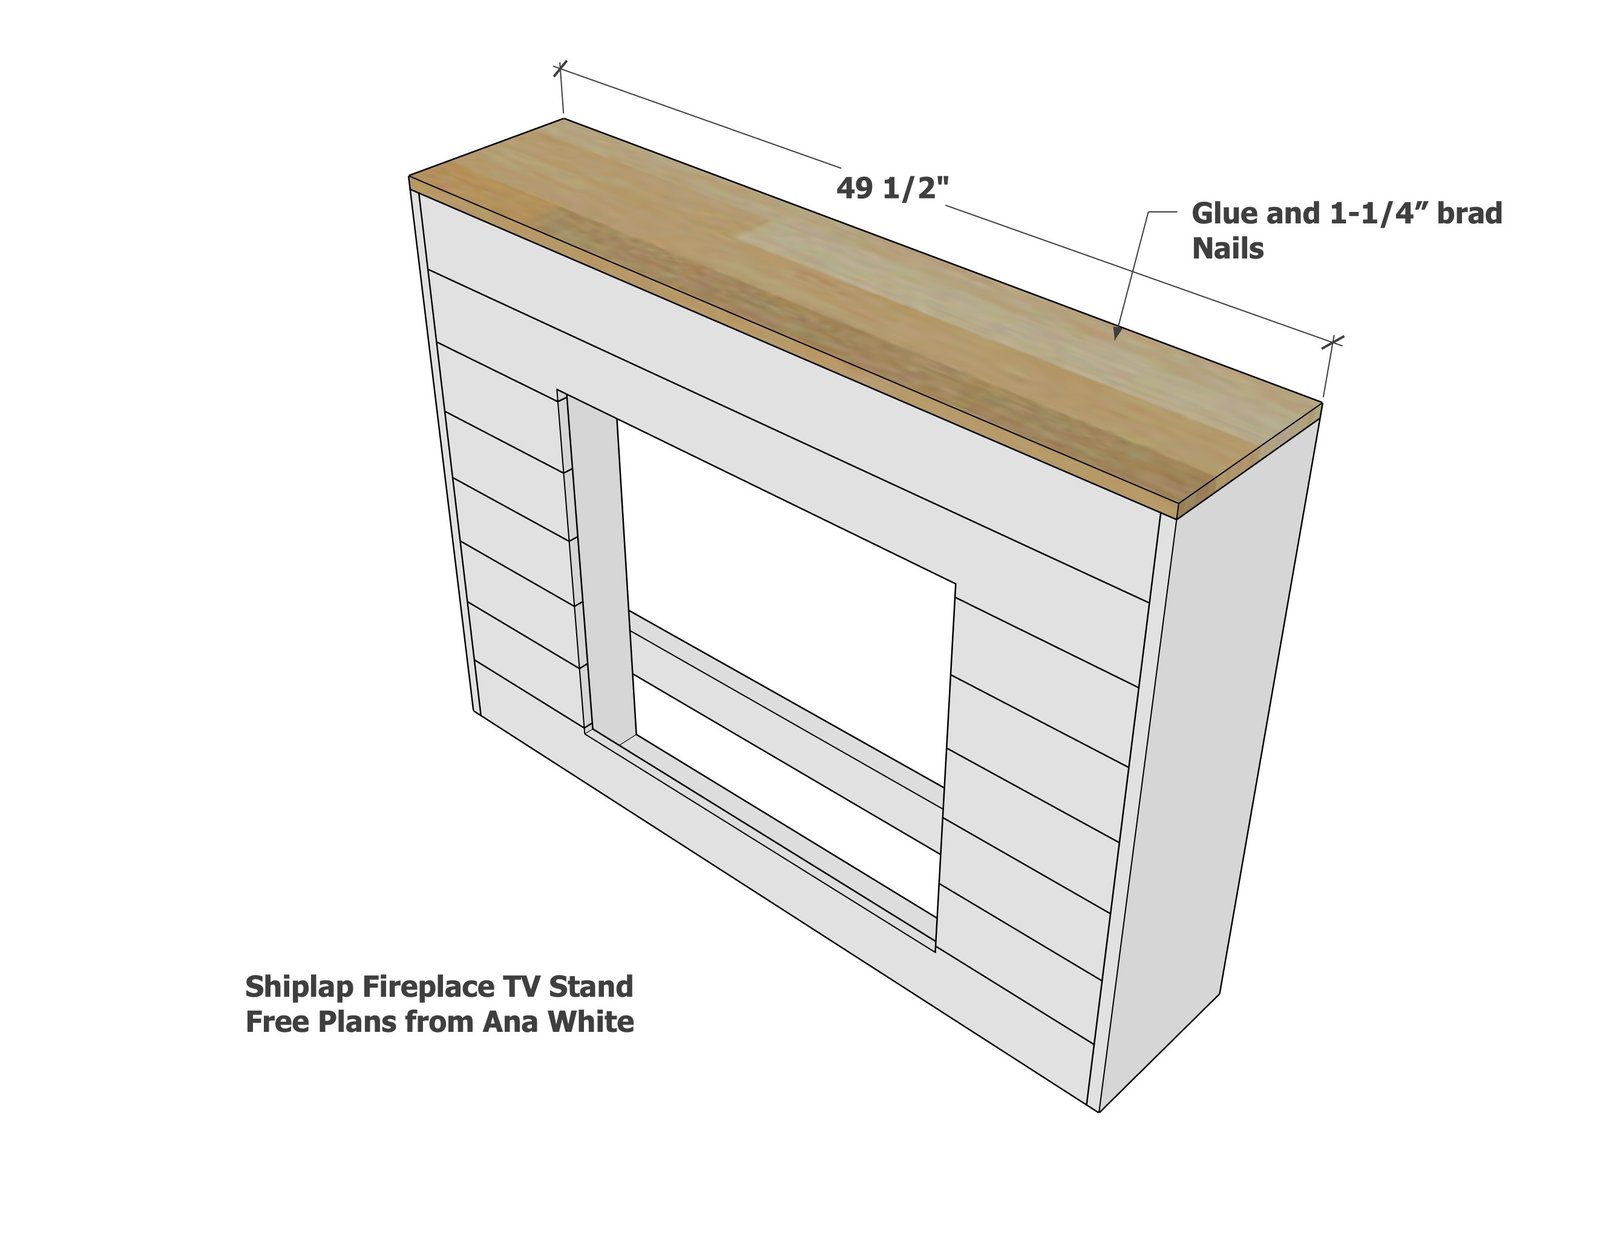
Measure and cut to fit the top 1x12. Use glue and 1-1/4" brad nails to attach. Further secure with a free screws if needed.
Step 6
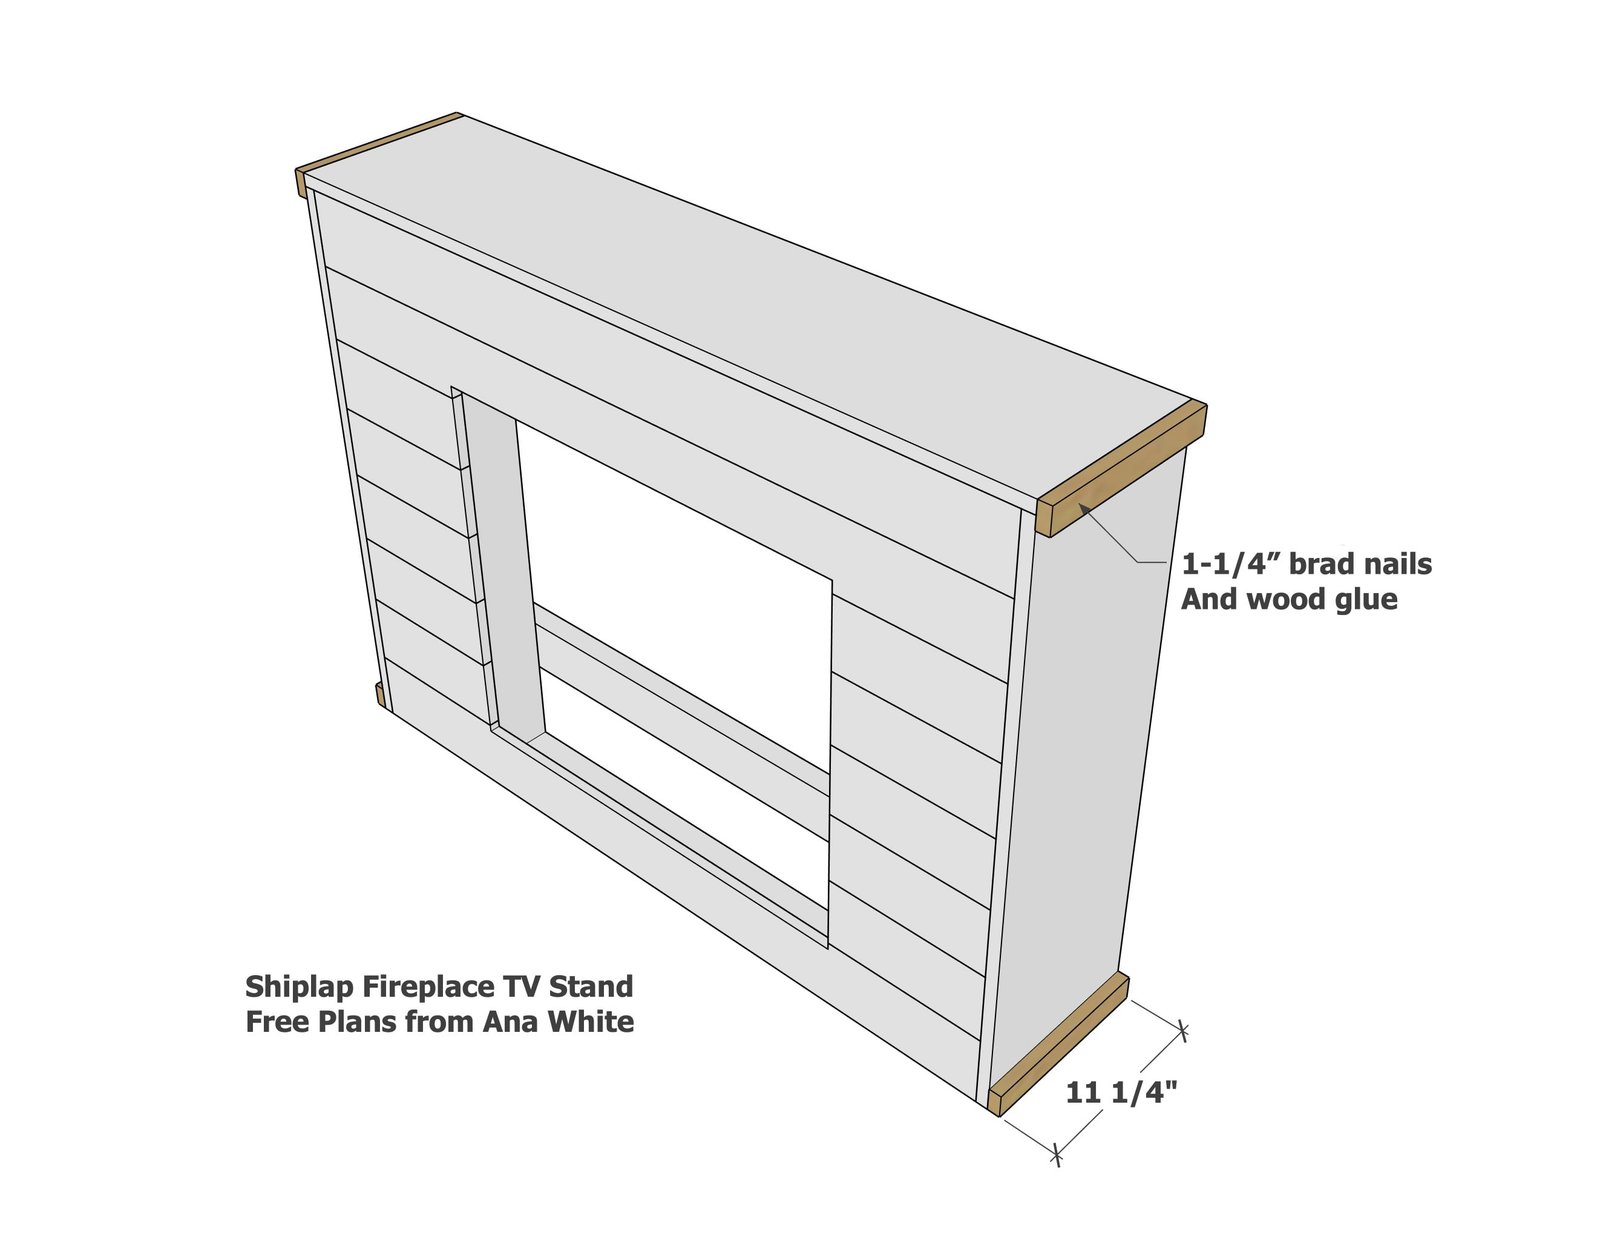
Measure and cut the 1x2 side trim pieces and attach to the sides with glue and 1-1/4" brad nails.
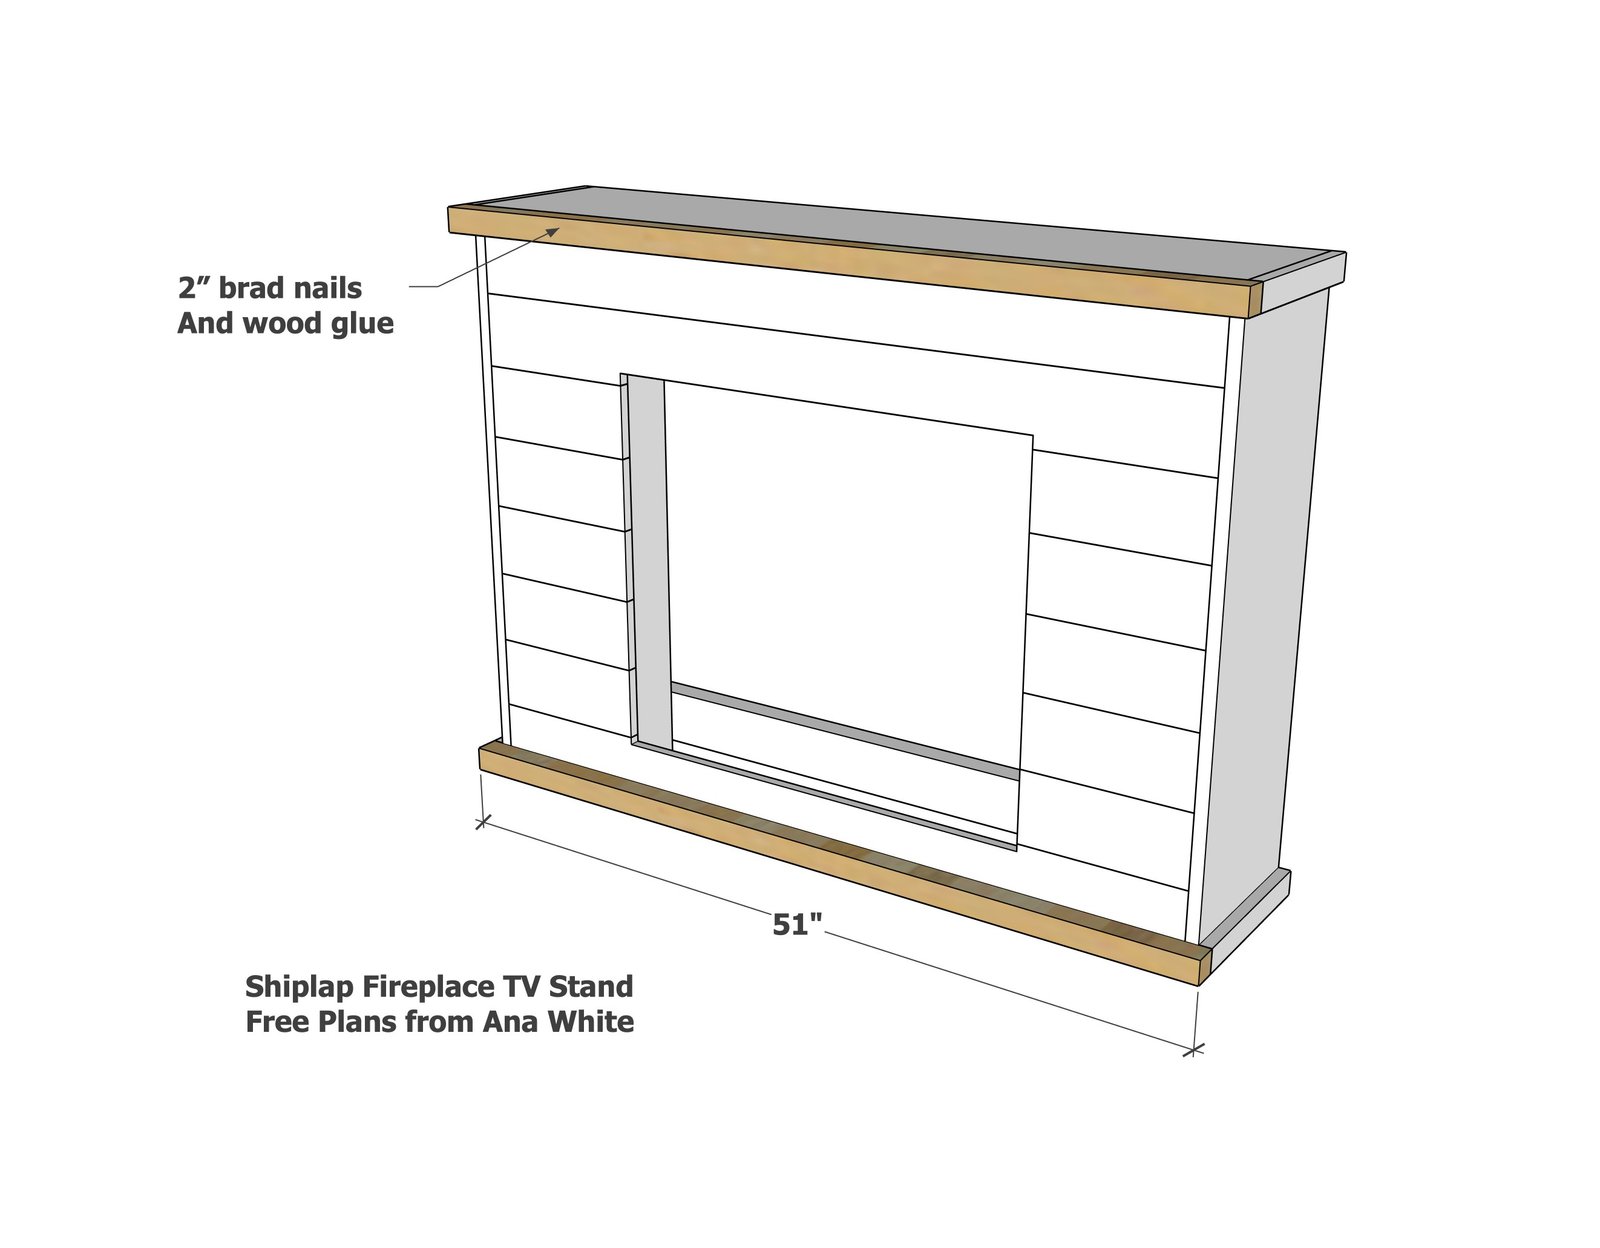
Measure and cut the 2x2s for the front.
Attach with 2" brad nails and screws if needed.
Step 8
Measure and cut the 1x2 trim for the front corners. Attach with glue and 1-1/4" brad nails.
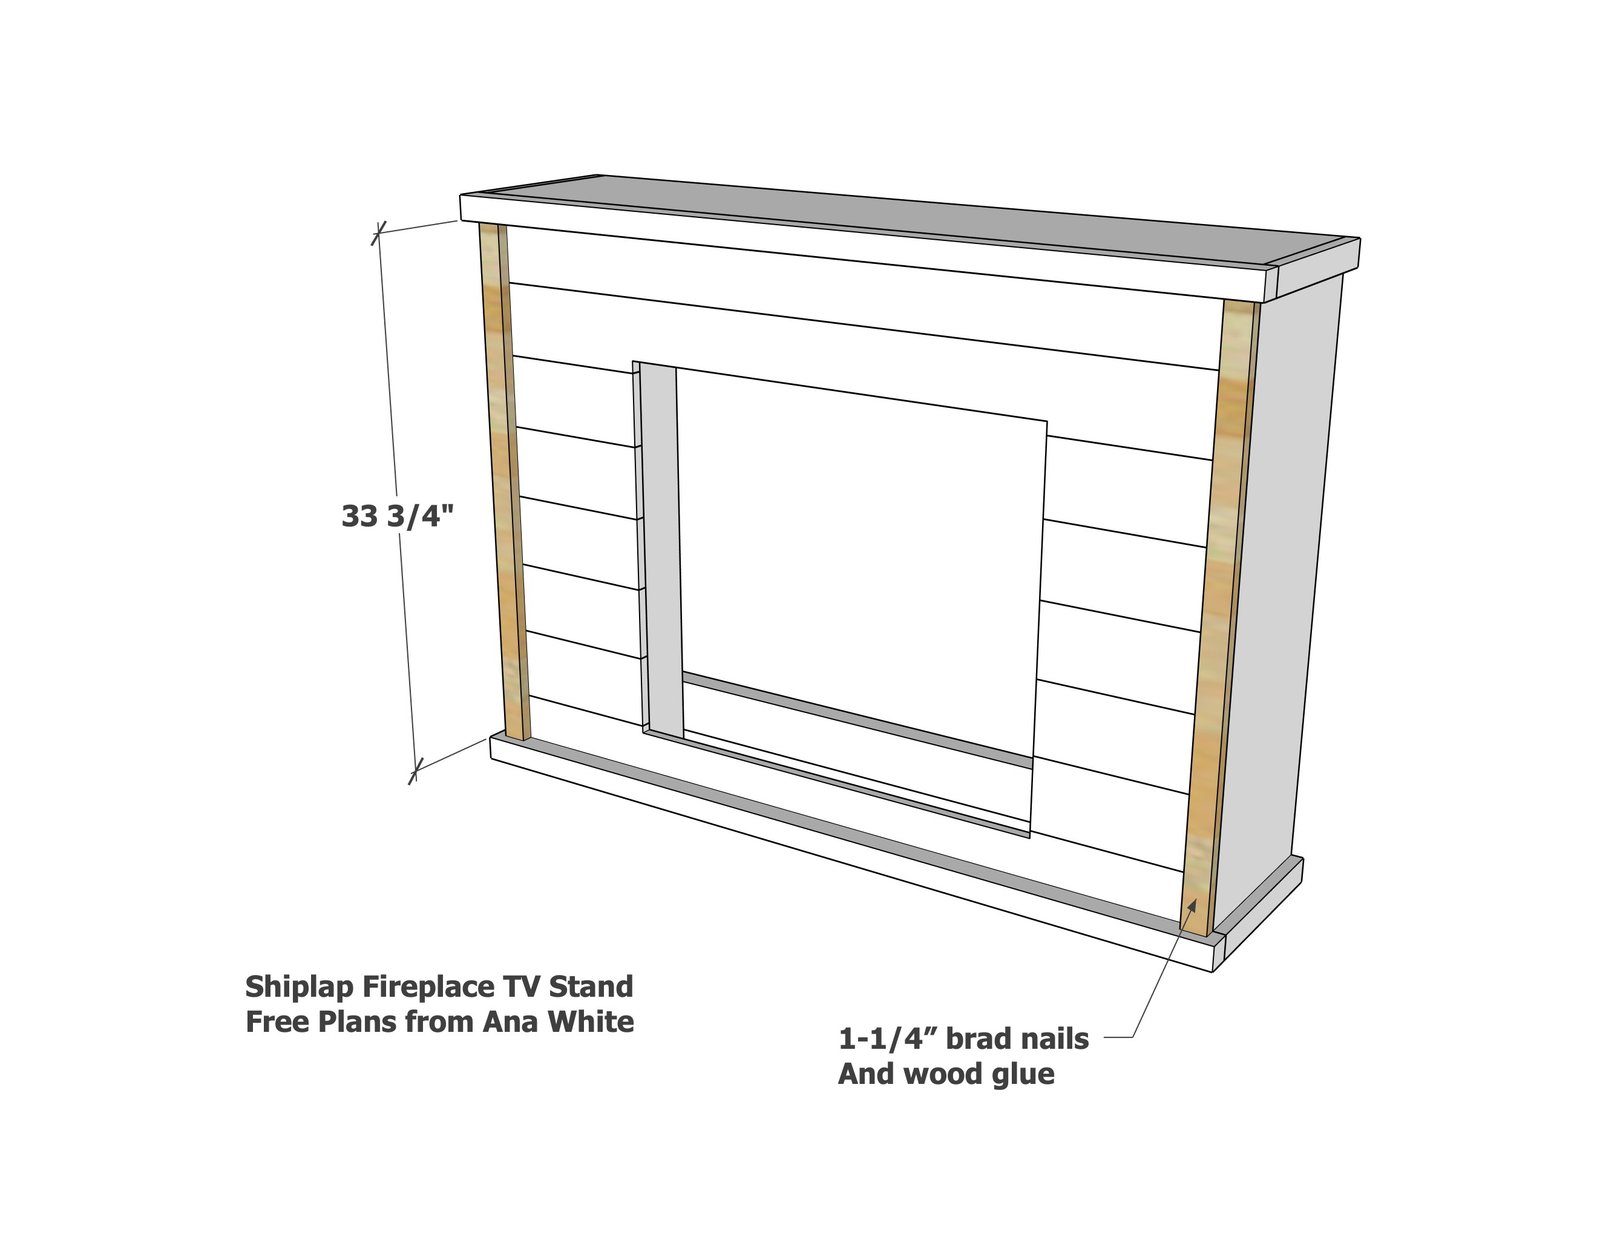
Step 9
Follow the manufacturer's instructions to install the fireplace insert.
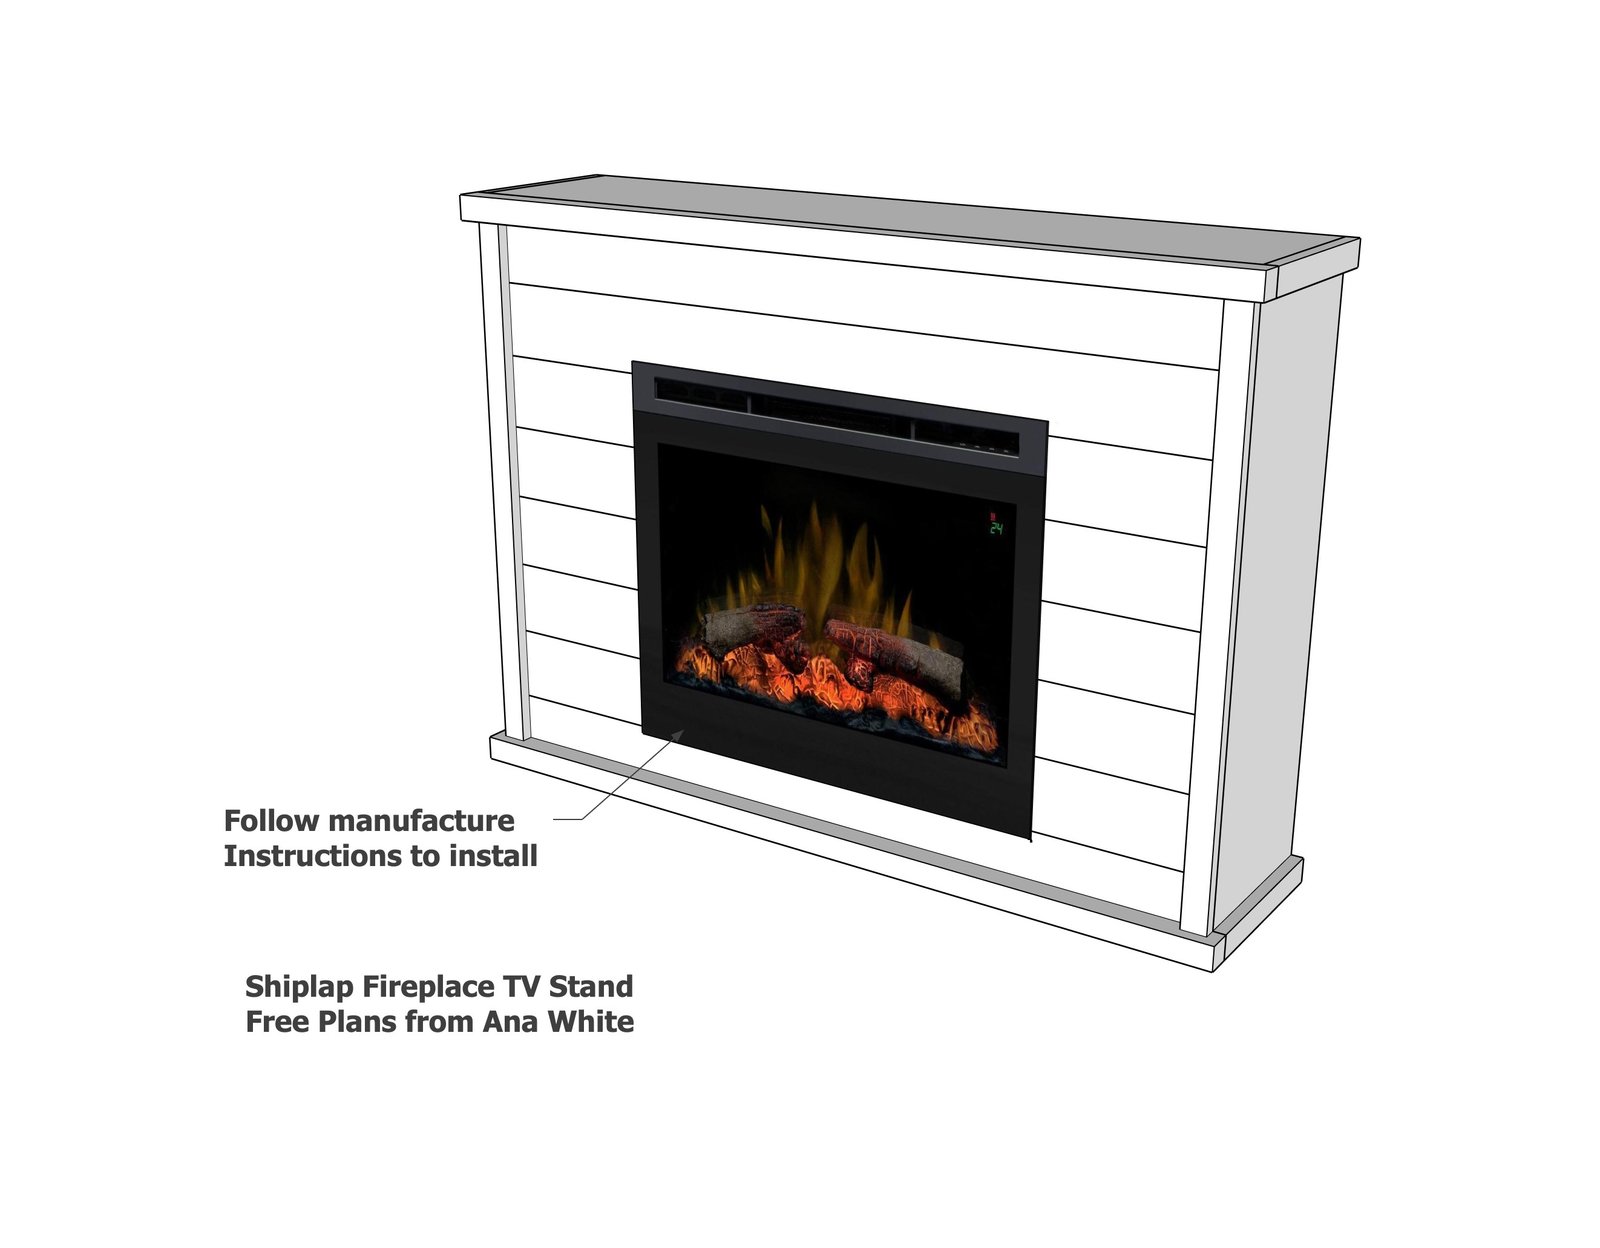
Finishing
Sand all surfaces, starting with a medium grit and finishing with fine. Wipe off the dust, fill any holes or gaps with wood filler, and sand smooth once dry. Apply primer if you're painting, then finish with your choice of paint or stain and seal with a durable clear topcoat. For outdoor projects, use exterior-rated primer, paint or stain, and sealer so the piece stands up to the weather.
Source (temporary): https://www.ana-white.com/woodworking-projects/shiplap-fireplace-tv-stand