Shoe Shrine Shelves
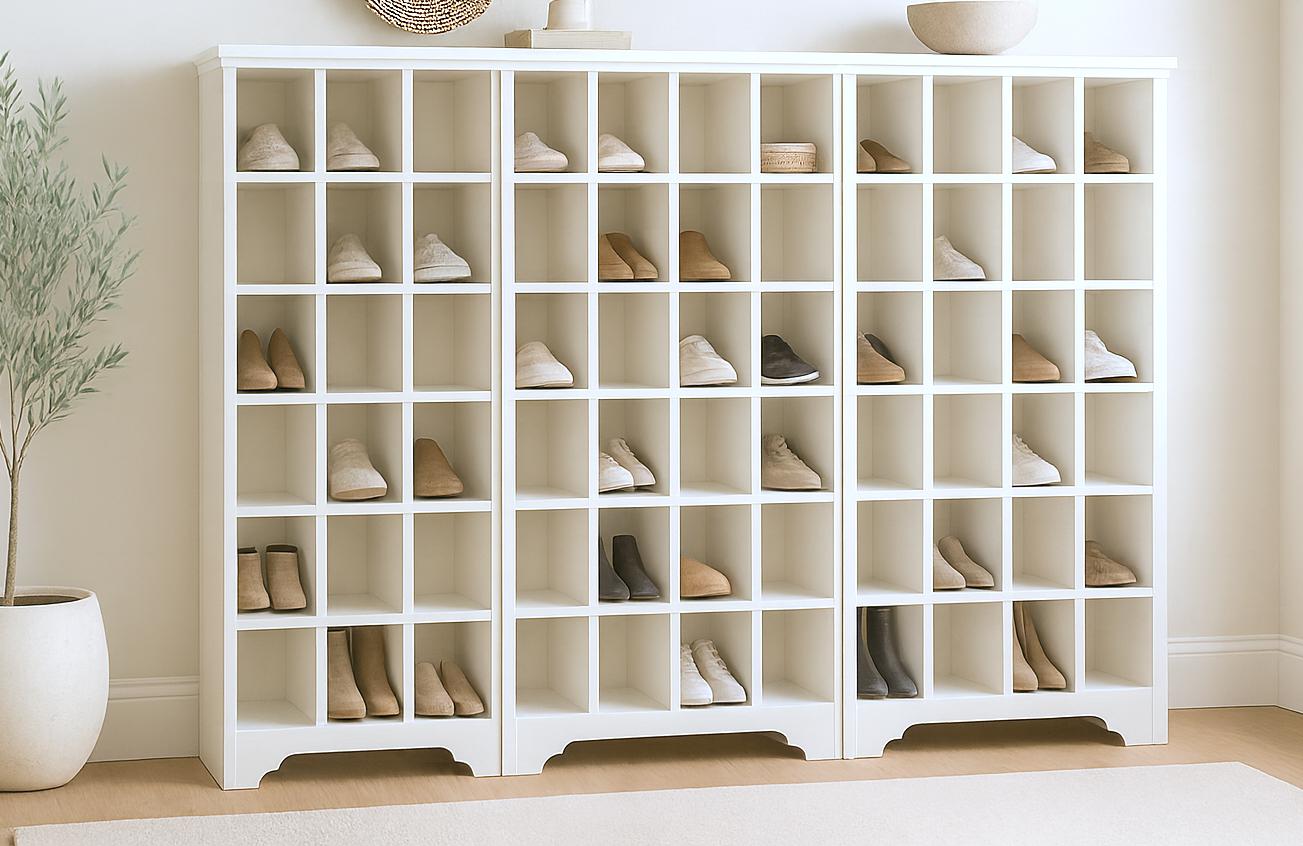
Shoe Storage Tower with Cubbies — Keep your entryway, mudroom, or closet organized with this single shoe storage tower. Designed with individual cubbies sized for sneakers, flats, and sandals plus taller compartments for boots, this piece offers a stylish, space-saving way to keep footwear neat and easy to find. The tower design is modular — build one for a compact solution, or line up multiple towers side-by-side to create a full wall of storage. With its clean lines and decorative base trim, it blends seamlessly into modern, farmhouse, or transitional spaces. Features • Compact vertical tower design • Multiple shoe cubbies for flats, sneakers, and sandals • Tall cubbies for boots • Modular system — build one or several to fit your needs • Decorative base trim gives it a furniture-style look • Beginner-friendly build with straightforward joinery Plan Includes • Free printable PDF woodworking plan • Materials and cut list for one tower • Step-by-step diagrams with assembly instructions • Finishing options (paint, stain, or natural wood) Why Build It? Retail shoe towers can be expensive and often don’t fit all shoe sizes. With, you can build a custom shoe storage tower that’s affordable, durable, and tailored to your exact space. Download the today and build a shoe storage tower that keeps your shoes organized in style — whether you need just one tower or want to expand into a full wall of storage.
Specifications
| Project type | Bookshelf and Bookcase Plans |
|---|---|
| Room | Storage Solutions |
| Style | Cottage Style Furniture Plans |
| Difficulty | Intermediate |
| Estimated cost | $100-$150 |
Dimensions
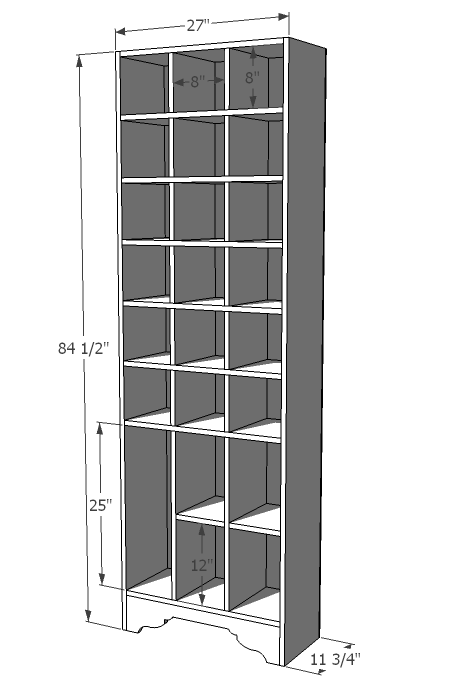
Use the size-specific shopping and cut lists below.
Shopping List
- 6 - 1x12 @ 8 feet long
- 1 - 1x6 @ 4 feet long
- 1 - sheet 1/4" plywood
Cut List
- 8 - 1x12 @ 25 1/2" (Shelves)
- 2 - 1x12 @ 84 1/2" (Sides)
- 12 - 1x12 @ 8" (Small Dividers)
- 2 - 1x12 @ 25" (Large Dividers)
- 1 - 1x6 @ 25 1/2" (Footer)
- 3 - 1x12 @ 8" (Optional Shelves, Boot Cubbies - see last step)
- 1 - 1/4" plywood @ 27" x 84 1/2" (Back)
Tools
- measuring tape
- square
- pencil
- safety glasses
- hearing protection
- kreg-jig
- drill
- circular saw
- jigsaw
- nailer
- sander
- level
Step-by-step Instructions
Step 1
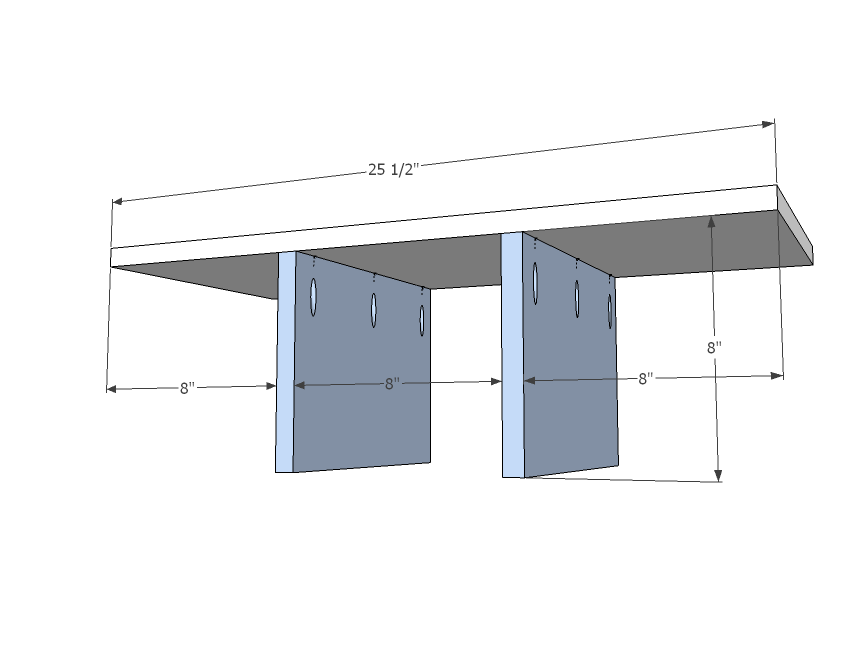
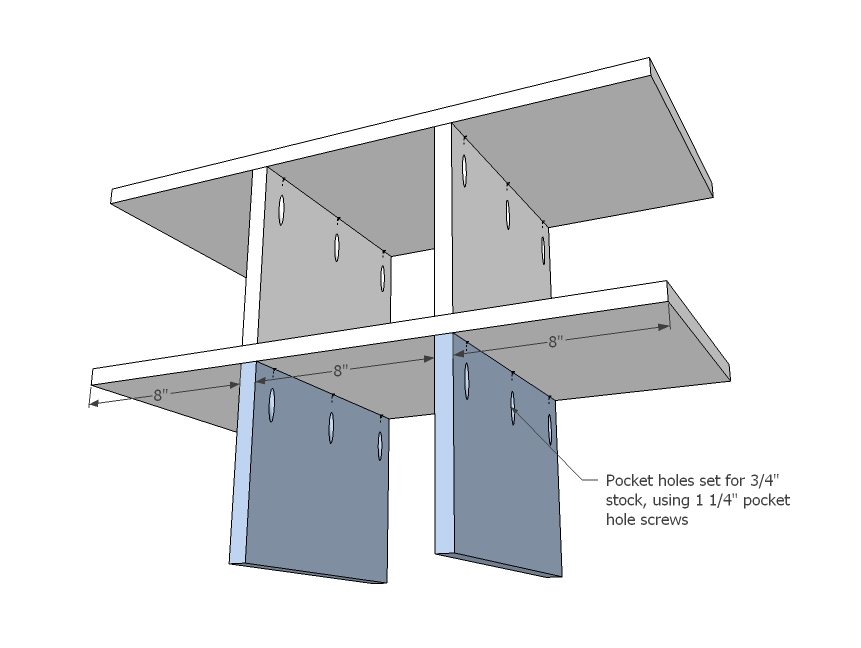
The trickiest part about building this shoe storage cabinet is going to be getting the joints done when there is limited clearance. You will need a Kreg Jig to join some of your shelves. Start by drilling pocket holes as shown in diagrams along the top edge of your dividers. Then attach two short dividers to the top shelf as shown above.
Step 2
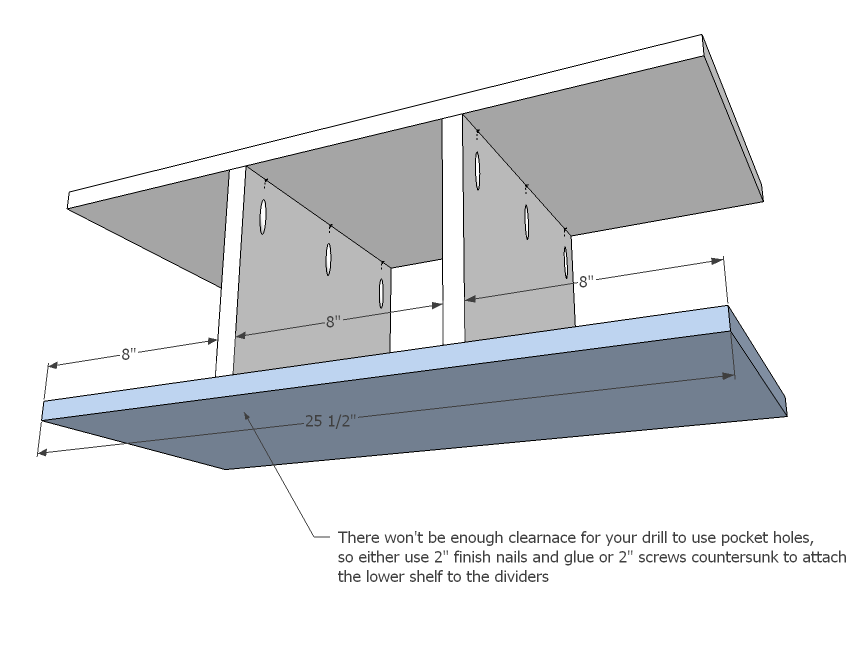
Now you won't be able to get a regular drill in there to do pocket holes along the bottom edge of the dividers. Apply glue, mark joints, and attach with either 2" finish nails or screws from the underside as shown above.
Step 3
Now you can add another row of dividers, this time you will have to use the pocket holes. A word to the wise, don't eyeball the location of your dividers - measure and mark 8" from the outsides and place, if you eyeball, over the course of several rows of shelves, you might just start to notice you are getting "off".
Step 4
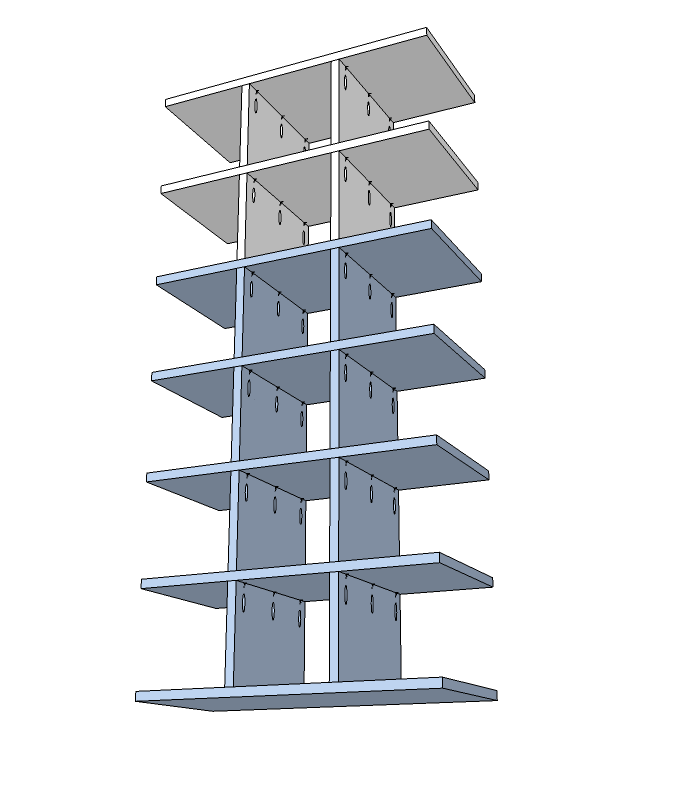
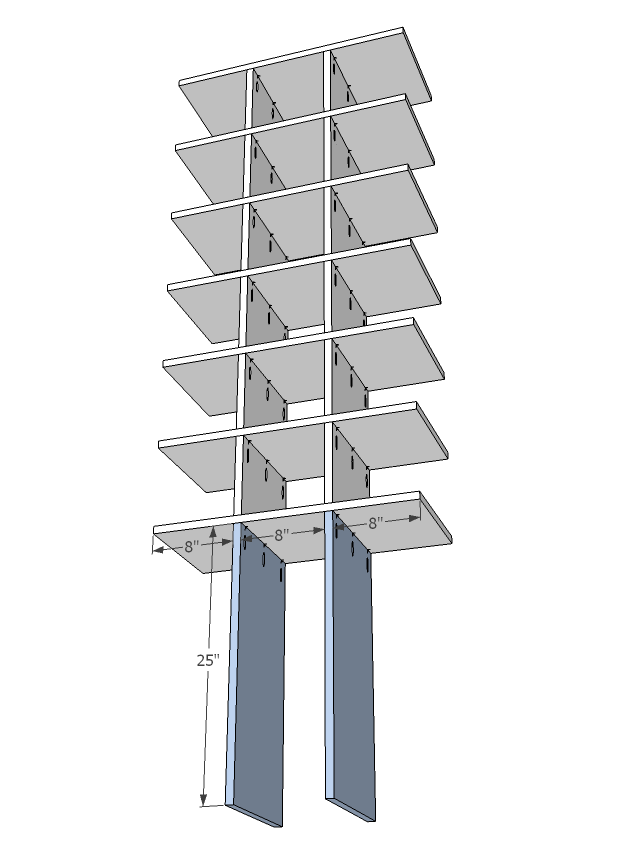
Continue alternating adding dividers and shelves until you are out of the short dividers.
Step 5
Step 6
And finally the bottom.
Step 7
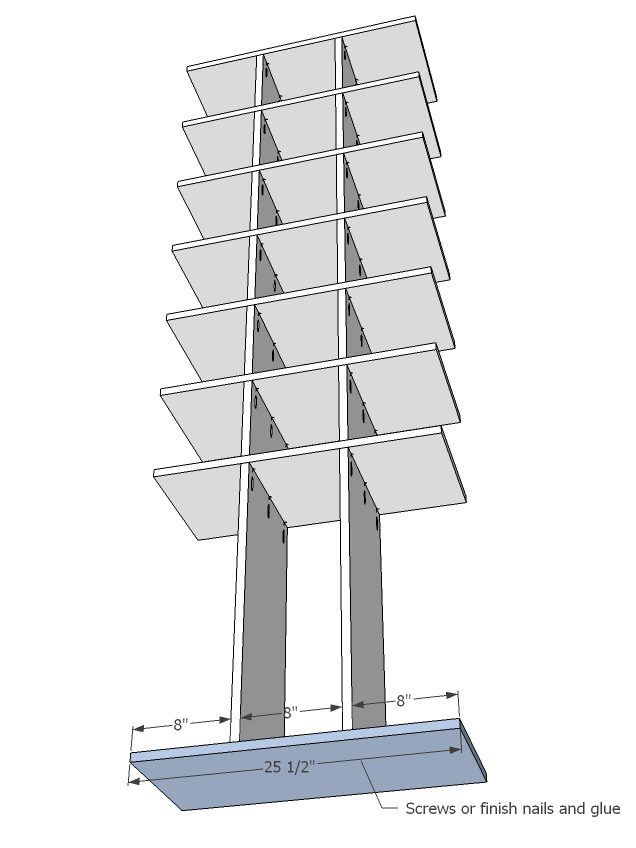
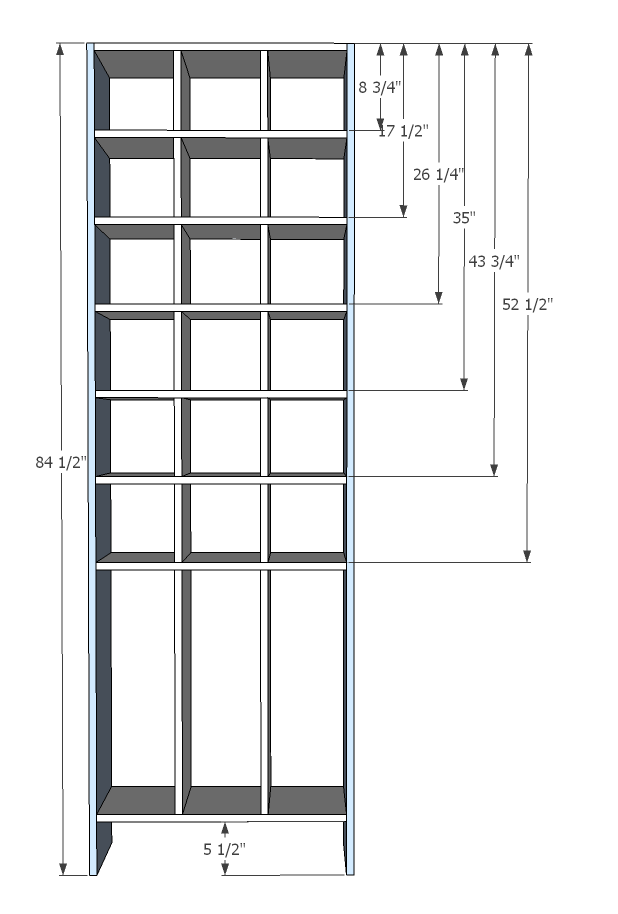
Measure and mark your sides as shown above, marking the location of each shelf. Measurements shown are to the tops fo the shelves. Line sides up with shelves and attach, using 2" finish nails and glue.
Step 8
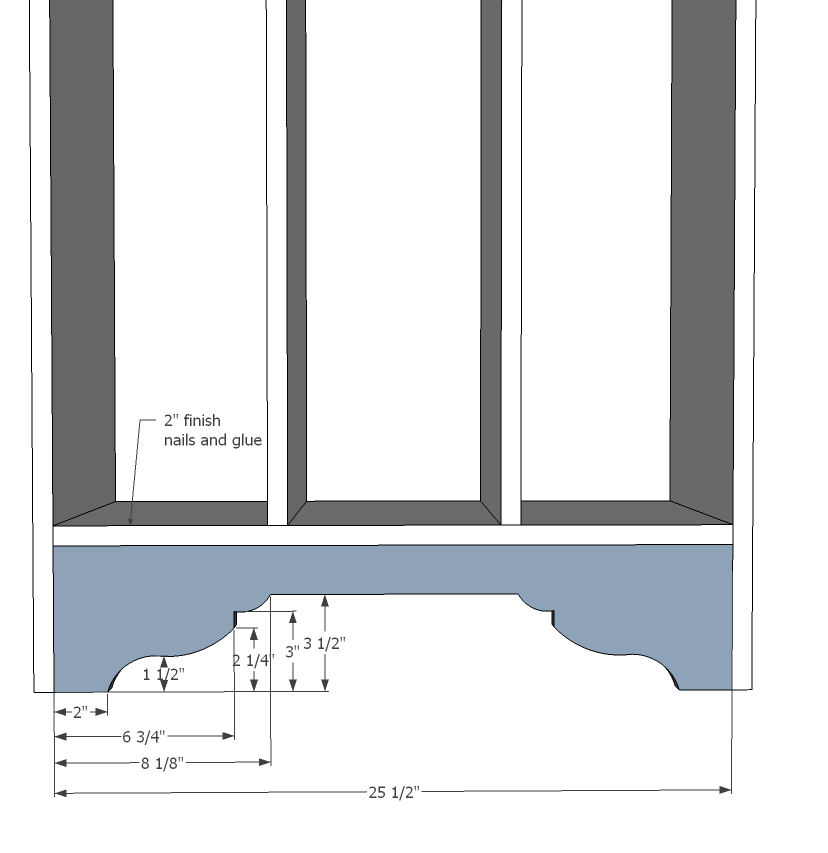
Attach footer as shown above, with 2" finish nails and wood glue. Use the measurements above to help you draw a pattern. Cut pattern out carefully with a jigsaw.
Step 9
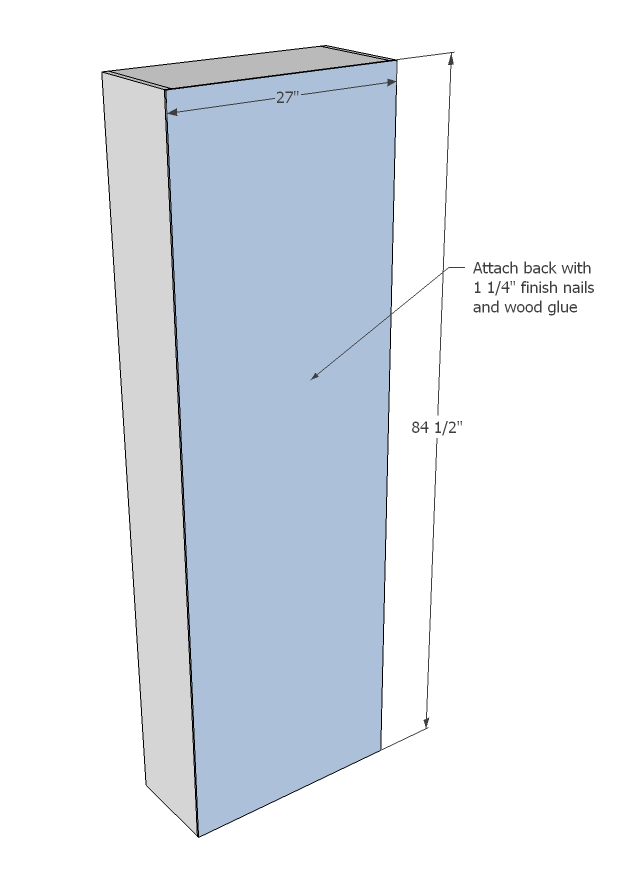
Adjust cabinet for square and attach back with 1 1/4" finish nails and wood glue.
Step 10
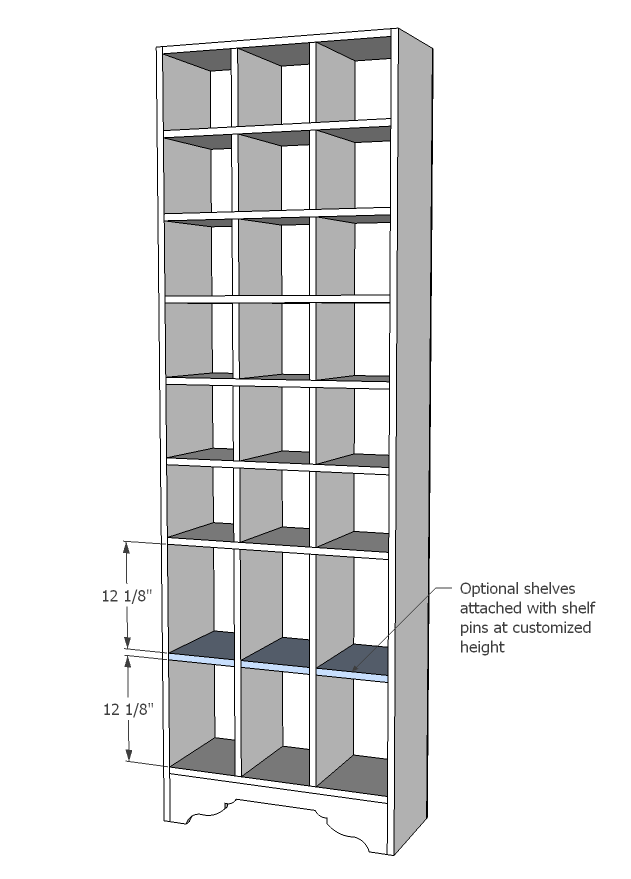
These shelves as done by Ballard Designs on their Sarah Storage Tower are adjustable. Use shelf pins to place shelves.
Finishing
Sand all surfaces, starting with a medium grit and finishing with fine. Wipe off the dust, fill any holes or gaps with wood filler, and sand smooth once dry. Apply primer if you're painting, then finish with your choice of paint or stain and seal with a durable clear topcoat. For outdoor projects, use exterior-rated primer, paint or stain, and sealer so the piece stands up to the weather.
Source (temporary): https://www.ana-white.com/woodworking-projects/shoe-shrine-shelves