Side Hutches for the Board and Batten Collection
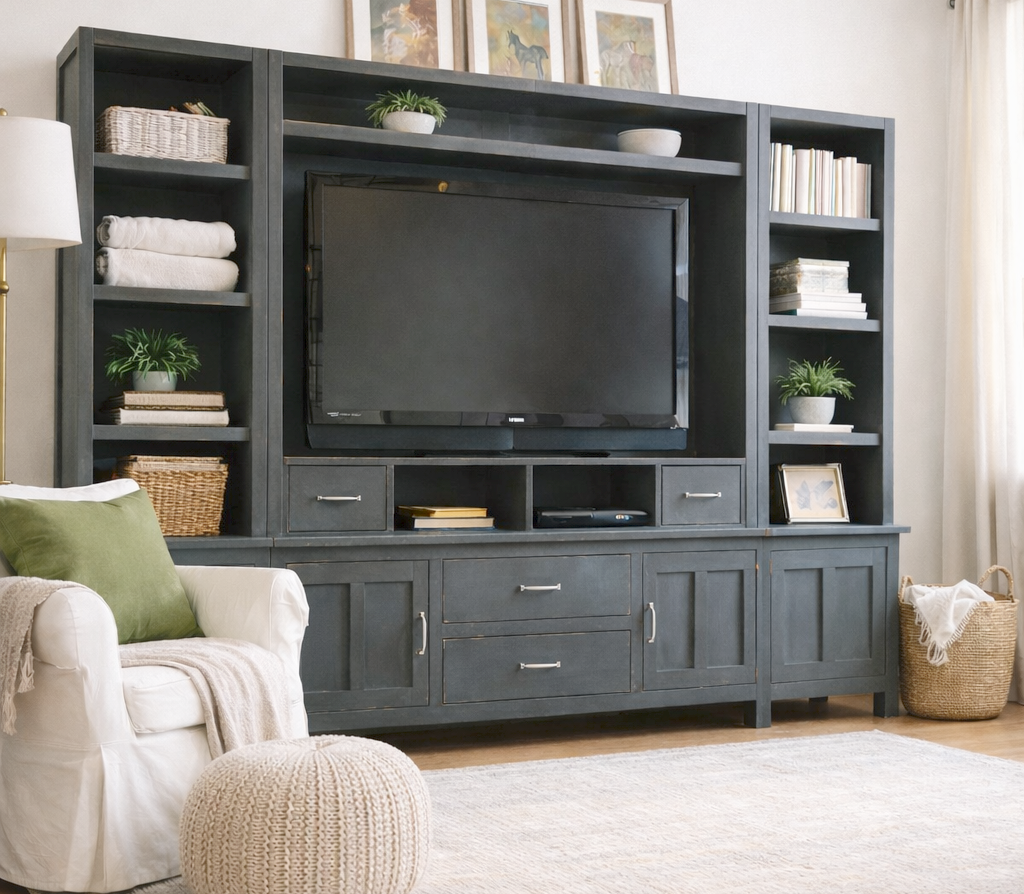
Build your own media wall with our Board and Batten Collection - this plan is for the side hutches that go over the small base cabinets. These hutches are perfect for storing everything from extra blankets to display objects to books and entertainment essentials. Shelves can be made adjustable. Board and Batten Collection – Classic and cozy board and batten style furniture you can build yourself. Perfect for bedrooms, guest spaces, and rustic-inspired homes. View the Full Collection
Specifications
| Project type | Bookshelf and Bookcase Plans |
|---|---|
| Room | Storage Solutions |
| Style | Cottage Style Furniture Plans |
| Difficulty | Intermediate |
| Estimated cost | $20 - $50 |
Dimensions
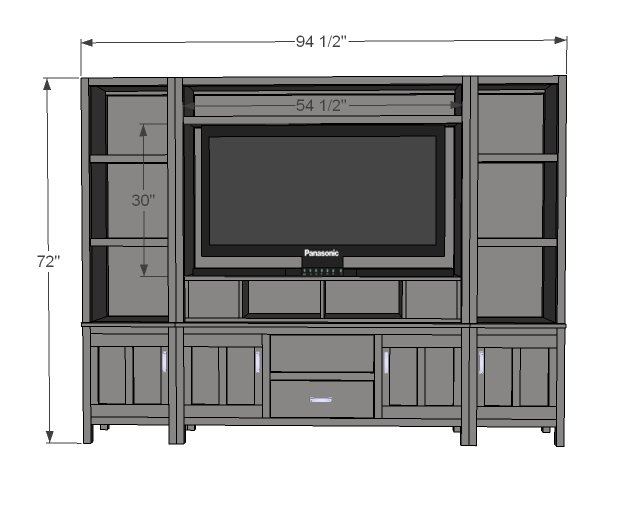
Use the size-specific shopping and cut lists below.
Shopping List
- 1 – 1×12 @ 8 feet long
- 1 – 1×12 @ 4 feet long
- 3 – 2×2 @ 8 feet long
- 1 – 1×2 @ 8 feet long
- 1/4″ plywood, 48″ x 18 1/2″ (optional back)
- 1 1/4″ screws and
- 2 1/2″ screws
- wood glue
- finishing supplies
Cut List
- 2 – 1×12 @ 48″ (Sides)
- 4 – 1×2 @ 11 1/2″ (Width of 1×12 – Side Trim)
- 4 – 2×2 @ 48″ (Legs)
- 3 – 1×12 @ 15 1/2″ (Shelves)
- 5 – 2×2 @ 15 1/2″ (Shelf Trim)
- 2 – 1×2 @ 15 1/2″ (Shelf Trim)
- 1 – 1/4″ plywood @ 48″ x 18 1/2″
Tools
- measuring tape
- square
- pencil
- hammer
- safety glasses
- hearing protection
- kreg-jig
- drill
- circular saw
- compound miter saw
- sander
Step-by-step Instructions
Sides
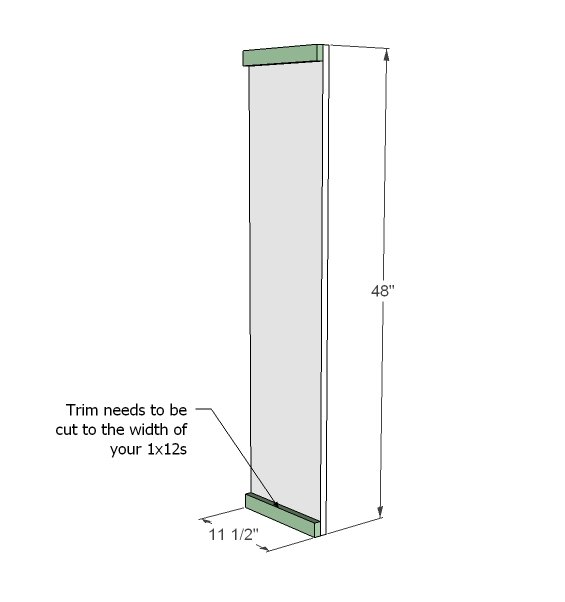
Start by attaching the trim to the sides. I used screws from the insides, but for those of you with a finish nailer, have at it. Just make sure your screws or nails are less than 1 1/4″ long.
Legs
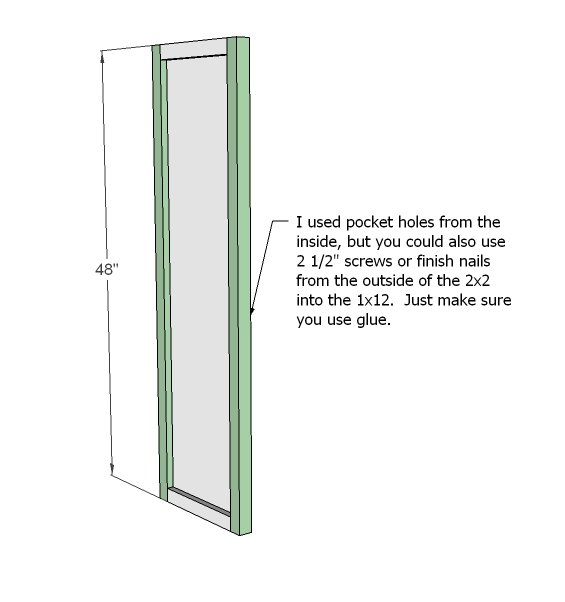
These aren’t really legs, but if we were making a bookshelf, these would be the legs, so we’ll refer to them as legs. Attach. I used pocket holes from the insides, but you could also use 2 1/2″ fasteners – just predrill holes carefully and use glue.
Shelves
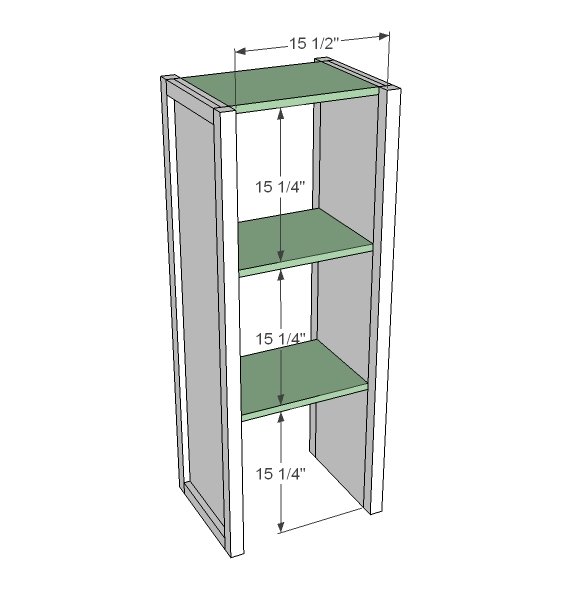
Attach the shelves to the sides as shown above. I used pocket holes, but again, you can also use countersunk screws and glue. You can also adjust the shelf height as desired but I found these heights perfect to fit large milk crates for storage.
Back Shelf Trim
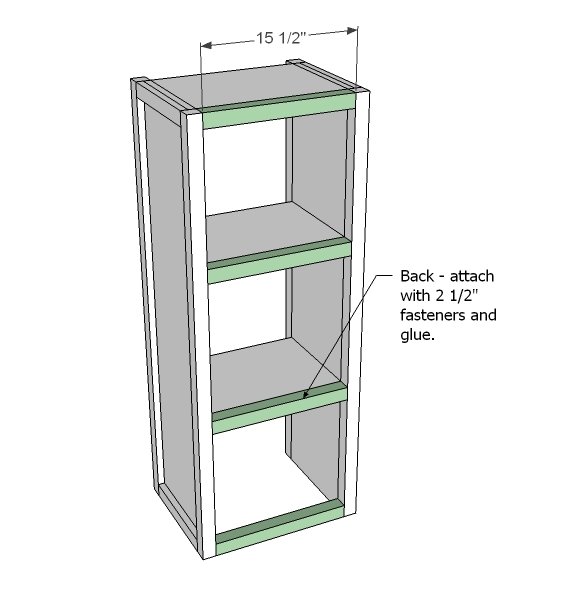
Trim out the back shelves as shown above. The bottom 2×2 will give you something to screw the plywood to.
Step 5
Back
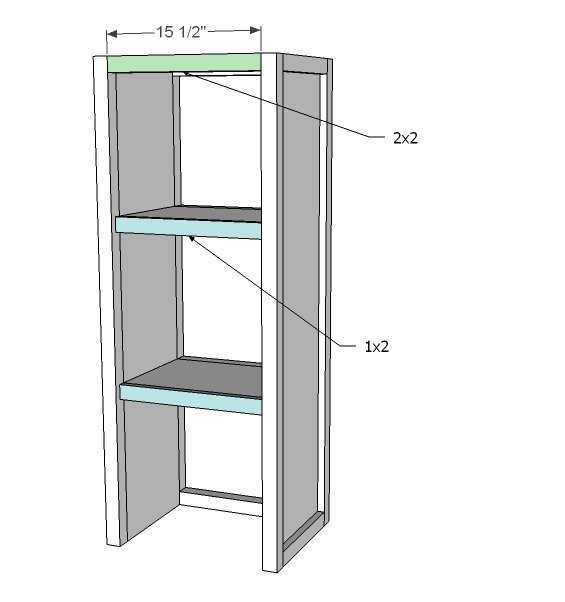
The back is really optional because of the trim on the back, but if you choose to add a back, glue and screw or nail to all of the shelves too.
Step 7
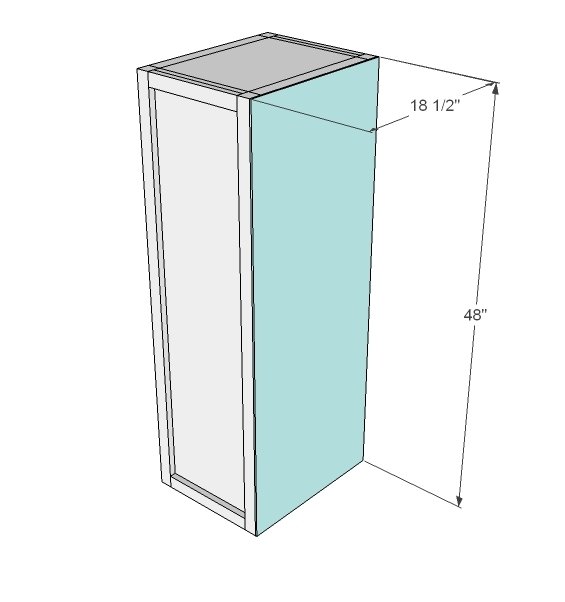
Finish as you finished the base. You should also anchor the hutch to a stud in the wall behind the hutch and attach to the base with screws for safety.
Finishing
Sand all surfaces, starting with a medium grit and finishing with fine. Wipe off the dust, fill any holes or gaps with wood filler, and sand smooth once dry. Apply primer if you're painting, then finish with your choice of paint or stain and seal with a durable clear topcoat. For outdoor projects, use exterior-rated primer, paint or stain, and sealer so the piece stands up to the weather.
Source (temporary): https://www.ana-white.com/woodworking-projects/side-hutches-board-and-batten-collection