Side Table or Nightstand [Super Simple Collection]
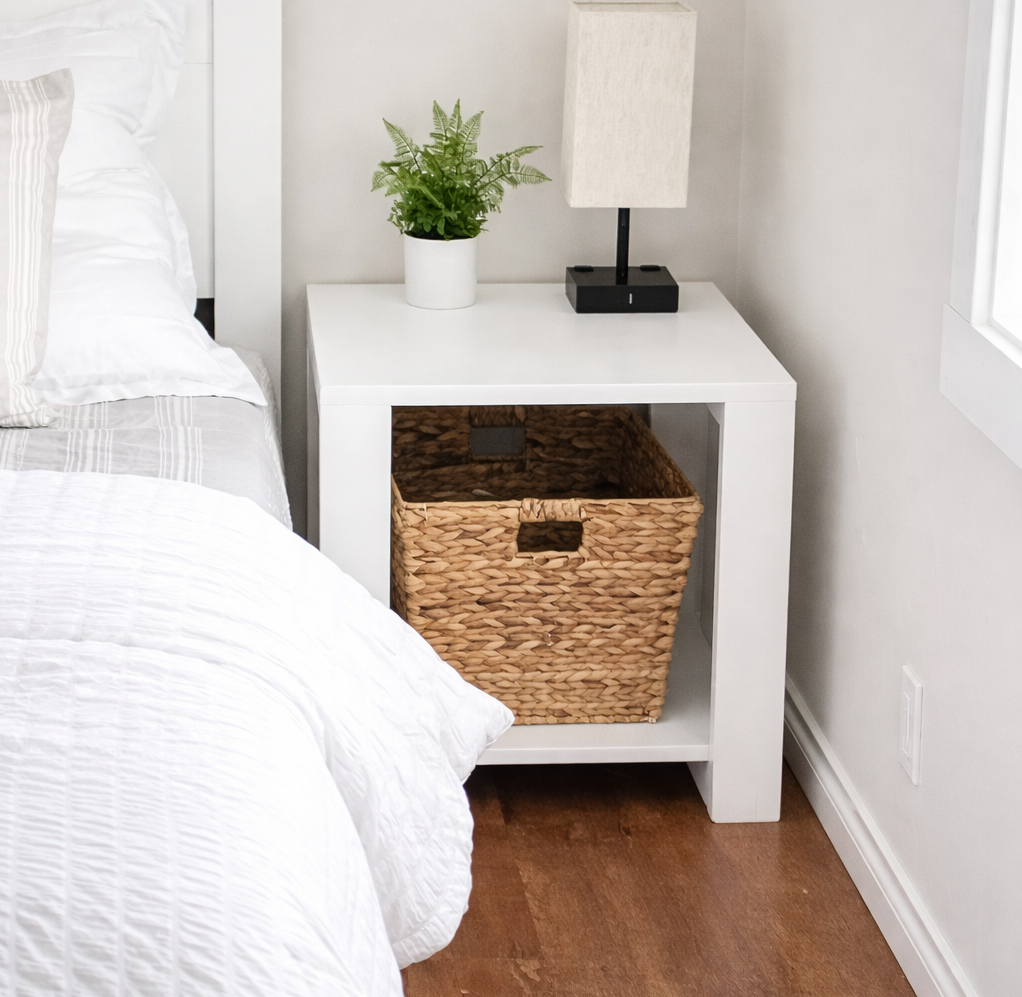
If you need an inexpensive and easy to make nightstand or side table, try this super simple end table or nightstand. Generously sized and sturdy, with a low bottom shelf for easy access, the clean lines blend with almost any style or decor. Solid wood construction, paint or stain any color. This is our easiest to build end table, side table, bedside table or nightstand plan. with diagrams, shopping and cut list from Related: Compact Modern Farmhouse Bed Plans
Specifications
| Project type | Nightstands |
|---|---|
| Room | Bedroom |
| Style | Farmhouse Furniture |
| Difficulty | Beginner Projects |
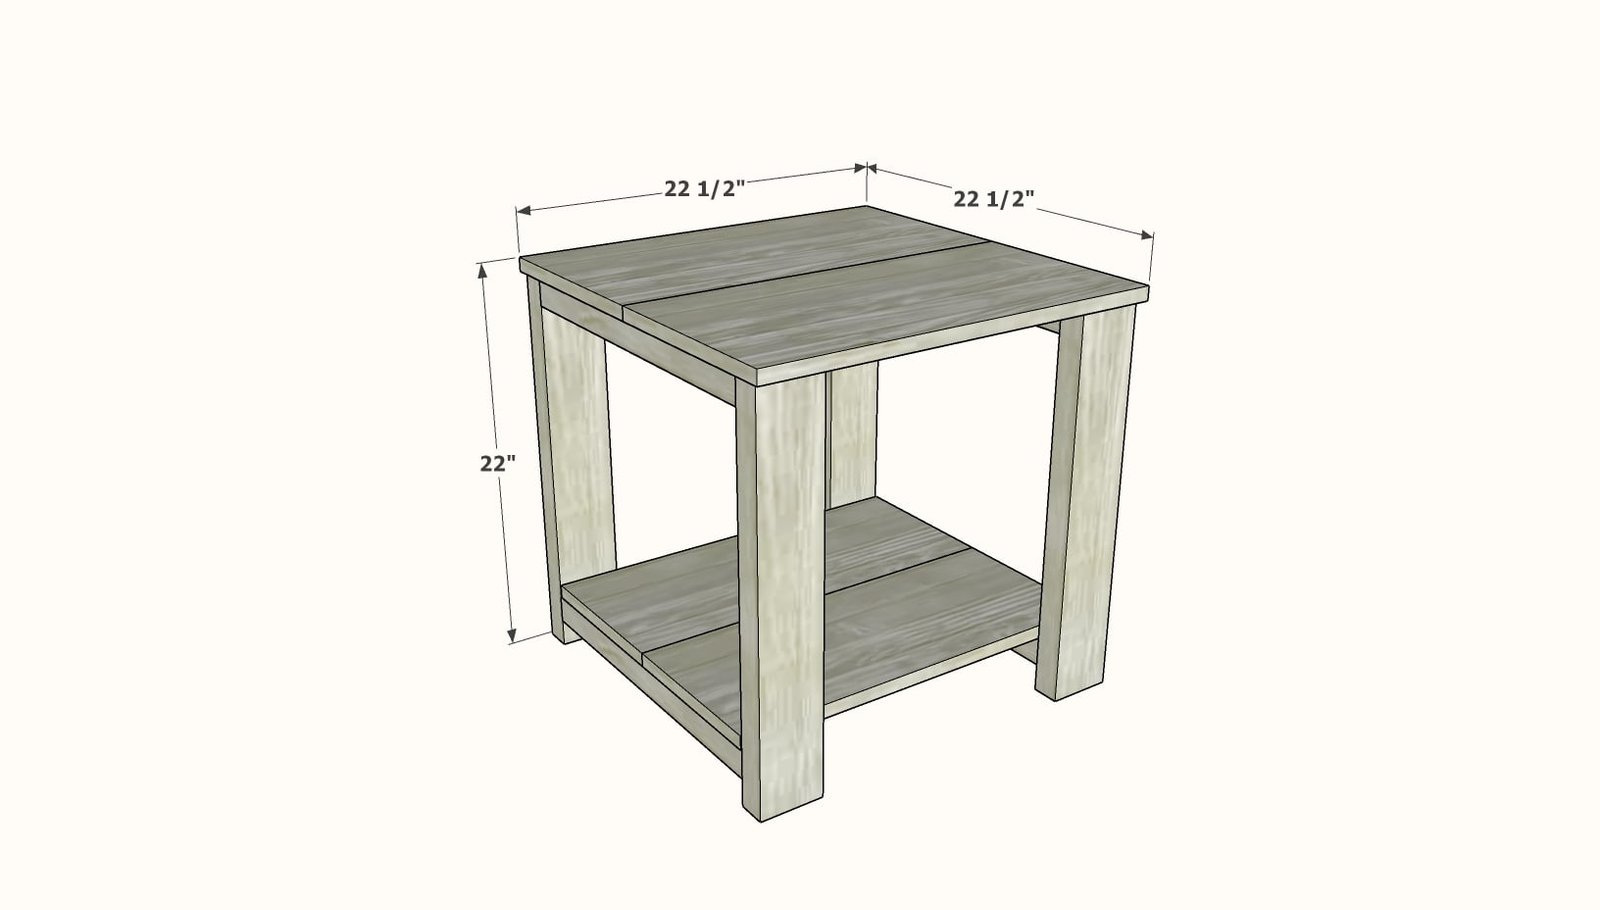
Dimensions
Use the size-specific shopping and cut lists below.
Shopping List
- 2 - 2x4 @ 8 feet long or stud length
- 1 - 1x10 @ 4 feet long
- 1 - 1x12 @ 4 feet long
- 16 - 2-1/2" long self tapping screws, star bit like SPAX or GRK brands
- 32 - 1-1/2" to 2" long self tapping screws, star bit like SPAX or GRK brands, OR use 1-1/4" brad nails and wood glue
Cut List
- 4 - 2x4 @ 21-1/4" - legs
- 4 - 2x4 @ 19" - side supports
- 2 - 1x10 @ 22" - bottom shelf
- 2 - 1x12 @ 22-1/2" - top shelf
Tools
- measuring tape
- square
- pencil
- safety glasses
- drill
- compound miter saw
- sander
Step-by-step Instructions
Step 1
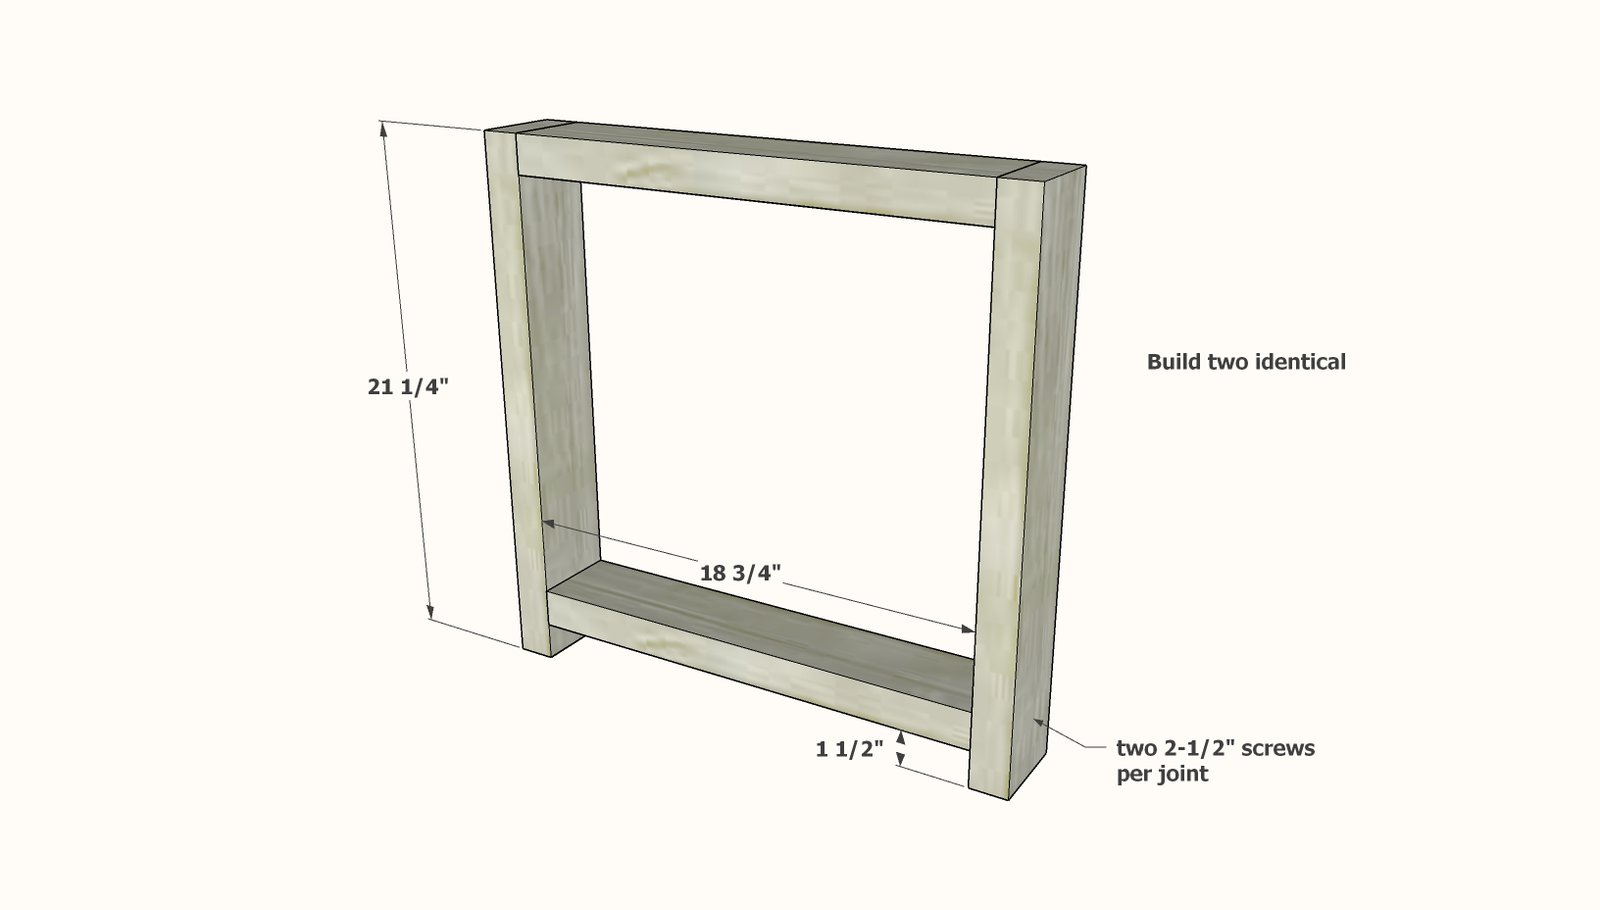
Build two of the leg sets using the longer screws, two screws per joint.
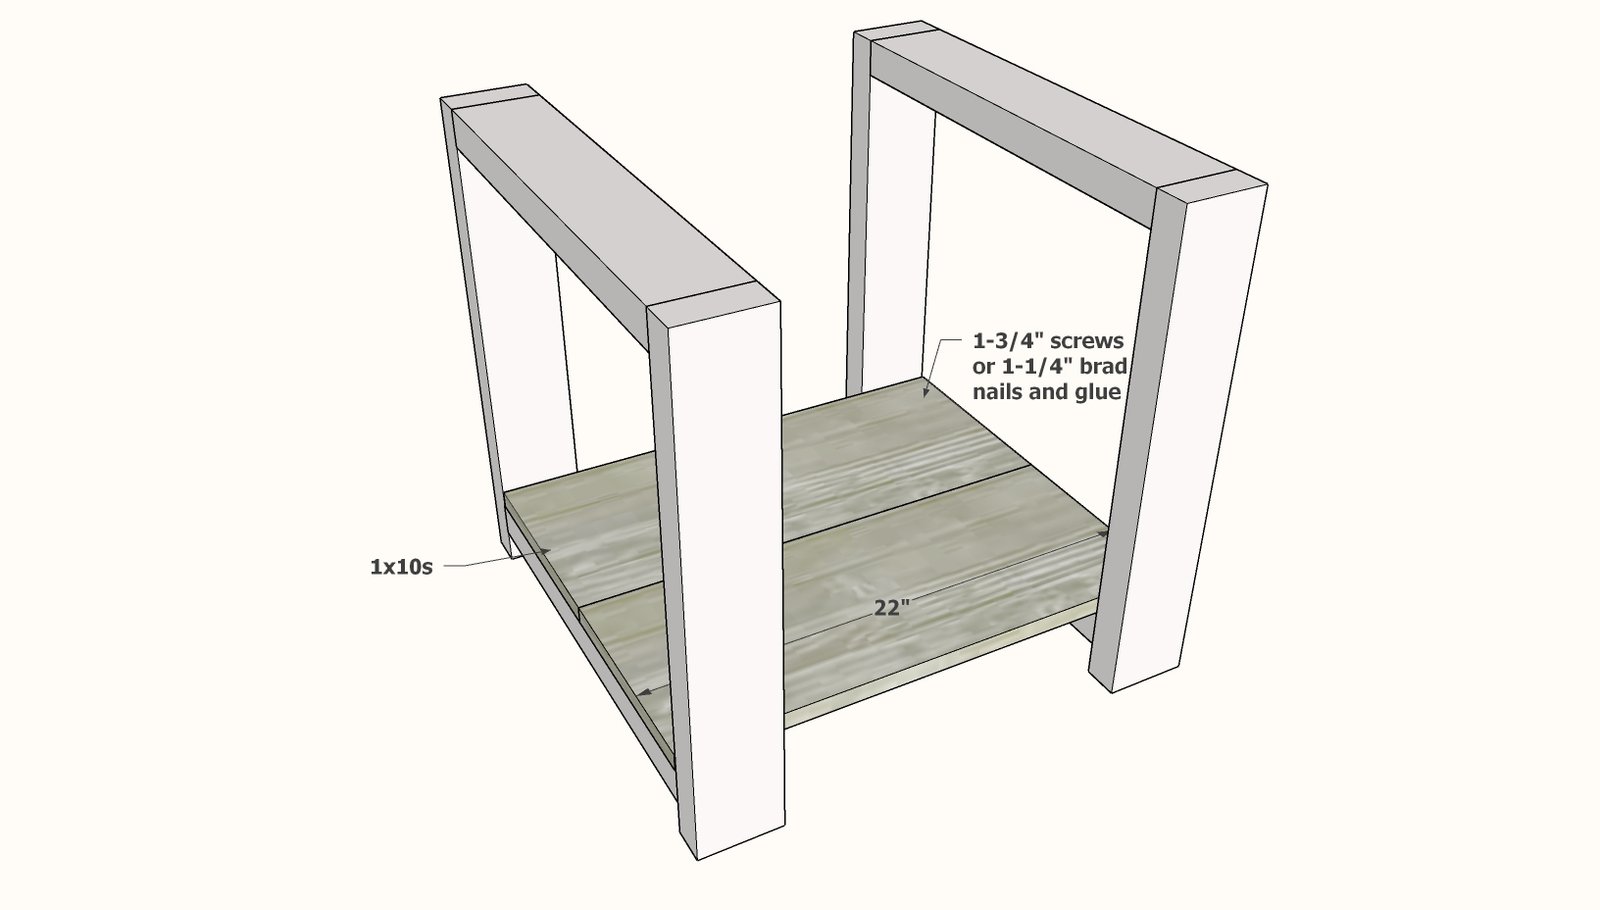
Attach the bottom shelf 1x10 boards inside the leg sets, so the edges are flush on the outsides.
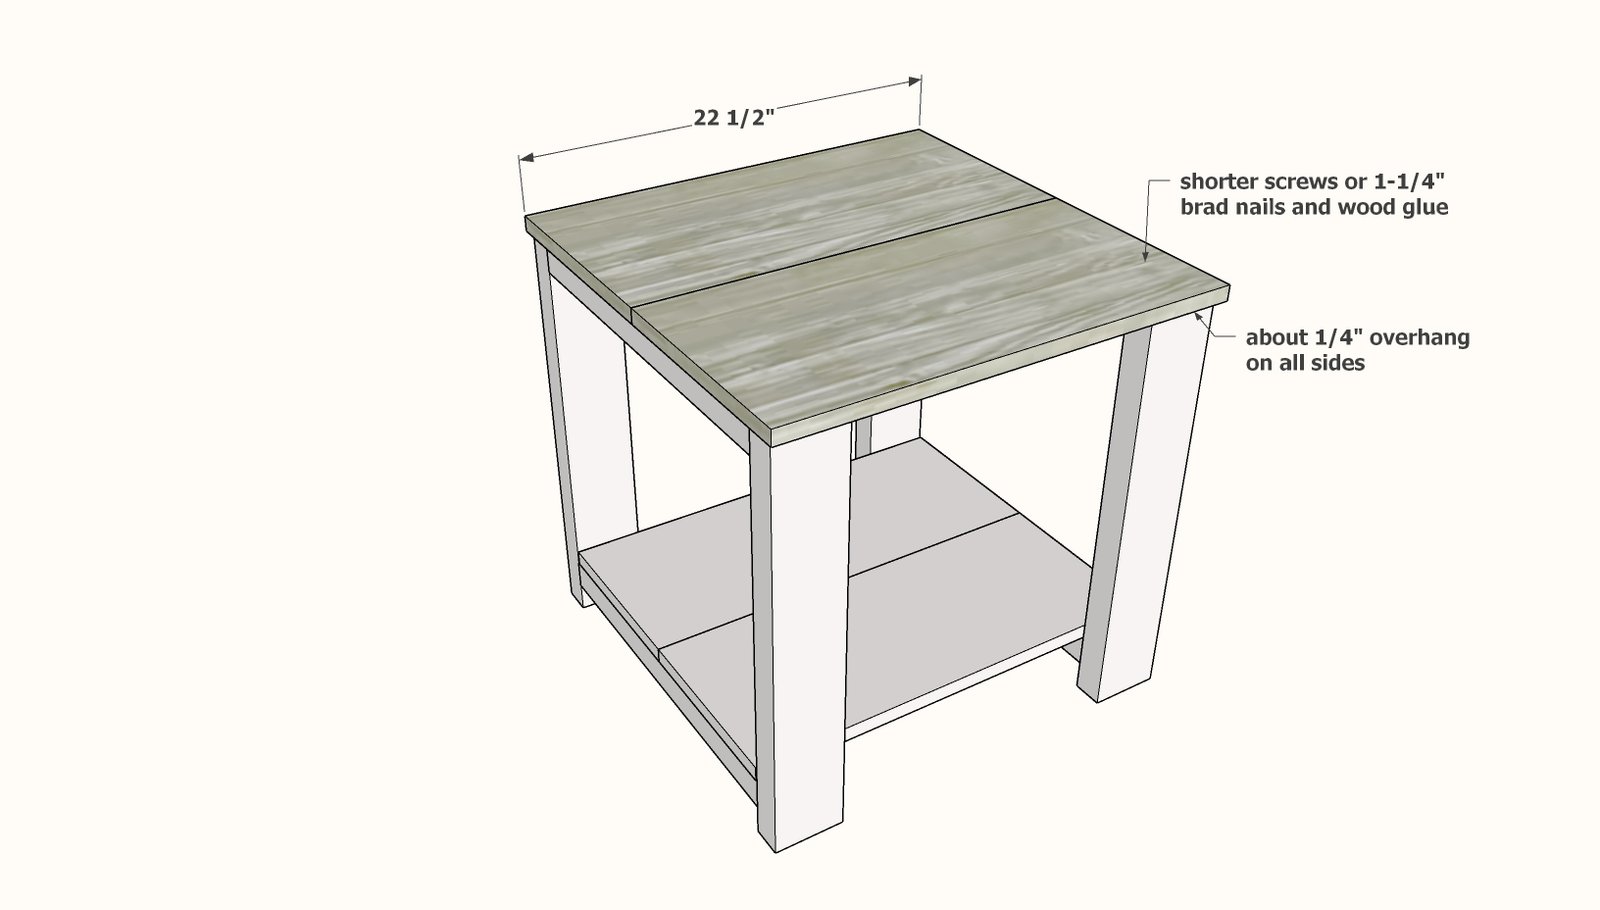
Use either glue and 1-1/4" brad nails to attach, or shorter star bit screws. For paint grade, star bit screws are easy to fill with wood filler and hide and will be a stronger joint. For a stain finish, nails are easiest to hide. Just use a good amount of glue. Be careful to make sure the legs are square to each other, you will know if the edges of the 1x10s aren't lining up right.
Repeat for the top 1x12s.
NO Top Overhang Option - I cut the 1x12 top pieces at 22" long. Since this was a bedside table (where the back is against a wall), I started at the front 1x12, flush on the front and sides. Then I added the back 1x12 and let it overhang about 1/2" on the back. For a floating side table or end table where the back is visible, you can trim the back edge with a circular saw.
Finishing
Sand all surfaces, starting with a medium grit and finishing with fine. Wipe off the dust, fill any holes or gaps with wood filler, and sand smooth once dry. Apply primer if you're painting, then finish with your choice of paint or stain and seal with a durable clear topcoat. For outdoor projects, use exterior-rated primer, paint or stain, and sealer so the piece stands up to the weather.
Source (temporary): https://www.ana-white.com/woodworking-projects/side-table-or-nightstand-super-simple-collection