Simple 1x4 Jewelry Organizer Shelf
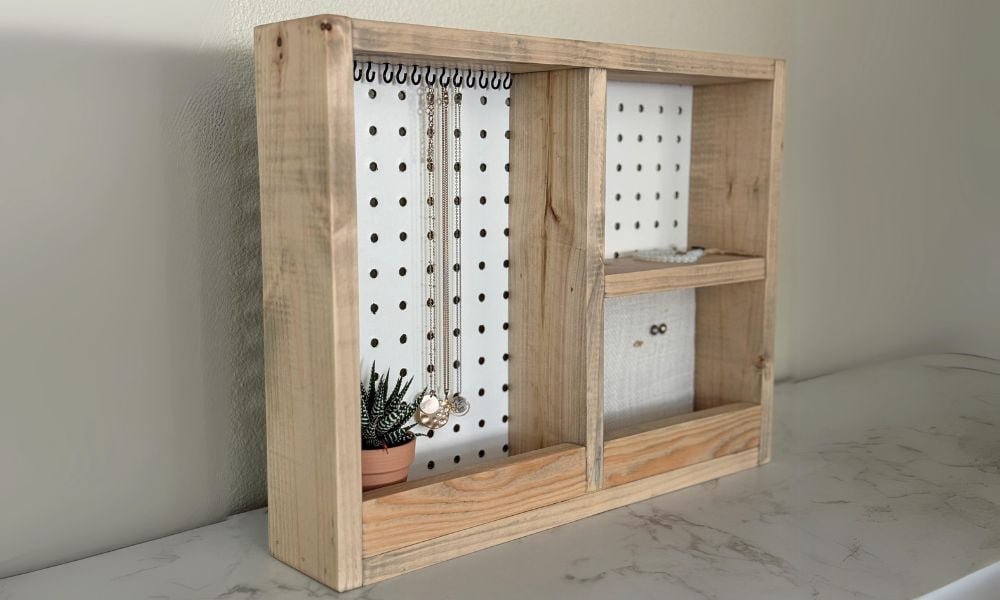
Organize jewelry in this simple shelf that can be mounted on the wall or set on a shelf or tabletop. Make this with scrap wood or new wood. from
Specifications
| Project type | Storage Woodworking Plans |
|---|---|
| Room | Bedroom |
| Difficulty | Starter Projects |
Dimensions
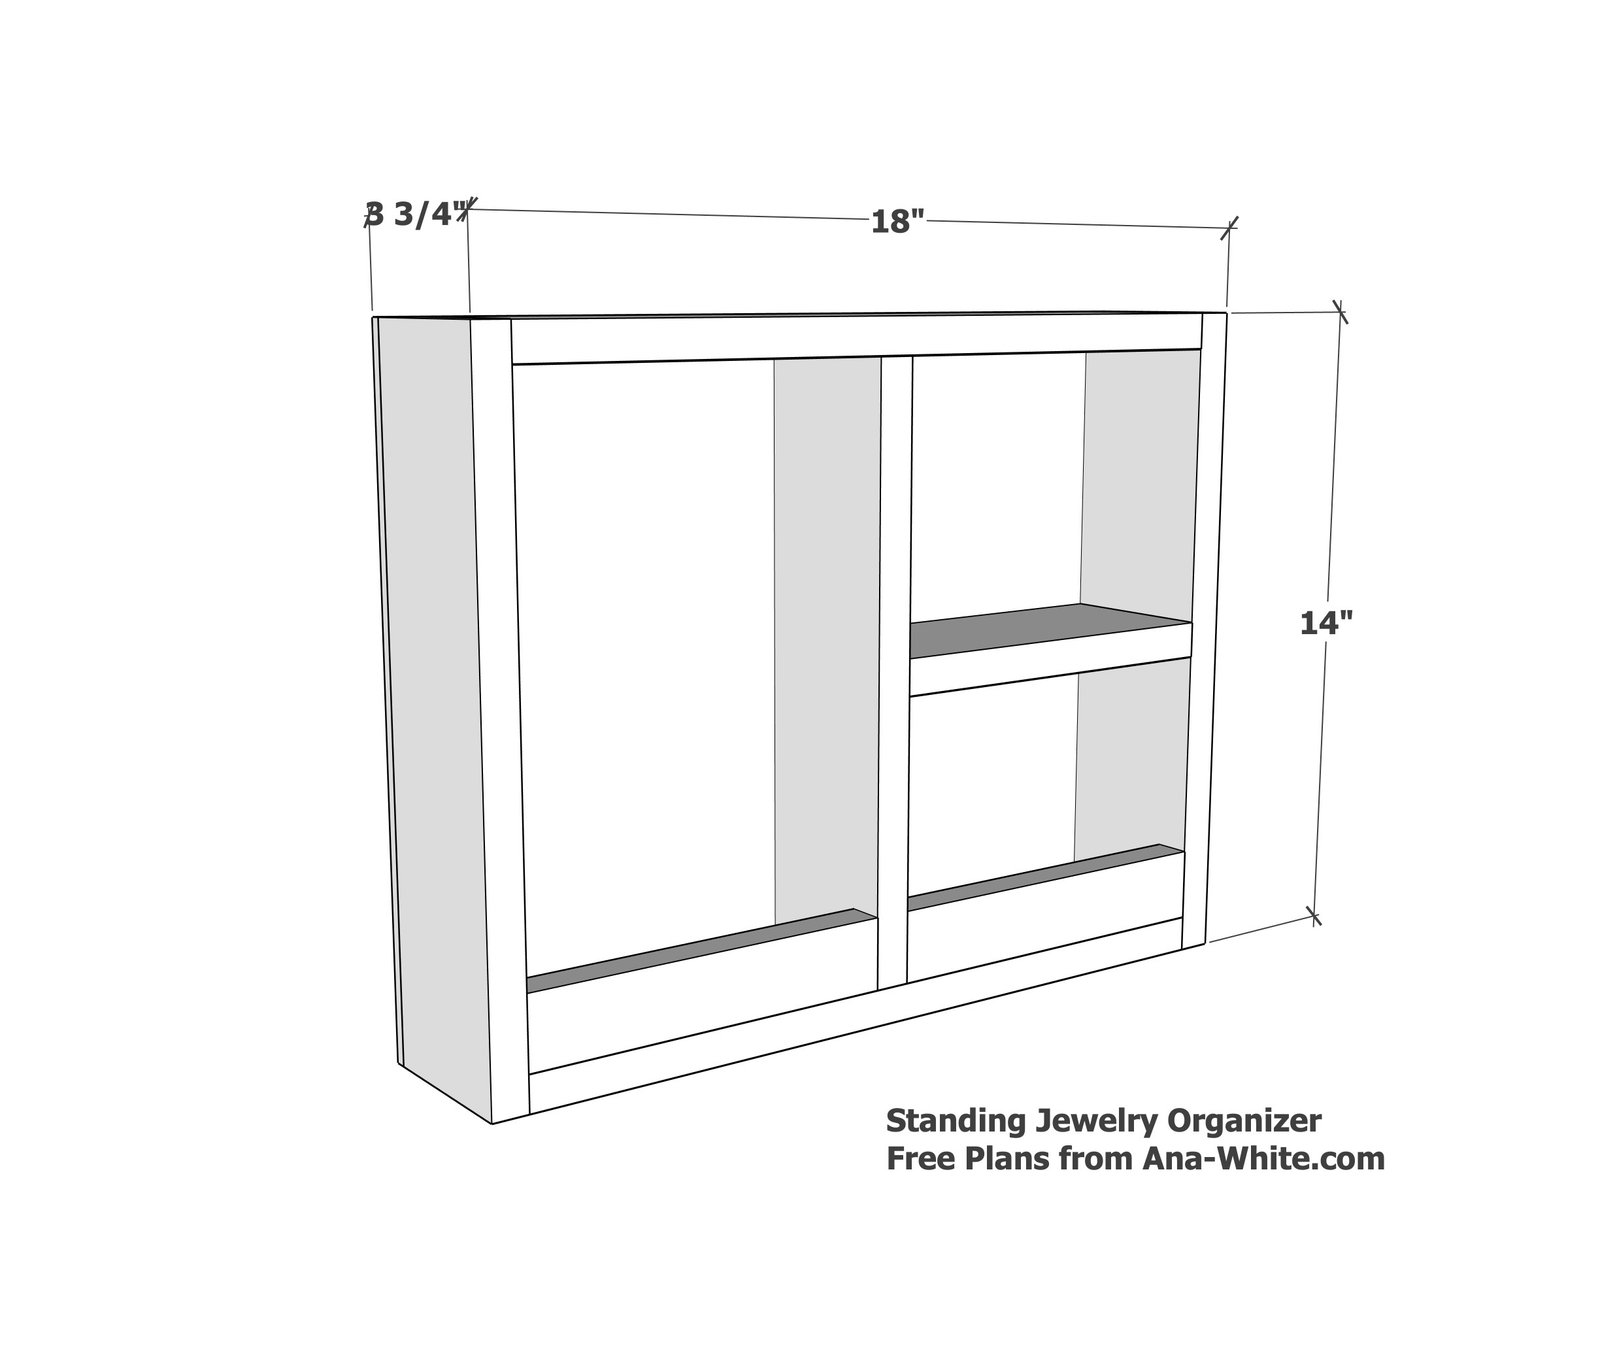
Use the size-specific shopping and cut lists below.
Shopping List
- 1 - 1x4x8’
- Scrap 1x2 - at least 16”
- Scrap pegboard - 2x2 panel/section
- Cup hooks ( I used 15 and spaced them 1/2” apart)
Cut List
- 2 - 1x4 @14” - Sides
- 1 - 1x4 @ 12.5” - Center Divider
- 2 - 1x4 @ 16.5” - Top and Bottom
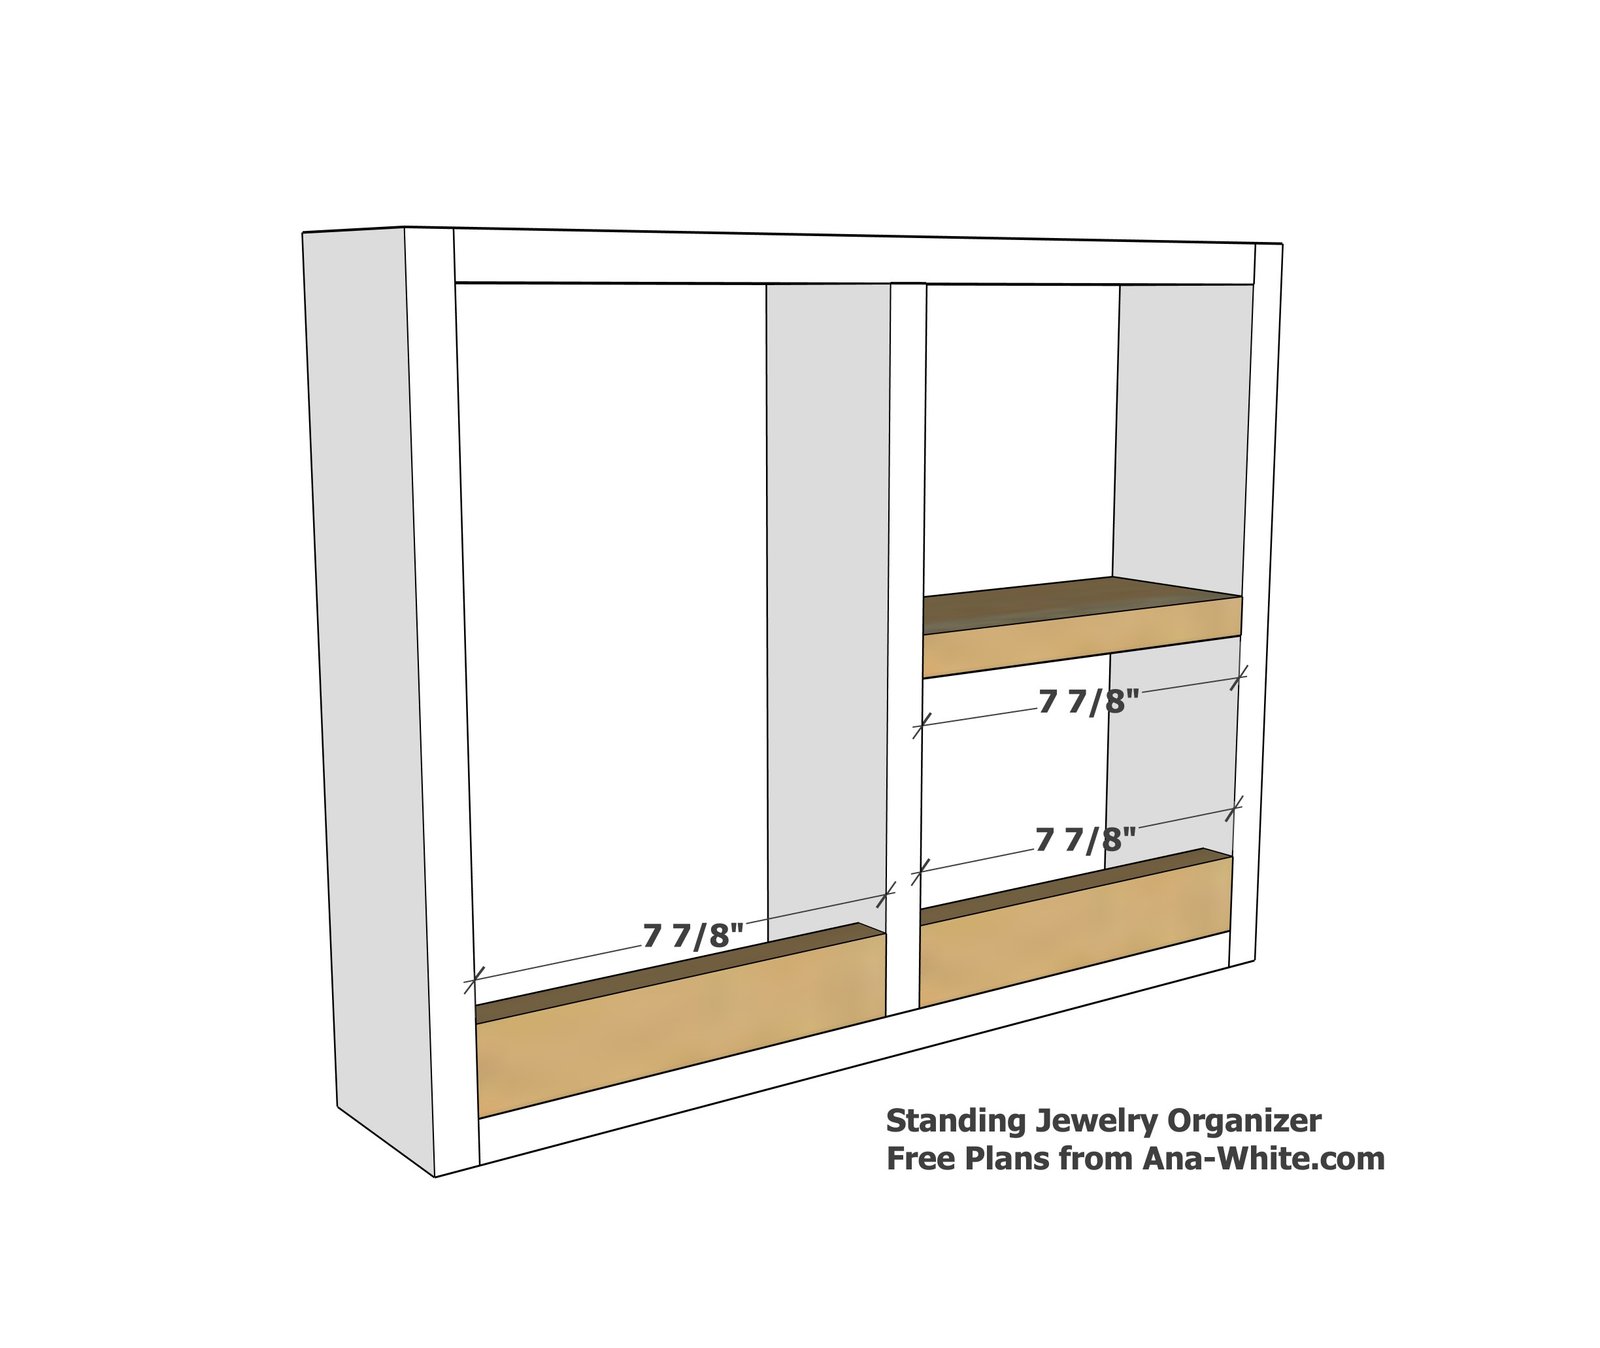
- 1 - 1x4 @ 7-7/8" (cut to fit) - Divider Shelf
- 2 - 1x2 @ 7-7/8" (cut to fit) - Bottom fronts
- Pegboard - cut to fit (approximately 17.75” x 13.75”)
Tools
- measuring tape
- square
- pencil
- safety glasses
- circular saw
- nailer
- sander
Step-by-step Instructions
Step 1
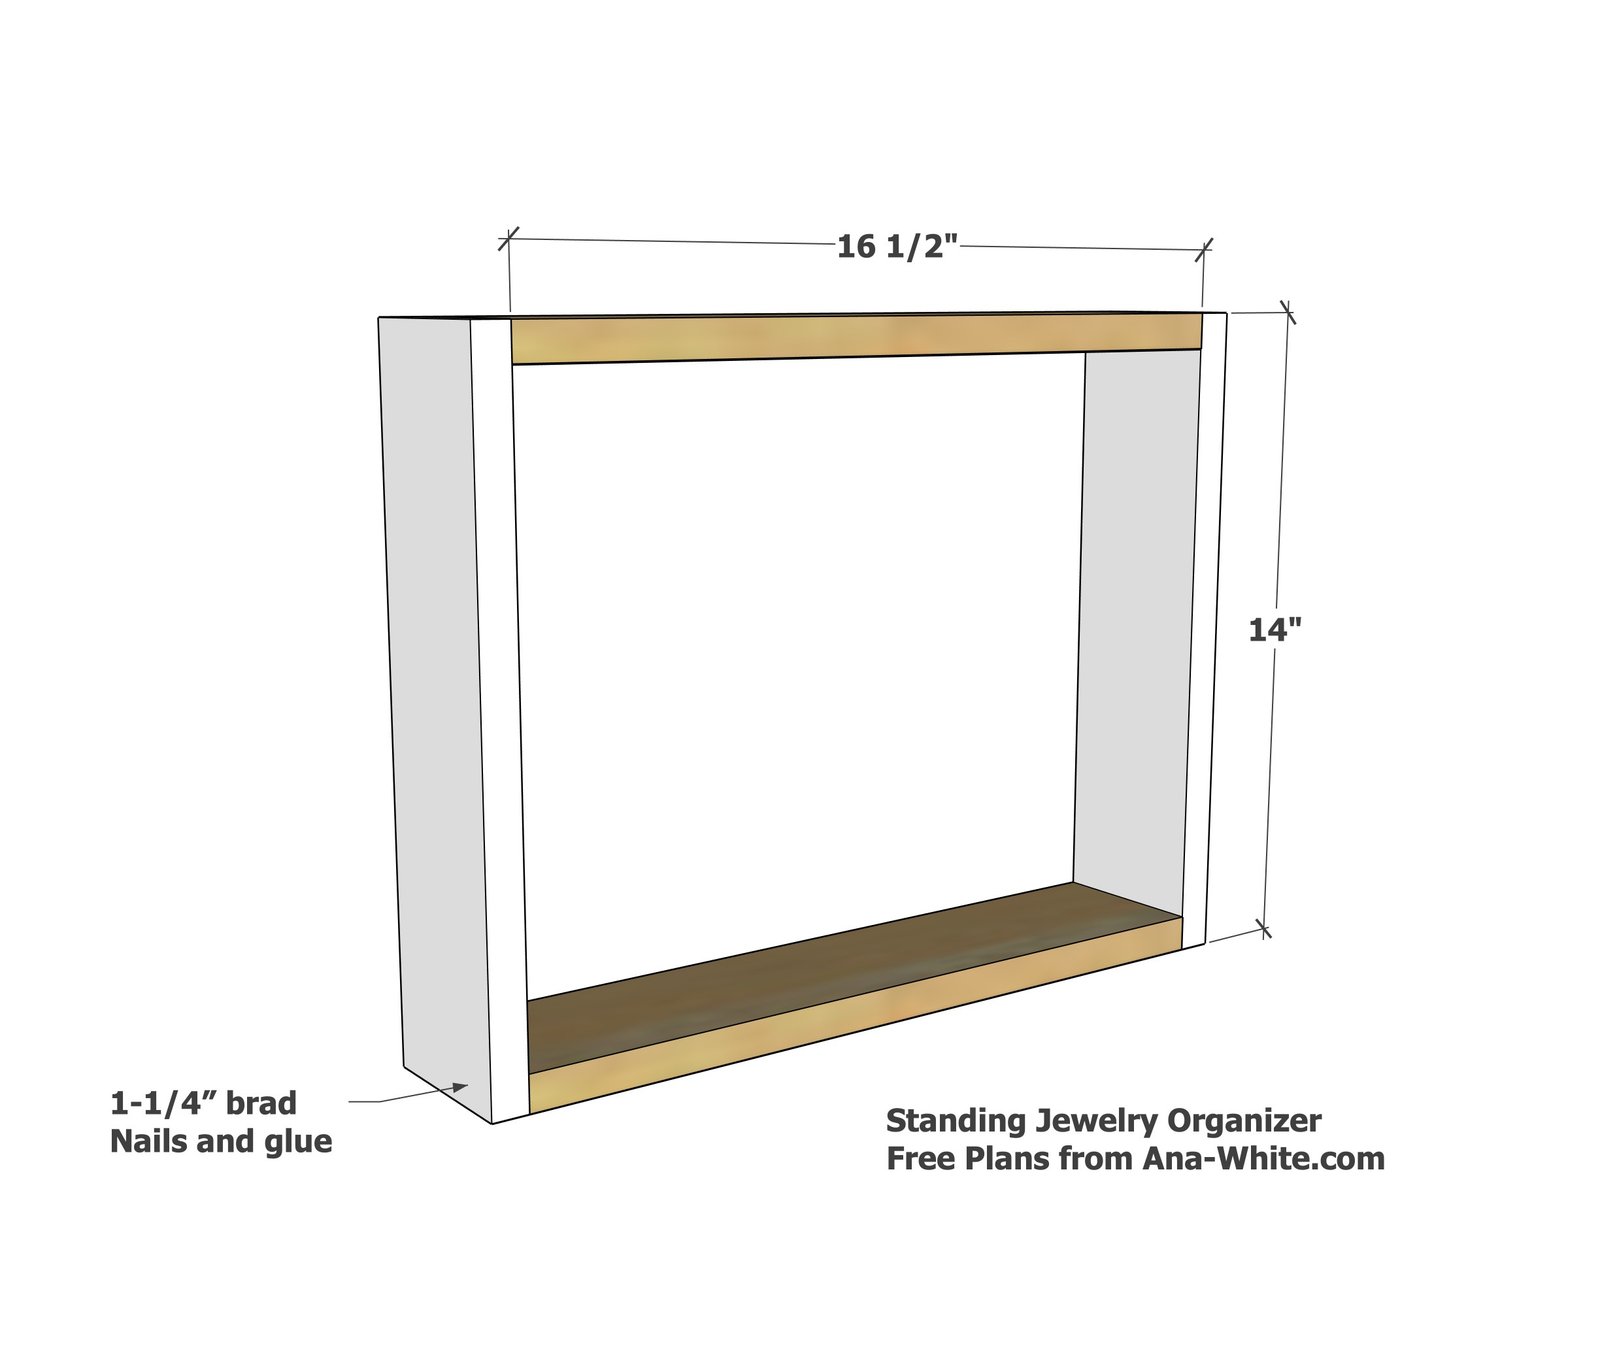
Attach the sides to the top and bottom with 1-1/4" brad nails and glue
Step 2
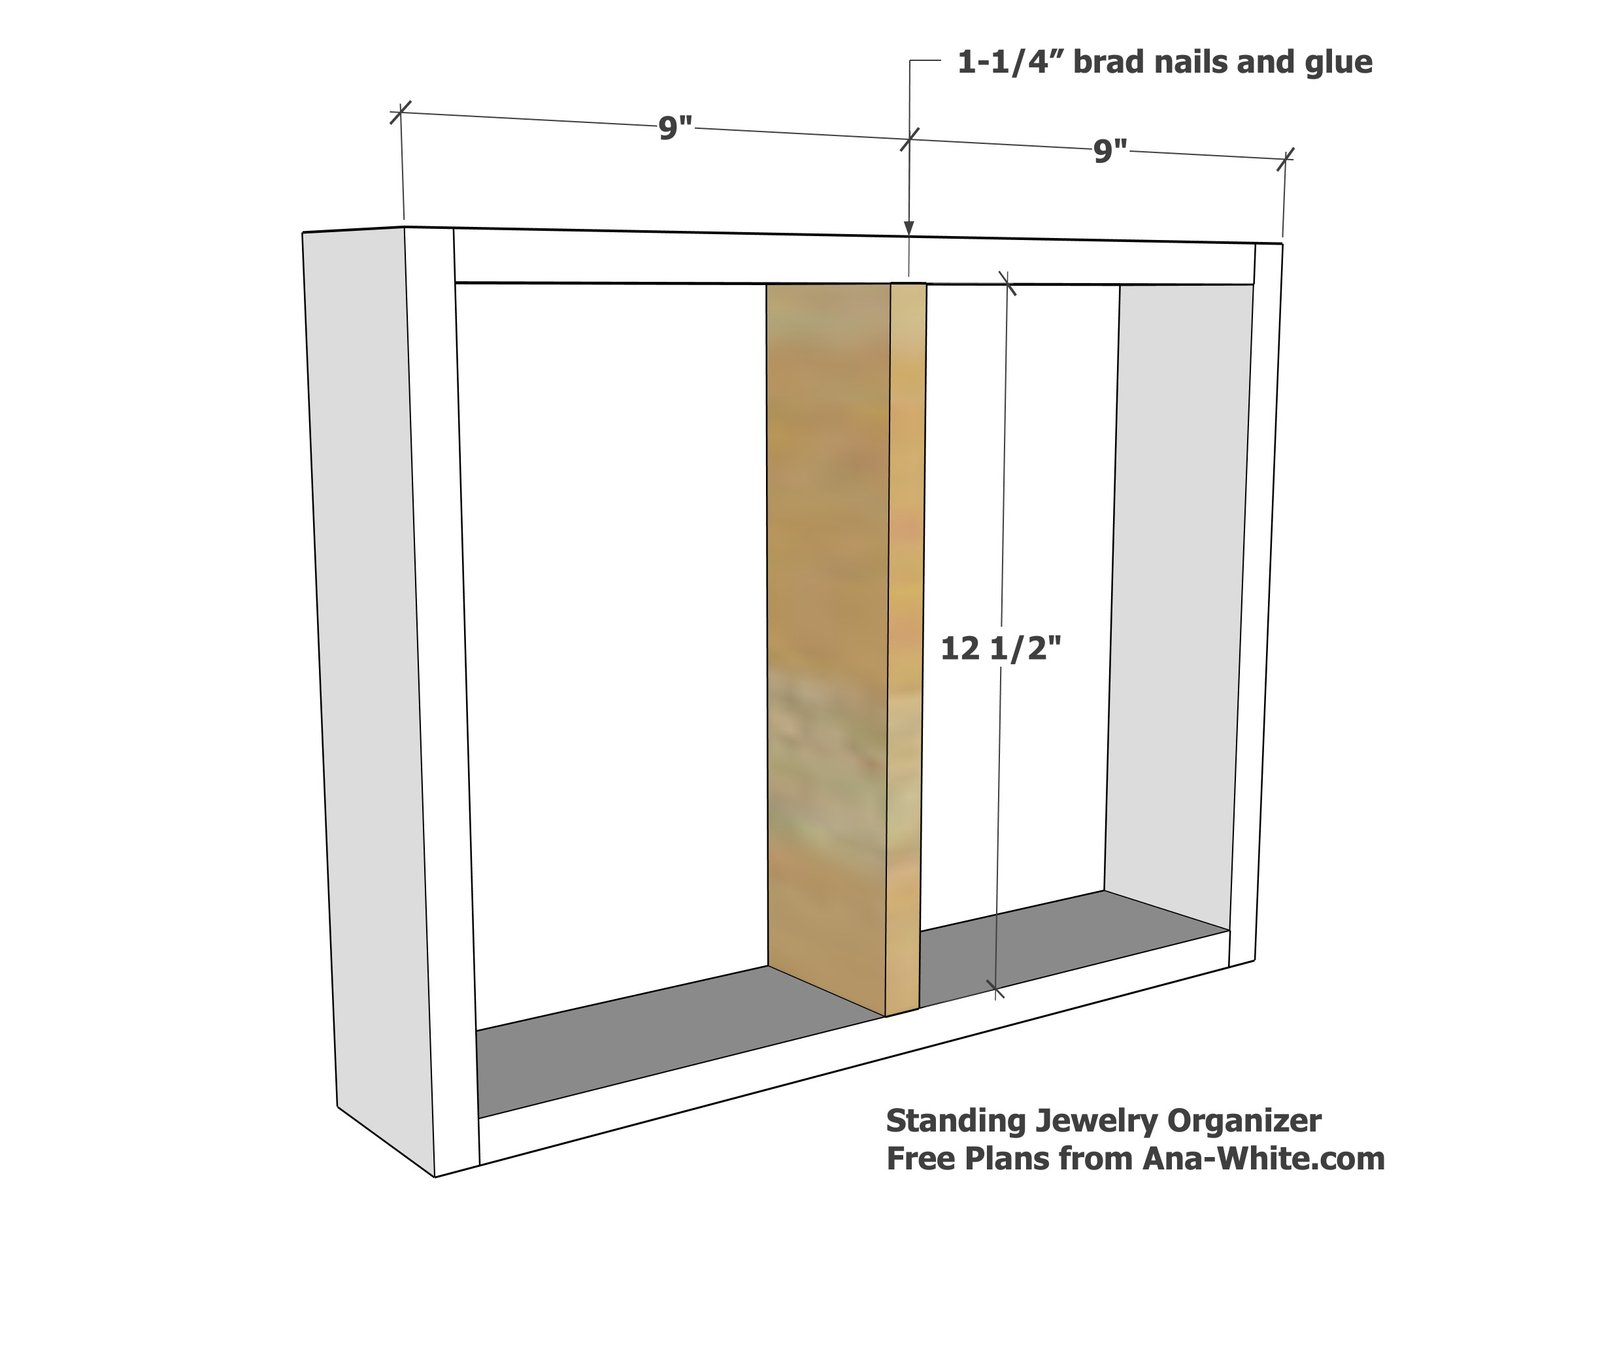
Add the center divider
Step 3
Add the shelf and the 1x2 pieces at the base
Step 4
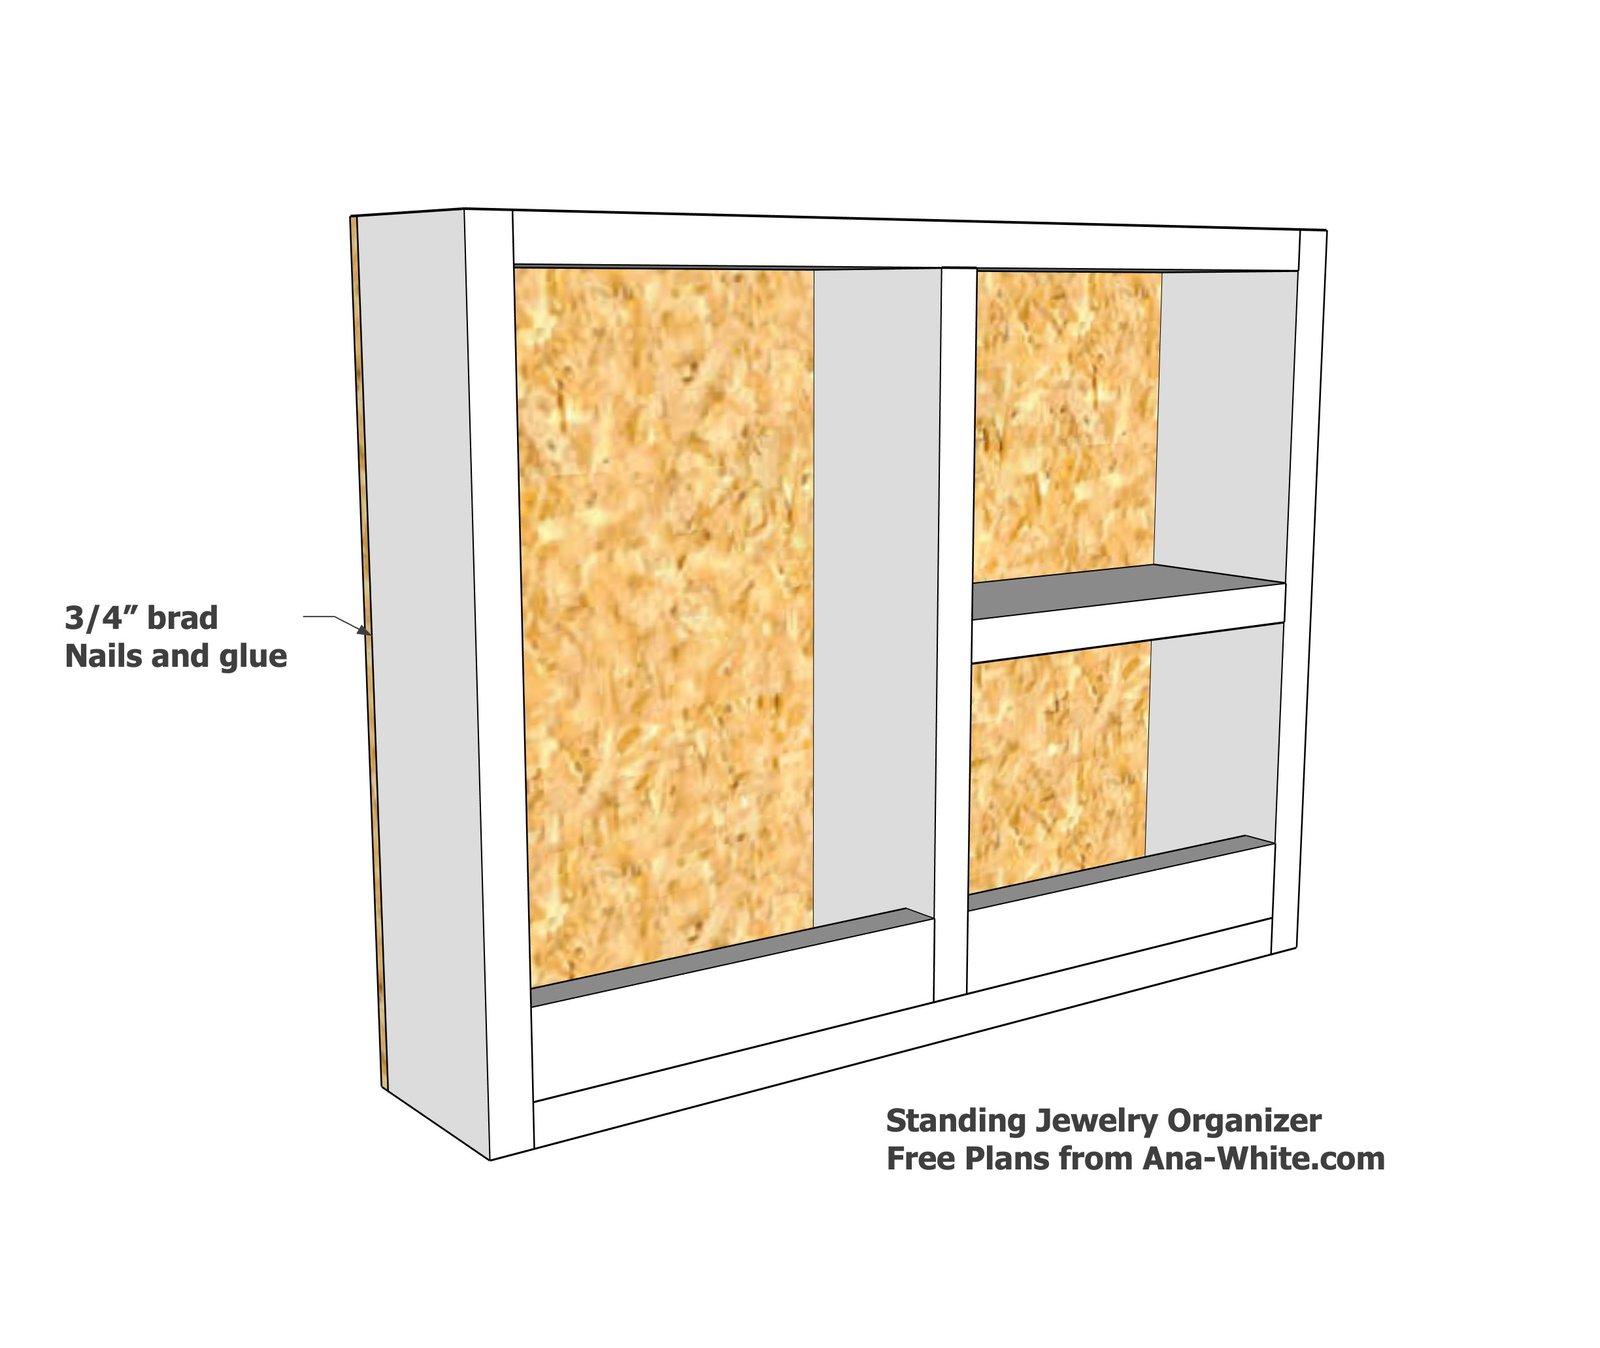
Attach the plywood or pegboard to the back
Finishing
Sand all surfaces, starting with a medium grit and finishing with fine. Wipe off the dust, fill any holes or gaps with wood filler, and sand smooth once dry. Apply primer if you're painting, then finish with your choice of paint or stain and seal with a durable clear topcoat. For outdoor projects, use exterior-rated primer, paint or stain, and sealer so the piece stands up to the weather.
Source (temporary): https://www.ana-white.com/woodworking-projects/simple-1x4-jewelry-organizer-shelf