Simple 1x6 Storage Shelves
Build these very simple storage shelves out of 1x6 boards. Add a metal rail to the front if desired.
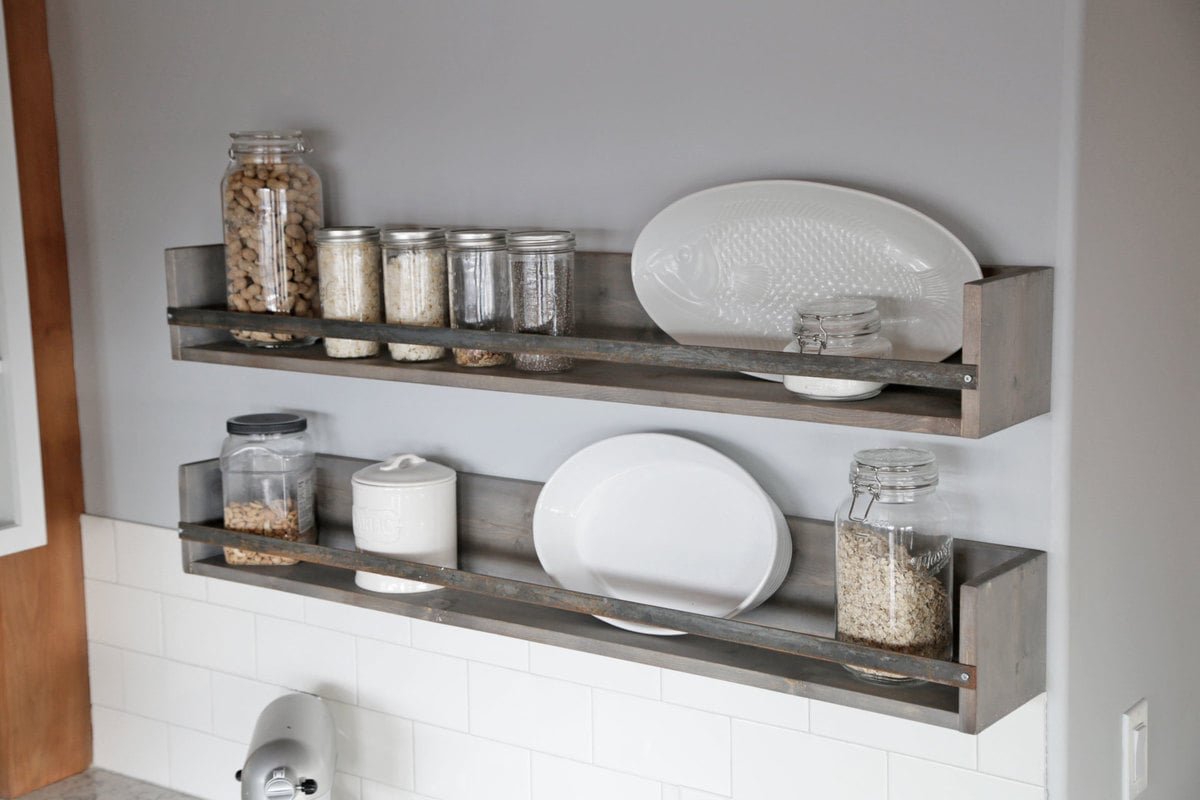
Specifications
| Project type | shelves |
|---|---|
| Room | Storage Solutions |
| Style | Cottage Style Furniture Plans |
| Difficulty | Starter Projects |
| Estimated cost | Under $20 |
Dimensions
Use the size-specific shopping and cut lists below.
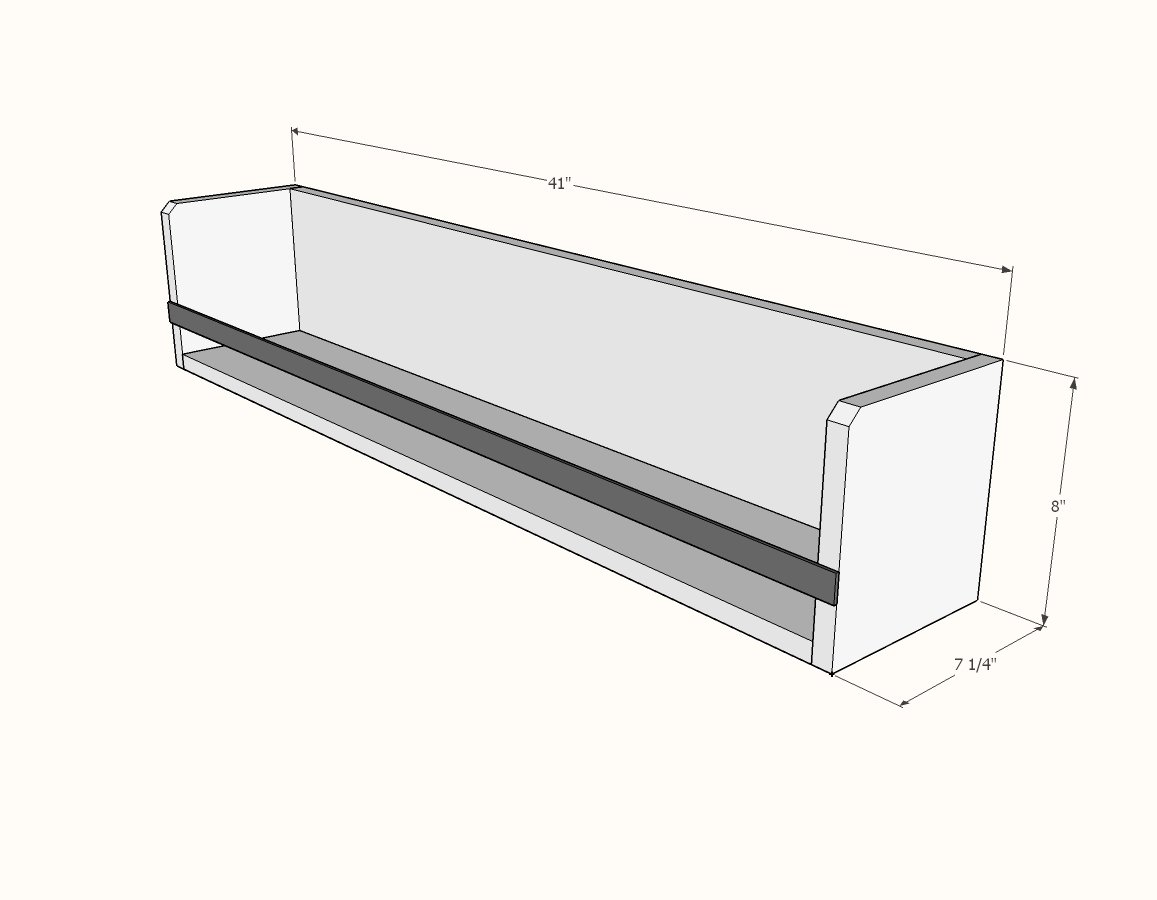
Shopping List
1 - 1x8 @ 8 foot long
1 - 3/4" wide flat metal stock, 41" long (can be cut with a jigsaw with metal blade)
1-1/4" brad nails
2" self tapping wood screws (try SPAX or similar) OR 1-1/4" pocket hole screws (to use with Kreg Jig)
Also need screws for hanging, this should be determined by your wall type. For a typical wall stud framed with 1/2" drywall, 2-1/2" screws would be great. Use a stud finder to locate studs and simply screw through back of shelf.
Cut List
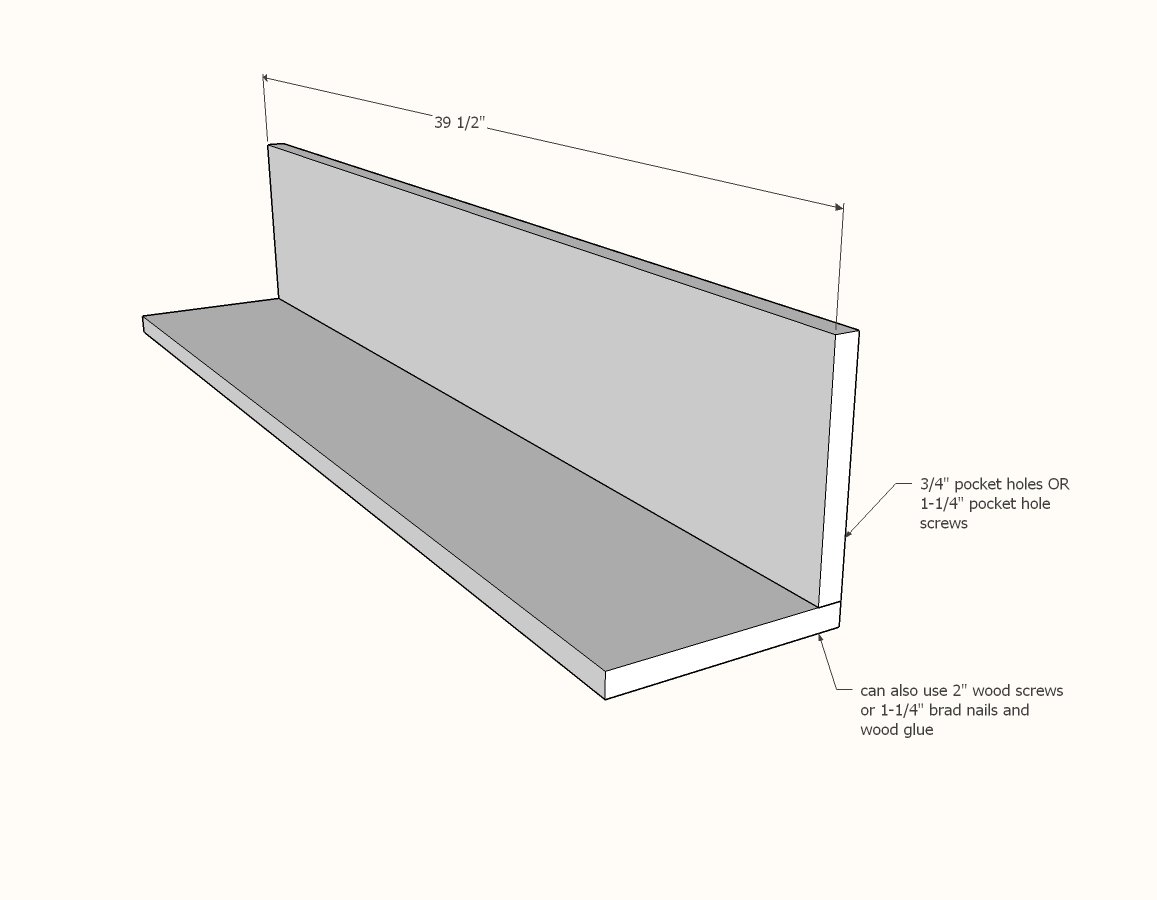
2 - 1x8 @ 39-1/2"
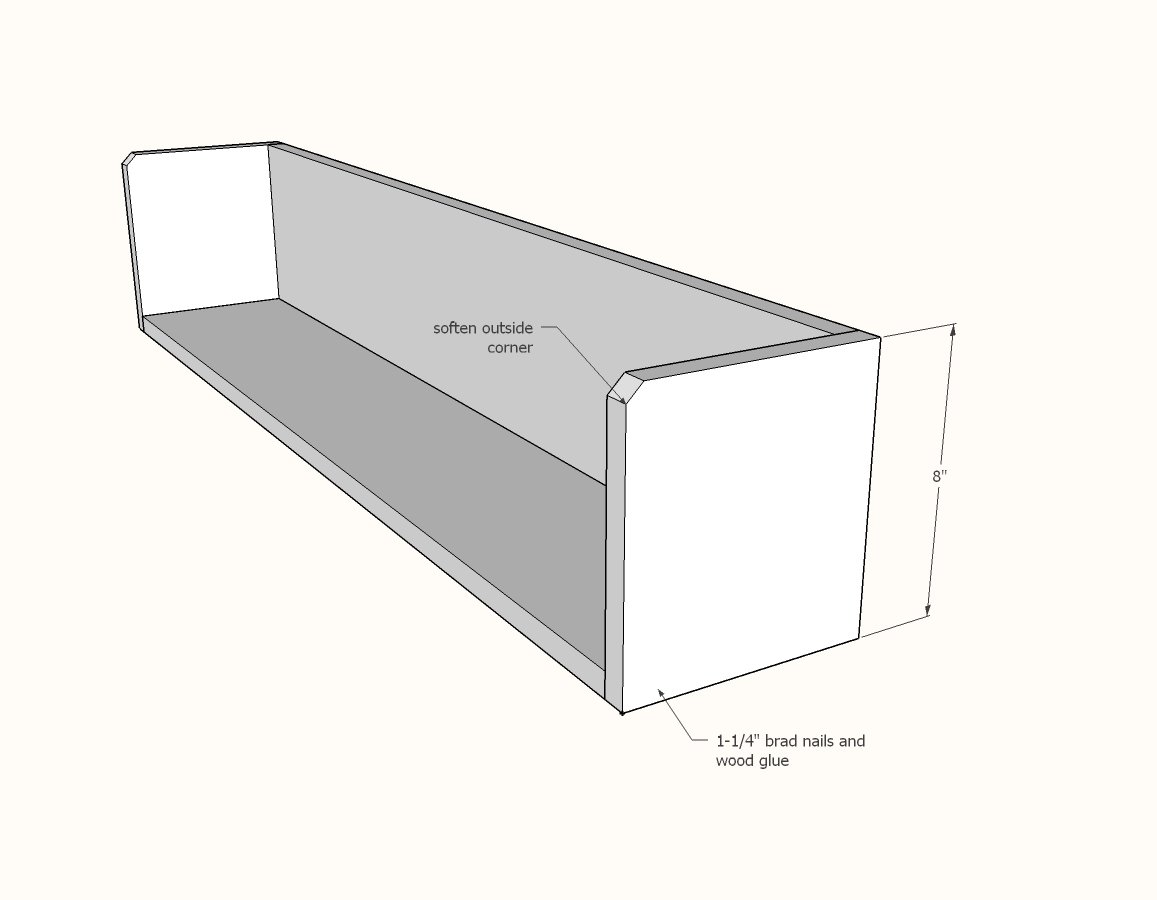
2 - 1x8 @ 8"
1 - 3/4" flat metal stock @ 41"
Tools
- measuring tape
- square
- pencil
- safety glasses
- hearing protection
- drill
- circular saw
- jigsaw
- nailer
- sander
- countersink drill bit
Step-by-step Instructions
Step 1
Attach the two 1x8s together with screws - either the pocket hole screw or the 2" self tapping screws. Place screws about 6-8" appart.
Step 2
Nail and glue sides to bottom/back. The sides are very structural, so these pieces are important.
Step 3
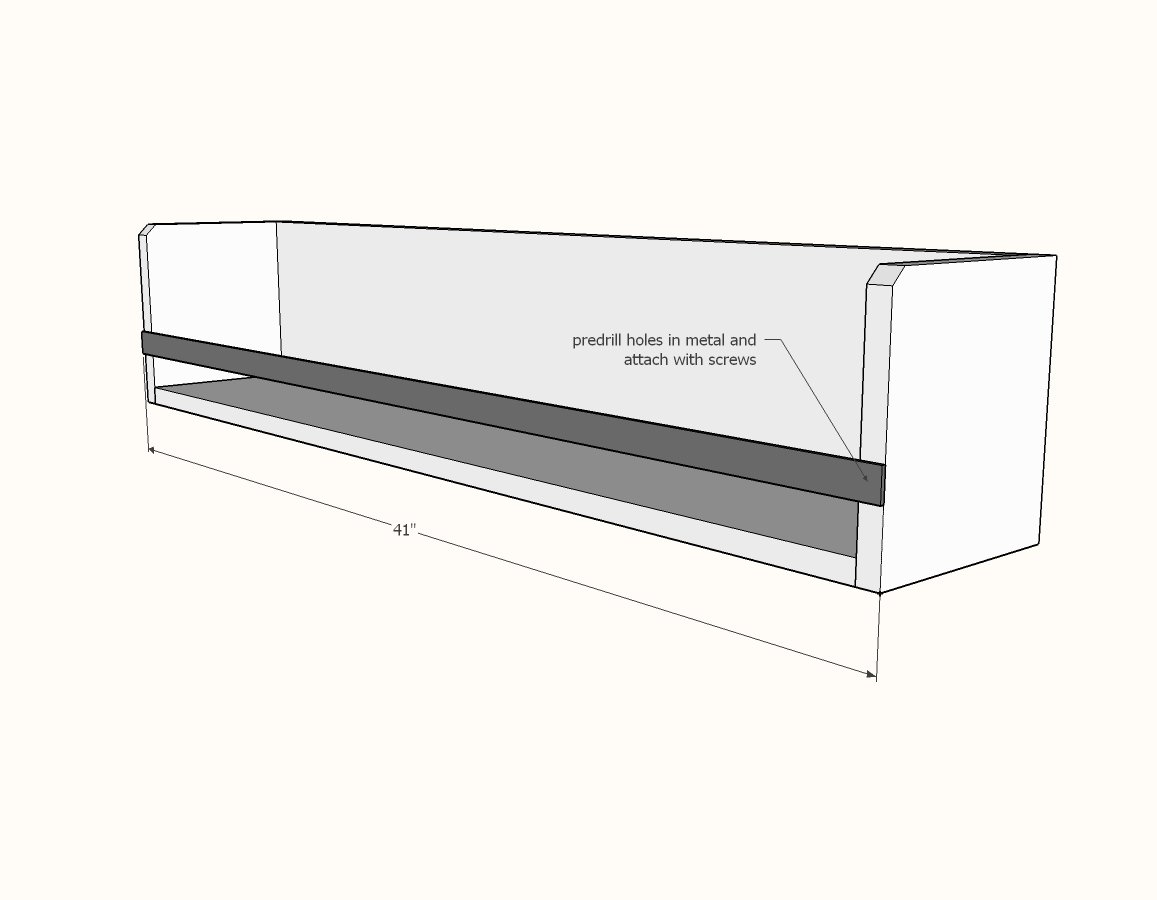
Cut the flat metal stock with a jigsaw with metal blade - use safety glasses. Predrill with metal drill bit and attach to front of shelves. You won't need much for screws - I actually used a 1-1/4" Kreg Jig screw. NOTE: The metal piece just keeps things from falling off the shelf and won't be super sturdy. This is fine.
Finishing
Sand all surfaces, starting with a medium grit and finishing with fine. Wipe off the dust, fill any holes or gaps with wood filler, and sand smooth once dry. Apply primer if you're painting, then finish with your choice of paint or stain and seal with a durable clear topcoat. For outdoor projects, use exterior-rated primer, paint or stain, and sealer so the piece stands up to the weather.
Source (temporary): https://www.ana-white.com/woodworking-projects/simple-1x6-storage-shelves