Simple 24" Bath Vanity
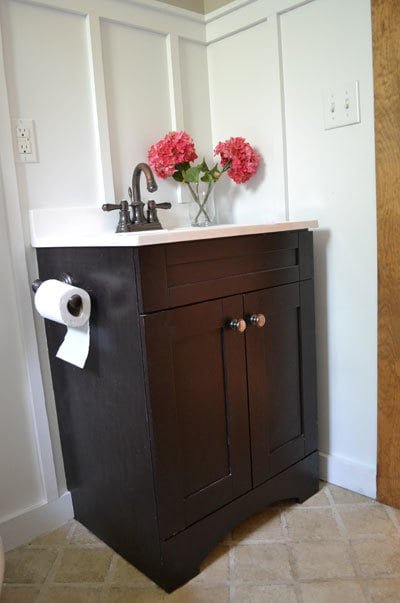
Build a small bath vanity with storage. These simple, step by step woodworking plans are designed for the beginner and can be built from a single sheet of plywood.
Specifications
| Project type | Cabinet Plans |
|---|---|
| Room | Bathroom |
| Style | Farmhouse Furniture |
| Difficulty | Beginner Projects |
| Estimated cost | $50 - $100 |
Dimensions
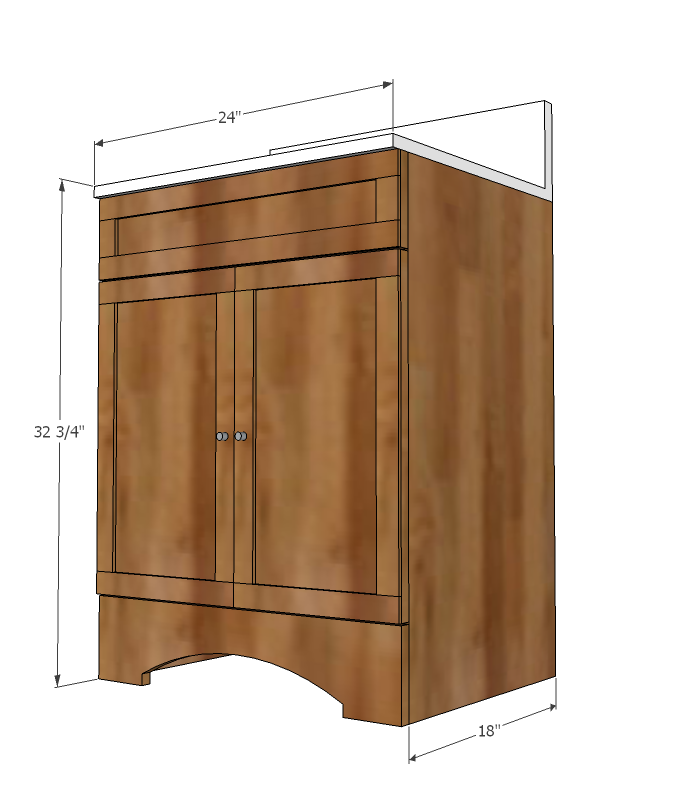
Use the size-specific shopping and cut lists below.
Shopping List
- 1 Sheet of 3/4" Plywood
- 1 - 1x3 @ 8 feet long
- 1 - 1x6 @ 4 feet long (optional)
- 1 - 1x2 - 1/4" thick stock @ 8 feet long (optional decorative door trim)
- 1 - 25 foot long roll edge banding for stained finishes
- 3/4" finish nails or brad nails if you are applying decorative trim
- Either pocket hole screws or countersunk screws/finish nails
Cut List
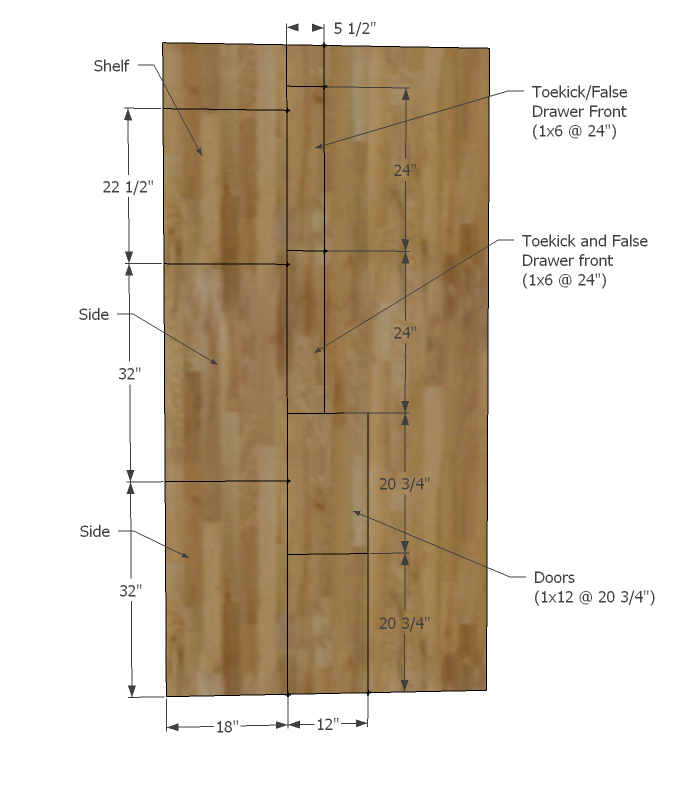
- 1 - 3/4" Plywood @ 22 1/2" x 18"
- 2 - 3/4" Plywood @ 32" x 18"
- 2 - 3/4" Plywood @ 30 3/4" x 12"
- 2 - 1x6 OR 3/4" Plywood @ 24"
- 4 - 1x3 @ 22.5"
- Cut trim pieces to fit door faces
Tools
- measuring tape
- square
- pencil
- safety glasses
- hearing protection
- kreg-jig
- drill
- circular saw
- jigsaw
- nailer
- sander
- level
- countersink drill bit
Step-by-step Instructions
Step 1
Cut plywood as shown above, with the grain, cutting long cuts first. So you would cut an 18" wide strip off of your plywood, and then from that 18" strip, cut the sides and shelf. You can ask the lumber store to make the cuts for you, and your plywood will be easier to transport and store.
Step 2
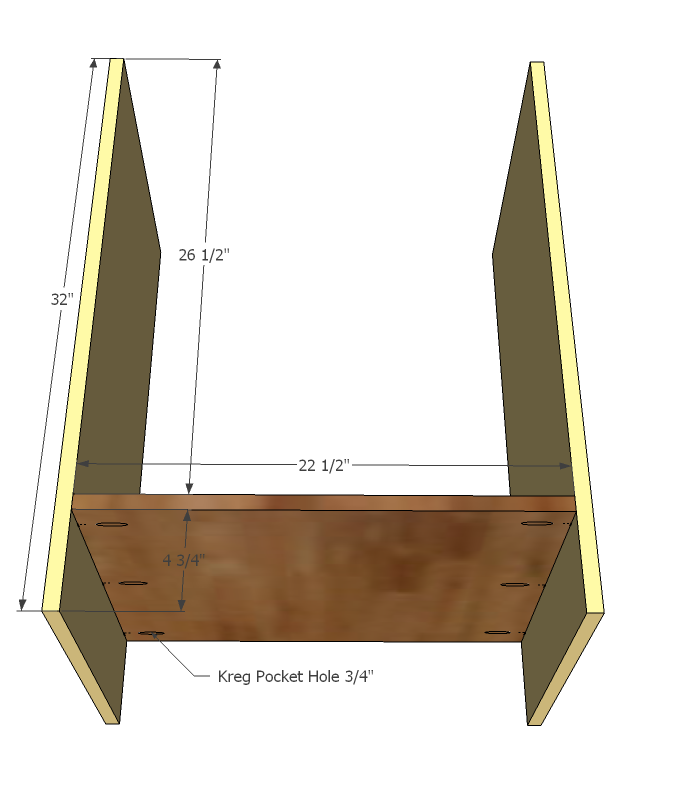
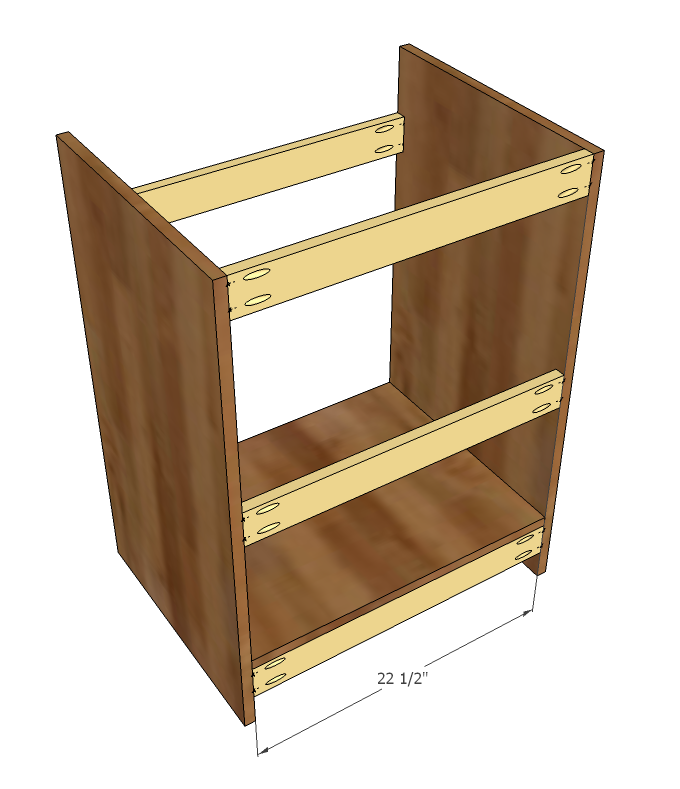
Place the bottom shelf as shown above between the sides, either using the Kreg Jig or countersunk screws or 2" finish nails and wood glue.
Step 3
Attach the 1x3s as shown above. The front 1x3 needs to be placed with a 4" space above it. The back 1x3s need to be placed at the top, bottom of the bottom shelf, and centered.
Step 4
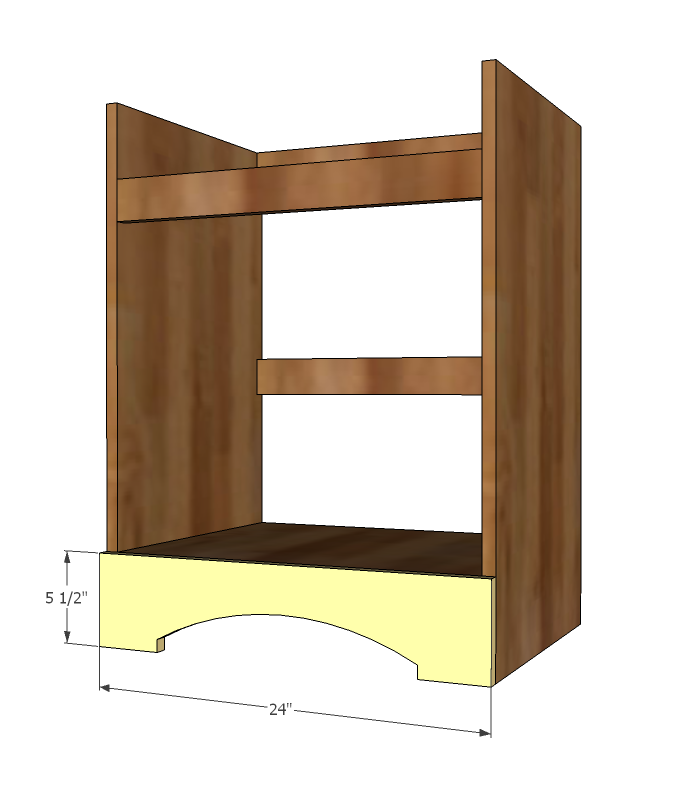
Now the toekick. Cut out and attach with 2" finish nails and wood glue.
Step 5
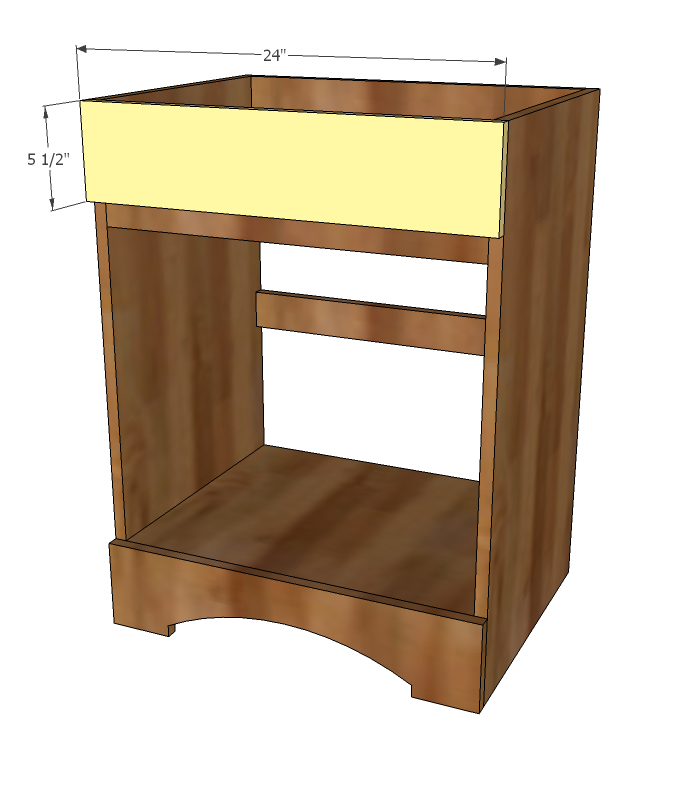
Step 6
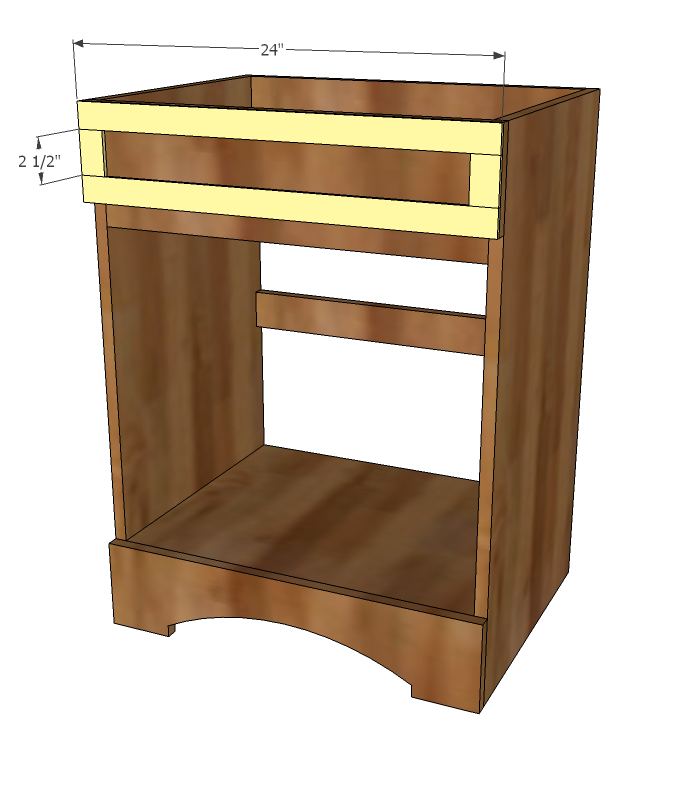
For the front apron, you can glue and attach the 1/4" trim pieces as shown above.
Step 7
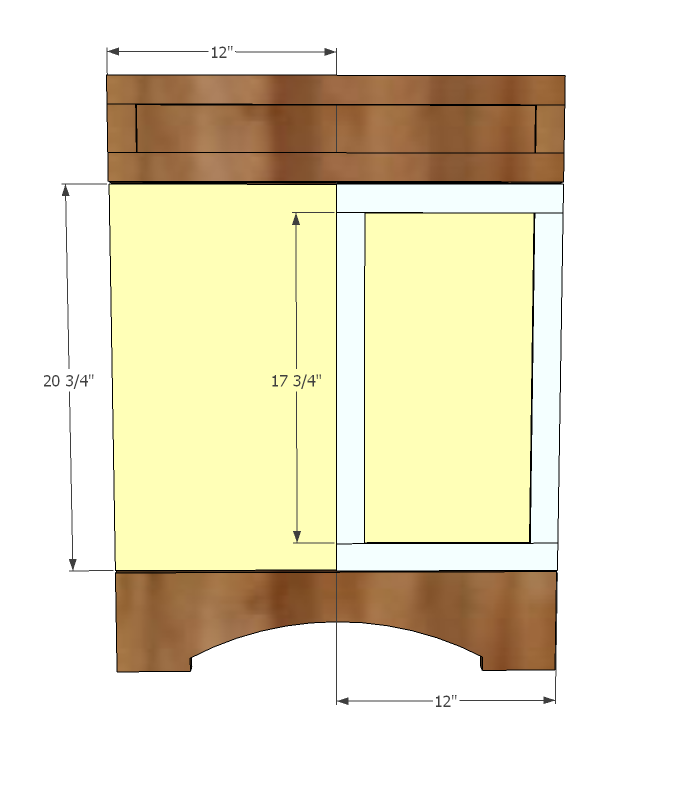
And the doors. You can attach trim pieces as well. The best hinges I've found for doors like these (full overlay) are these ones from the Home Depot:
Finishing
Sand all surfaces, starting with a medium grit and finishing with fine. Wipe off the dust, fill any holes or gaps with wood filler, and sand smooth once dry. Apply primer if you're painting, then finish with your choice of paint or stain and seal with a durable clear topcoat. For outdoor projects, use exterior-rated primer, paint or stain, and sealer so the piece stands up to the weather.
Source (temporary): https://www.ana-white.com/woodworking-projects/simple-24-bath-vanity