Simple 2x4 Potting Bench with Slatted Back
How to build a potting bench - super easy and looks great - this is a featuring step by step diagrams, shopping and cut list, everything you need to build your own potting bench. We love this simple design with a back hutch with shelf and rails for hanging tools. The bottom shelf is perfect for storing accessories and supplies for all your potting needs.
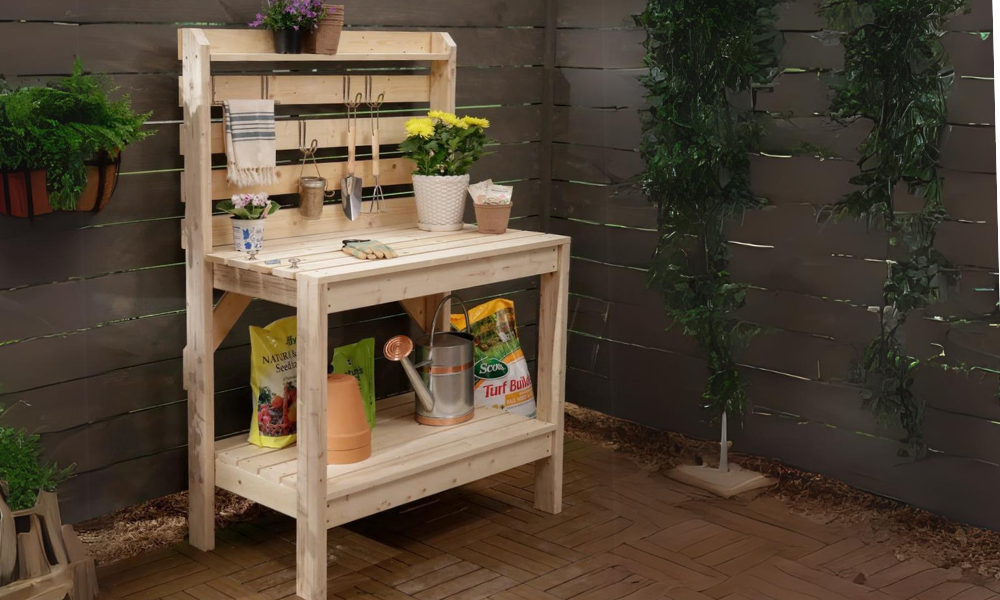
Specifications
| Project type | Planters, Garden Beds, and Greenhouses |
|---|---|
| Room | Outdoor |
| Style | Farmhouse Furniture |
| Difficulty | Beginner Projects |
| Estimated cost | $100-$150 |
Dimensions
Use the size-specific shopping and cut lists below.
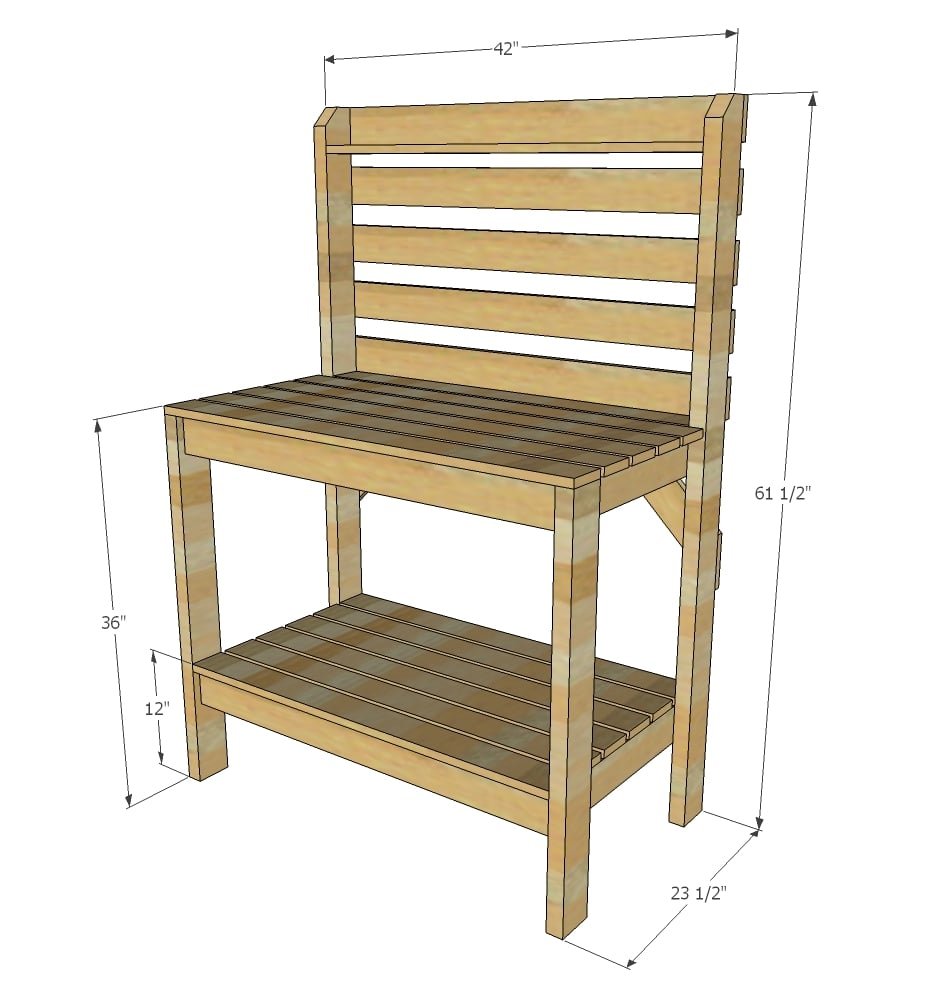
Shopping List
- 8 – 1x4 @ 8 feet long
- 2 – 1x4 @ 10 feet long
- 4 – 2x4 @ 8 feet long
- 2-1/2” and 2” exterior self tapping screws
- Wood glue
Cut List
- 2 – 2x4 @ 61-1/2” (back legs)
- 2 – 2x4 @ 35-1/4” (front legs)
- 4 – 2x4 @ 22” (side aprons)
- 10 – 1x4 @ 39” (front aprons, short shelf boards, back shelf)
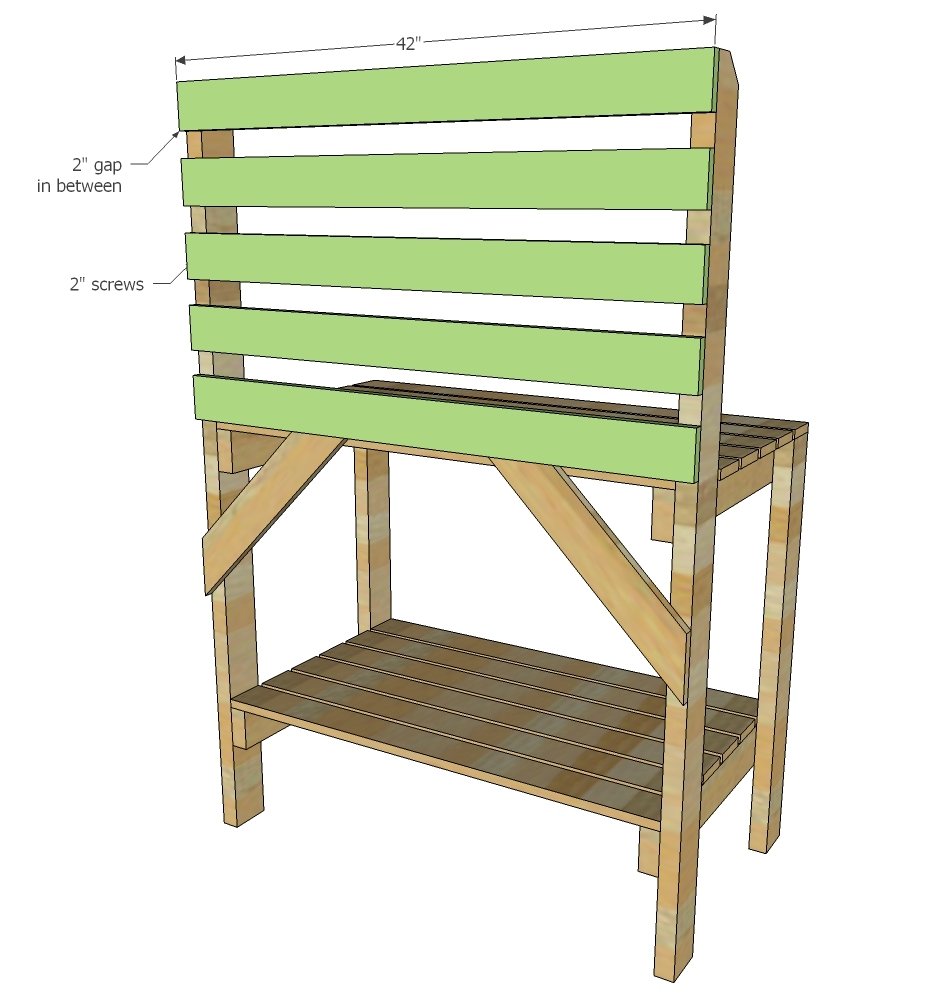
- 10 – 1x4 @ 42” (long shelf boards, back boards)
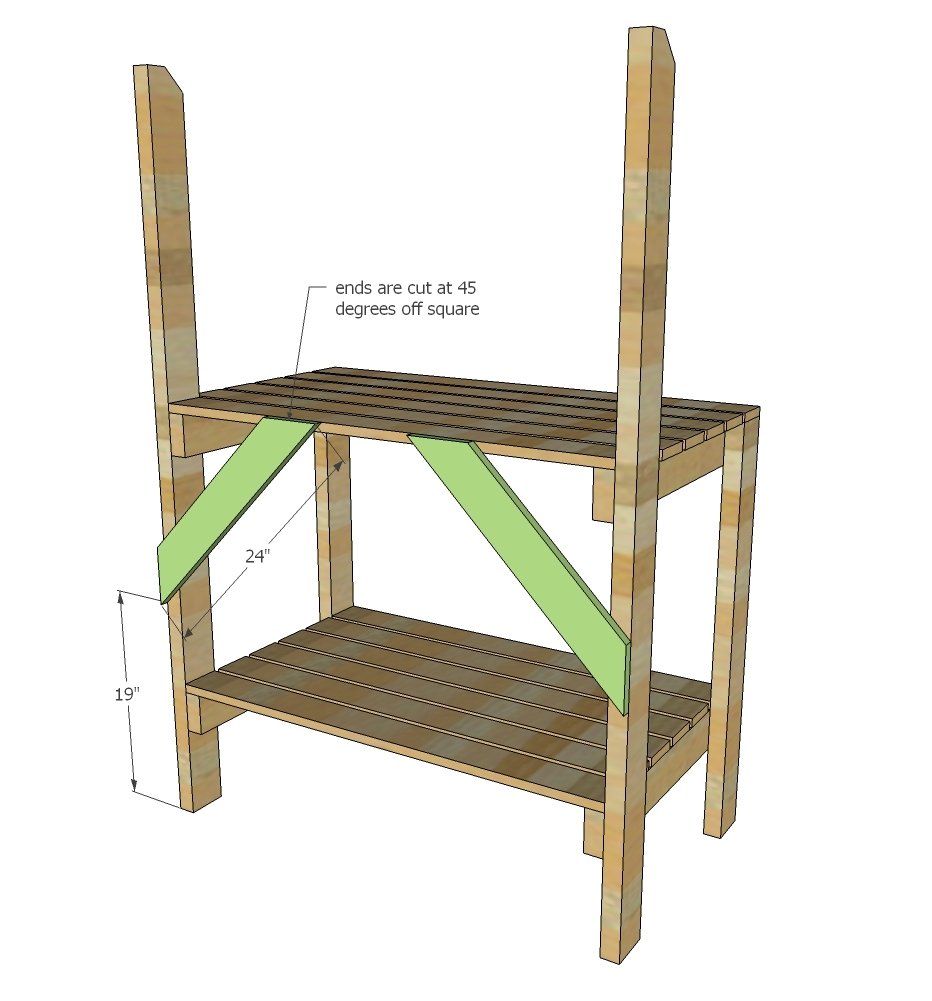
- 2 – 1x4 @ 24” both ends cut at 45 degrees, long point to short point measurement (cross support)
Tools
- measuring tape
- pencil
- safety glasses
- hearing protection
- drill
- circular saw
Step-by-step Instructions
Step 1
Mark the back legs from the bottom at 11-1/4” and 35-1/4”. Attach with 2-1/2” self tapping exterior wood screws the 22” long side aprons to the back legs, matching marks with tops of aprons. Then mark the front legs 1-1/2” in from front edge and also 11-1/4” up from bottom of leg. Attach other side of 22” long side aprons to the front legs.
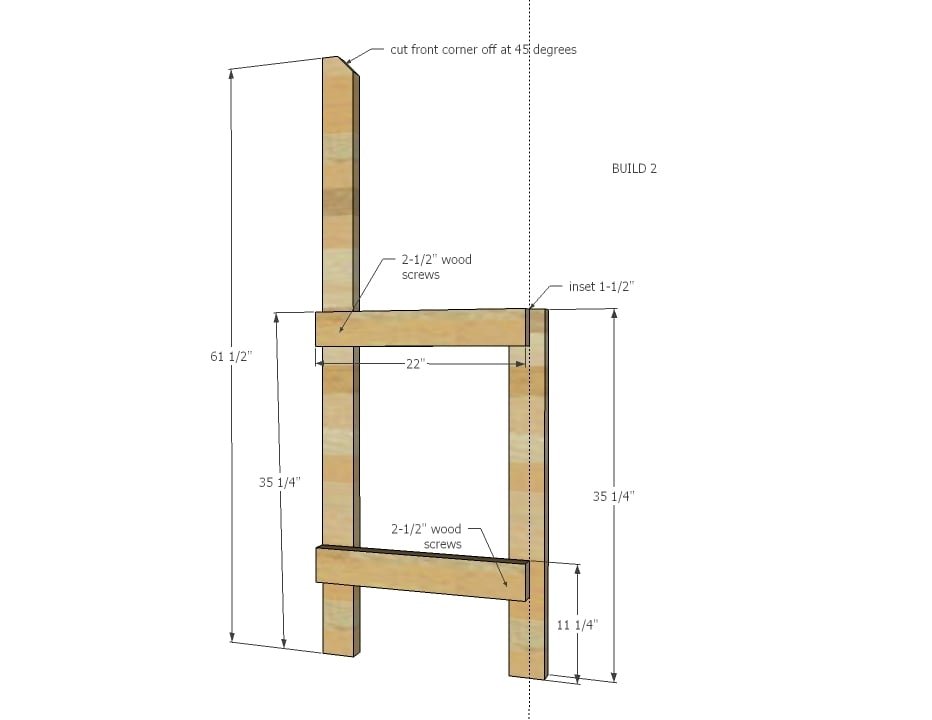
Step 2
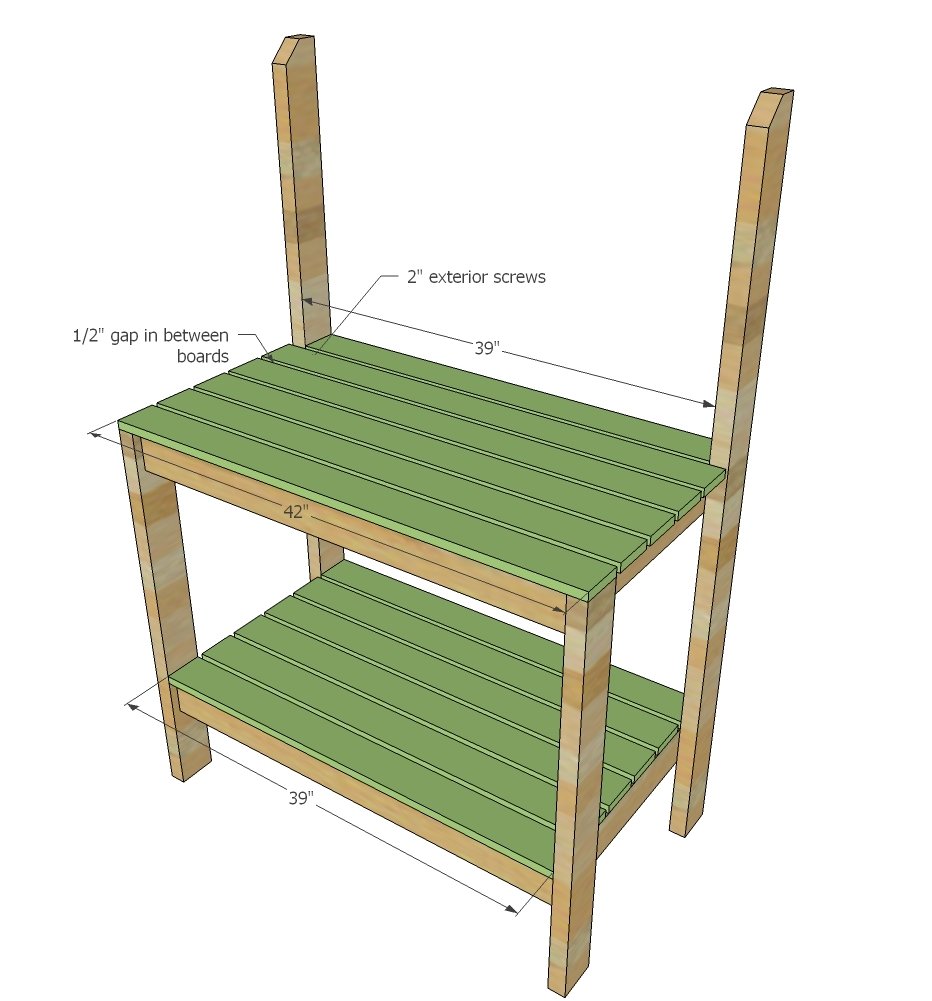
Attach front aprons to the side aprons with 2” wood screws and glue.
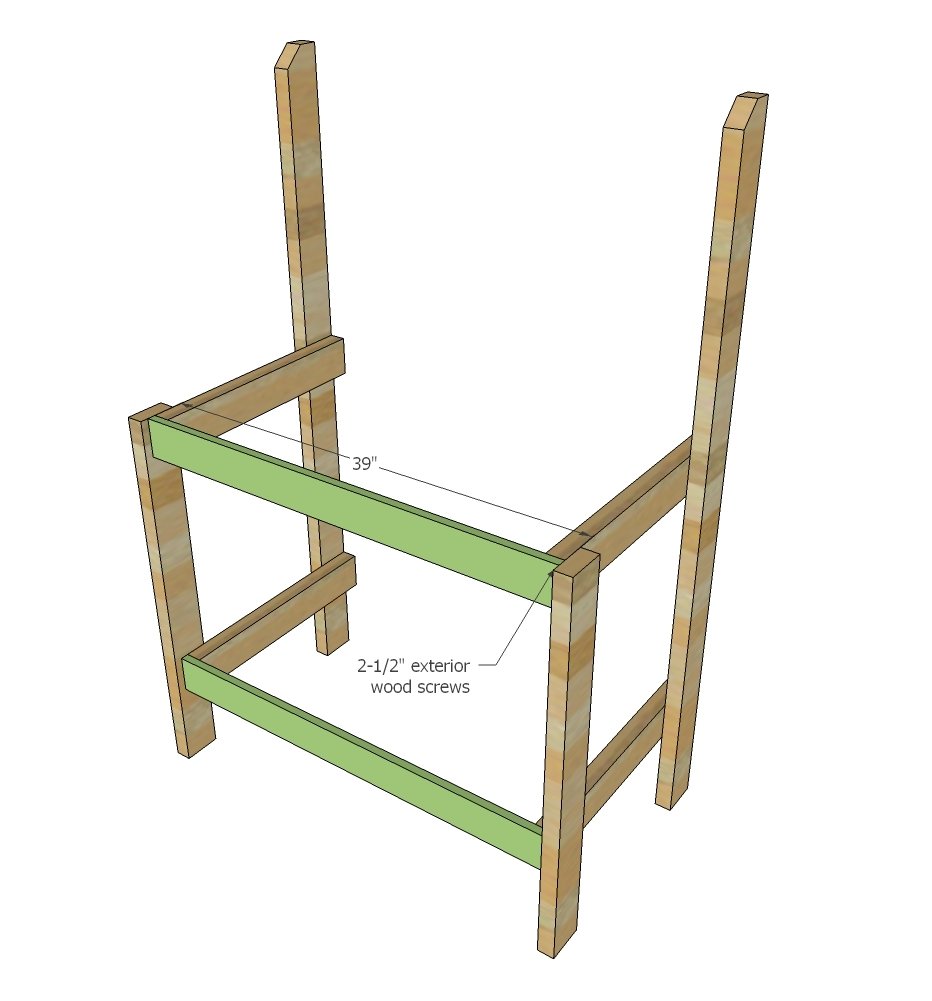
Step 3
Shelving – Place shelving boards on bottom shelf. Attach with about a ½” gap in between shelf boards with 2” exterior wood screws. Repeat for top shelf.
Step 4
Cross bracing – cut cross bracing at 45 degree angles on ends. Attach to back legs and the back shelf board with 2” exterior wood screws and glue.
Step 5
Step 6
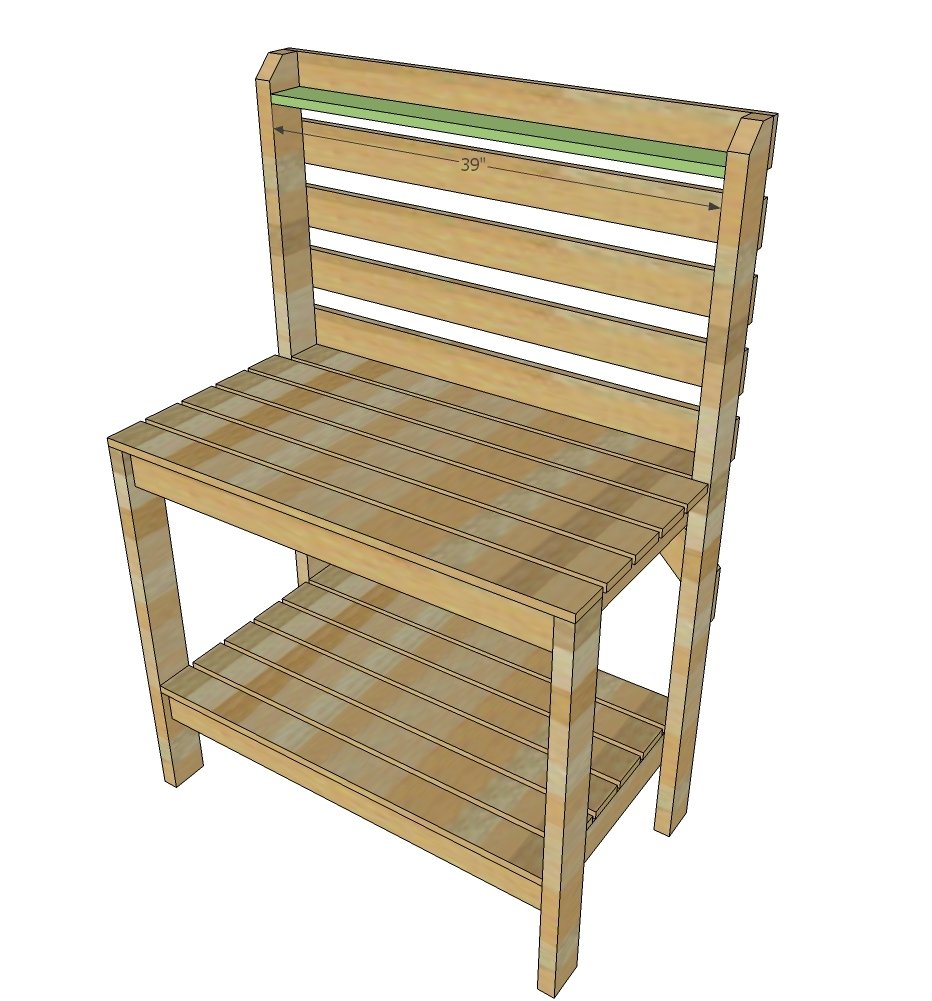
Hutch Shelf – Screw through back boards and back legs into the hutch shelf board sides and back to attach with 2” exterior self tapping screws.
Finishing
Sand all surfaces, starting with a medium grit and finishing with fine. Wipe off the dust, fill any holes or gaps with wood filler, and sand smooth once dry. Apply primer if you're painting, then finish with your choice of paint or stain and seal with a durable clear topcoat. For outdoor projects, use exterior-rated primer, paint or stain, and sealer so the piece stands up to the weather.
Source (temporary): https://www.ana-white.com/woodworking-projects/simple-2x4-potting-bench-slatted-back