Simple Book Rack
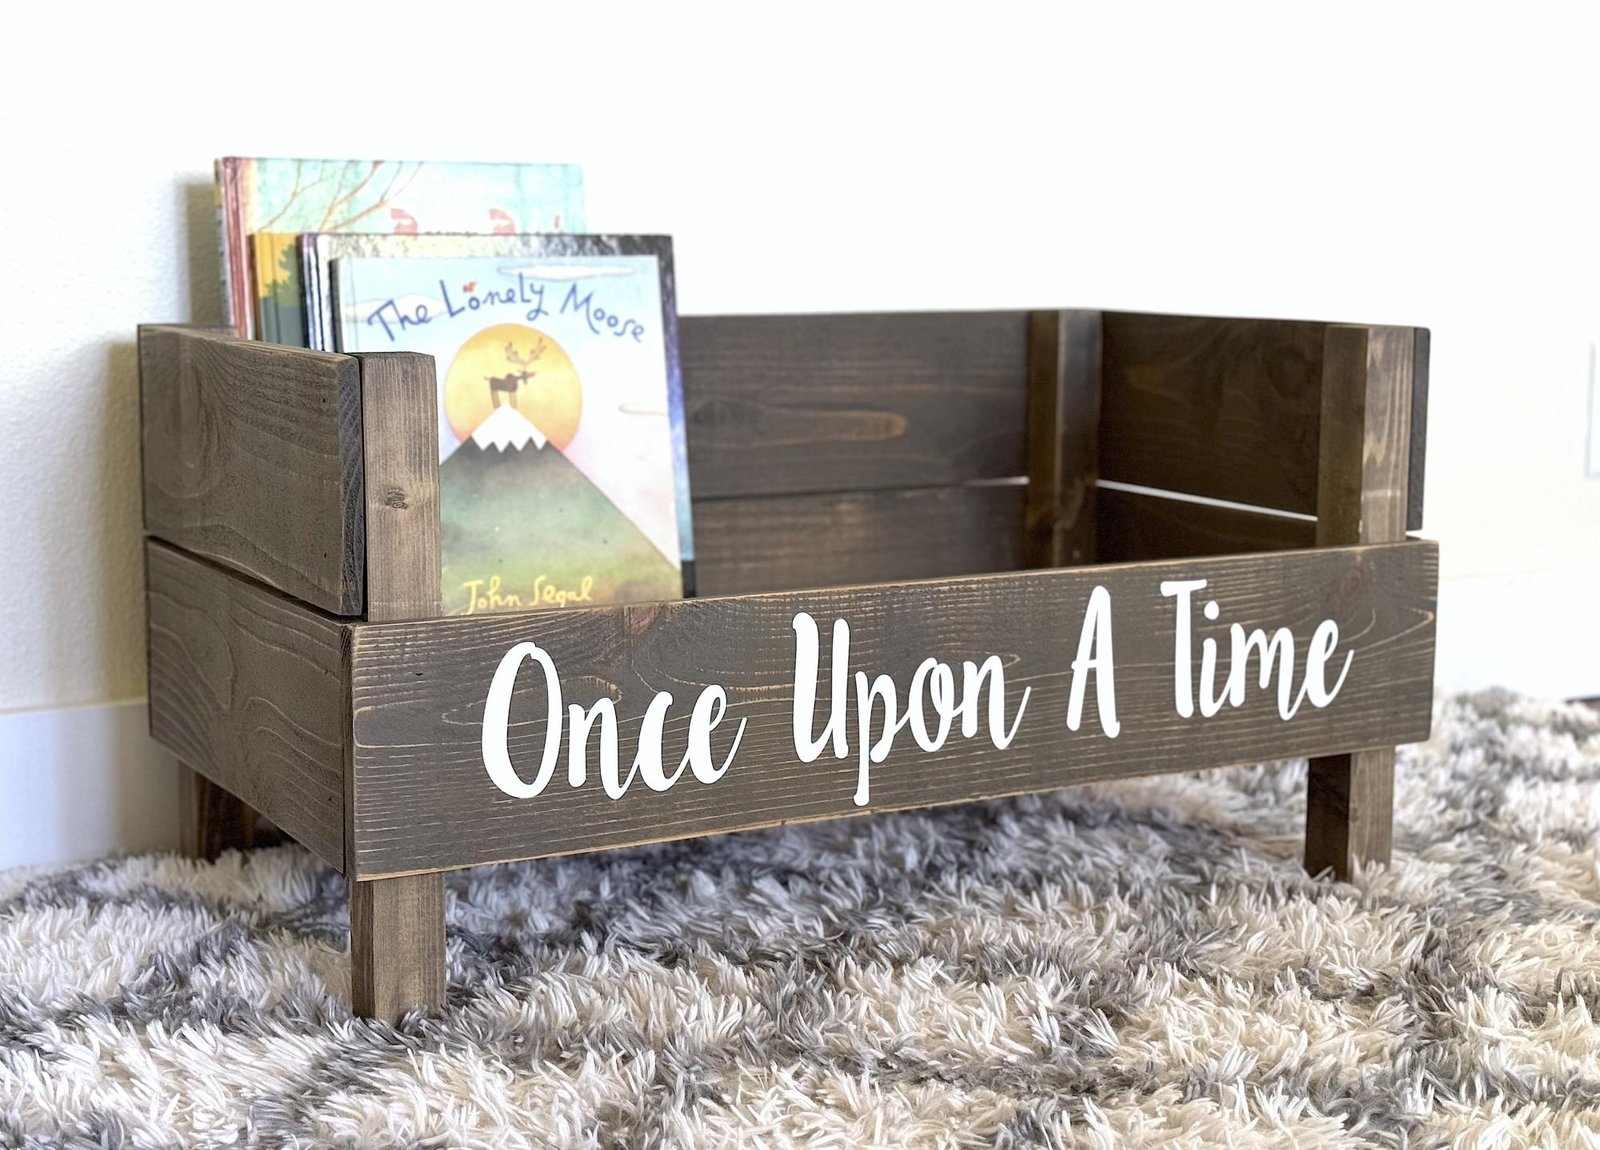
Build a book rack from This simple bookrack or bin stores books face forward, can be placed on a floor, nightstand or shelf, is large sized for lots of books. This is a DIY project using cedar fence pickets and 2x2 and 1x2 boards. It is easy to build, makes a great gift or item to sell at craft fairs or markets. include photos, shopping list, cut list, and step by step diagrams - everything you need to make your own bookrack. Designed and built by Family DIYnamic
Specifications
| Project type | Bookshelf and Bookcase Plans |
|---|---|
| Room | Kids and Toys |
| Difficulty | Starter Projects |
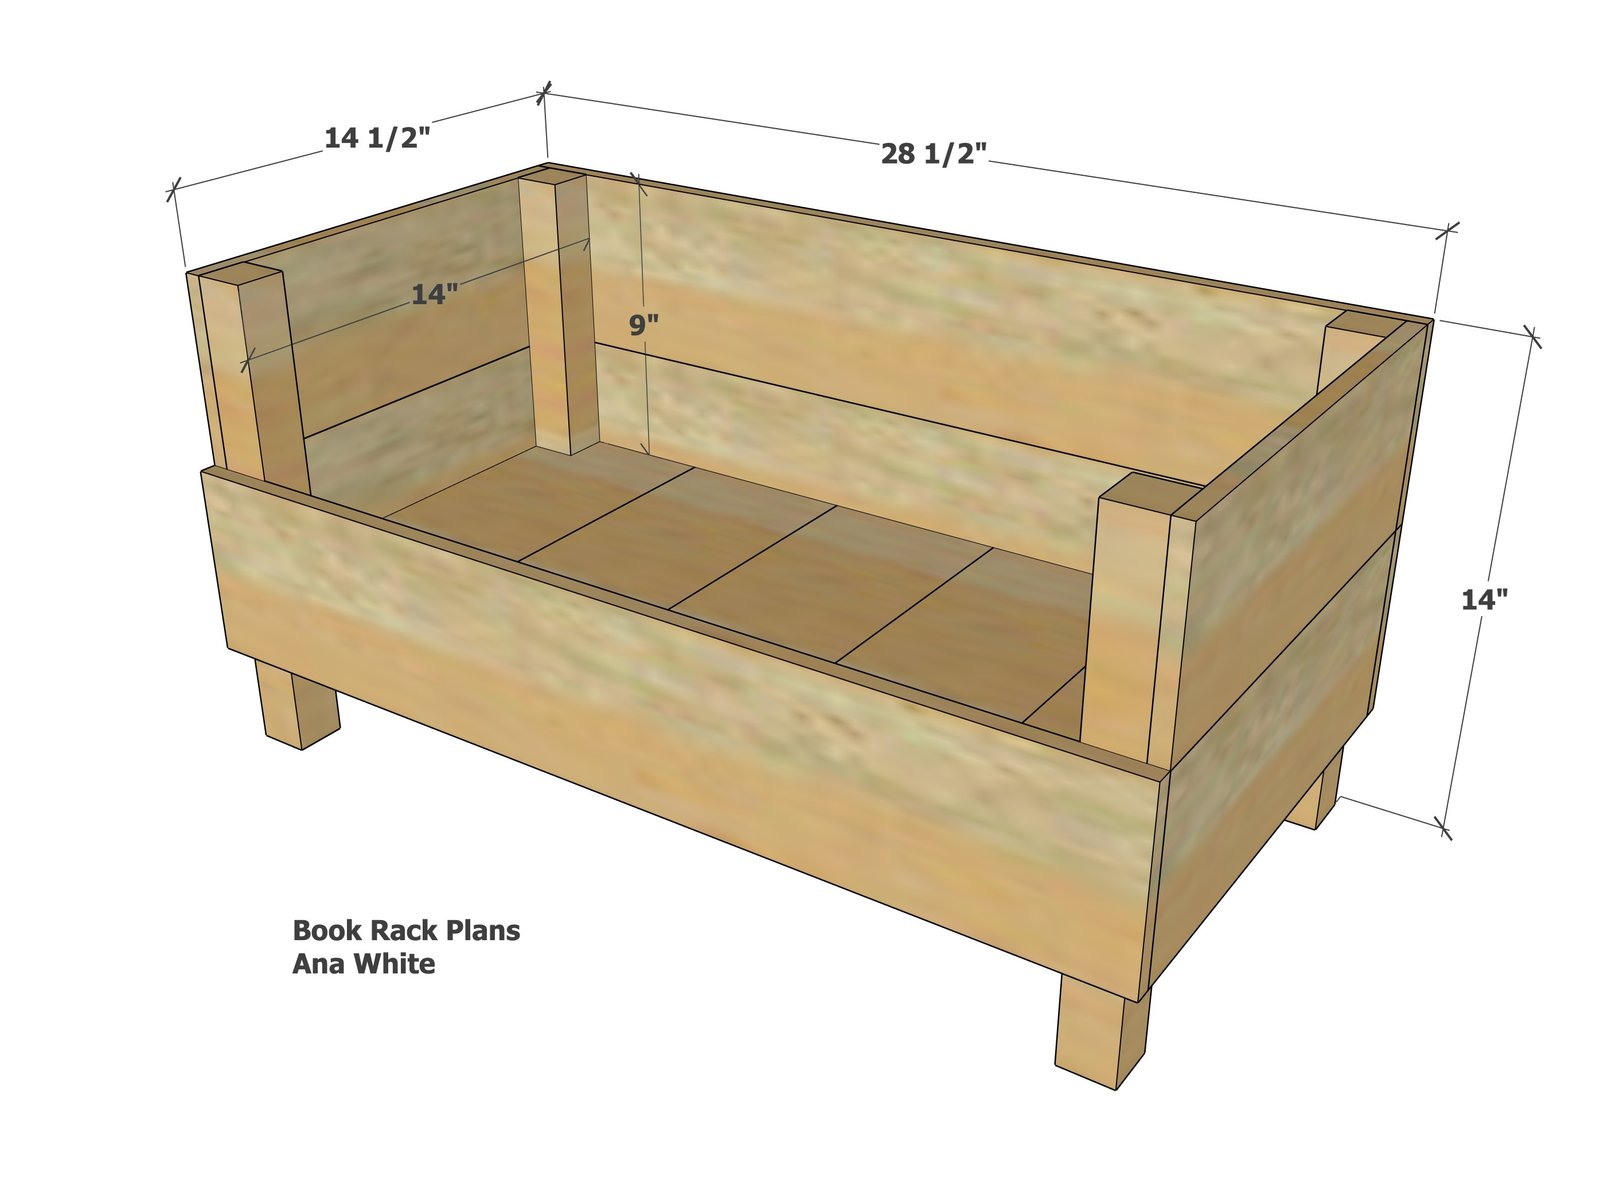
Dimensions
Use the size-specific shopping and cut lists below.
Shopping List
- 1 - 2x2 @ 6 or 8 feet long
- 1 - 1x2 @ 6 feet long
- 3- 5-1/2" wide cedar fence pickets, not dogeared
- 1-1/4" self tapping wood screws or brad nails
- wood glue
- medium grit sandpaper
- wood stain
Cut List
- 4 - 2x2 @ 14" - legs
- 3 - cedar fence picket @ 28" - front and back
- 4 - cedar fence picket @ 14" - sides
- 2 - 1x2 @ 27-1/2" - measure and cut to fit - inner cleats
- 5 - 1x6 or cedar fence pickets @ 14" - bottom slats
Tools
- measuring tape
- pencil
- safety glasses
- drill
- jigsaw
- compound miter saw
- nailer
- sander
Step-by-step Instructions
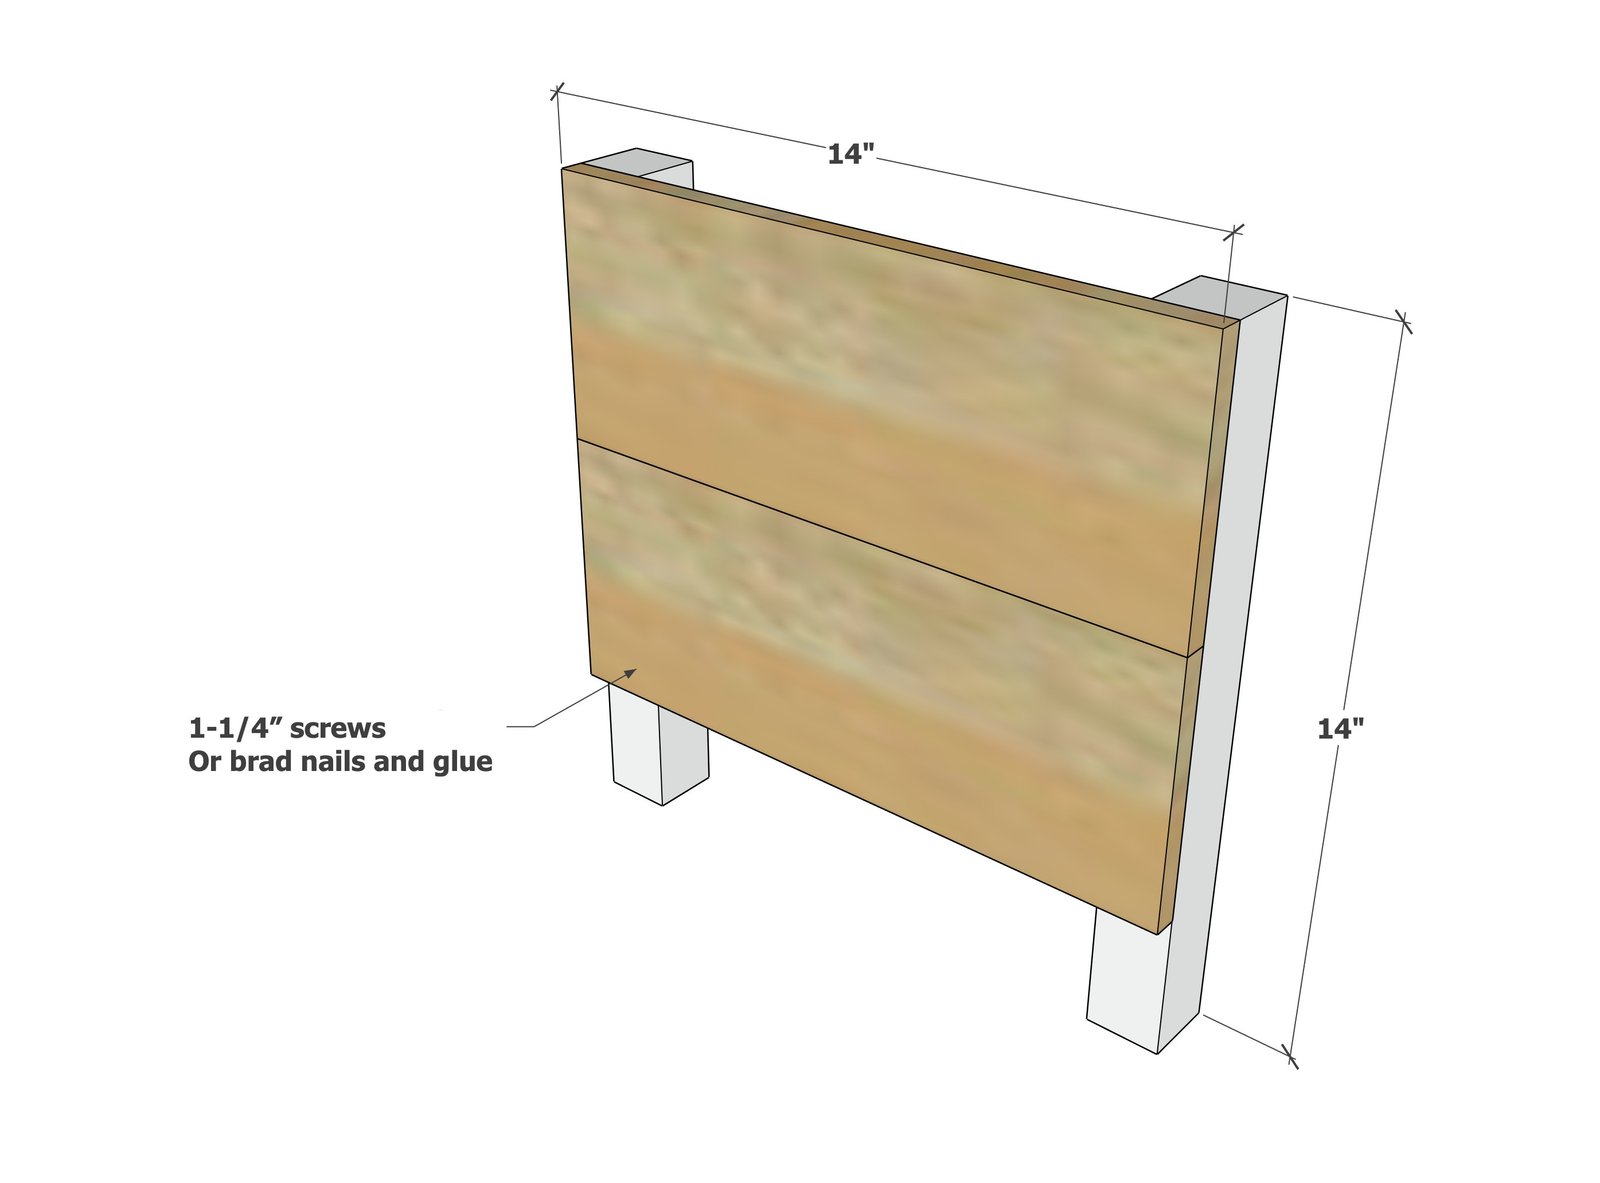
Build two of the side panels as shown, by attaching the cedar fence pickets to the 2x2s.
If using brad nails, glue is recommended.
Step 2
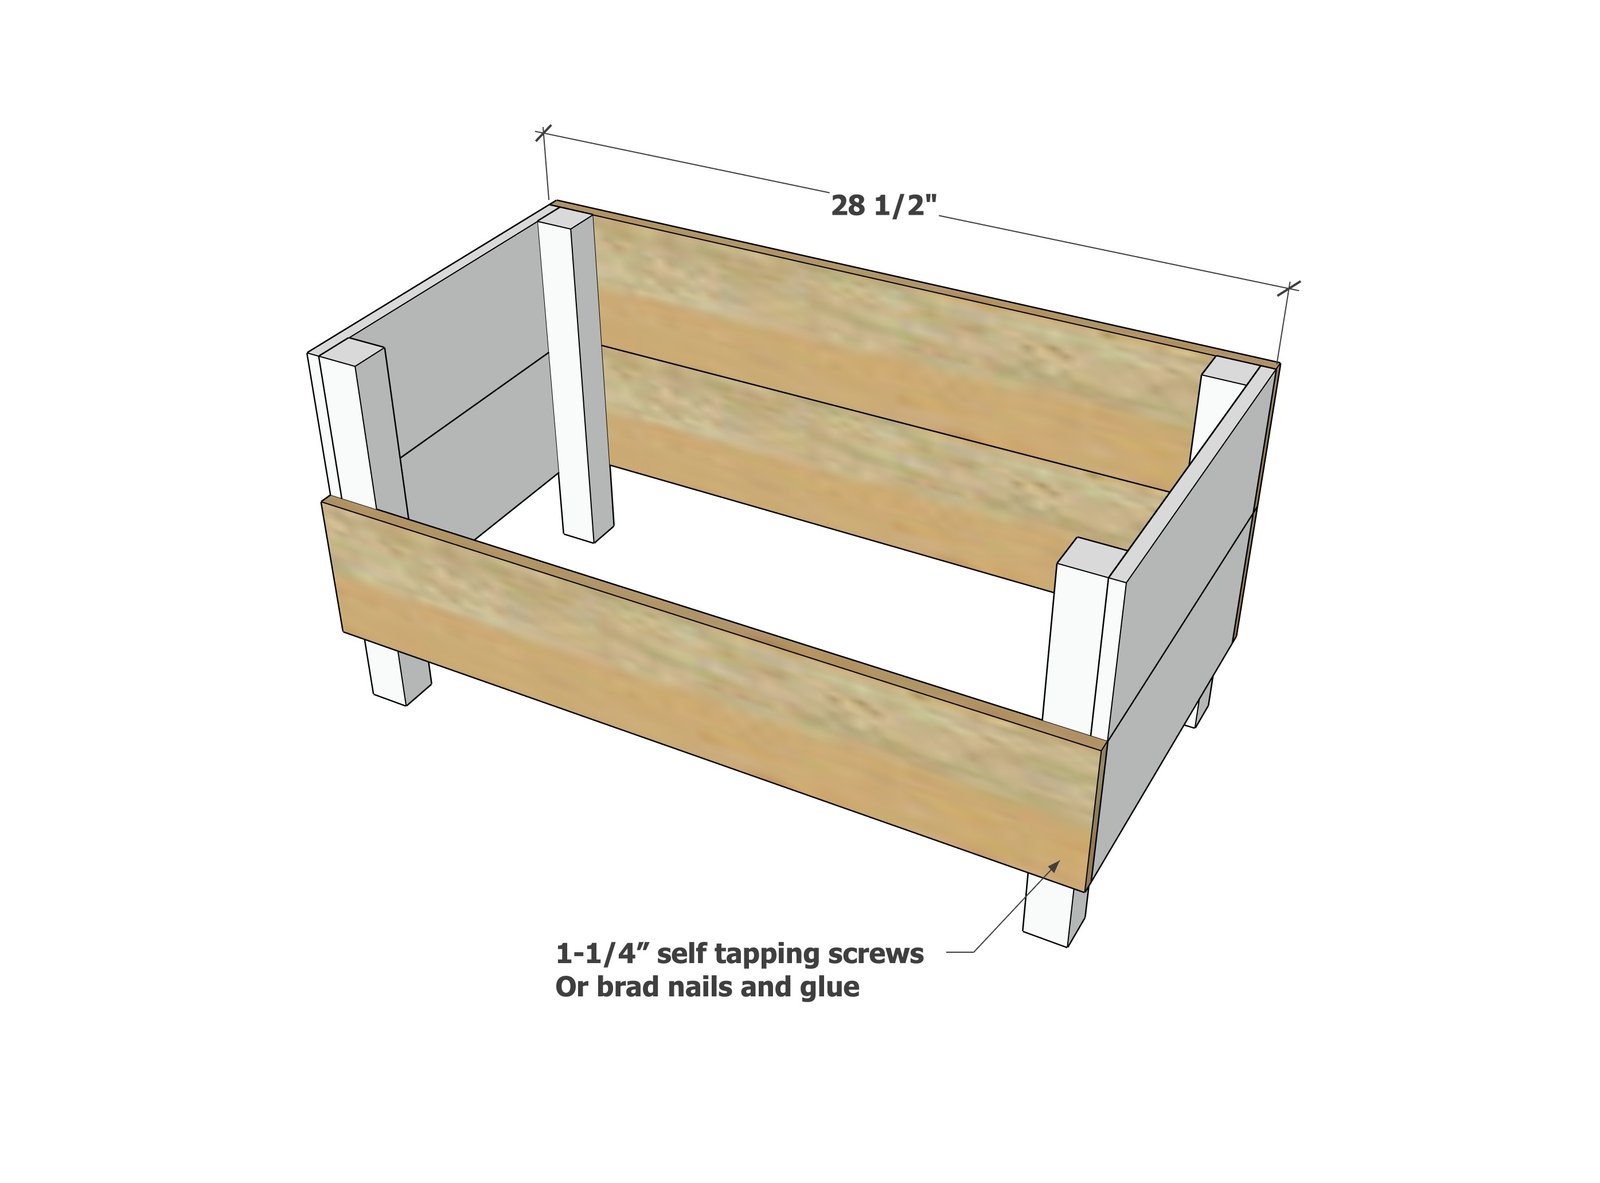
Attach the front and back pieces to the side panels to create the shape of the book rack.
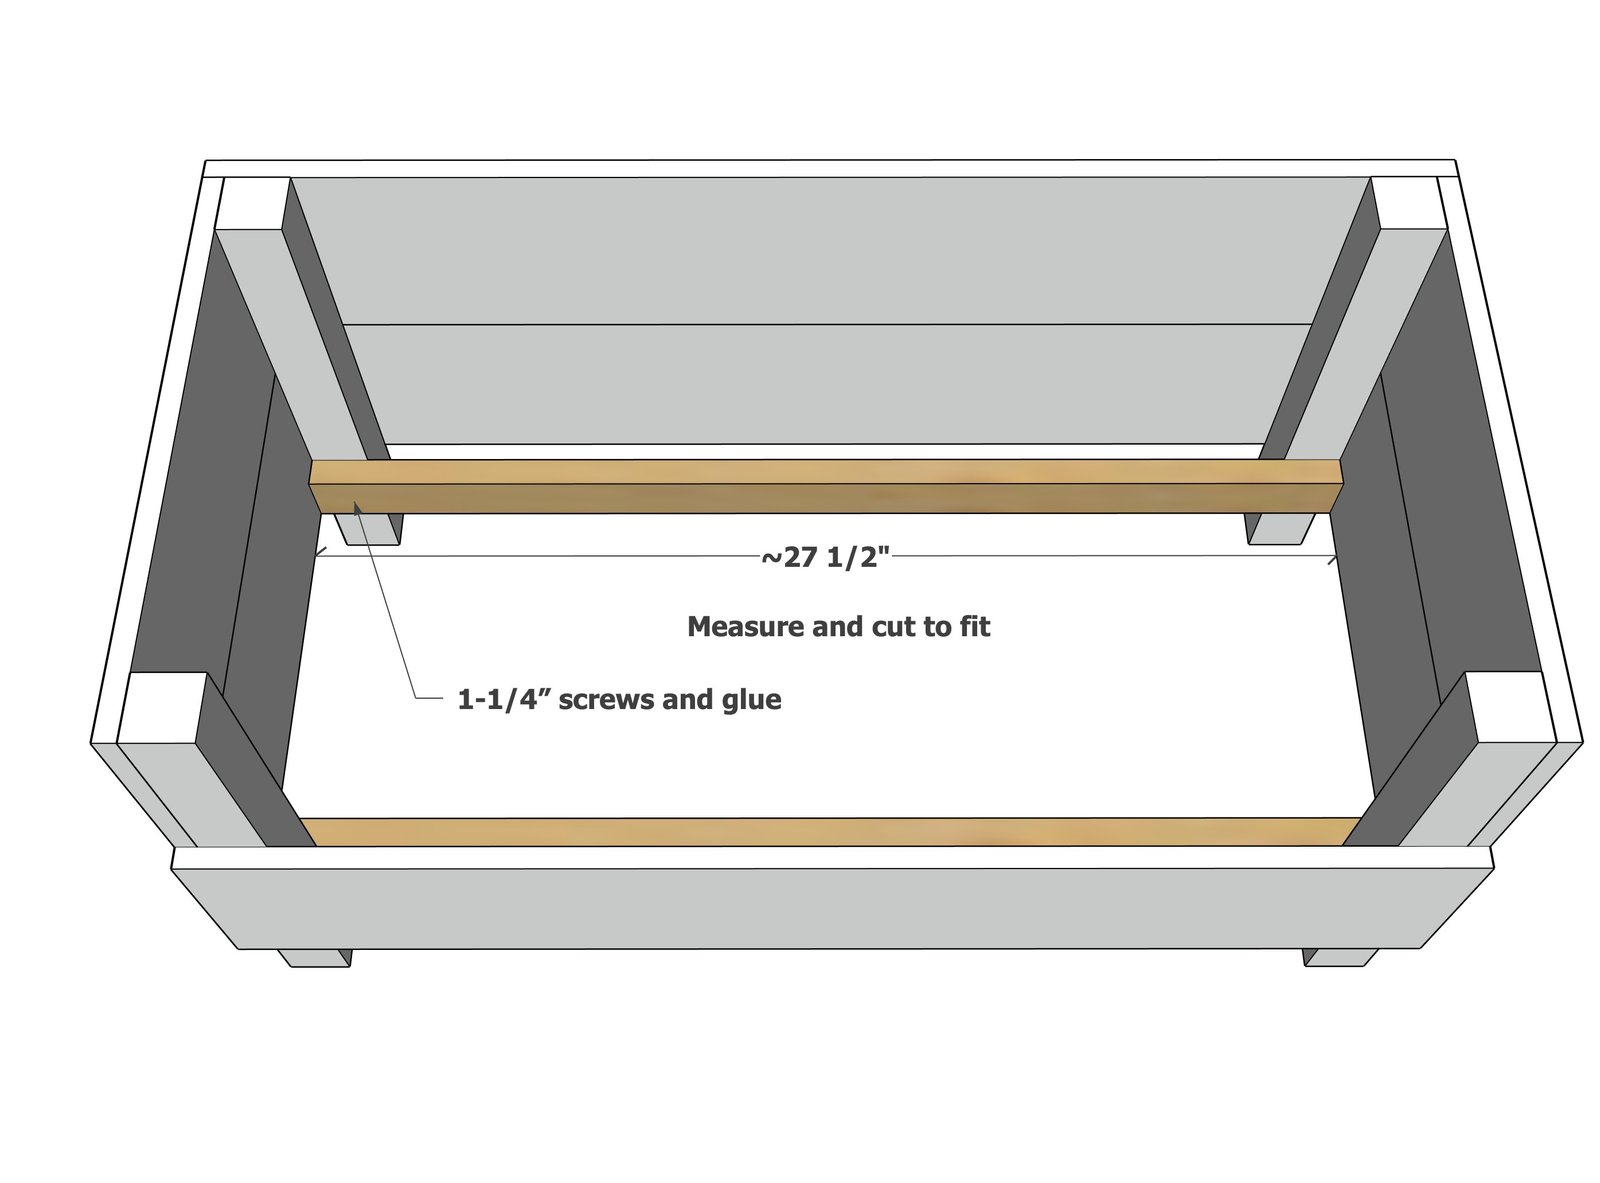
Inside the book rack, add 1x2 cleats as shown.
Nails or screws can be at a slight angle if needed to fit the drill or brad nailer inside for attaching.
Step 4
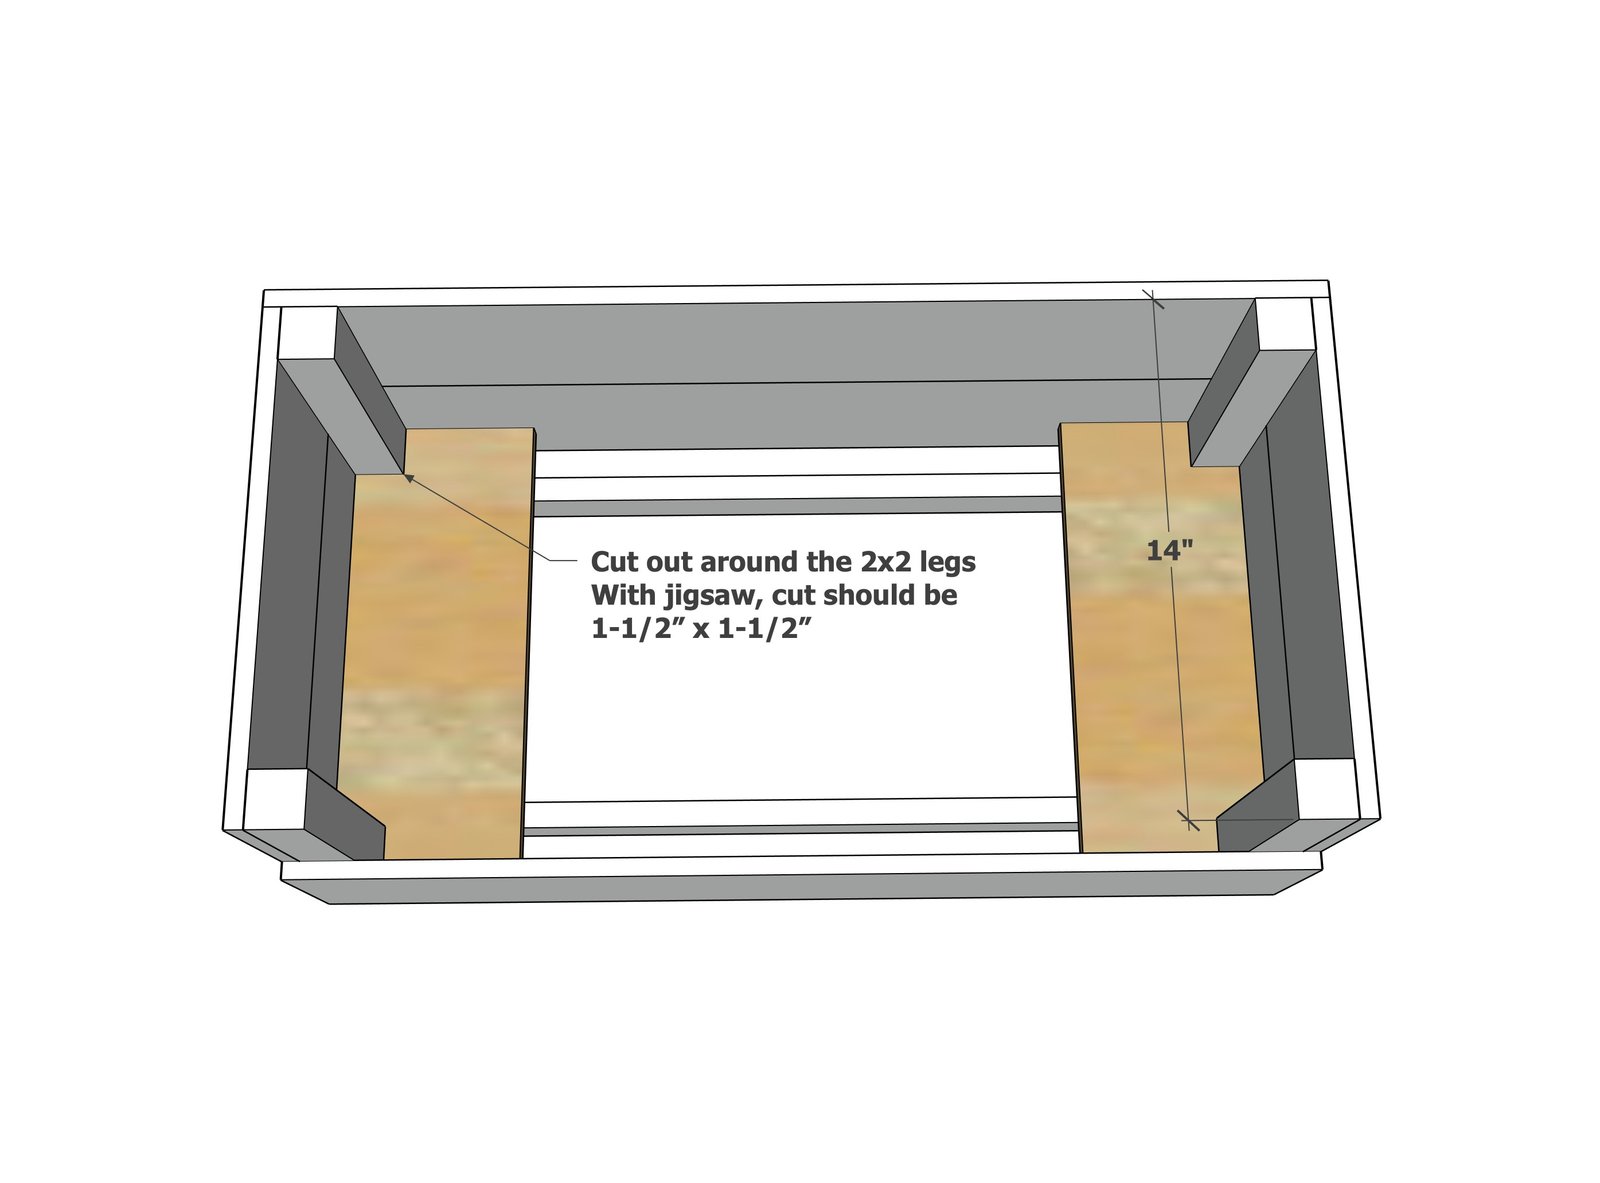
Cut the bottom pieces and then mark the outer pieces to fit around the 2x2 legs. Cut out with a jigsaw. Fit and screw or nail down.
Step 5
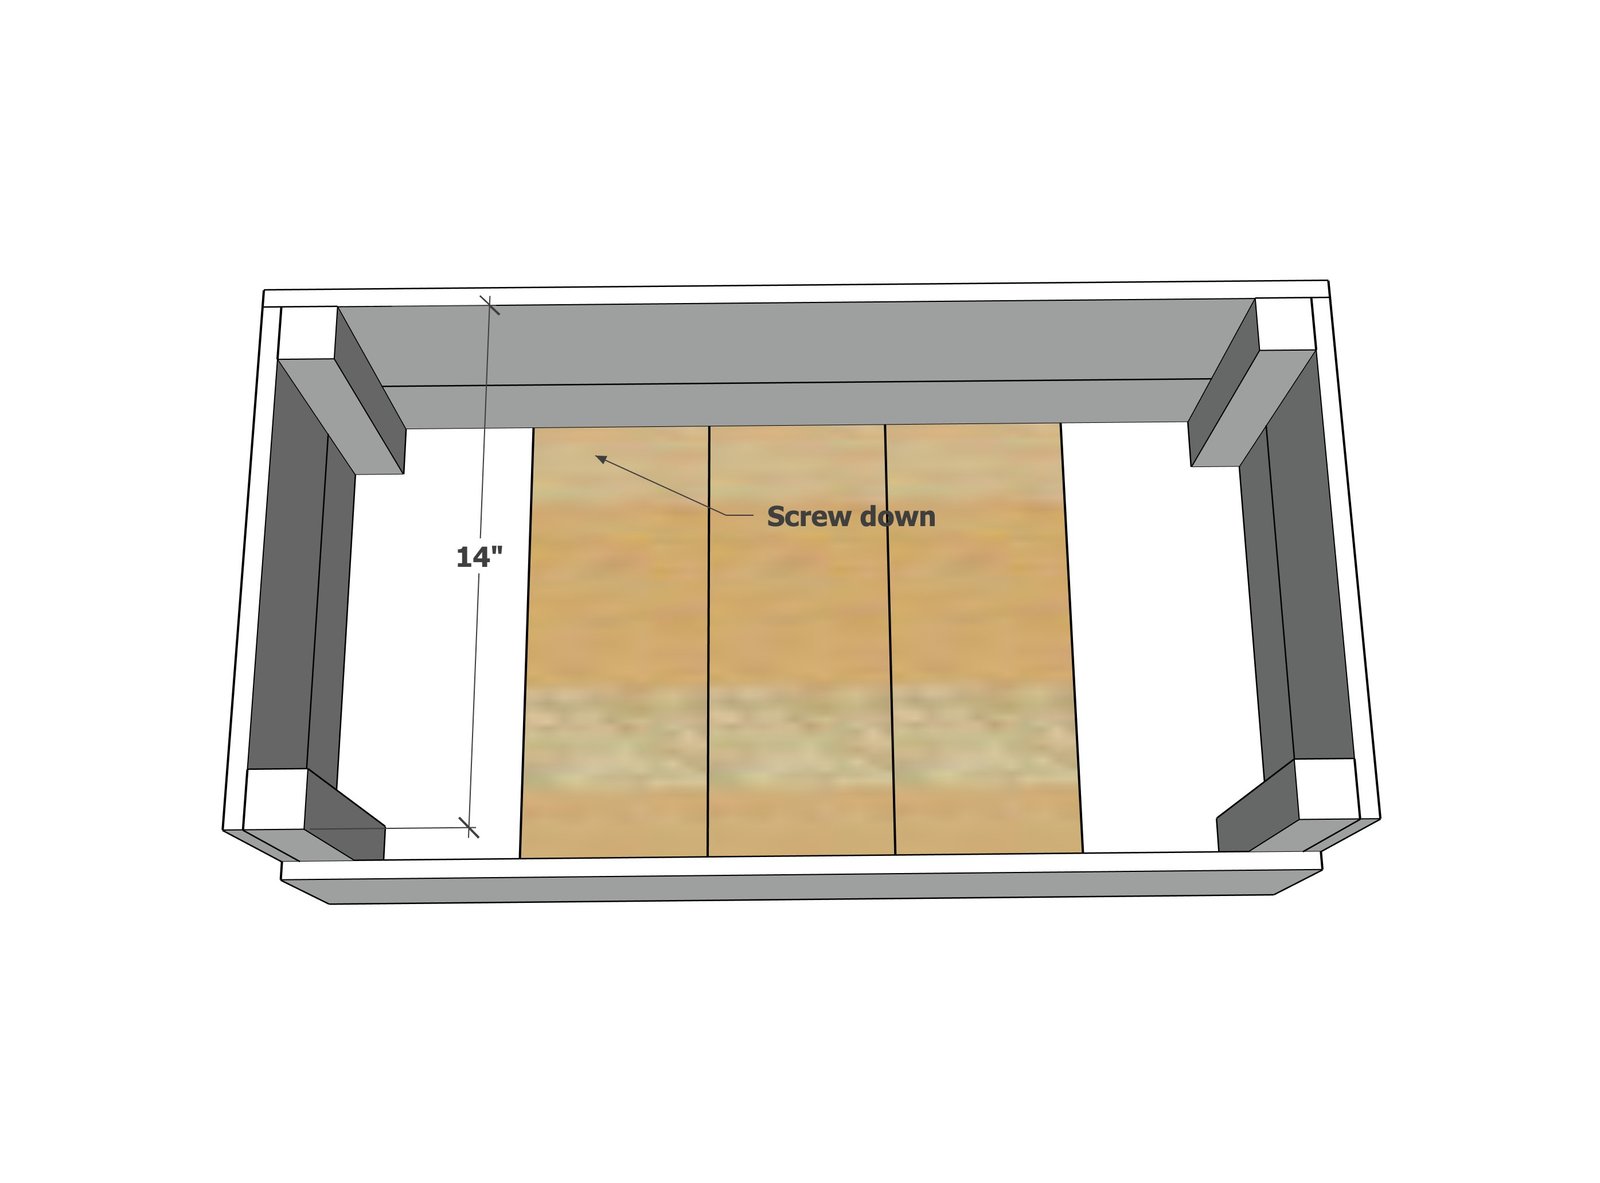
Add remaining pieces. Space gaps evenly between the boards. Nail or screw down.
Finishing
Sand all surfaces, starting with a medium grit and finishing with fine. Wipe off the dust, fill any holes or gaps with wood filler, and sand smooth once dry. Apply primer if you're painting, then finish with your choice of paint or stain and seal with a durable clear topcoat. For outdoor projects, use exterior-rated primer, paint or stain, and sealer so the piece stands up to the weather.
Source (temporary): https://www.ana-white.com/woodworking-projects/simple-book-rack-plans