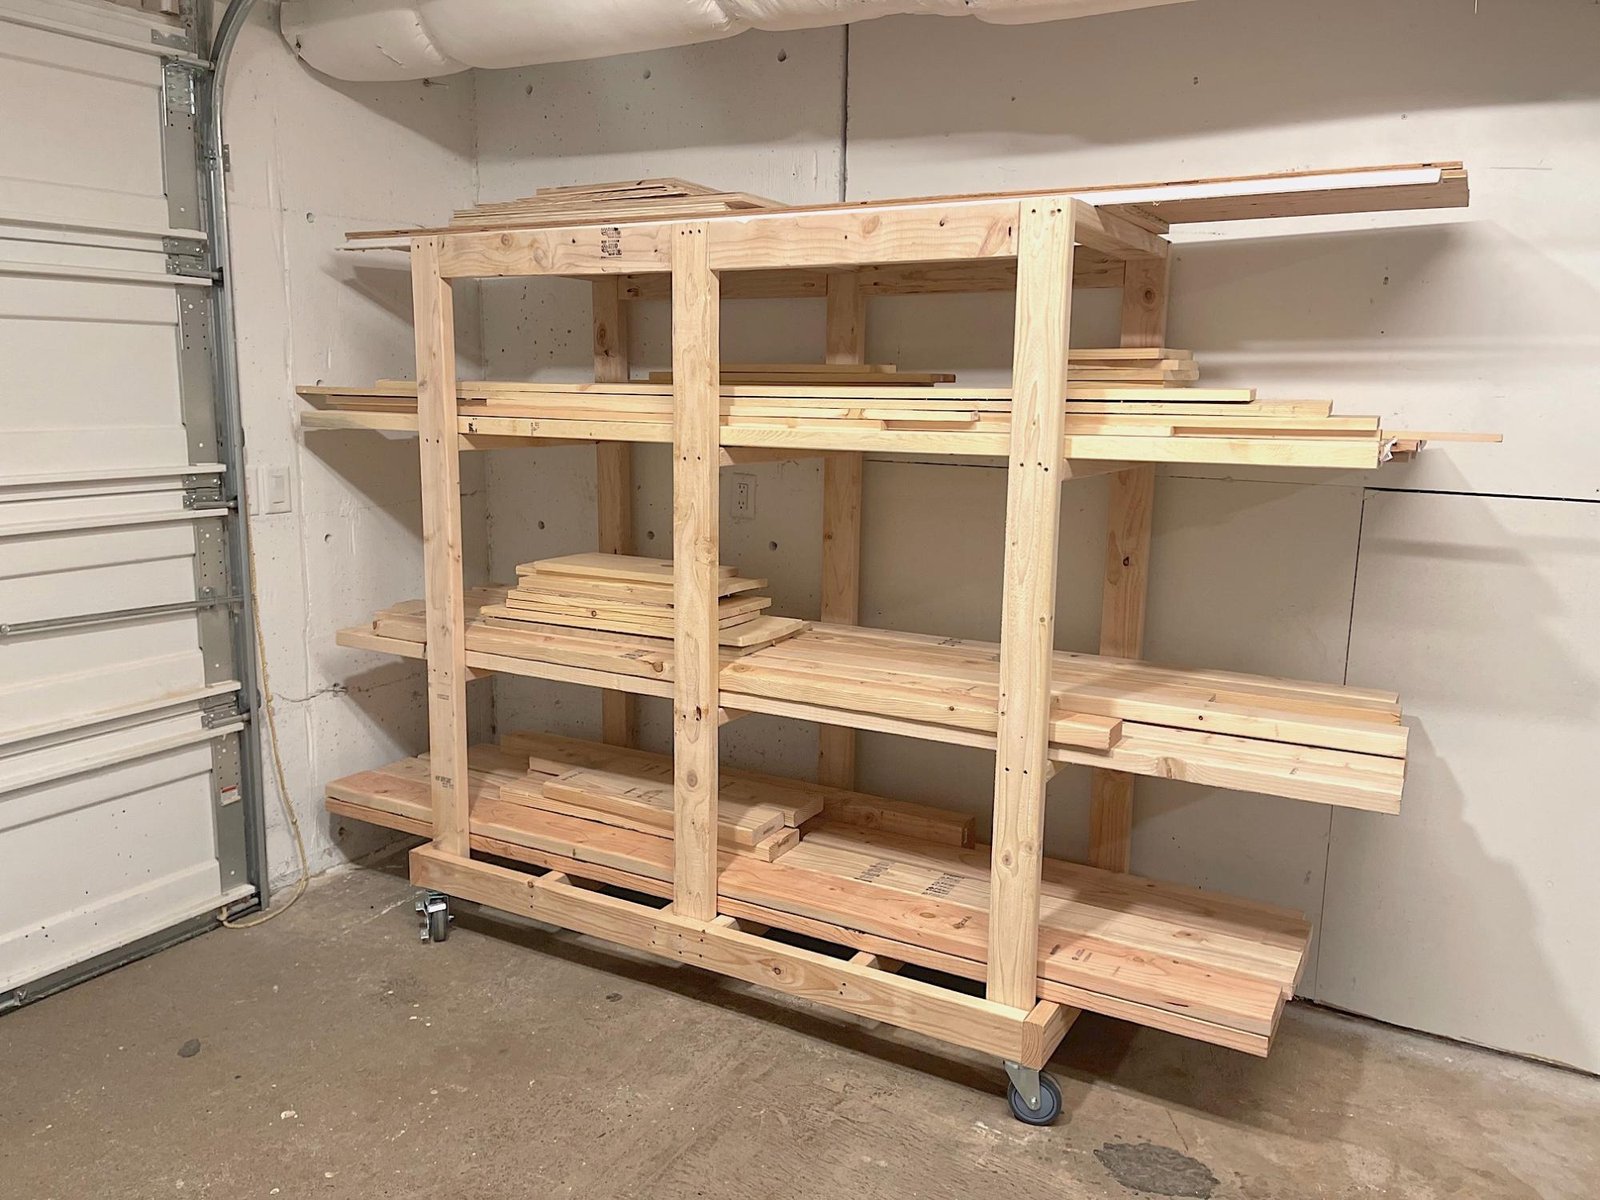
Simple to Build Rolling Wood Cart
to build a simple wood storage cart using 2x4s. Detailed plan includes shopping list, cut list, step by step diagrams and more from
Specifications
| Project type | Workshop and Garage Plans |
|---|---|
| Room | Garage and Workshop |
| Difficulty | Beginner Projects |
Dimensions
Use the size-specific shopping and cut lists below.
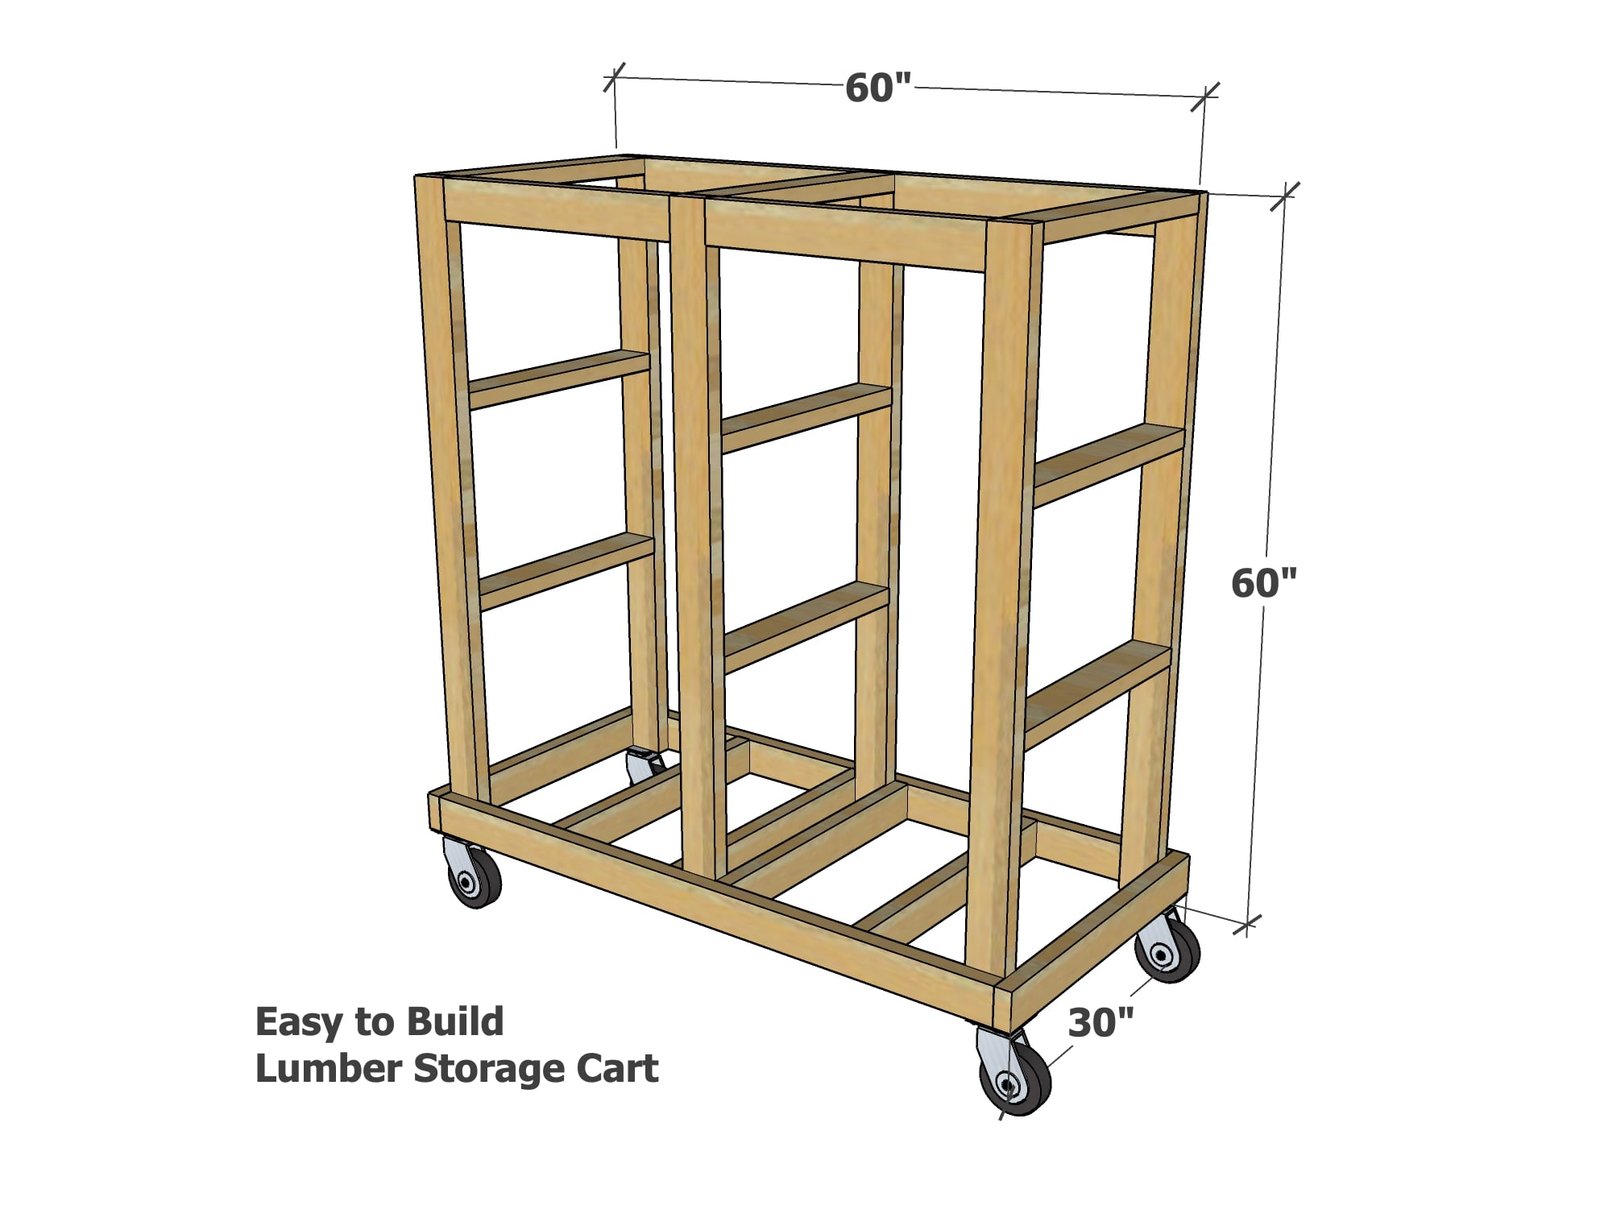
Shopping List
- 10 - 2x4 @ 10 feet long
- 4 - 5" Caster Wheels, Heavy Duty
- 100 - 2-1/2" self tapping star bit screws (#9 or #10)
- 16 - 2-1/2" pocket hole screws (optional)
Cut List
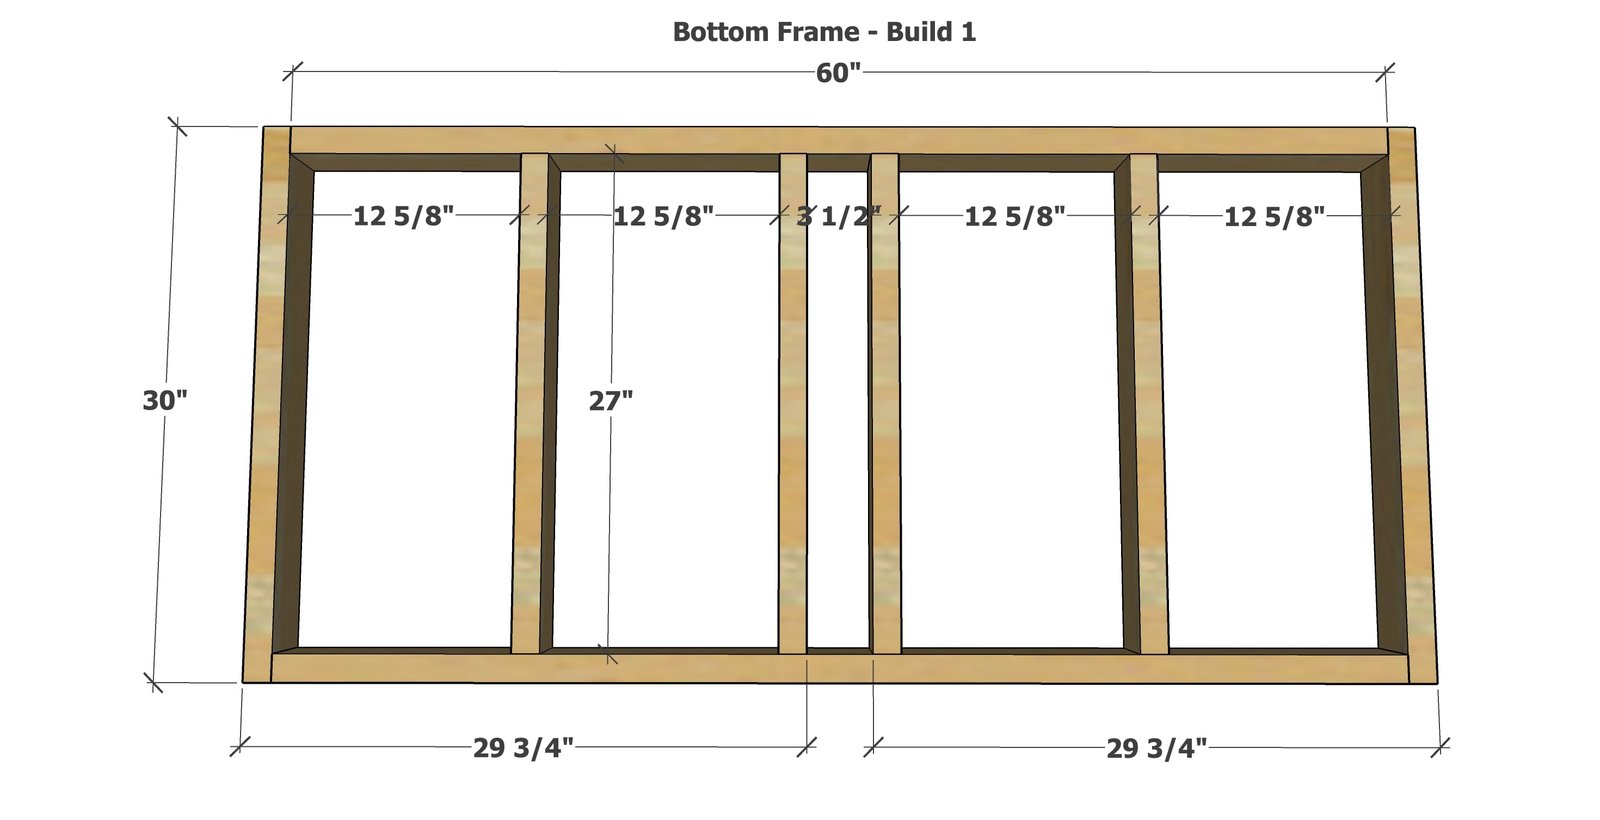
Bottom Frame
- 2 - 2x4 @ 60" - side
- 2 - 2x4 @ 30" - ends
- 4 - 2x4 @ 27" - middle
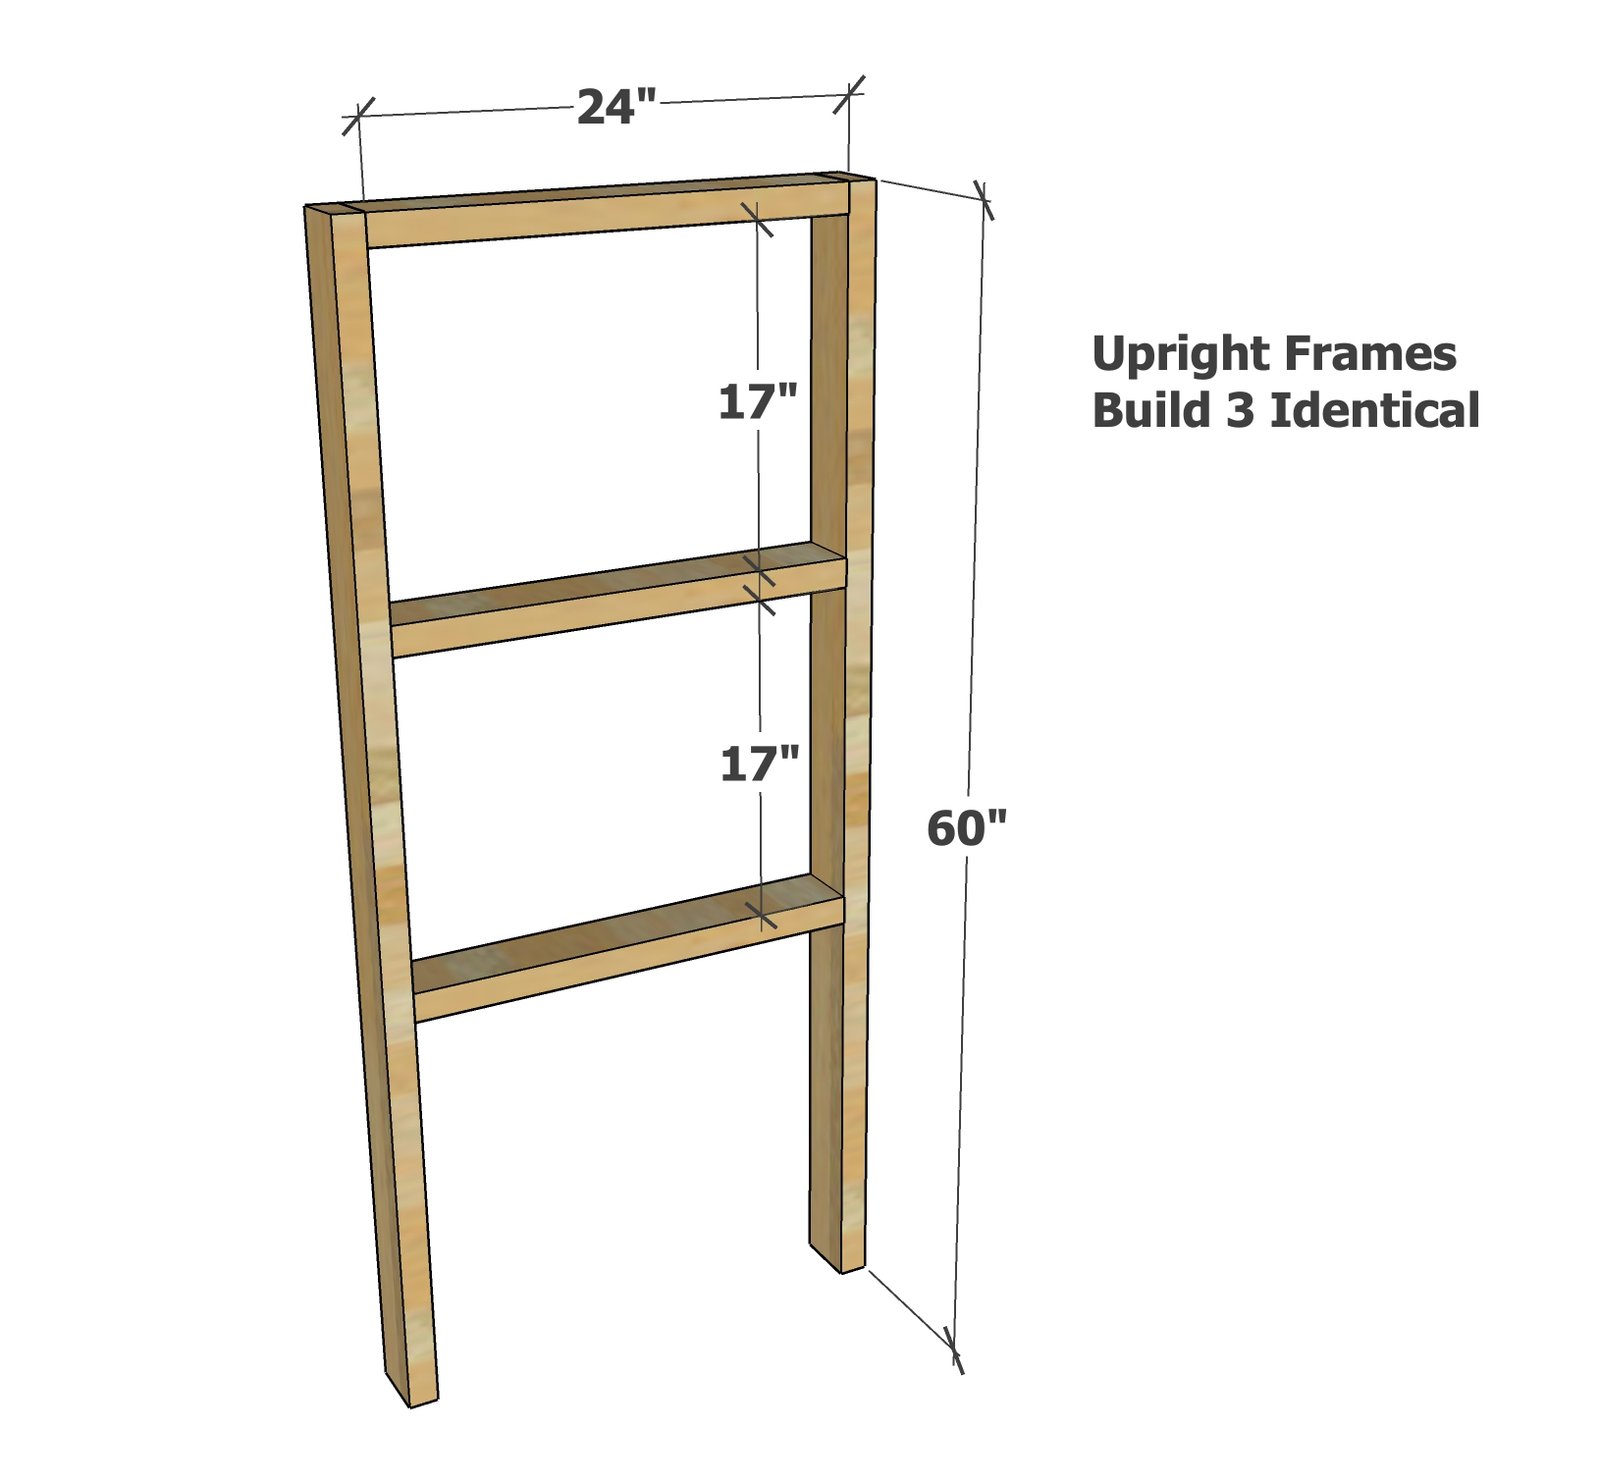
Upright Frames
- 6 - 2x4 @ 60" - legs
- 9 - 2x4 @ 24" - rungs
- 4 - 2x4 @ 24-3/4" - top tie in
Tools
- measuring tape
- square
- pencil
- safety glasses
- drill
- circular saw
Step-by-step Instructions
Build the bottom frame, attaching with star bit screws, two per joint.
Make sure the center opening will allow for a 2x4 to fit inside (see step 3)
Step 2
Build three of the upright frames using the star bit screws, two screws per joint.
Step 3
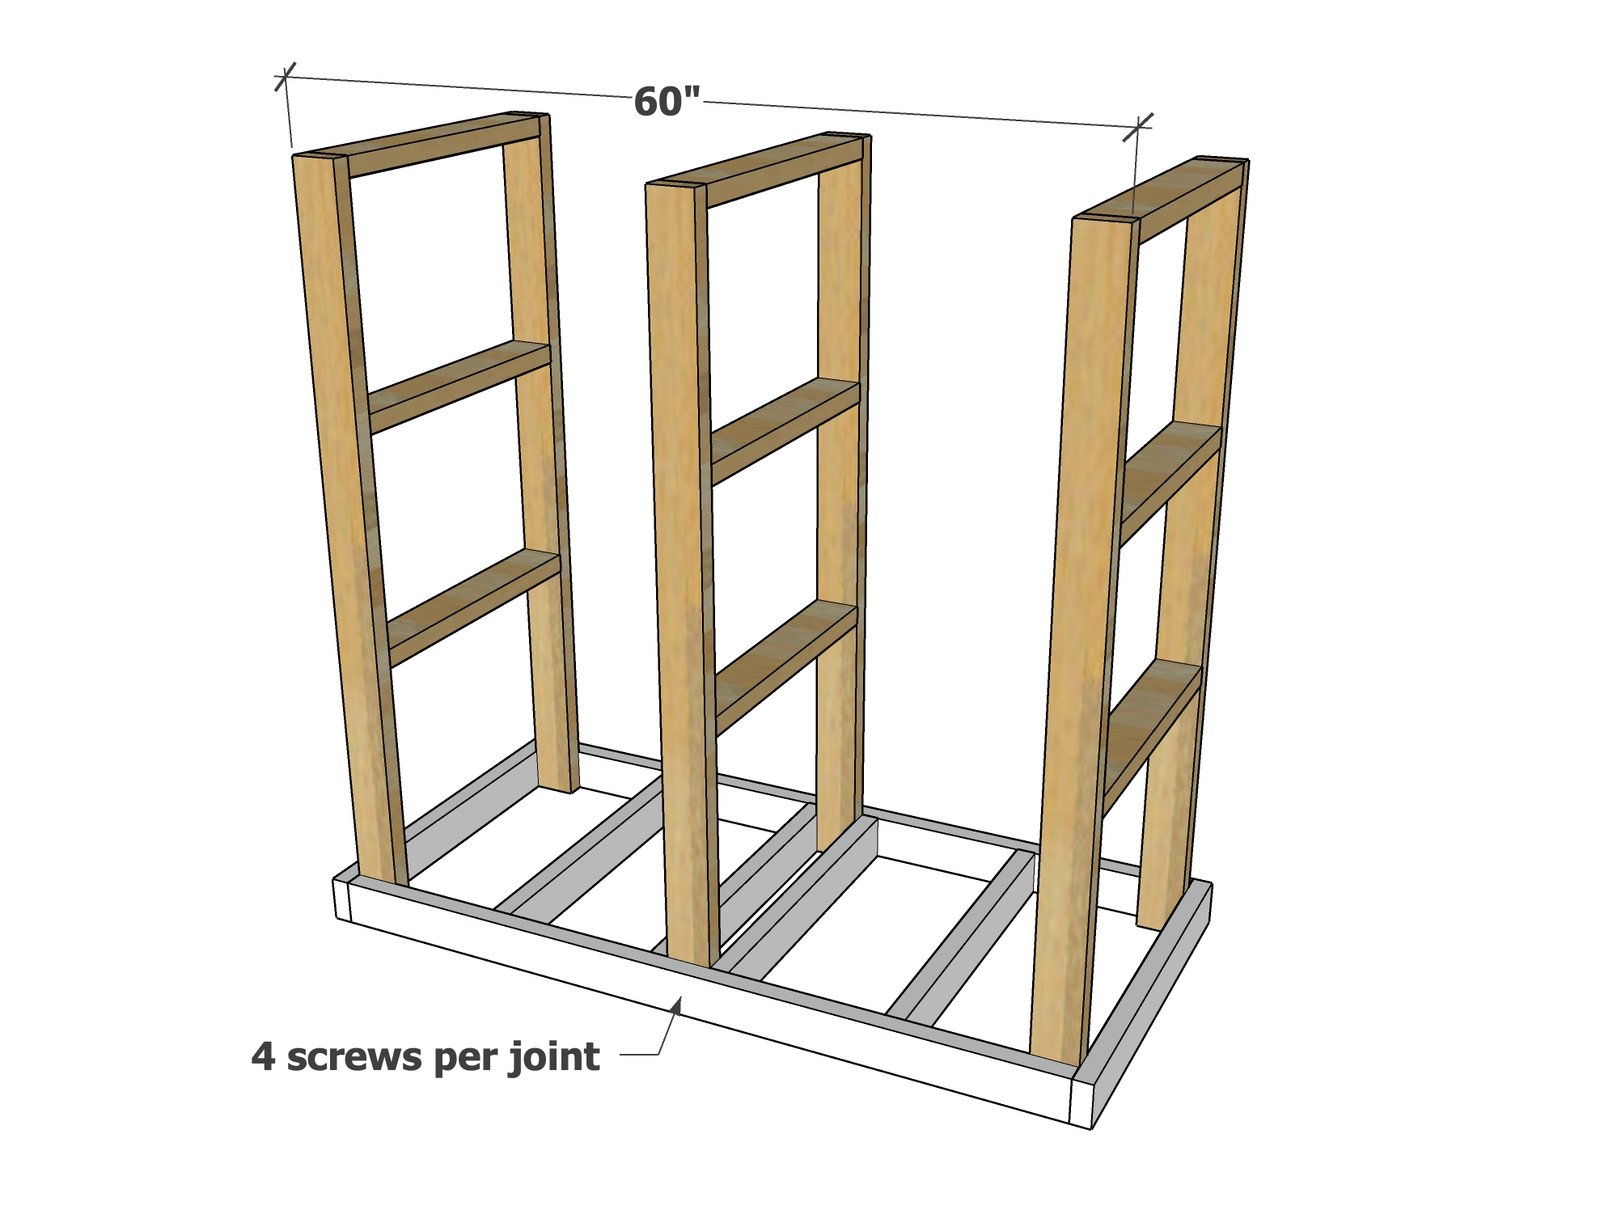
Attach the upright frames to the base frame with four screws per joint. Make sure the upright frames are attached at a 90 degree angle to the bottom frame. You can also do this by leveling up the bottom frame first, then using a level to attach the upright frames.
Step 4
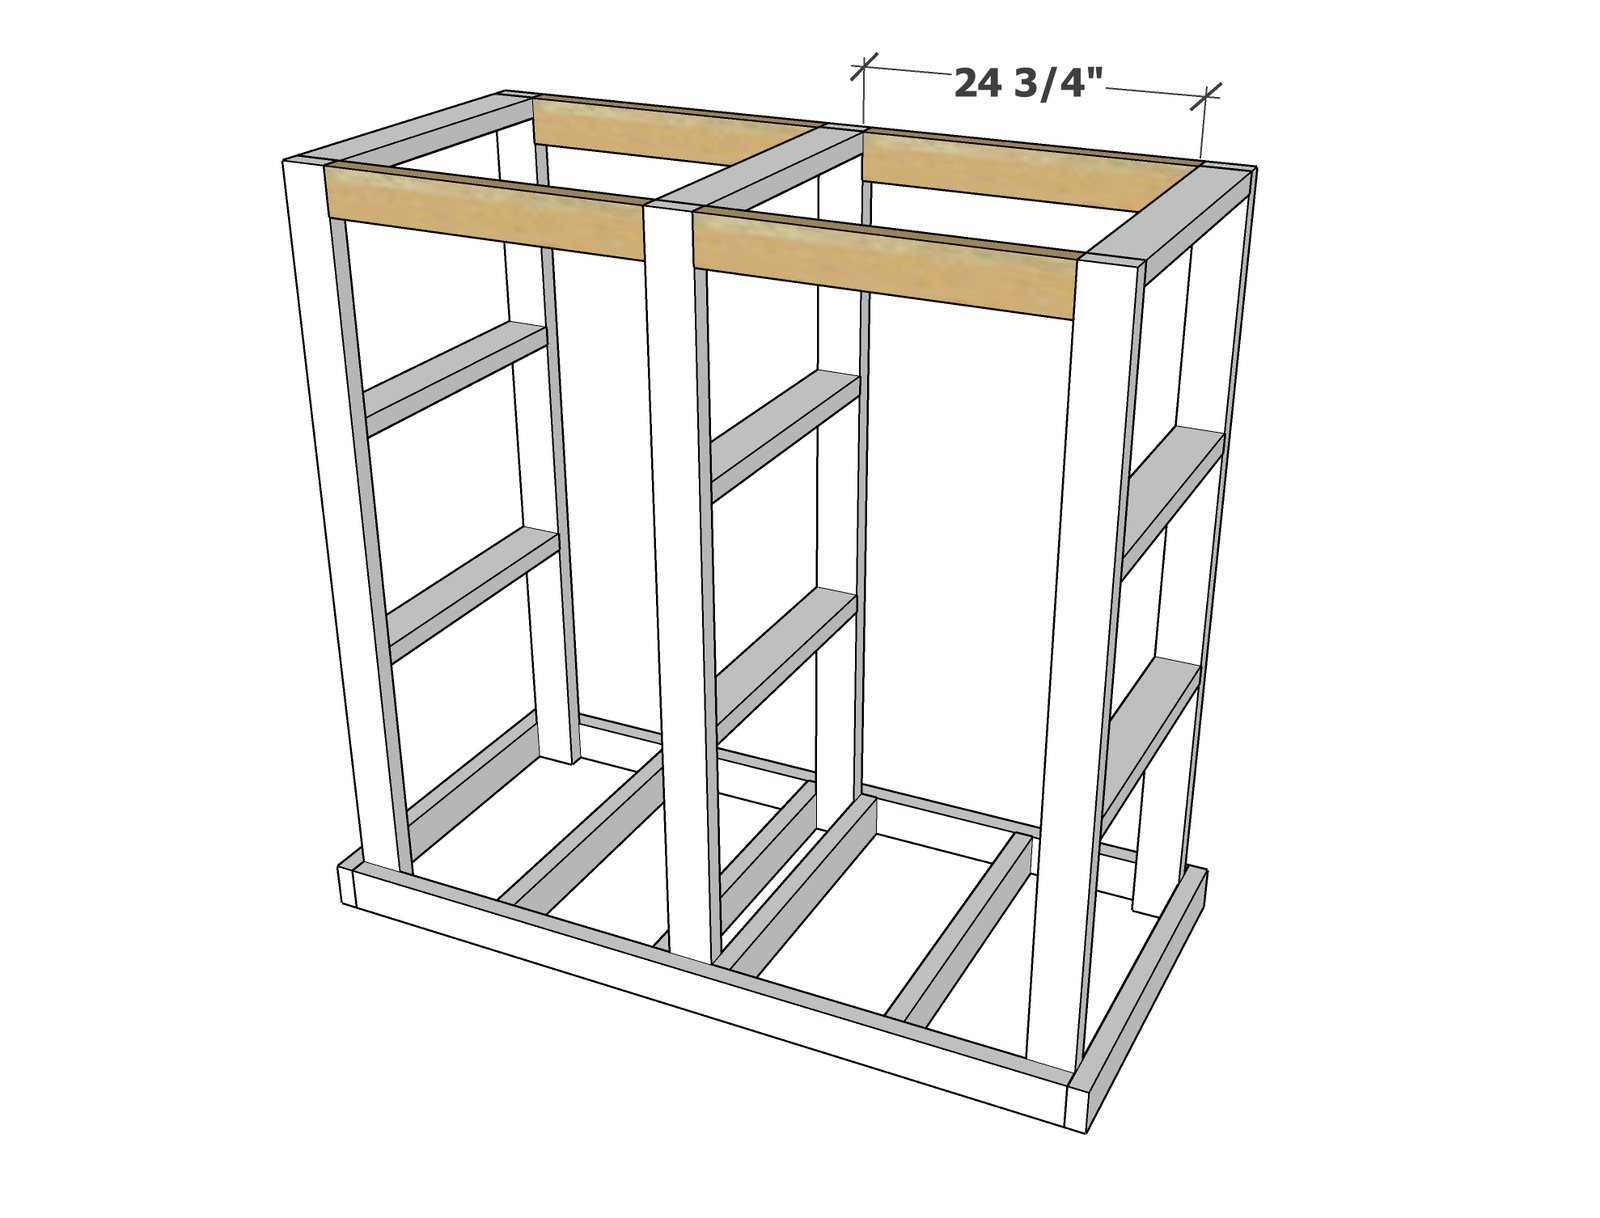
Attach the upper tie ins with 1-1/2" pocket holes and 2-1/2" pocket hole screws. Alternatively, screw with the star bit screws at an angle to attach from top and bottom.
Step 5
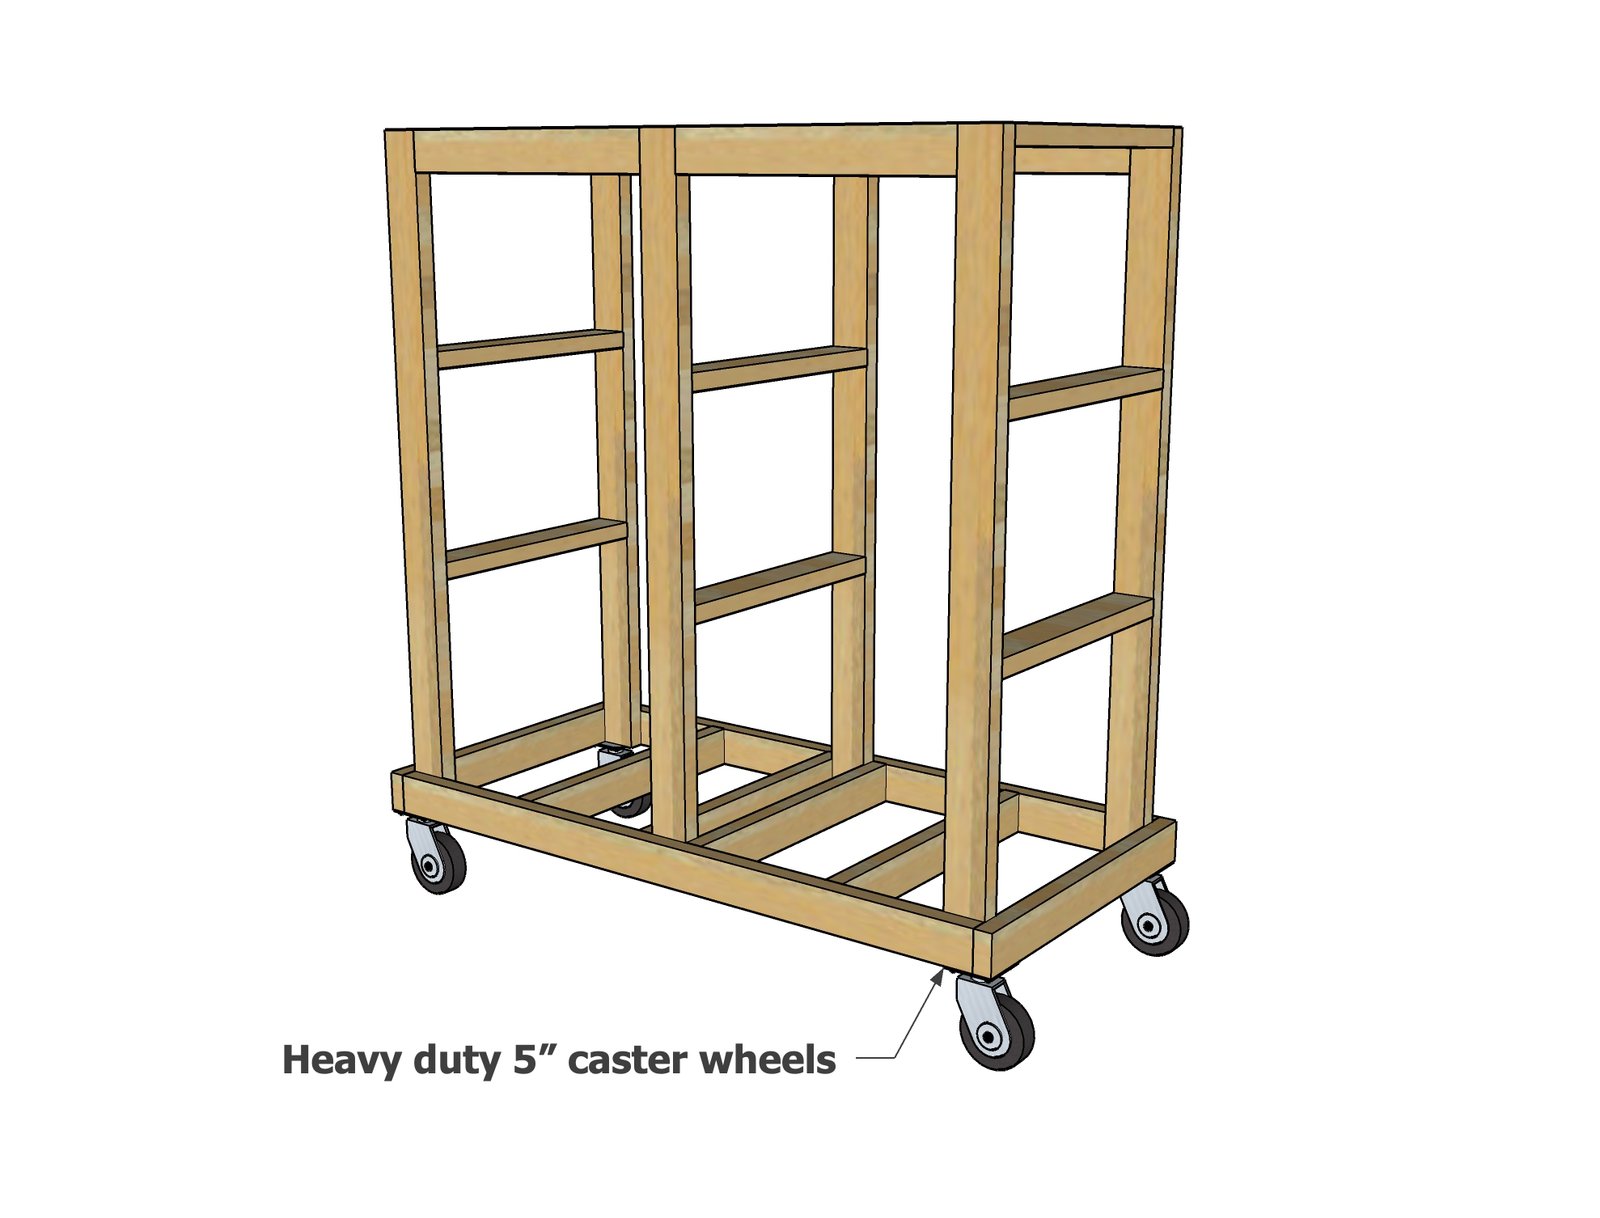
Attach the caster wheels to the base, screwing into the ends of the upright 2x4s as well as the bottom frame.
Finishing
Sand all surfaces, starting with a medium grit and finishing with fine. Wipe off the dust, fill any holes or gaps with wood filler, and sand smooth once dry. Apply primer if you're painting, then finish with your choice of paint or stain and seal with a durable clear topcoat. For outdoor projects, use exterior-rated primer, paint or stain, and sealer so the piece stands up to the weather.
Source (temporary): https://www.ana-white.com/woodworking-projects/simple-build-rolling-wood-cart