Simple Built-In Daybed Frame
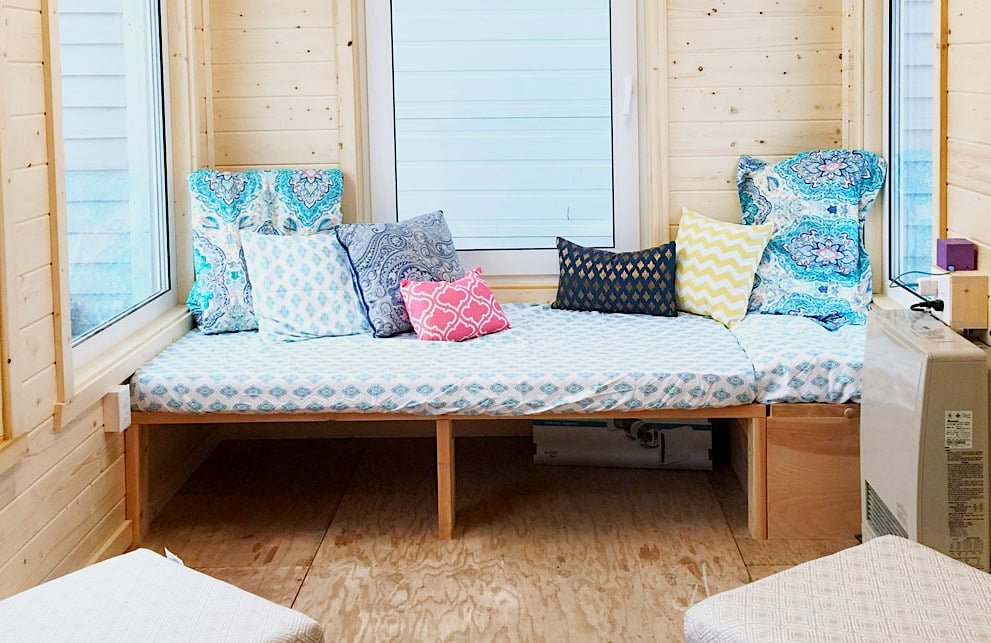
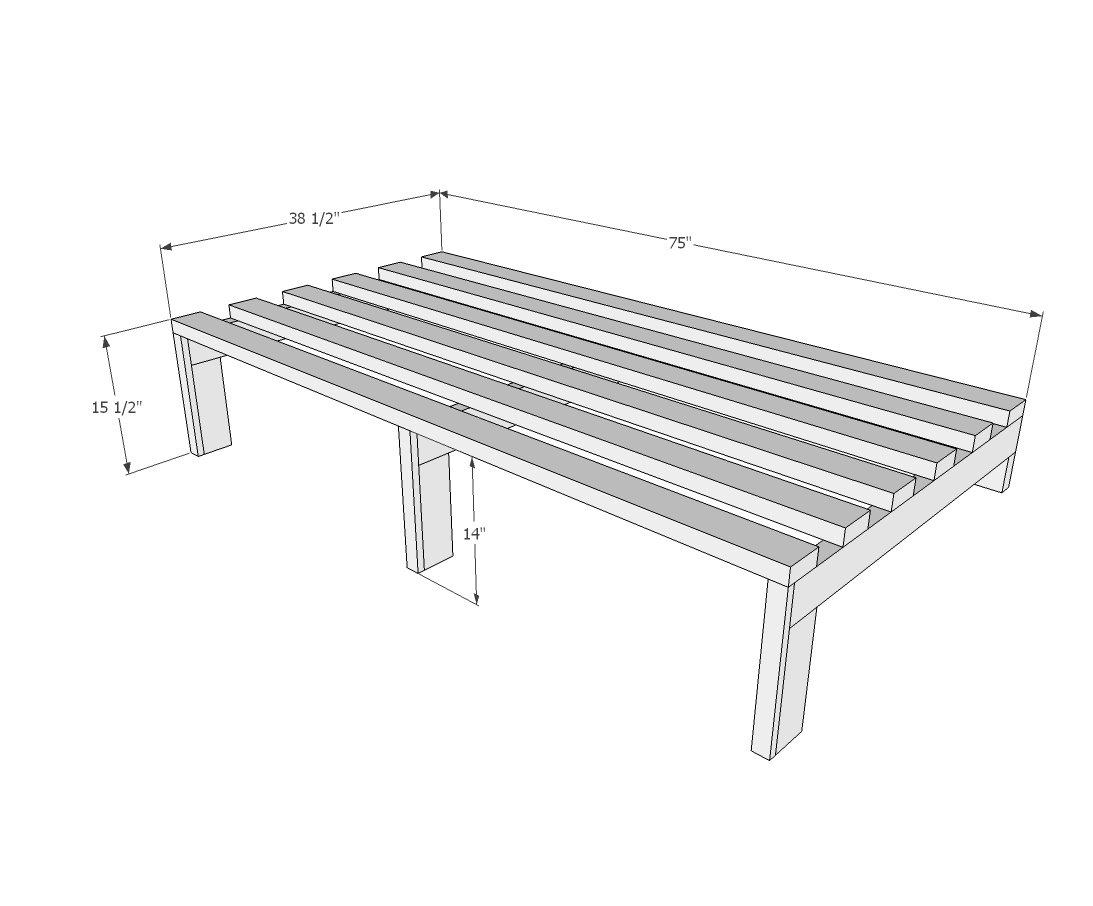
How to build a simple 2x4 daybed with storage underneath that doubles as seating. Fits standard twin mattress. Free
Specifications
| Project type | Beds and Bed Frames |
|---|---|
| Room | Bedroom |
| Style | Rustic Furniture Plans |
| Difficulty | Intermediate |
| Estimated cost | $50 - $100 |
Dimensions
Use the size-specific shopping and cut lists below.
Shopping List
- 9 - 2x4 @ 8 feet or stud length
- 1 - 1x2 @ 4 feet
- 2-1/2" pocket hole screws
- 2-1/2" or longer (depending on wall material) screws for attaching daybed to walls
- 1-1/4" brad nails
Cut List
- 3 - 2x4 @ 37-3/4"
- 3 - 2x4 @ 10-1/2"
- 3 - 1x2 @ 14"
- 7 - 2x4 @ 75"
Tools
- measuring tape
- square
- pencil
- safety glasses
- hearing protection
- kreg-jig
- drill
- circular saw
- nailer
- sander
Step-by-step Instructions
Step 1
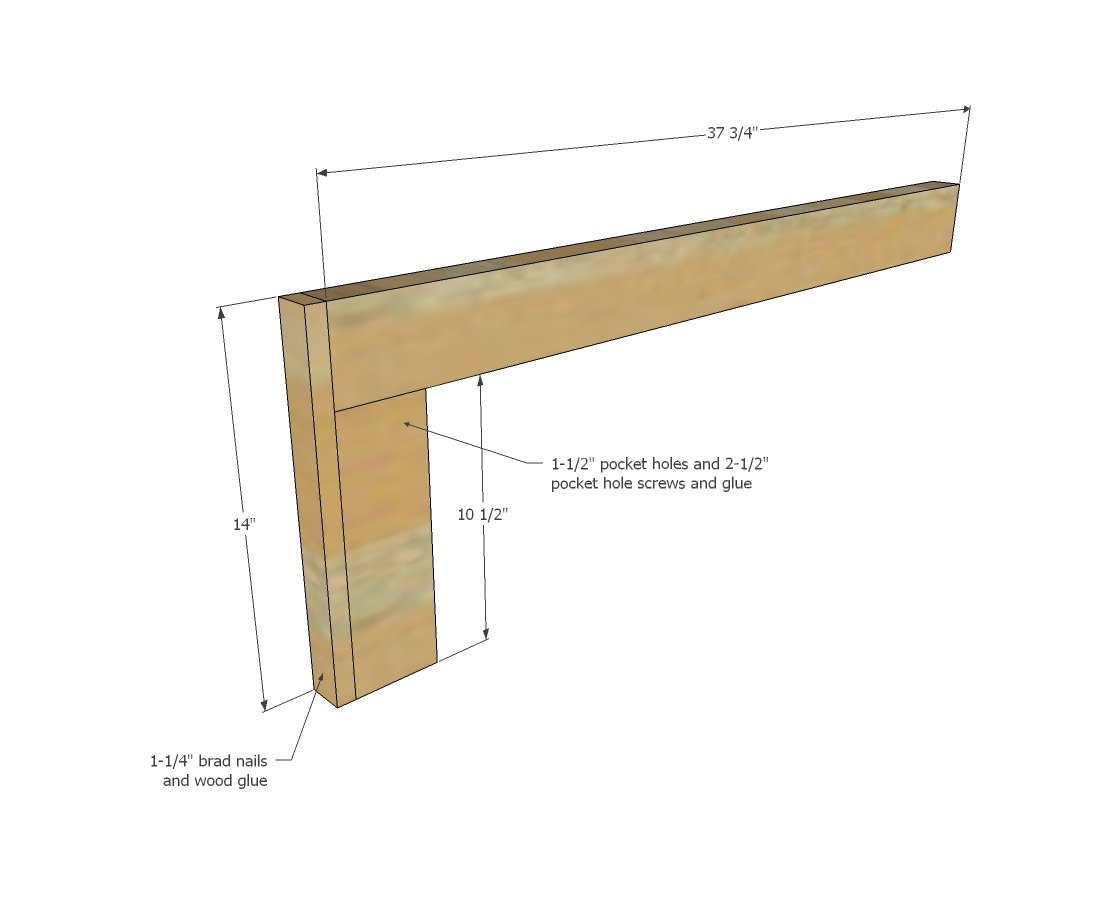
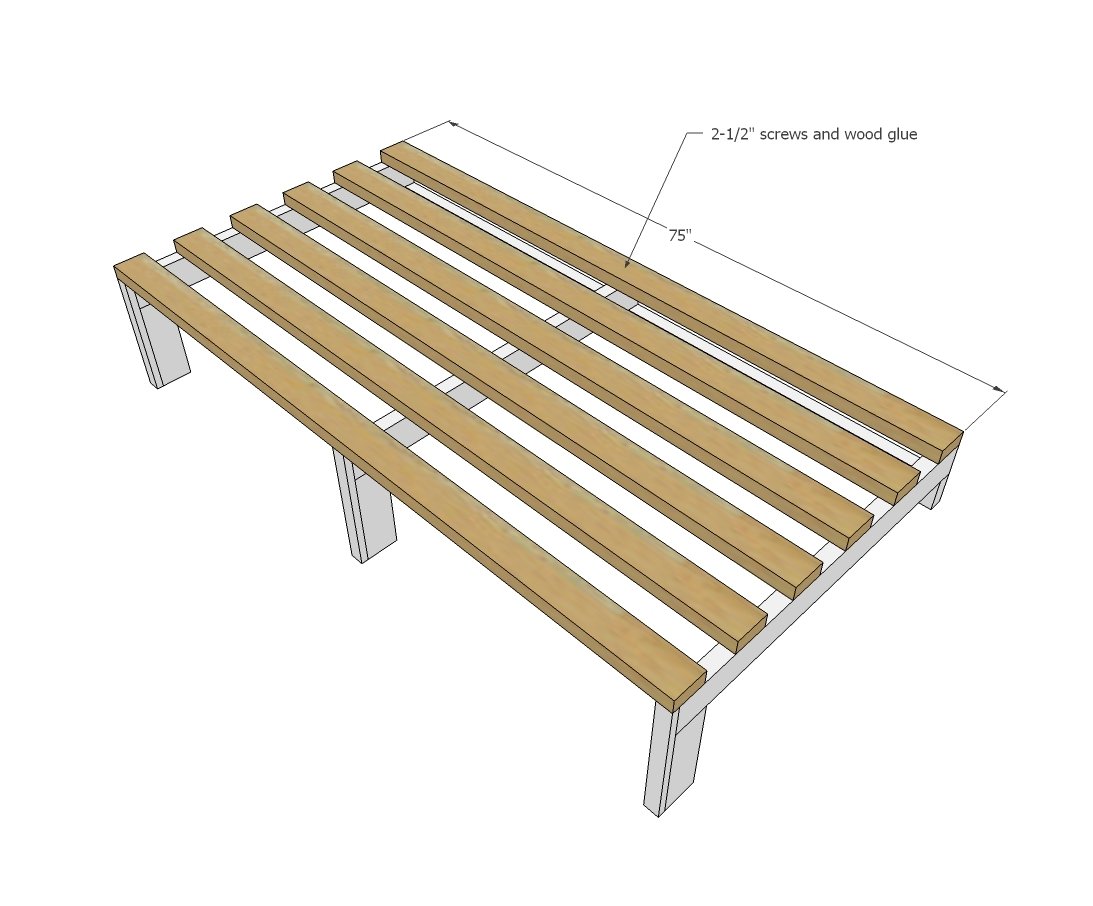
Build three legs for a 75" wide daybed. If you want to span a longer distance, you'll need a leg about every 3 feet to support the 2x4 slats.
Step 2
Attach back cleat to studs in wall with 2-1/2" wood screws. Then attach legs to the back cleat with pocket hole screws. One leg must be attached to studs in the wall, preferably both outer legs. We had a storage box built in in the corner, so attached the second outer leg to the storage box. This keeps the daybed from racking.
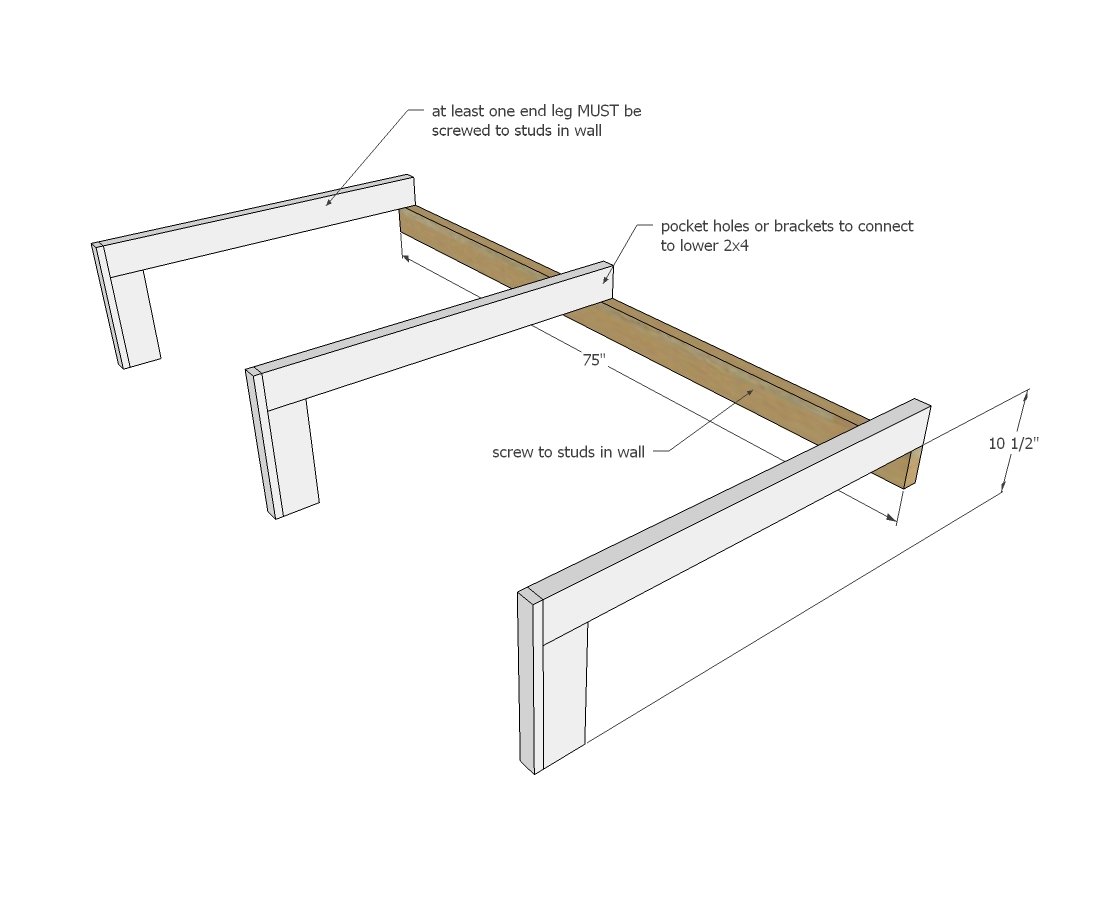
Attach slats to legs with 2-1/2" screws.
Exposed ends can be covered in plywood or wood planking to finish out for a nicer look.
Finishing
Sand all surfaces, starting with a medium grit and finishing with fine. Wipe off the dust, fill any holes or gaps with wood filler, and sand smooth once dry. Apply primer if you're painting, then finish with your choice of paint or stain and seal with a durable clear topcoat. For outdoor projects, use exterior-rated primer, paint or stain, and sealer so the piece stands up to the weather.
Source (temporary): https://www.ana-white.com/woodworking-projects/simple-built-daybed-frame