Simple Changing Table
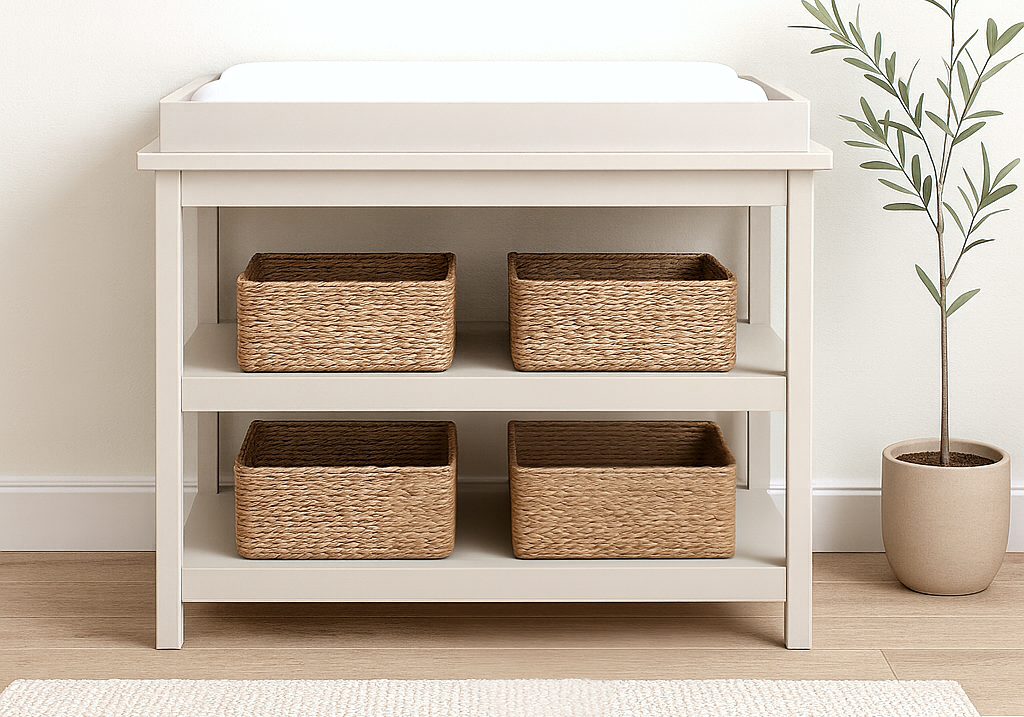
Keep baby care simple and stylish with this easy-to-build changing table. Designed with straightforward construction, this piece is perfect for beginner woodworkers and practical parents alike. Features: • Sturdy frame built with basic cuts and joints – no advanced tools required. • Two open lower shelves provide plenty of storage for baskets, diapers, and essentials. • Raised top frame keeps the changing pad securely in place. • Versatile design that can be painted, stained, or left natural to match any nursery style. • Grows with your family – later repurpose it as a storage shelf or console. Why You’ll Love It: This changing table is budget-friendly, strong enough for everyday use, and designed with simplicity in mind. With its clean lines and minimal materials, you can build it in a weekend and enjoy a functional, beautiful piece of nursery furniture for years.
Specifications
| Project type | Bookshelf and Bookcase Plans |
|---|---|
| Room | Nursery and Baby |
| Style | Children's and Kid's Room Furniture and Toy Plans |
| Difficulty | Beginner Projects |
| Estimated cost | $20 - $50 |
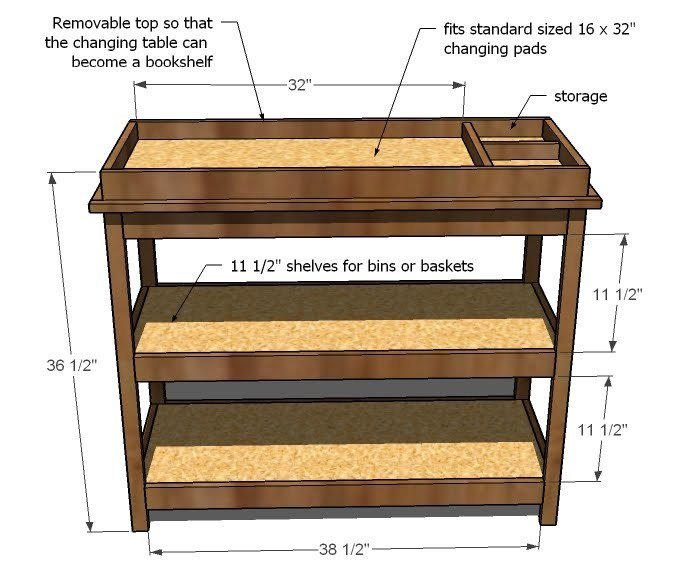
Dimensions
Use the size-specific shopping and cut lists below.
Shopping List
- 2 – 1×2 Boards, 8′ Long 1 – Sheet of 3/4″ MDF or Hardwood Plywood, cut into 15 1/2″ wide and 8′ long strips (these strips will be referred to as 1×16 boards)
- 1 – 10′ 1×4 Board
- 4 – 1×3, 8′ Long
- 12′ of edge beading, 3/4″ thick
- 2″ Self tapping wood screws 1 1/4″ Self tapping wood screws
- 1 1/4″ Nails
- Wood Glue
- Wood Filler
- Sand Paper
Cut List
- 4 – 1×2 @ 34″ (Legs)
- 2 – 1×4 @ 15 1/2″ (Top Trim, Ends)
- 4 – 1×3 @ 15 1/2″ (Shelf Trim, Ends)
- 4 – 1×16 @ 40″ (Shelves)
- 4 – 1×3 @ 38 1/2″ (Shelf Trim, Sides)
- 2 – 1×4 @ 38 1/2″ (Top Trim, Sides)
- 2 – 1×3 @ 15 1/2″ (Topper Trim)
- 2 – 1×3 @ 41 1/2″ (Topper Trim)
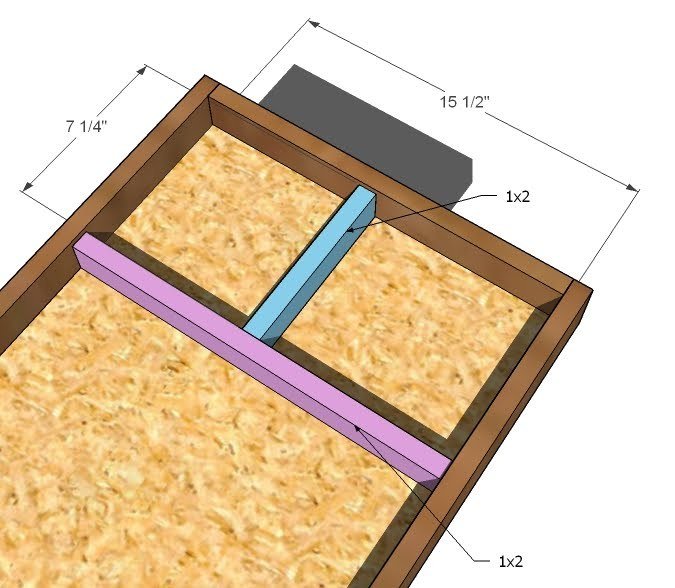
- 1 – 1×2 @ 7 1/4″ (Topper Partition)
- 1 – 1×2 @ 15 1/2″ (Topper Partition)
Tools
- measuring tape
- square
- pencil
- safety glasses
- hearing protection
- kreg-jig
- drill
- circular saw
- table saw
- nailer
- sander
Step-by-step Instructions
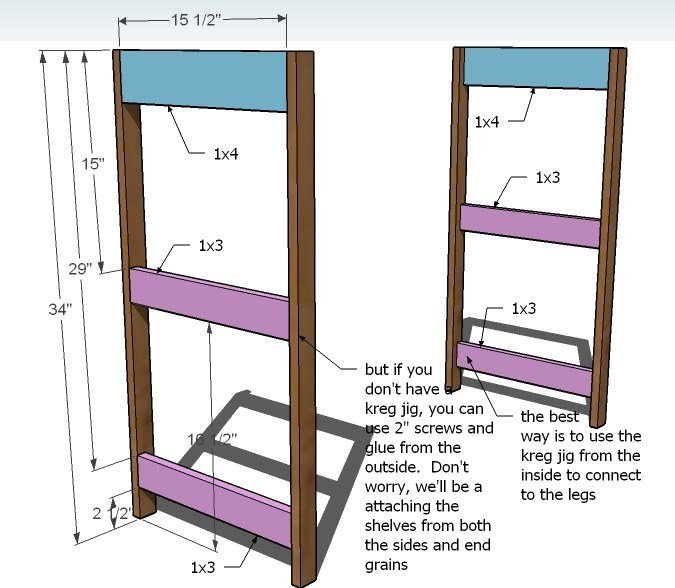
ENDS
Build your ends as shown above. Use 2″ screws and glue unless you have a Kreg Jig™ and you can fasten the end trim from the insides.
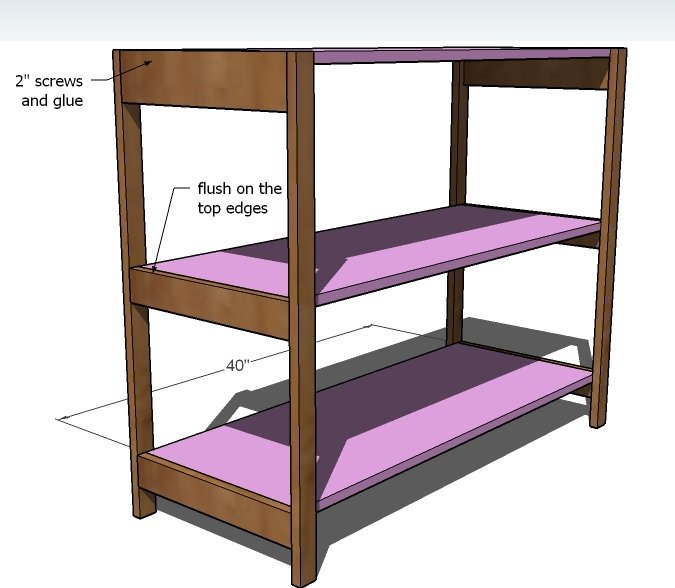
SHELVES
Fasten the shelves to the end trim pieces as shown above. Again, 2″ screws and glue or use the Kreg Jig™ from the underside of the shelves. Keep the top edge flush on the shelves.
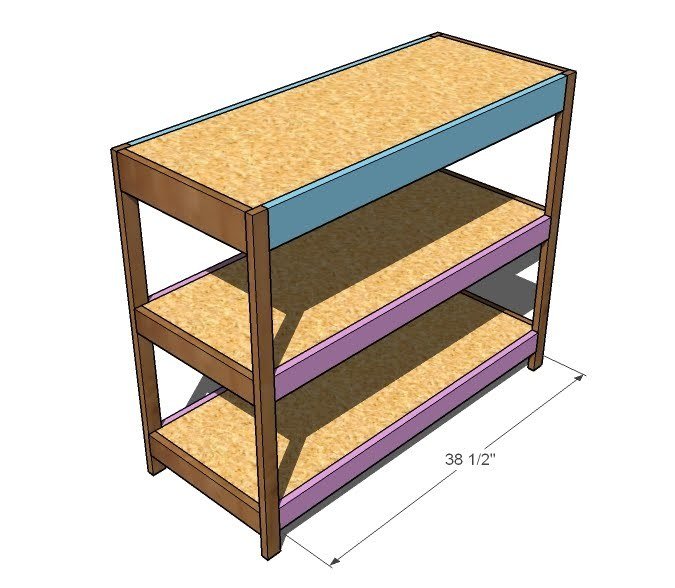
SHELF SIDE TRIM
Trim out the shelf sides as shown above, use 2″ screws and glue. Fasten the trim to the legs to for extra support on the shelves from the outside of the leg or use a Kreg Jig™.
Edge Trim
Use 1 1/4″ nails and glue to fasten edge trim around the top of the table, as shown above. Miter your corners at 45 degrees for a neat edge. Cut the edge trim to fit, as dimensions are not shown in the above diagram.
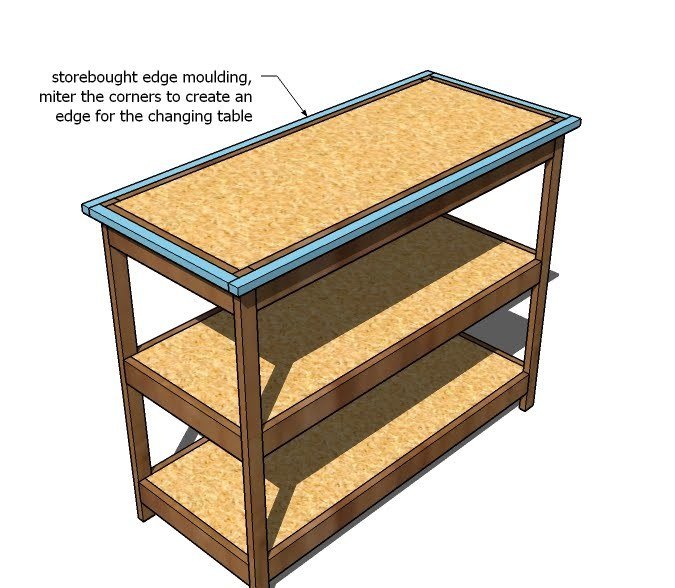
Step 5
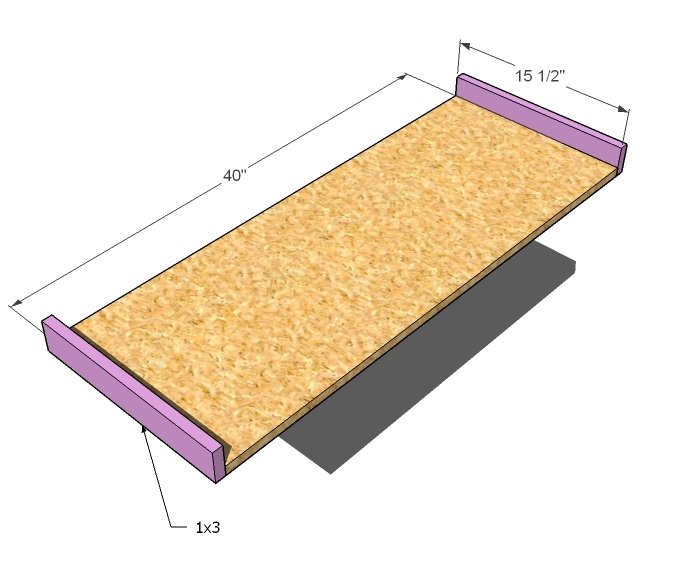
TOPPER SIDES
Attach the side trim to the topper as shown above. Also attach to the end trim from step 5. Use glue and 2″ nails or screws.
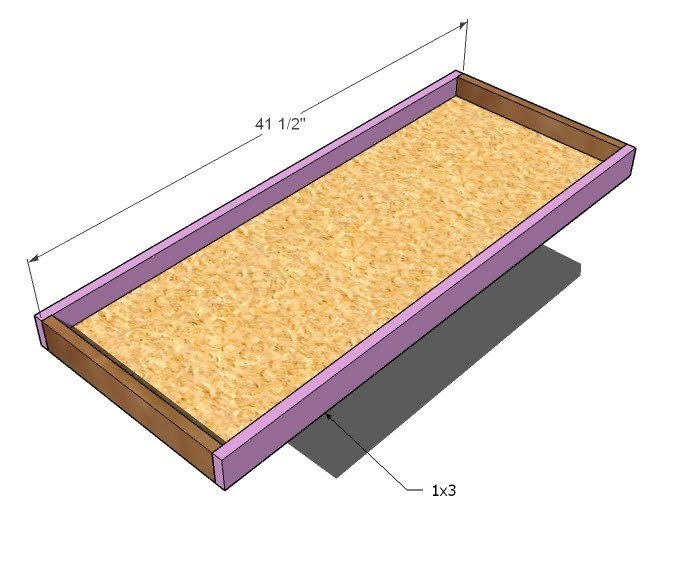
PARTITIONS
Attach the partitions to the bottom of the topper, and to the side and end trim pieces as shown above. Use glue.
ASSEMBLY
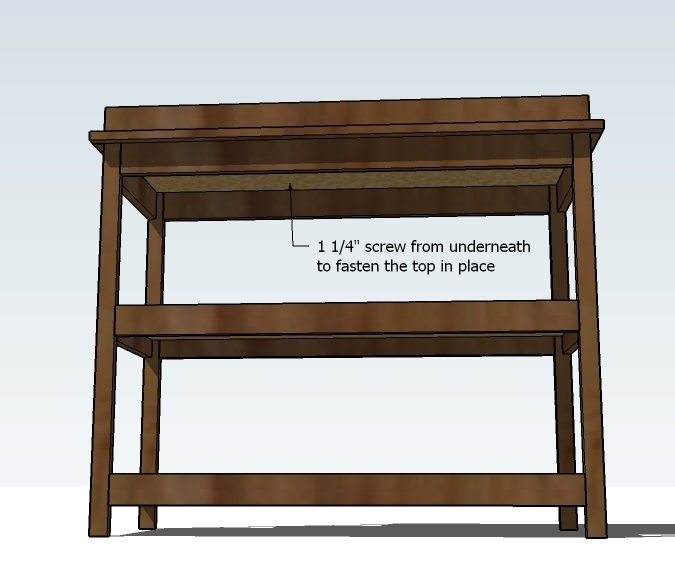
From the underside of the changing table, attach the topper with 1 1/4″ screws. Omit the glue if you wish to remove the topper at a future date.
Finishing
Sand all surfaces, starting with a medium grit and finishing with fine. Wipe off the dust, fill any holes or gaps with wood filler, and sand smooth once dry. Apply primer if you're painting, then finish with your choice of paint or stain and seal with a durable clear topcoat. For outdoor projects, use exterior-rated primer, paint or stain, and sealer so the piece stands up to the weather.
Source (temporary): https://www.ana-white.com/woodworking-projects/simple-changing-table