Simple Closet Organizer
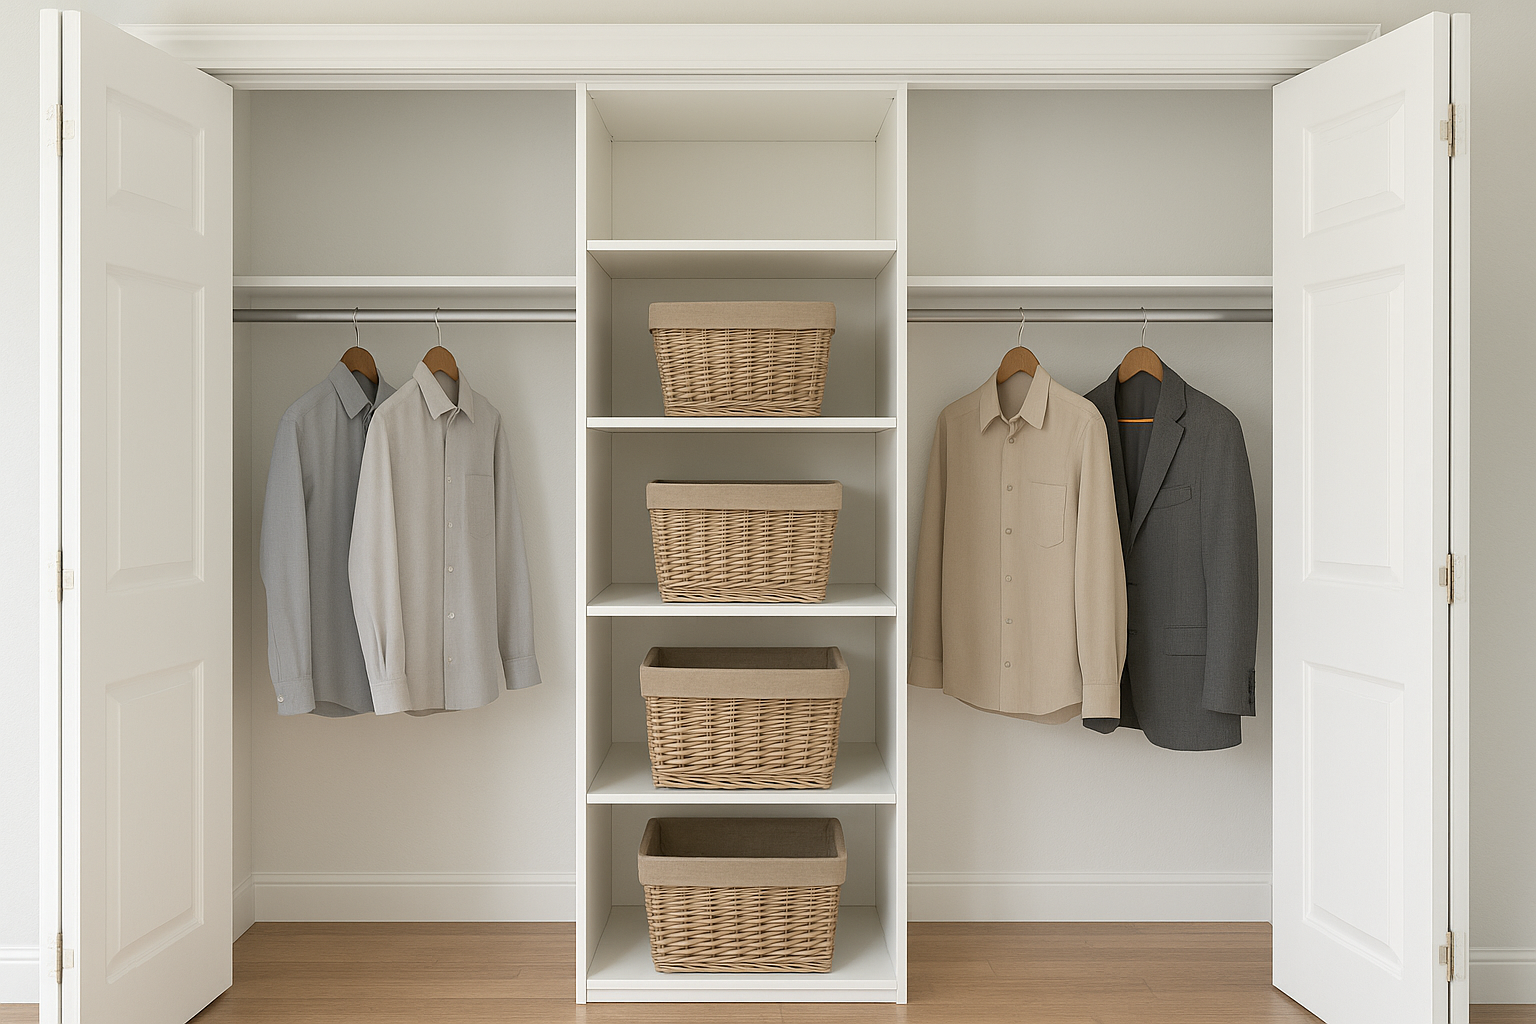
Build a Custom Simple Closet Organizer – Maximize your closet storage with this easy-to-build Simple Closet Organizer – a clean, customizable system designed to bring order to any reach-in or walk-in closet. from, you can create a professional-looking organizer using basic tools and off-the-shelf lumber. Why this DIY closet organizer is a favorite: • Custom fit for any closet: Adjustable width and flexible layout lets you adapt the build to your exact closet size—ideal for small bedrooms, guest rooms, or primary closets. • Beginner-friendly project: This is a great project if you’re new to woodworking—simple cuts, easy assembly, and no fancy joinery required. • Budget-conscious: Built from standard 1x and 2x boards plus a sheet of plywood, making it far more affordable than store-bought systems. • Real wood construction: Durable and long-lasting—no particleboard, no plastic, just solid wood that you can paint, stain, or finish to match your style. •: Includes a complete cut list, detailed diagrams, and easy-to-follow instructions with photos. What the design includes: • Central vertical shelving tower with up to five cubbies • Dual hanging rod sections for short and long clothing • Optional baskets, drawers, or bins for added storage customization Perfect for: • Bedroom closets • Kids’ or nursery closets • Entryway storage • Small walk-in pantries **Get organized and take back your closet—**grab the and start building today.
Specifications
| Project type | Bookshelf and Bookcase Plans |
|---|---|
| Room | Closets |
| Style | Cottage Style Furniture Plans |
| Difficulty | Beginner Projects |
| Estimated cost | $20 - $50 |
Dimensions
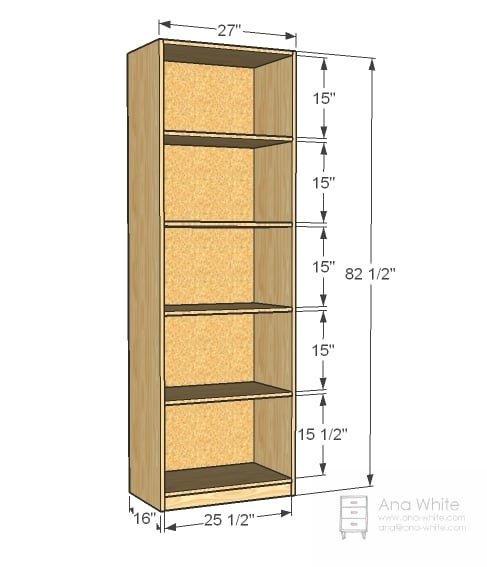
Use the size-specific shopping and cut lists below.
Shopping List
- 2 – Sheets of 3/4″ Particle Board (closet grade) or MDF or cabinet grade plywood ripped into 15 1/2″ wide strips, 8 feet long
- You could also use closet shelving in any width as a substitute (for example 20″ wide shelves for a 20″ deep shelving system)
- These strips will be referred to as "1x16" in the plans
- 1 sheet 1/4″ plywood or MDF
- 1 – 1×2 26″ long
- 2″ self tapping star bit screws
- 3/4″ brad nails
Cut List
- 2 – 1×16 @ 82 1/2″ (Sides)
- 6-1×16 @ 25 1/2″ (Shelves)
- 1 – 1/4″ Plywood @ 82 1/2″ x 27″ (Back)
- 1 – 1×3 @ 25 1/2″ (Footer)
Tools
- measuring tape
- square
- pencil
- safety glasses
- hearing protection
- drill
- circular saw
- sander
- countersink drill bit
Step-by-step Instructions
Build the Box
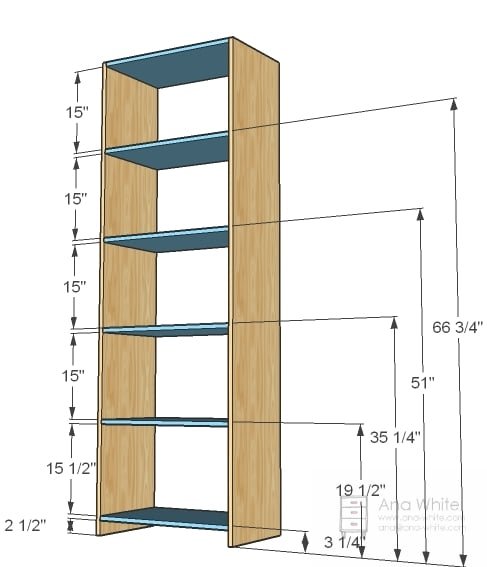
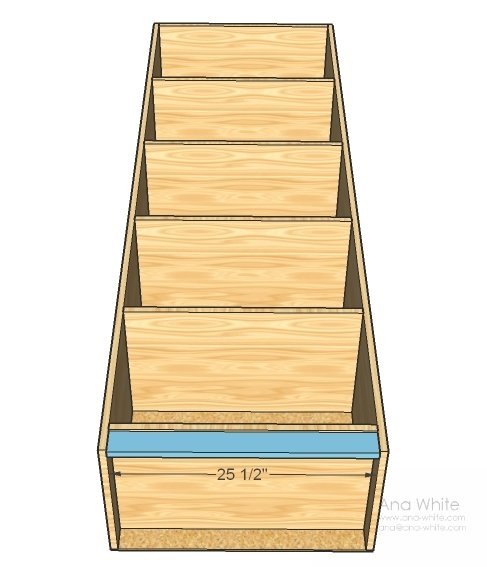
Mark the sides as shown in the diagram. Then either drill pocket holes in all the shelves and screw the shelves to the sides or predrill holes in the sides and screw the sides to the shelves. Use glue and adjust for square.
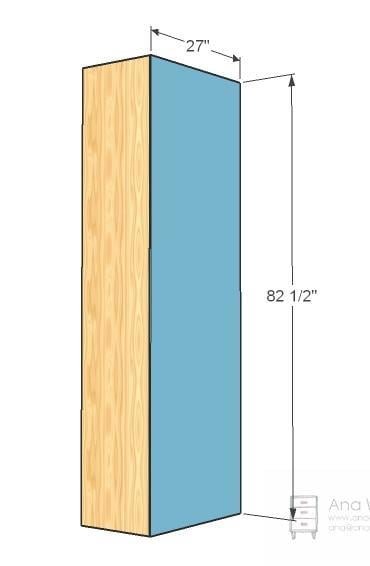
Back
Attach the back to the box with finish nails and glue. Make sure you nail into all the shelves too for added strength and support.
Footer
Glue and nail the 1×3 footer to the base of the shelf. Inset the footer slightly as shown in the photo. Assembly Position the unit in the closet. Attach to a stud in the wall behind the closet using L brackets. If a stud is not in the right position, use drywall anchors to secure the shelf to the back of the closet.
Closet Rods and Shelves
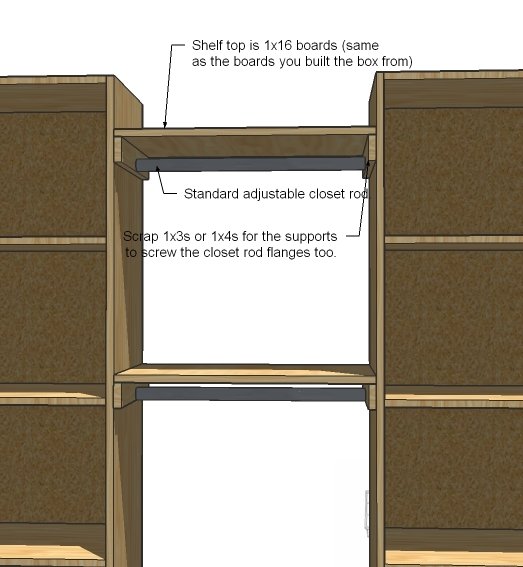
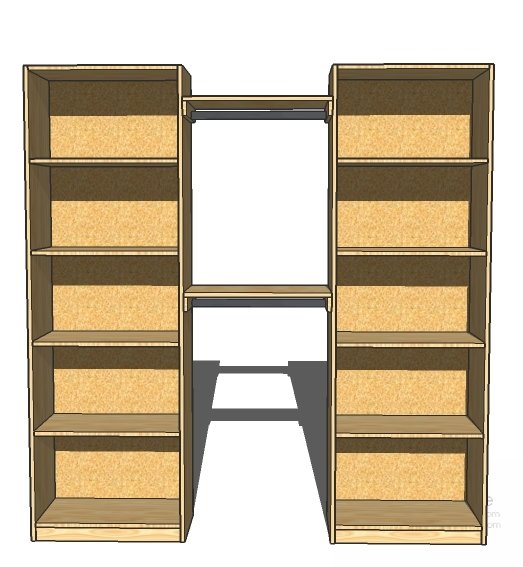
Now here is the sweet spot. With your scrap pieces of 1×16 leftover, you can build additional shelves in your closet! Simple use 1 1/4″ screws to screw a scrap piece of 1×3 to the side of the closet and in the same position on the side of the interior closet wall (or as shown above for a freestanding application, another closet shelf) and then lay a shelf on top! Screw down, and add a closet rod below.
Step 5
Step 6
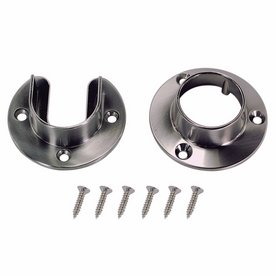
And putting up closet rods is both easy ans attractive (and inexpensive) with closet rod flanges like these ones from Blue.
Finishing
Sand all surfaces, starting with a medium grit and finishing with fine. Wipe off the dust, fill any holes or gaps with wood filler, and sand smooth once dry. Apply primer if you're painting, then finish with your choice of paint or stain and seal with a durable clear topcoat. For outdoor projects, use exterior-rated primer, paint or stain, and sealer so the piece stands up to the weather.
Source (temporary): https://www.ana-white.com/woodworking-projects/simple-closet-organizer