Simple Fireplace Mantle
Hang your stockings on this simple fireplace mantle plan. This design can be easily stored away when the Holidays are over, or kept in the center of your living room too!

Specifications
| Project type | Home DIY |
|---|---|
| Room | dining room |
| Style | Farmhouse Furniture |
| Difficulty | Beginner Projects |
| Estimated cost | $20 - $50 |
Dimensions
Use the size-specific shopping and cut lists below.
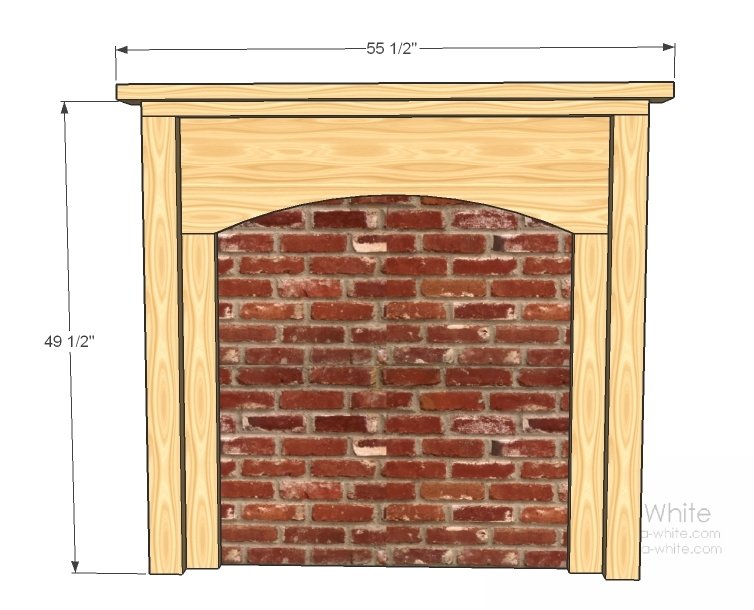
Shopping List
- 1/2 – sheet of faux brick paneling or 1/4″ plywood or mdf paneling
- 1 – 4×4 post, 8 feet long OR 2 – 2x4s, 8 feet long
- 2 – 2×4, 8 feet or stud length (in addition to the 4×4 posts above)
- 1 – 2×6, 8 feet or stud length
- 1 – 2×12, 4 feet long
- 3″ screws
- 1 1/4″ screws
- wood filler, paint and sandpaper
Cut List
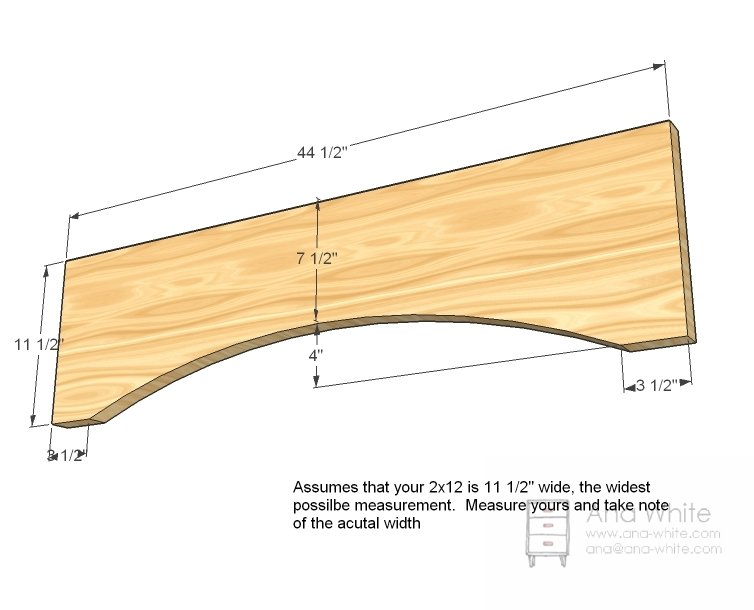
- 1 – 2×12 @ 44 1/2″ (cut at an arch shape)
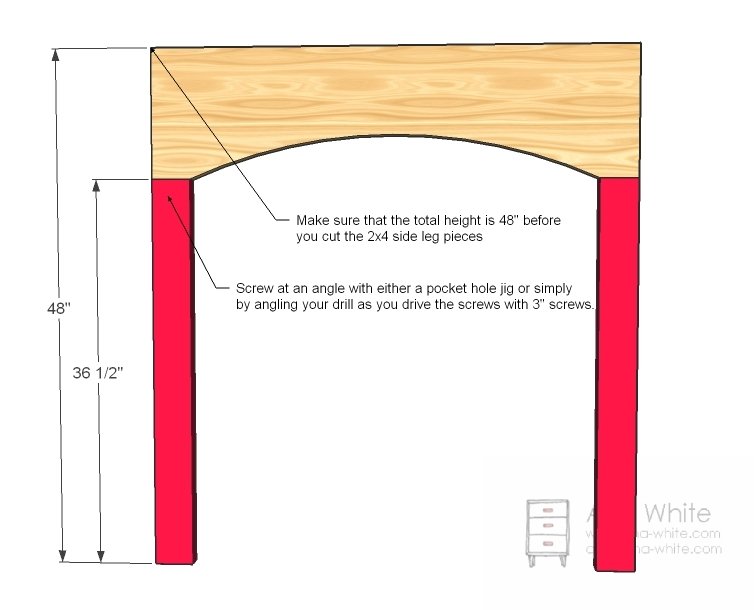
- 2 – 2×4 @ 36 1/2″ 2 – 4×4 @ 48″ (legs)
- 1 – 2×4 @ 51 1/2″ (top)
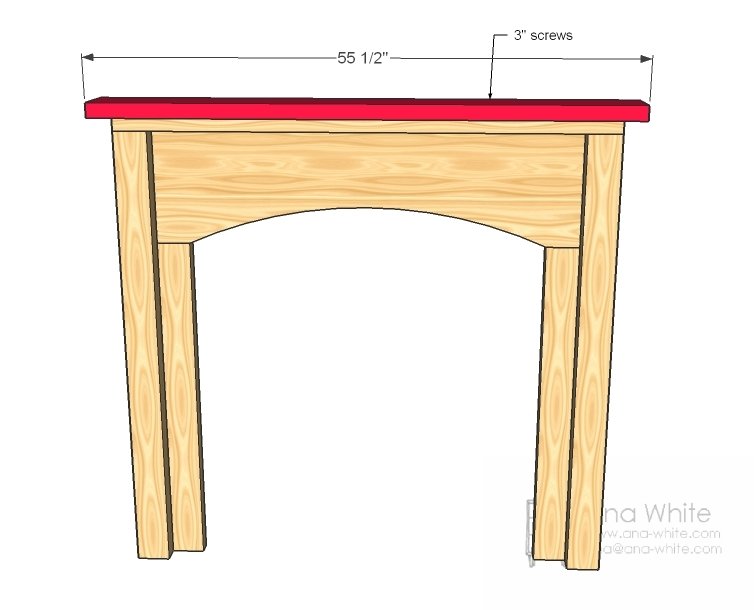
- 1 – 2×6 @ 55 1/2″ (top TOP)
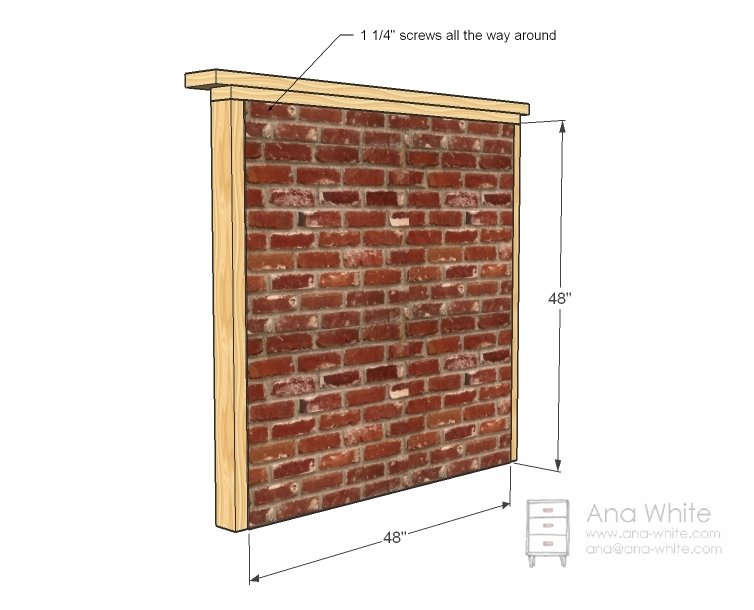
- 1 – 1/4″ paneling @ 48″ x 48″
Tools
- measuring tape
- square
- pencil
- hammer
- safety glasses
- hearing protection
- circular saw
- sander
- countersink drill bit
Step-by-step Instructions
Header
Cut the header at an arch shape as shown above. Sand the cut edge to make sure the arch is even.
Inner Trim
Assuming that your 2x12s are 11 1/2″ wide (widths can vary, I choose to list the widest possible widths) cut your 2x4s and screw to the arched top. Don’t worry about getting a super strong joint, the joint will be reinforced from the back and sides. If you don’t have a Kreg Jig™, try just screwing at an angle from the 2×4 into the 2×12.
Legs
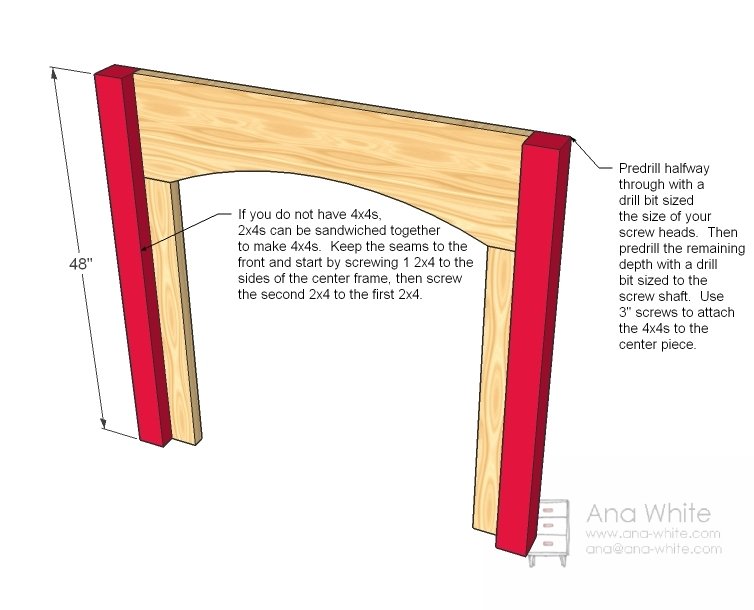
Now add the 4×4 posts to the sides as shown above. Back is flush. Use a drill bit the size of your screw heads to drill approximately 1/2 way through the 4×4 posts. Then use a drill bit the size of the screw shaft to drill the remaining way through the 4×4 posts. Screw the posts to the 2x4s with 3″ screws.
Top
If you’ve built a farmhouse bed, you are probably thinking, that all looks quite familiar. And in fact, this could easily double as a full size headboard. In this step, just screw the 2×4 to the top with 3″ screws.
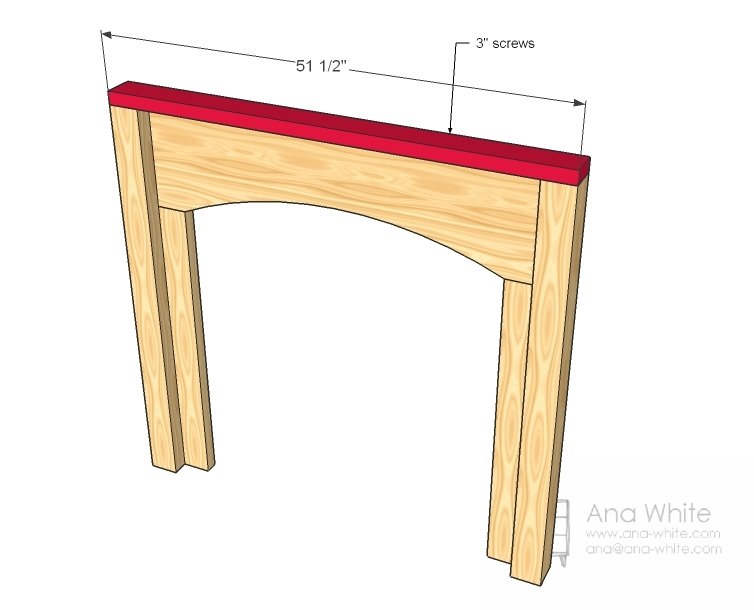
Step 5
Back
Now simply screw the back paneling on.
Finishing
I finished mine by filling holes with wood filler, sanding, and then priming everything but the top. I painted two coats of paint in an muted oooops green paint, and stained the top with Minwax Express Color in Pecan. Make sure you screw through the 2×12 header into a stud in the wall behind the faux fireplace to keep it from tipping forward. Good luck and Happy Holidays!
Finishing
Sand all surfaces, starting with a medium grit and finishing with fine. Wipe off the dust, fill any holes or gaps with wood filler, and sand smooth once dry. Apply primer if you're painting, then finish with your choice of paint or stain and seal with a durable clear topcoat. For outdoor projects, use exterior-rated primer, paint or stain, and sealer so the piece stands up to the weather.
Source (temporary): https://www.ana-white.com/woodworking-projects/simple-fireplace-mantle