Simple Frame
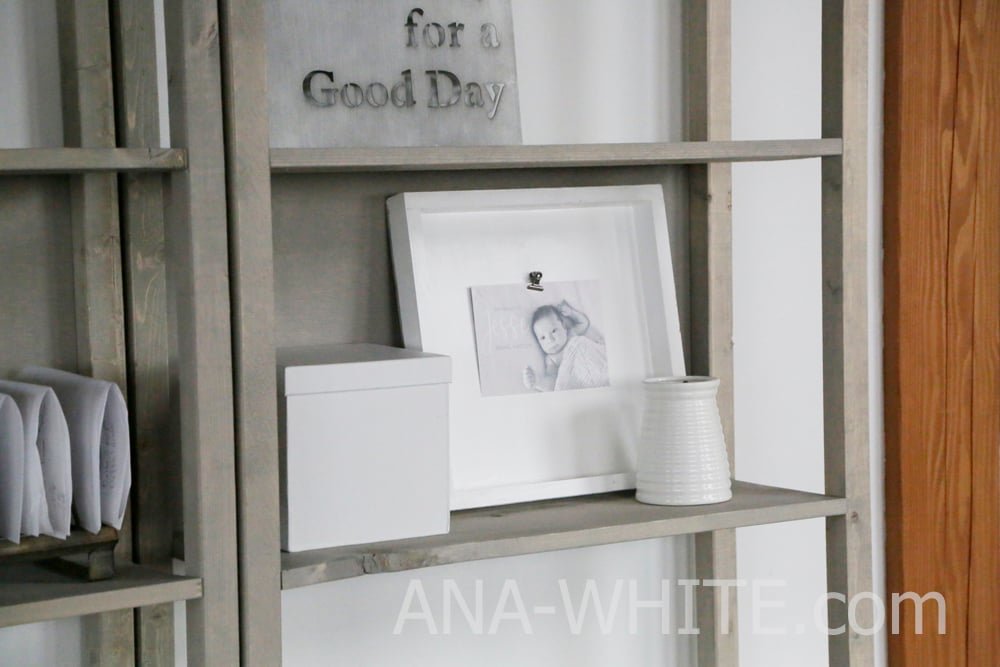
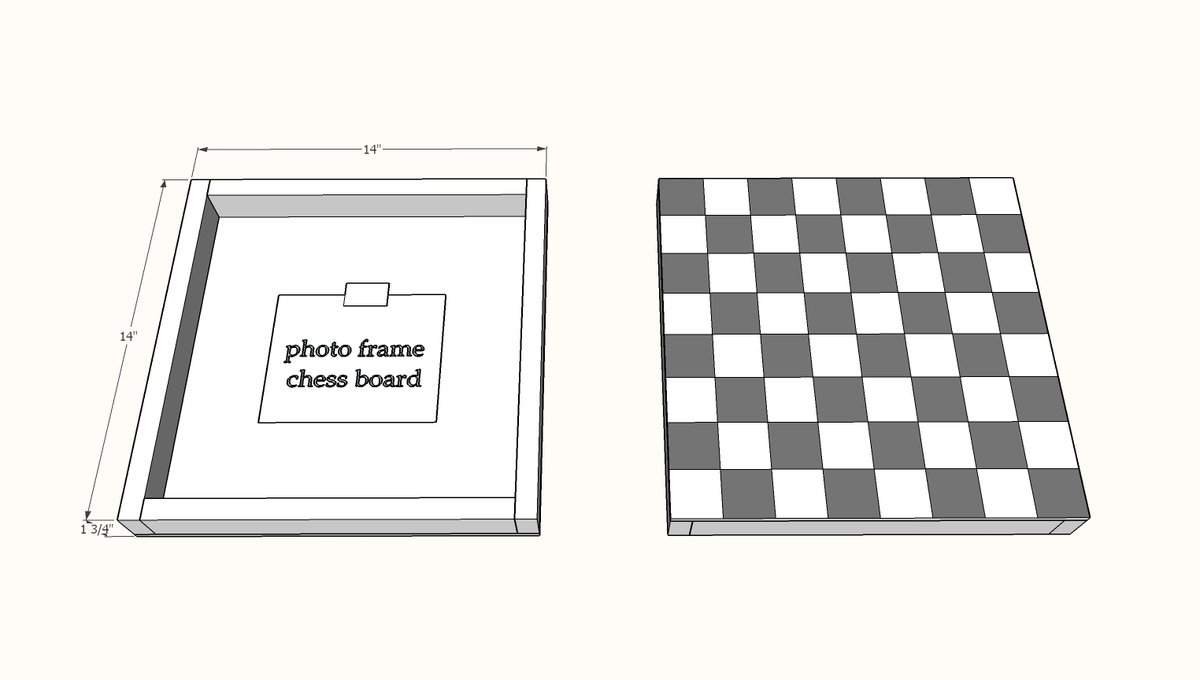
Here's a quick and fun project - a photo frame on the front, chess board on the back! You can make this photo frame chess board with just a couple tools with scrap wood pieces! Tutorial by
Specifications
| Project type | frames |
|---|---|
| Room | dining room |
| Style | Farmhouse Furniture |
| Difficulty | Starter Projects |
Dimensions
Use the size-specific shopping and cut lists below.
Shopping List
1 - 1x2 @ 5 feet
1 - 1/4" plywood @ 14" x 14"
1 - clipboard clip (available at most craft stores, smaller versions available in the scrapbooking section of craft stores)
painter's tape at least 1-3/4" wide
black spray paint
polyurethane
white paint
chess set ( try these from Amazon - link is affiliate)
Cut List
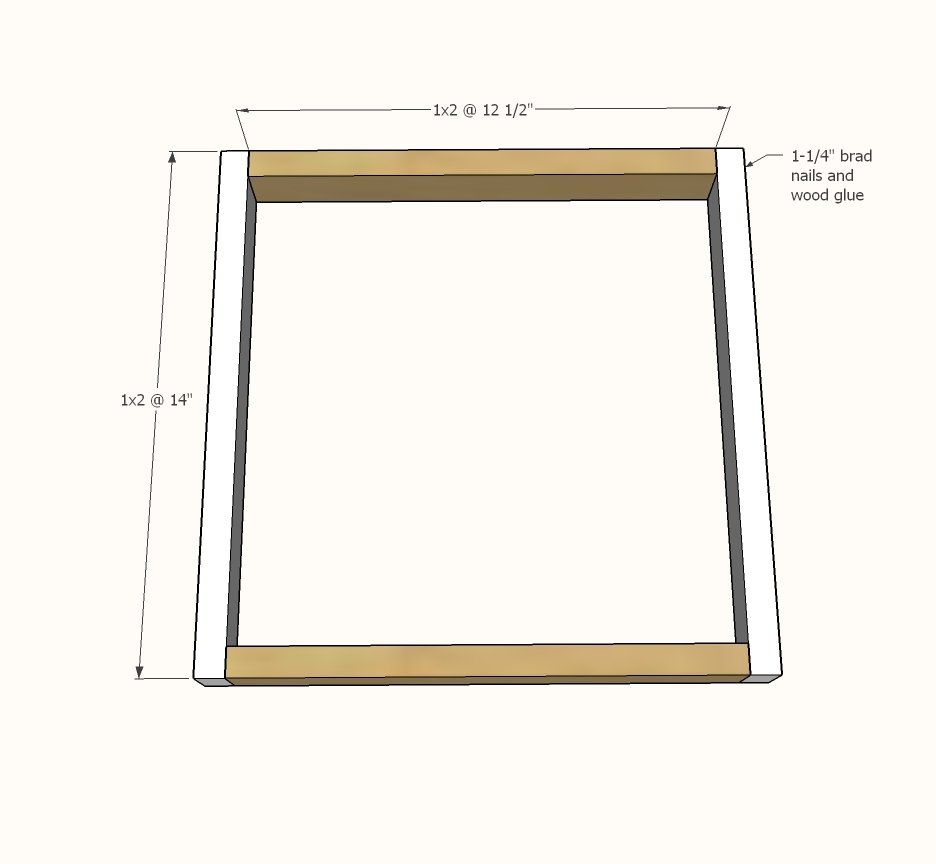
2 - 1x2 @ 12-1/2"
2 - 1x2 @ 14"
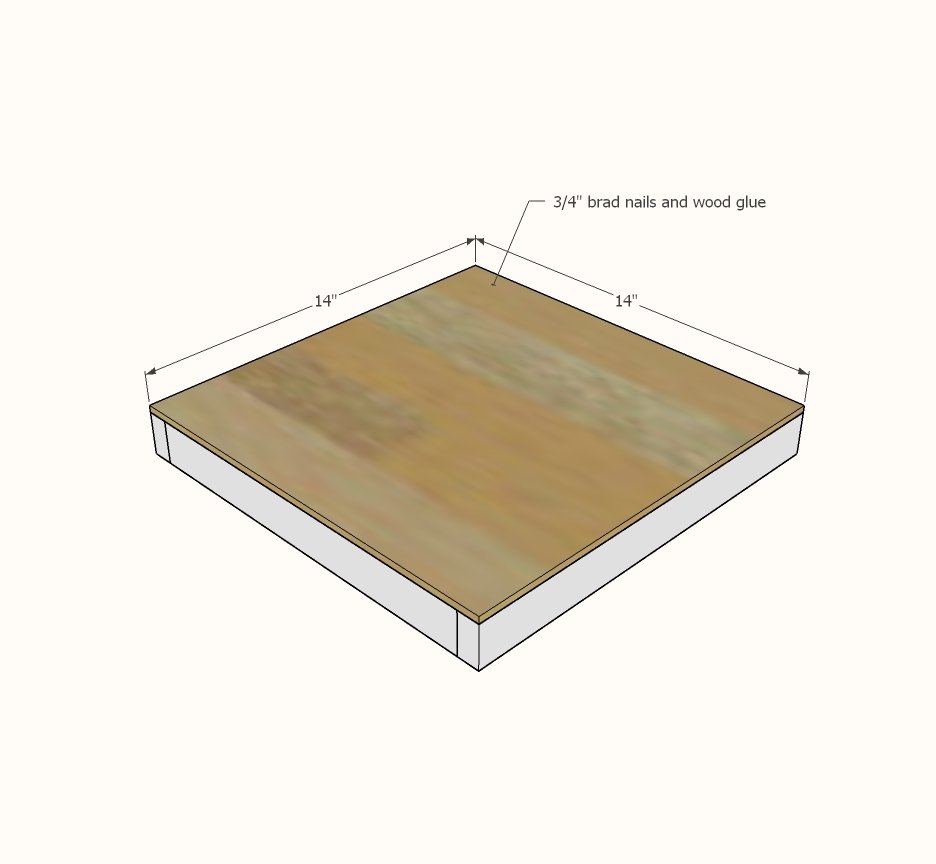
1 - 1/4" plywood @ 14" x 14"
Tools
- measuring tape
- square
- pencil
- safety glasses
- hearing protection
- compound miter saw
- nailer
Step-by-step Instructions
Step 1
Nail together the 1x2 pieces to make a square. Use 1-1/4" brad nails and wood glue.
Step 2
Glue and nail the 1/4" plywood on top of the 1x2 frame. Sand any rough edges. Fill all nail holes with wood filler.
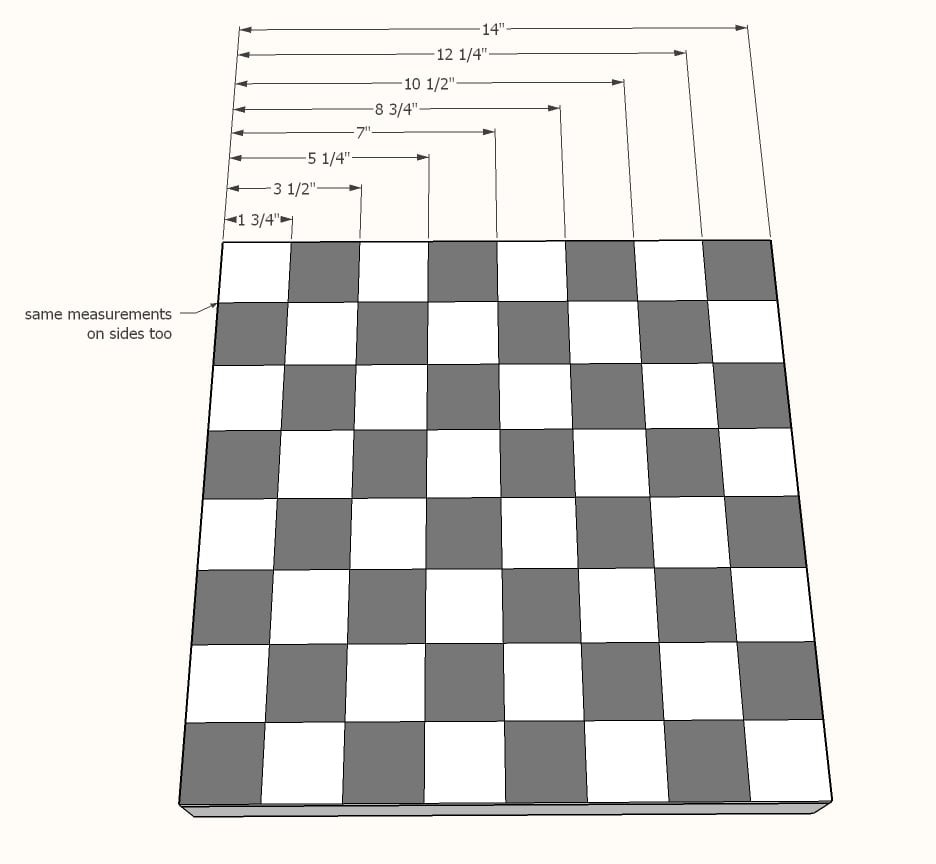
Mark out the chess grid and draw pencil lines.
Watch the video for details on how we taped and painted the chess board quickly and easily.
Finishing
Sand all surfaces, starting with a medium grit and finishing with fine. Wipe off the dust, fill any holes or gaps with wood filler, and sand smooth once dry. Apply primer if you're painting, then finish with your choice of paint or stain and seal with a durable clear topcoat. For outdoor projects, use exterior-rated primer, paint or stain, and sealer so the piece stands up to the weather.
Source (temporary): https://www.ana-white.com/woodworking-projects/simple-frame-flips-chess-board