Simple Kitchen Island
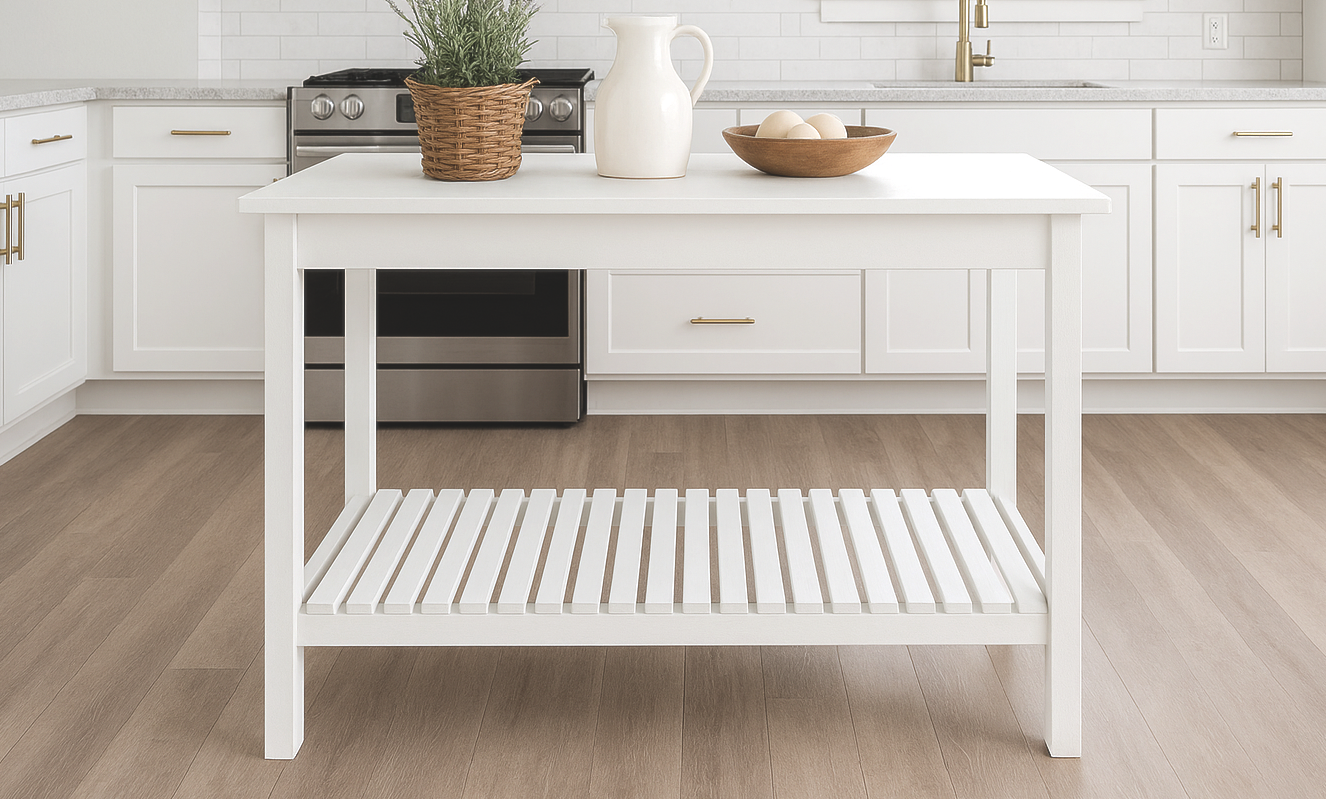
Looking for a super-simple kitchen island project, that's also affordable? For about $25, you can build this easy island inspired from the Clara's Table plans. Preferably you'd use a Kreg jig to hide the holes, but if you intend to paint it, then you should have no problem building it the easy way and just filling in your holes. Keep your costs down by choosing furring strips for your 1x2's and buying the cheap whitewood boards.
Specifications
| Project type | Other Projects |
|---|---|
| Room | kitchen |
| Style | Cottage Style Furniture Plans |
| Difficulty | Beginner Projects |
| Estimated cost | $20 - $50 |
Dimensions
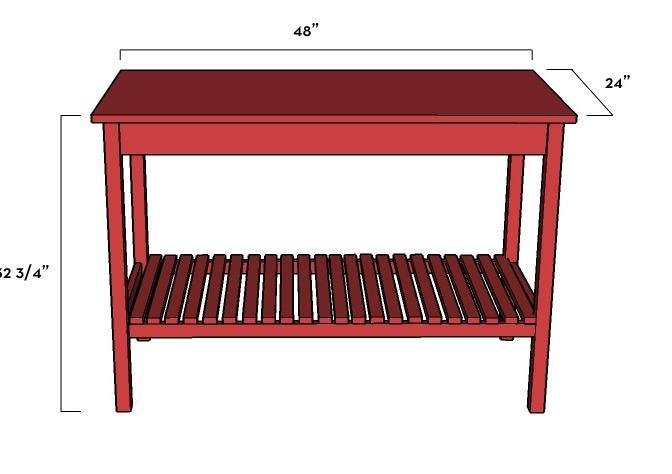
Use the size-specific shopping and cut lists below.
Shopping List
- 1 - 2'x4' project panel
- 2 - 2 x 2 x 8' boards
- 2 - 1 x 4 x 8' boards
- 7 - 1 x 2 x 8' boards
Cut List
- Project board for top does not need to be cut.
- 4 - 2 x 2 @ 32" (legs)
- 2 - 1 x 4 @ 19" (end aprons)
- 2 - 1 x 4 @ 43" (side aprons)
- 2 - 1 x 2 @ 19" (bottom end shelf supports)
- 2 - 1 x 2 @ 43" (bottom side shelf supports)
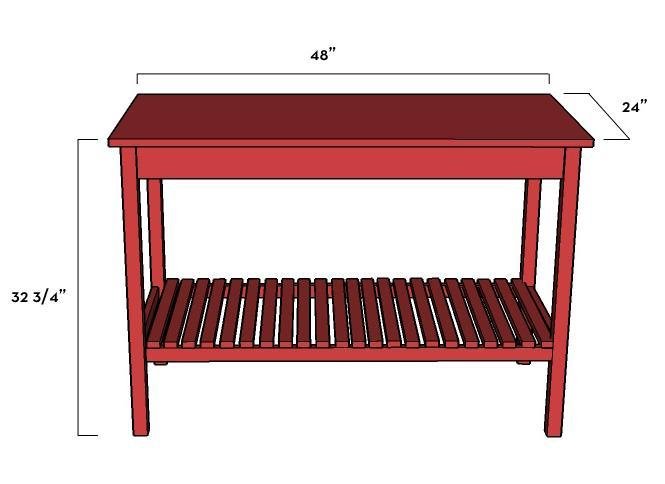
- 22 - 1 x 2 @ 21.5" (bottom shelf slats)
Tools
- measuring tape
- square
- pencil
- hammer
- safety glasses
- kreg-jig
- drill
- compound miter saw
- sander
- level
- countersink drill bit
Step-by-step Instructions
Step 1
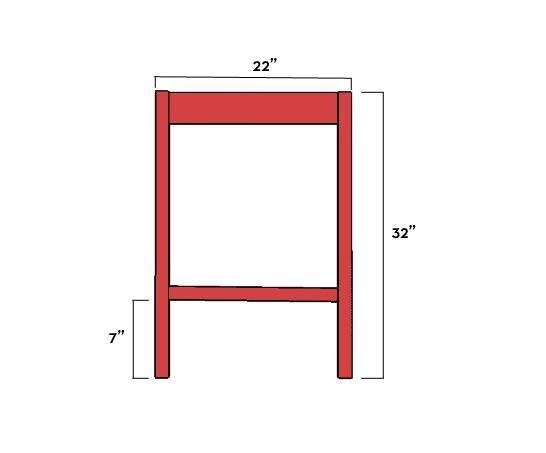
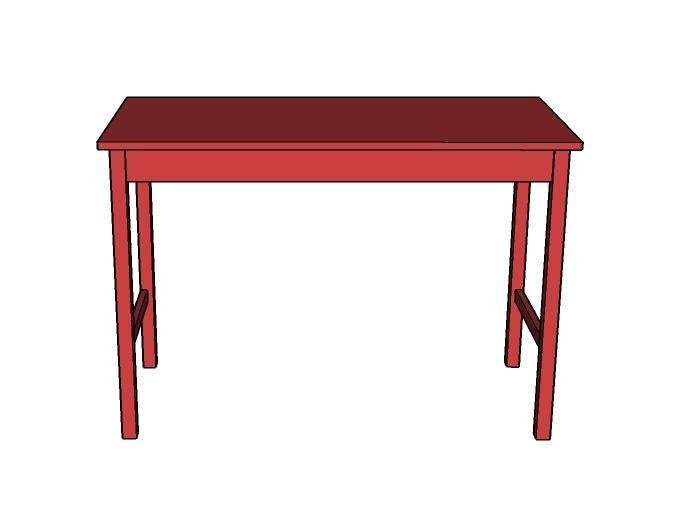
If using a Kreg Jig™, pre-drill your holes (2 on each end of the back side of the 1x4, 1 on each end of the back of the 1x2, 1 in the top interior of the 2x2) Build your two ends by attaching the legs to your aprons. You can adjust the height of the bottom shelf to your own specifications. I chose 7" from the bottom to line up the bottom of my 1x2 apron.
Step 2
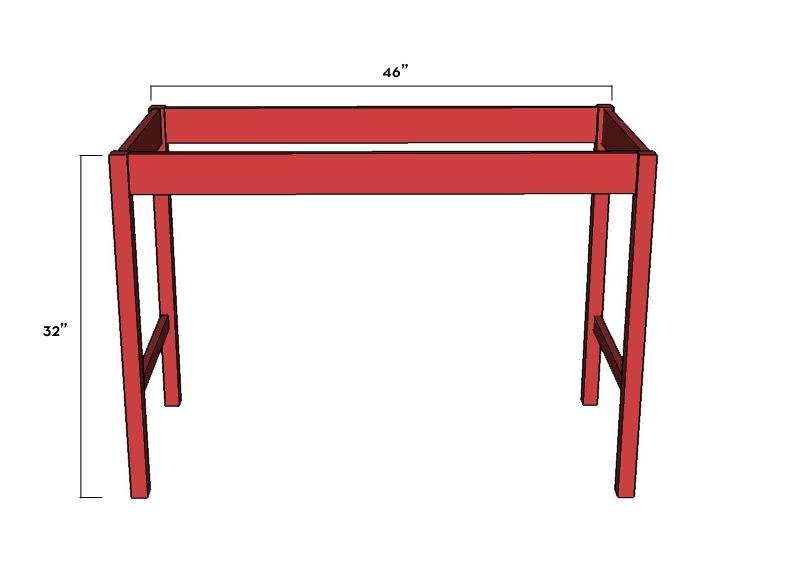
If using the Kreg Jig™, pre-drill your holes in the side aprons (two on each end of the interior side) Connect your end pieces with the two side aprons.
Step 3
Attach your top. If using the Kreg, lay the the project panel topside-down on the ground, then flip your frame-base upside down onto it, centering it onto the panel (about 1.5" in on all sides). Secure with pocket-hole screws. If using the traditional method, place the panel on top of your frame, centering it (about 1.5" in from each end). Countersink your screws into the 2x2 legs. Use glue on the top of the frame for added security. If you'd like to secure it even more, measure where your aprons are located and hammer in a few finishing nails to keep it in place while the glue dries.
Step 4
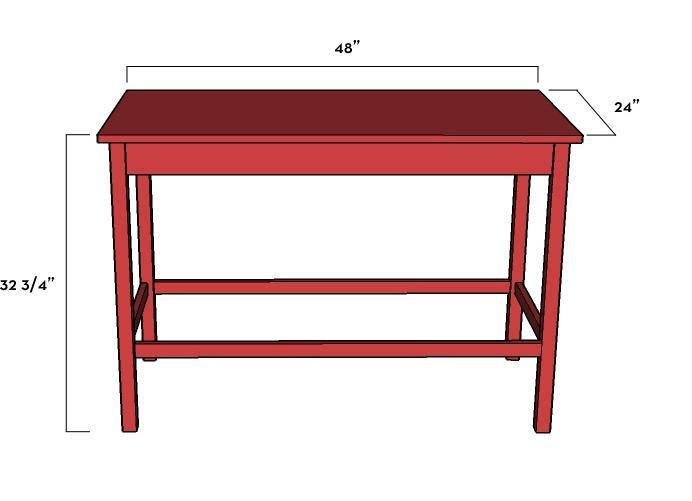
Attach the lower side shelf supports so they are flush with the end shelf supports. Mine are 7" up from the bottom.
Step 5
Finishing
Sand all surfaces, starting with a medium grit and finishing with fine. Wipe off the dust, fill any holes or gaps with wood filler, and sand smooth once dry. Apply primer if you're painting, then finish with your choice of paint or stain and seal with a durable clear topcoat. For outdoor projects, use exterior-rated primer, paint or stain, and sealer so the piece stands up to the weather.
Source (temporary): https://www.ana-white.com/woodworking-projects/simple-kitchen-island