Simple Modern Doll House
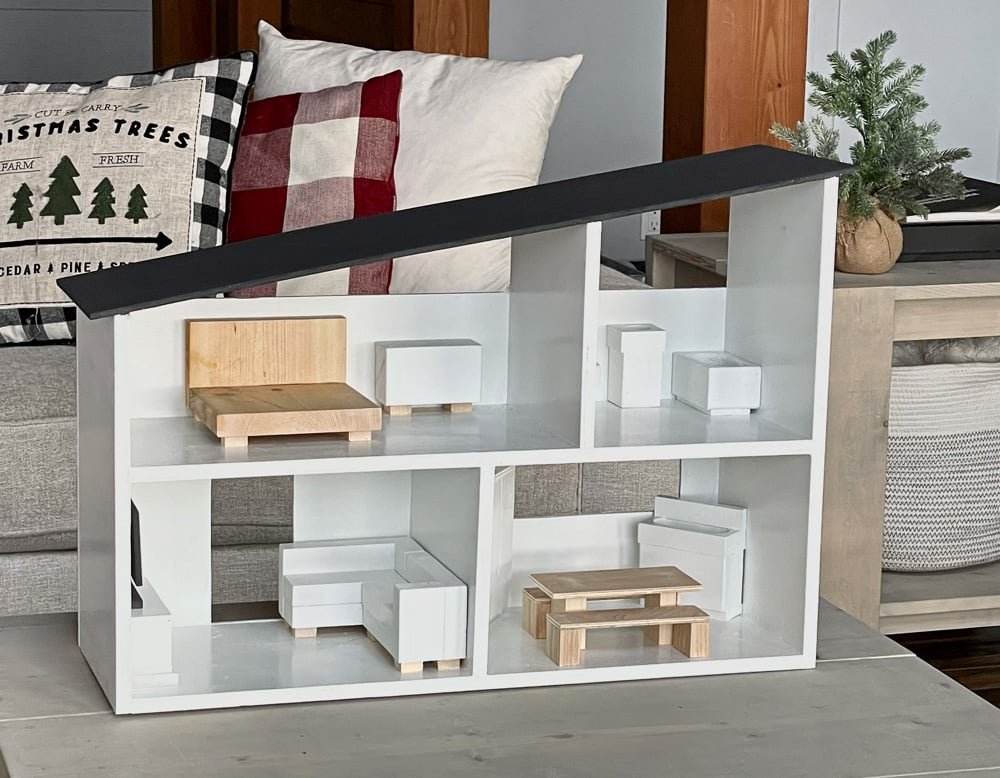
Build your own modern dollhouse from Cost was about $30 for materials. It's a joy to build and a joy to give!
Specifications
| Project type | Toys |
|---|---|
| Room | Kids and Toys |
| Difficulty | Intermediate |
| Estimated cost | $20 - $50 |
Dimensions
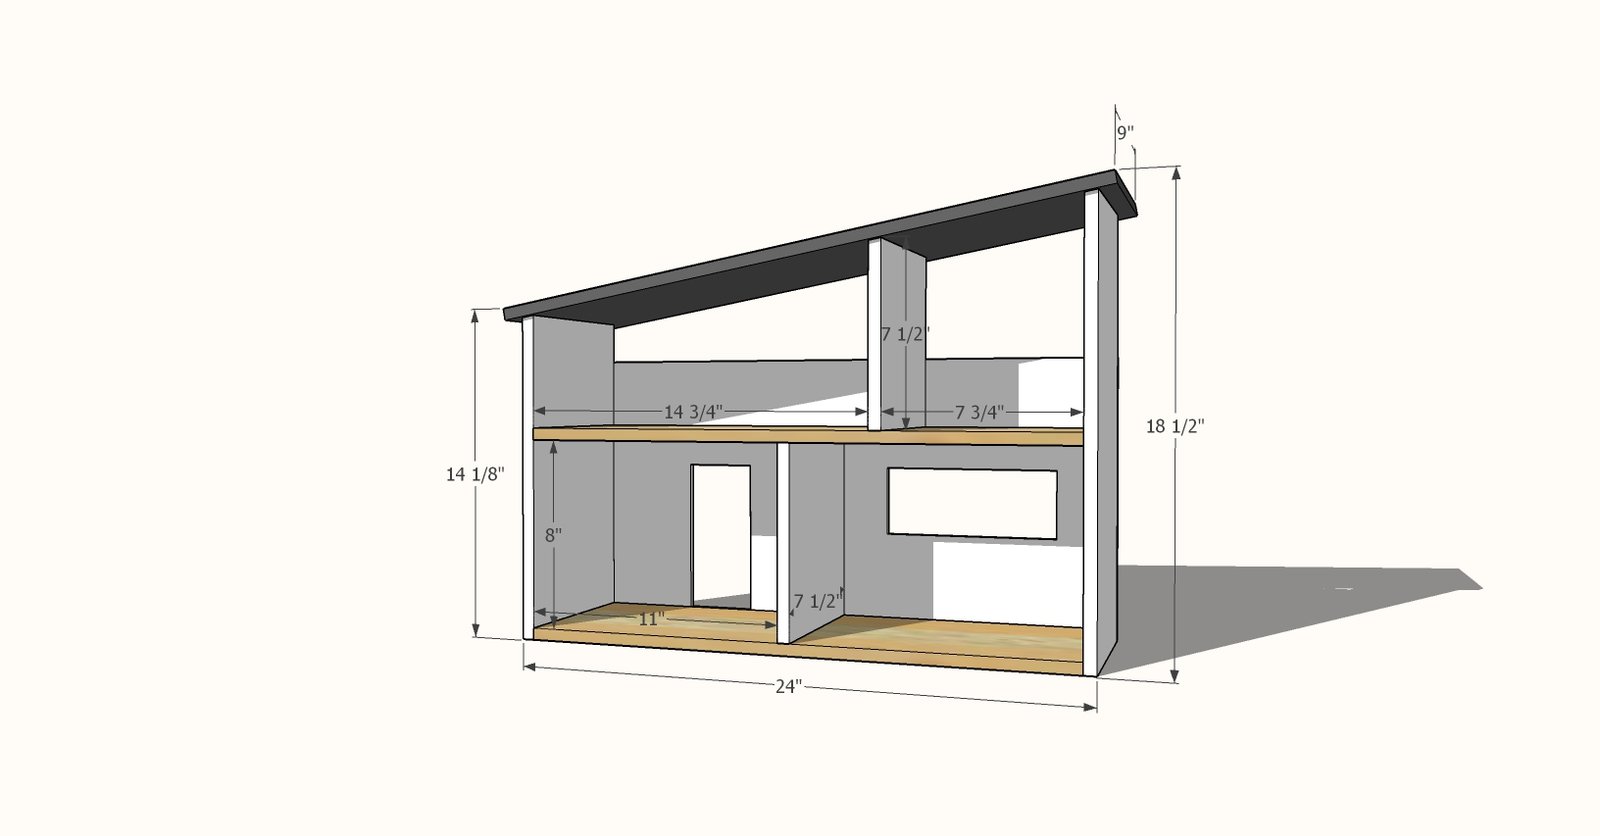
Use the size-specific shopping and cut lists below.
Shopping List
1 - 1/2" plywood panel, 2 feet x 4 feet in dimension
1 - 1/4" plywood panel, 1 foot x 2 feet in dimension
1-1/4" and 5/8" brad nails
Tools
- measuring tape
- square
- pencil
- safety glasses
- drill
- circular saw
- jigsaw
- compound miter saw
- nailer
- sander
Step-by-step Instructions
Step 1
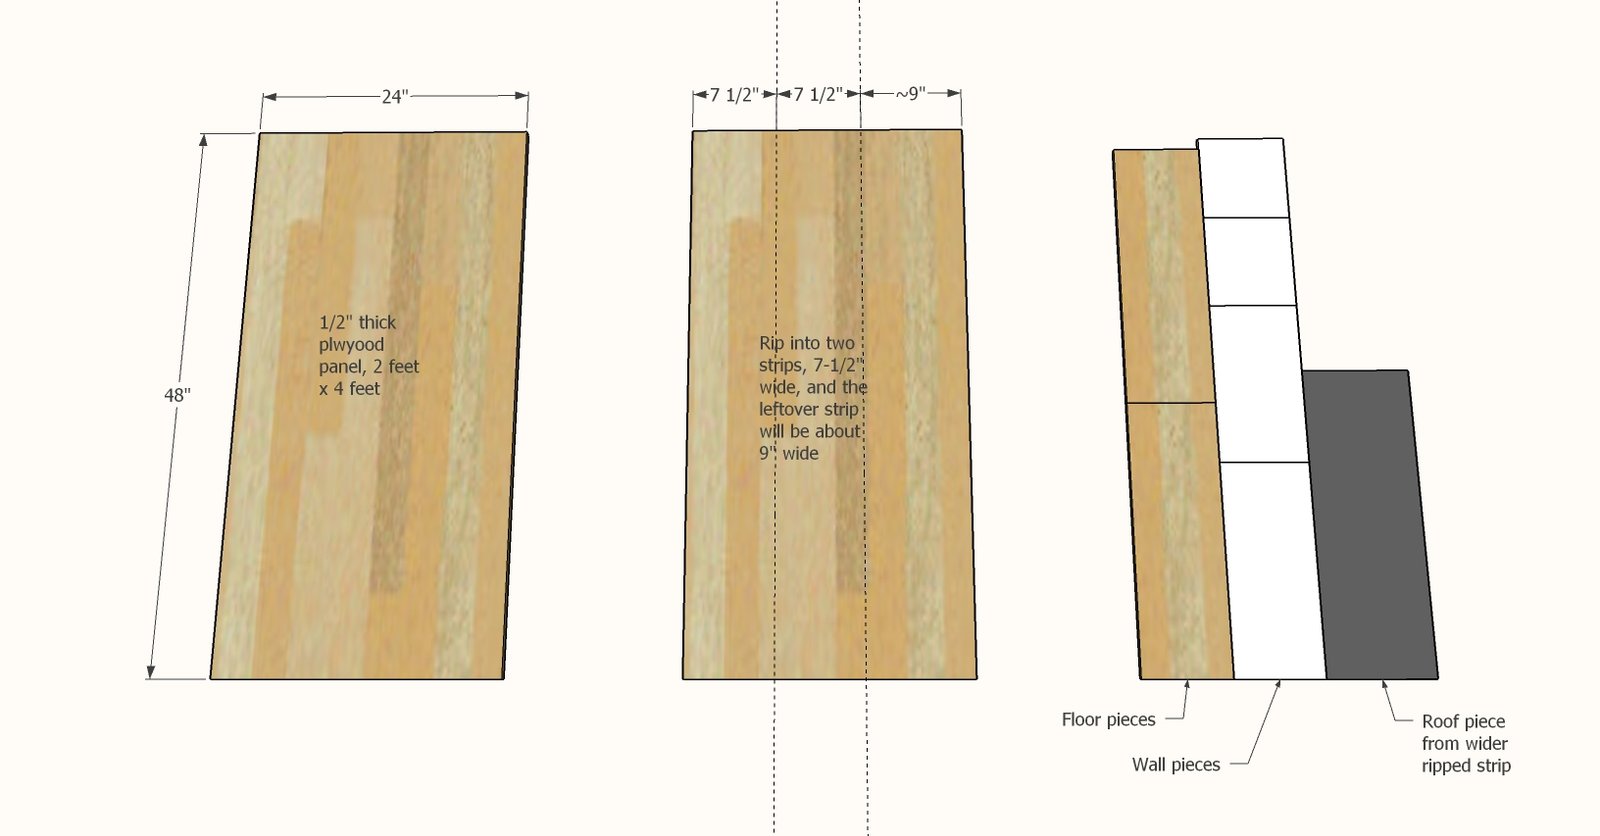
From the 1/2" piece of plywood measuring 2 feet x 4 feet, rip into two strips that are each 7-1/2" wide x 48" long. Save the remaining strips (about 9" wide) for the roof panel. Rip using either a table saw, a circular saw with a straight edge, or have your home improvement store make the cuts for you. Then cut from those pieces the following: From the 7-1/2" wide rips: • 2 @ 23" - floors • 1 @ 8" - bottom floor interior wall • 1 @ 13-3/4" - top end cut at 10 degrees off square, long point measurement (short outside wall) • 1 @ 18" - top end cut at 10 degrees off square, long point measurement (long outside wall) • 1 @ 7-1/2" - top end cut at 10 degrees off square, long point measurement (upper floor interior wall) From the 9" wide strip • 1 @ 25-3/4" - roof For the back • 1/4" plywood @ 12" x 24" (may not need to cut at all)
Step 2
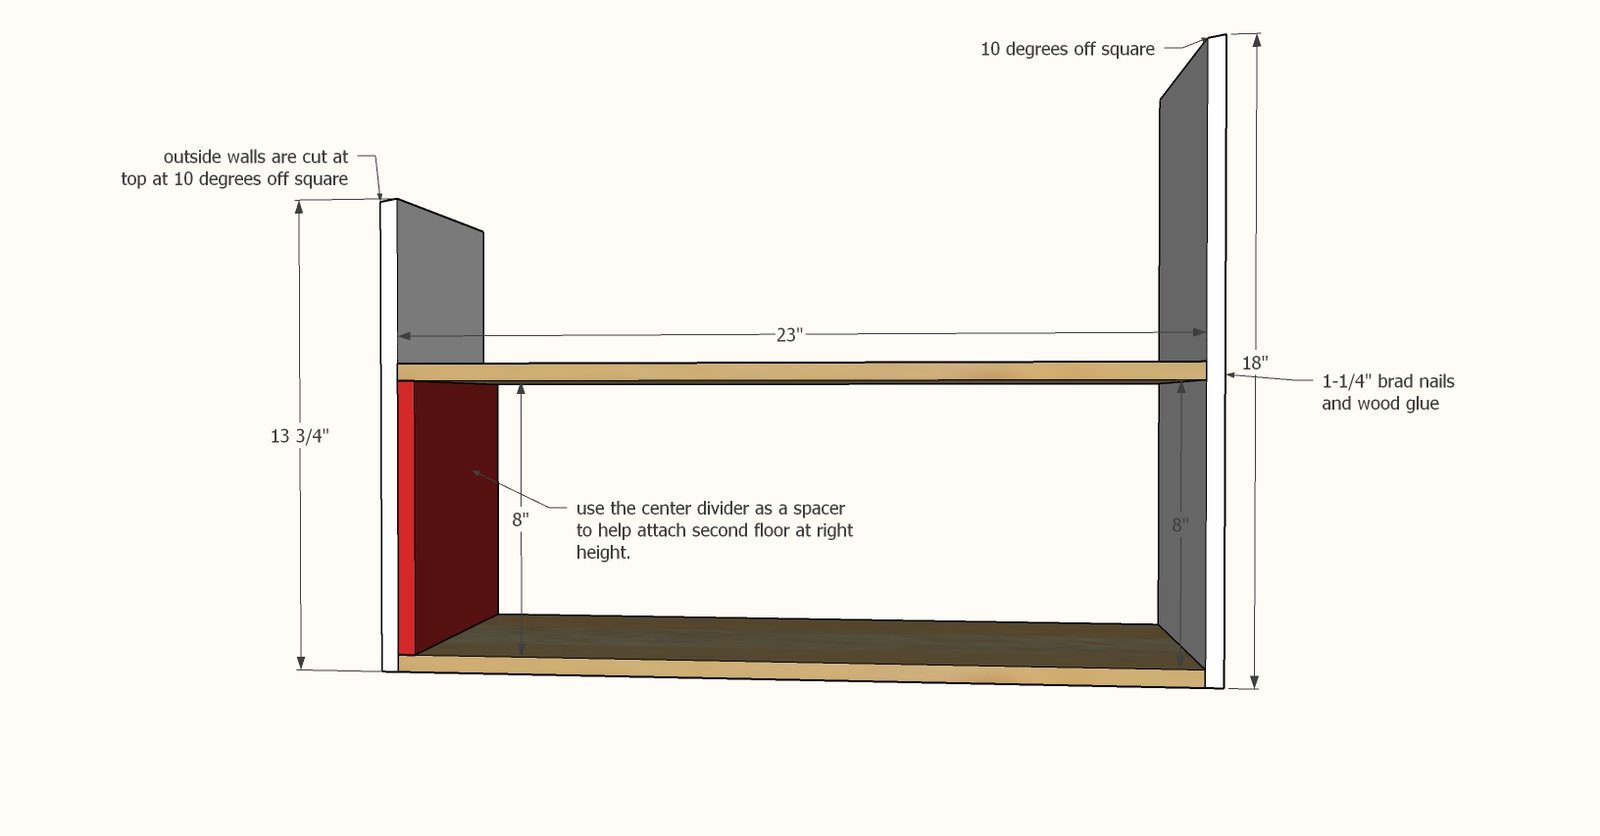
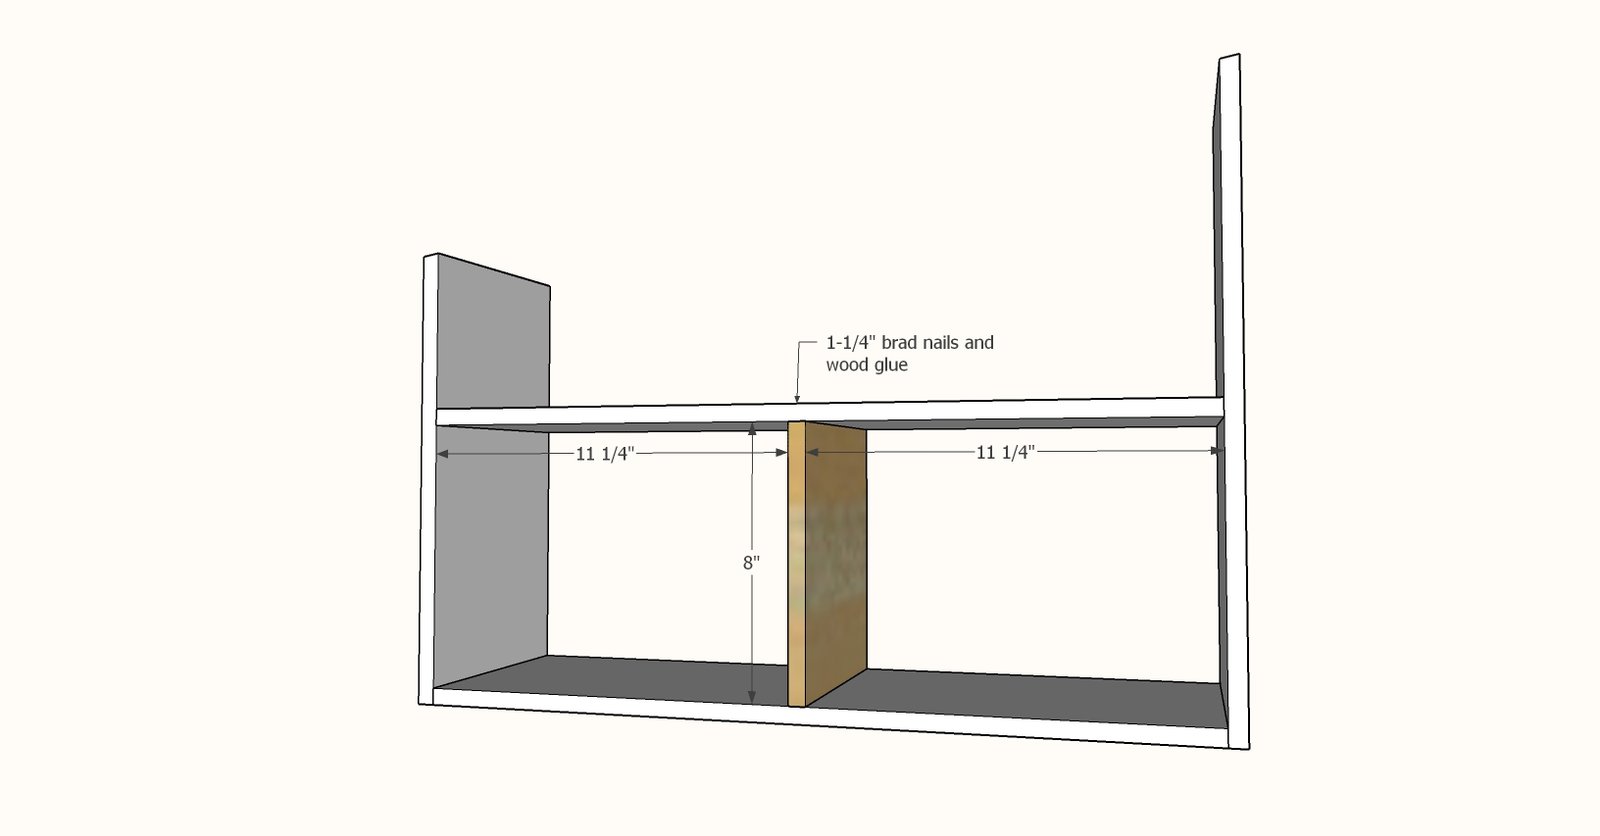
Attach the bottom floor to the side walls, making sure the side walls are orientated correctly, so the top angles angle in the same direction. Use 1-1/4" brad nails and wood glue. Then set the bottom floor interior wall (shown in red in the diagram) inside the dollhouse and place the middle floor on top. Attach with 1-1/4" brad nails. Repeat for the second side of the middle floor.
Step 3
Attach bottom floor interior wall centered on the two floors with 1-1/4" brad nails and wood glue.
Step 4
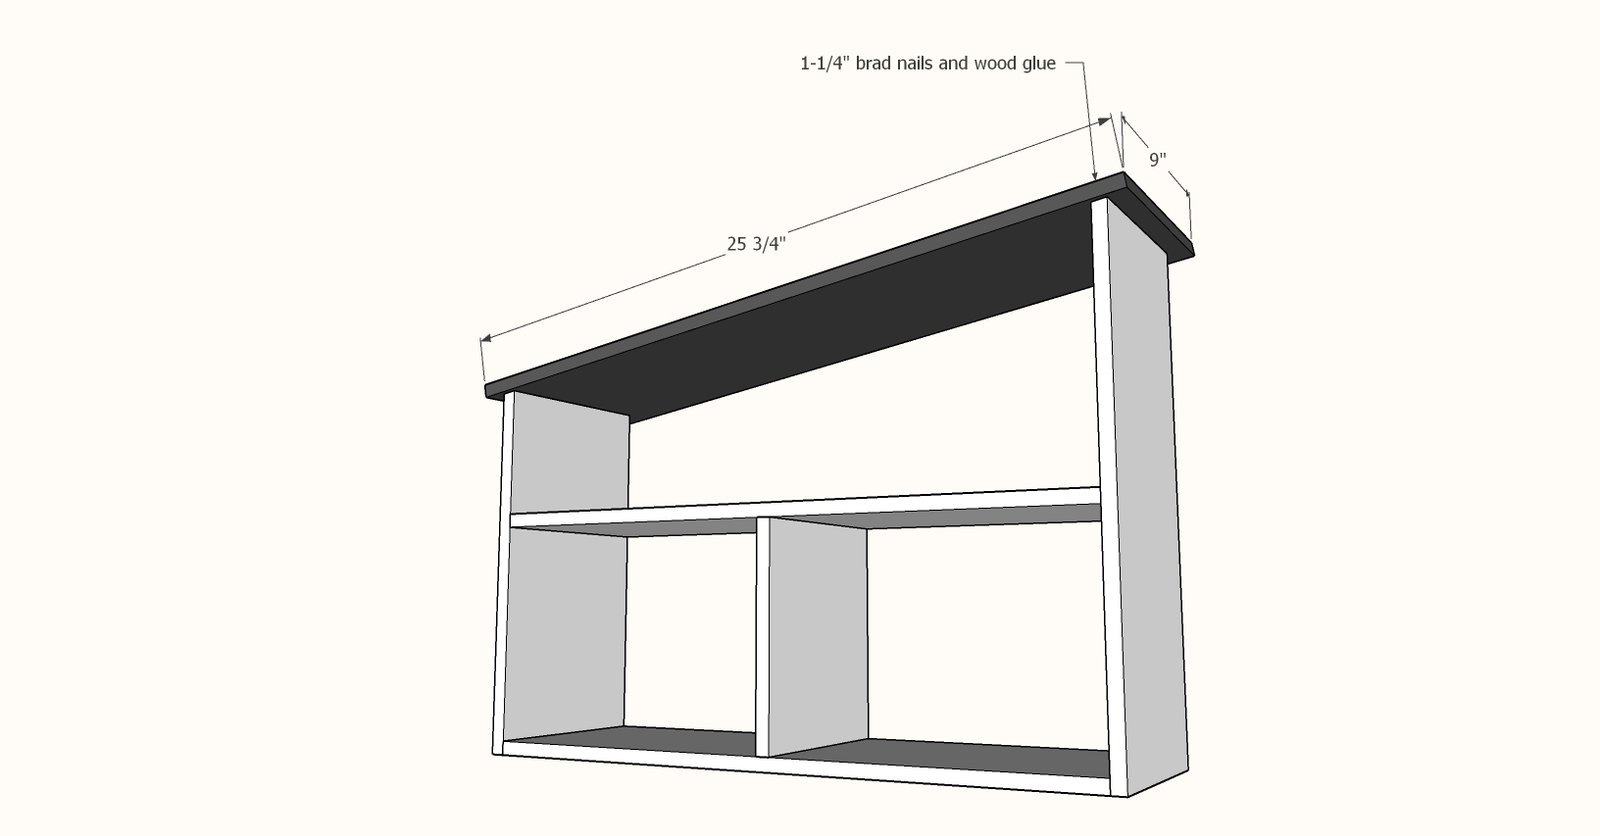
Center the roof on the exterior walls and attach with 1-1/4" brad nails and wood glue.
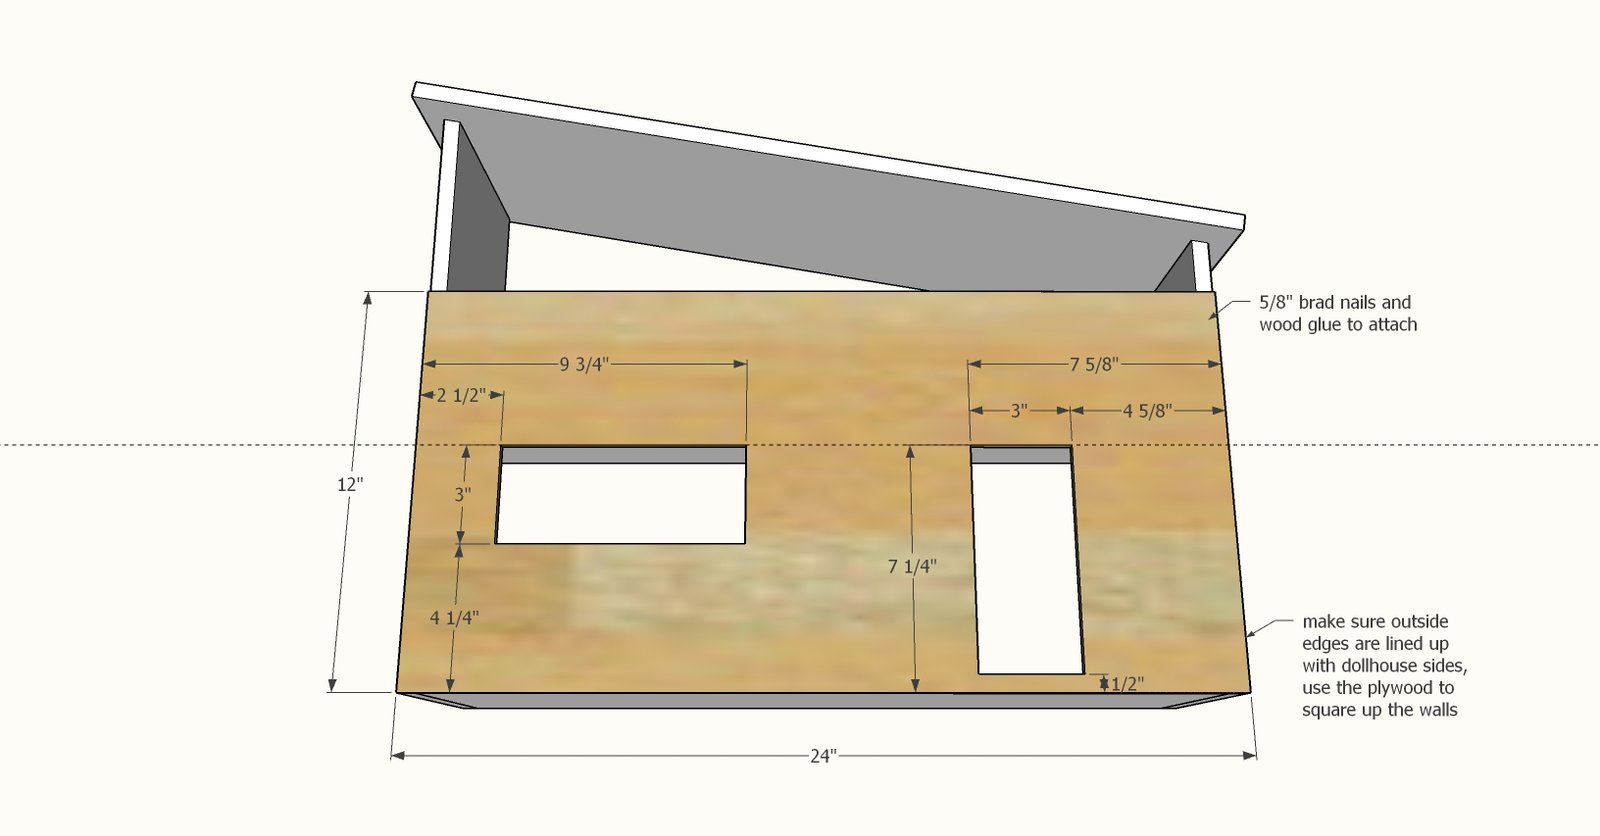
Switch nails to 5/8" nails.
Apply glue to the back edges and place the 1/4" plywood on top. Force the dollhouse walls square to the 1/4" plywood panel and nail on. Cut holes out with a jigsaw. You'll need to use a drill and drill bit to start the jigsaw in the centers of the windows/doors. I used a Kreg Jig bit.
Step 6
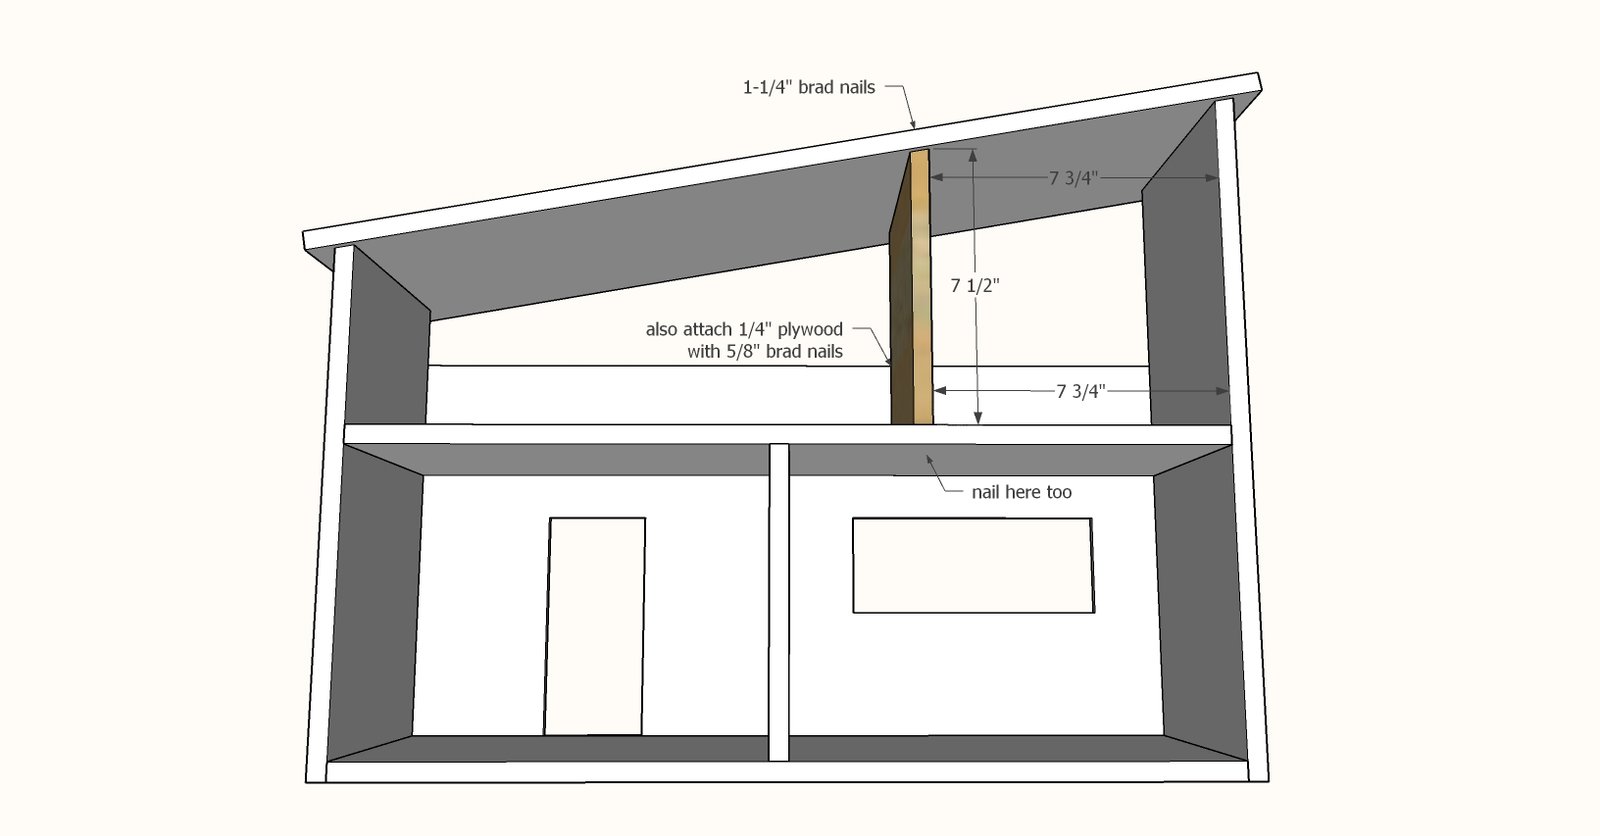
Place the upstairs interior wall and nail and glue in place.
Finishing
Sand all surfaces, starting with a medium grit and finishing with fine. Wipe off the dust, fill any holes or gaps with wood filler, and sand smooth once dry. Apply primer if you're painting, then finish with your choice of paint or stain and seal with a durable clear topcoat. For outdoor projects, use exterior-rated primer, paint or stain, and sealer so the piece stands up to the weather.
Source (temporary): https://www.ana-white.com/woodworking-projects/simple-modern-doll-house