Simple Modern Toy Box with Lid
Build your own toy box with one of ’s most-loved and most-built woodworking plans! This simple, modern toy box design features clean lines, a smooth-closing lid, and a safety cutout to help prevent pinched fingers. Perfect for beginners, this project includes a detailed shopping list, cut list, and step-by-step instructions —plus lots of real build photos from readers who’ve had success. Whether you're organizing toys or looking for a practical storage solution, this DIY toy box is a proven winner in homes and playrooms everywhere.
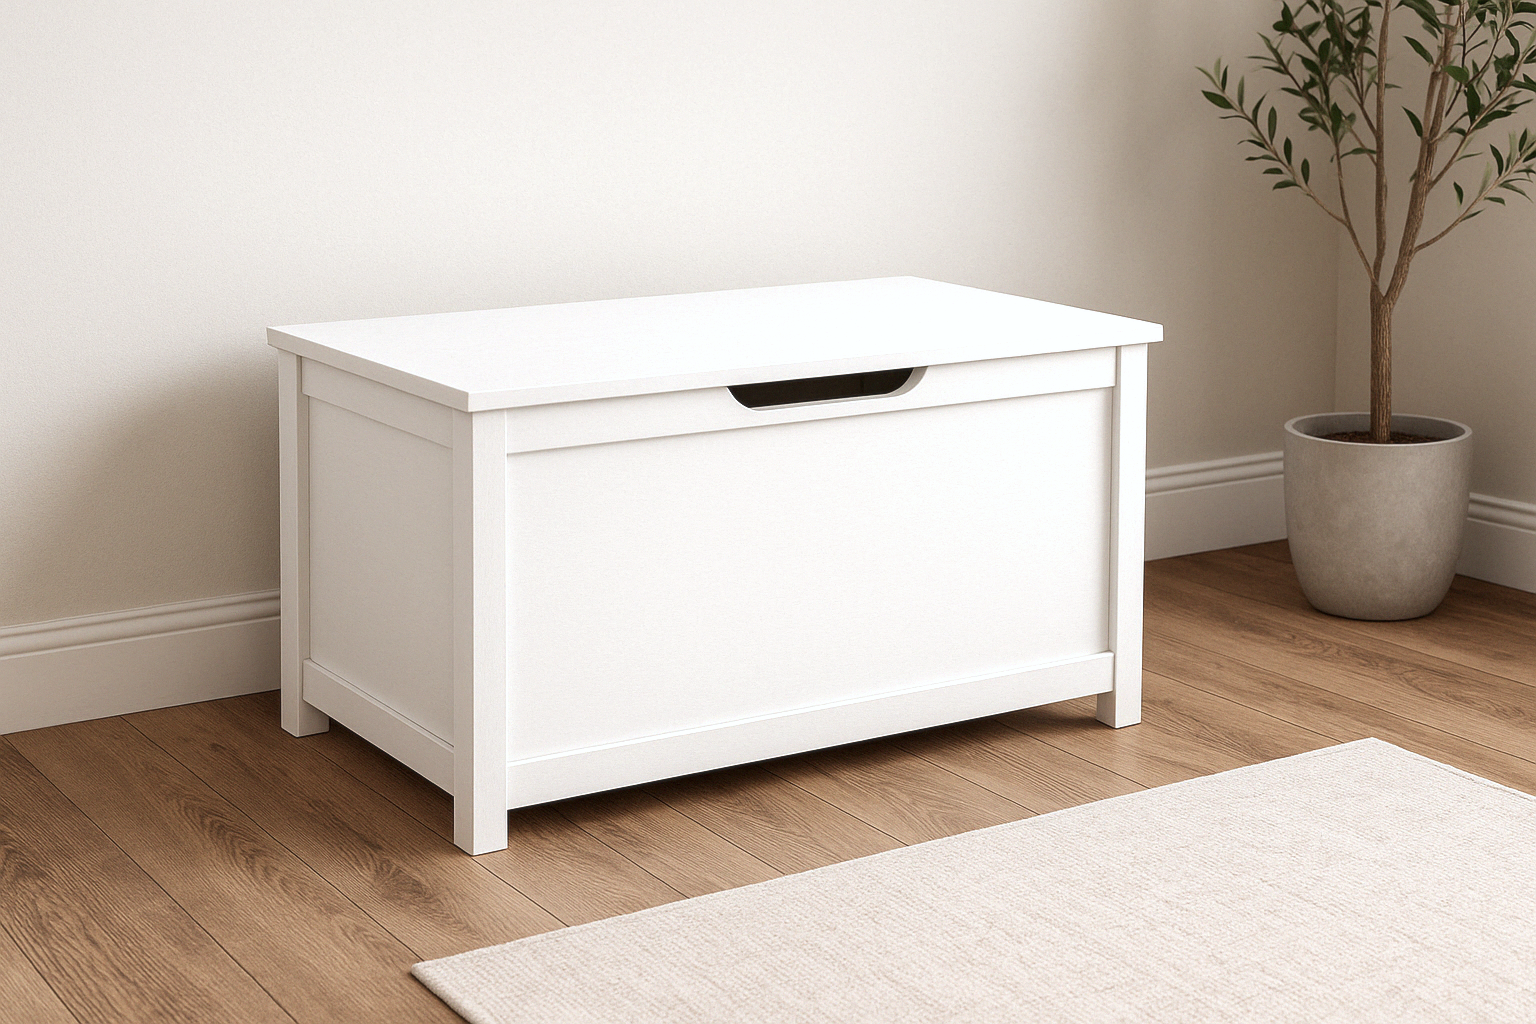
Specifications
| Project type | Toy box Plans |
|---|---|
| Room | Kids and Toys |
| Style | Children's and Kid's Room Furniture and Toy Plans |
| Difficulty | Intermediate |
Dimensions
Use the size-specific shopping and cut lists below.
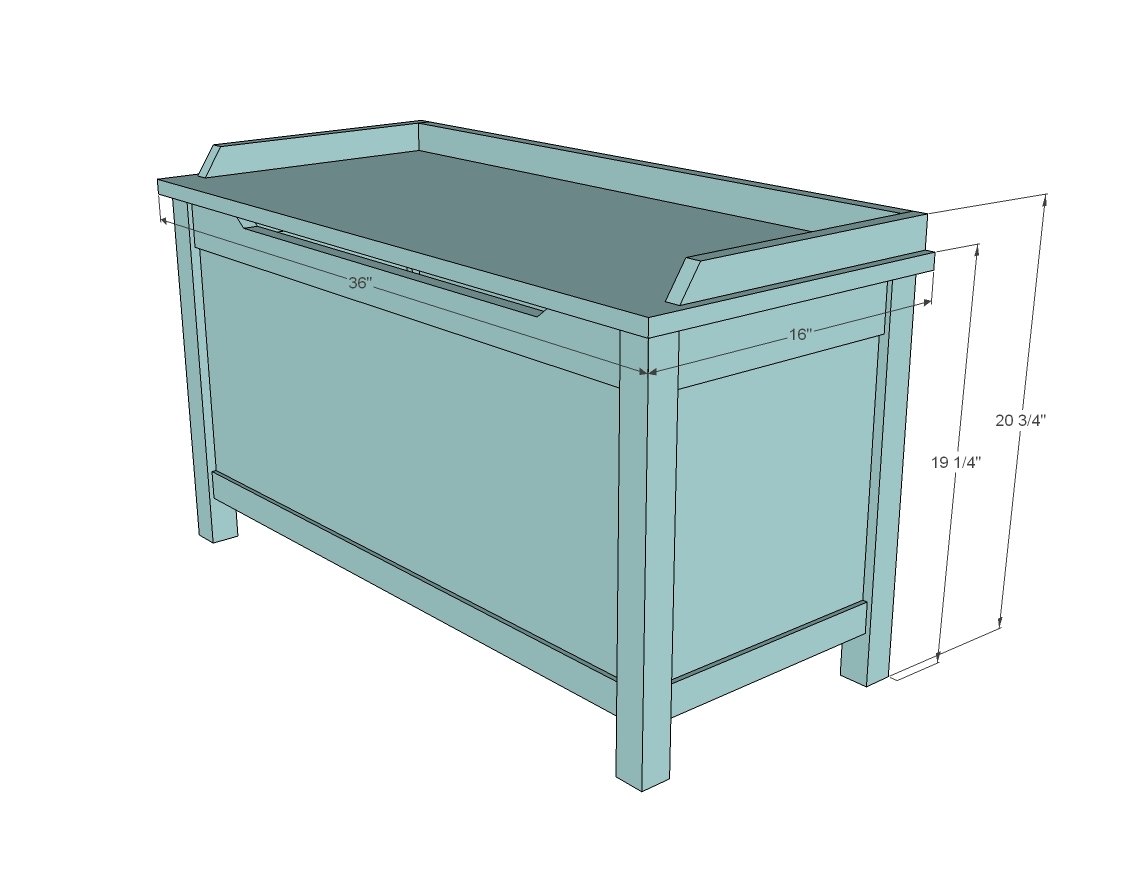
Shopping List
- 1 - 4x4 foot sheet of 1/2” thick hardwood plywood
- 1 - 3/4” thick project panel 36” x 16”
- 2 - 1x3 @ 8 feet long
- 1 - 1x2 @ 8 feet long (need 1 more for optional top)
- 1 - 2x2 @ 8 feet long
- 1” and 1 1/4” pocket hole screws
- Hinges and felt pads, possibly a hinge support to keep the lid from slamming shut or falling backwards
Cut List
- 2 - 1/2” plywood 12” x 12”
- 2 - 1x3 @ 12”
- 2 - 1x2 @ 12”
- 2 - 1/2” plywood @ 12” x 32”
- 2 - 1x3 @ 32”
- 2 - 1x2 @ 32”
- 4 - 2x2 @ 18 1/2”
- 3 - 1x3 @ 13”
- 1/2” plywood 33” x 13”
- 1 - 3/4” thick project panel 36” x 16”
Optional top
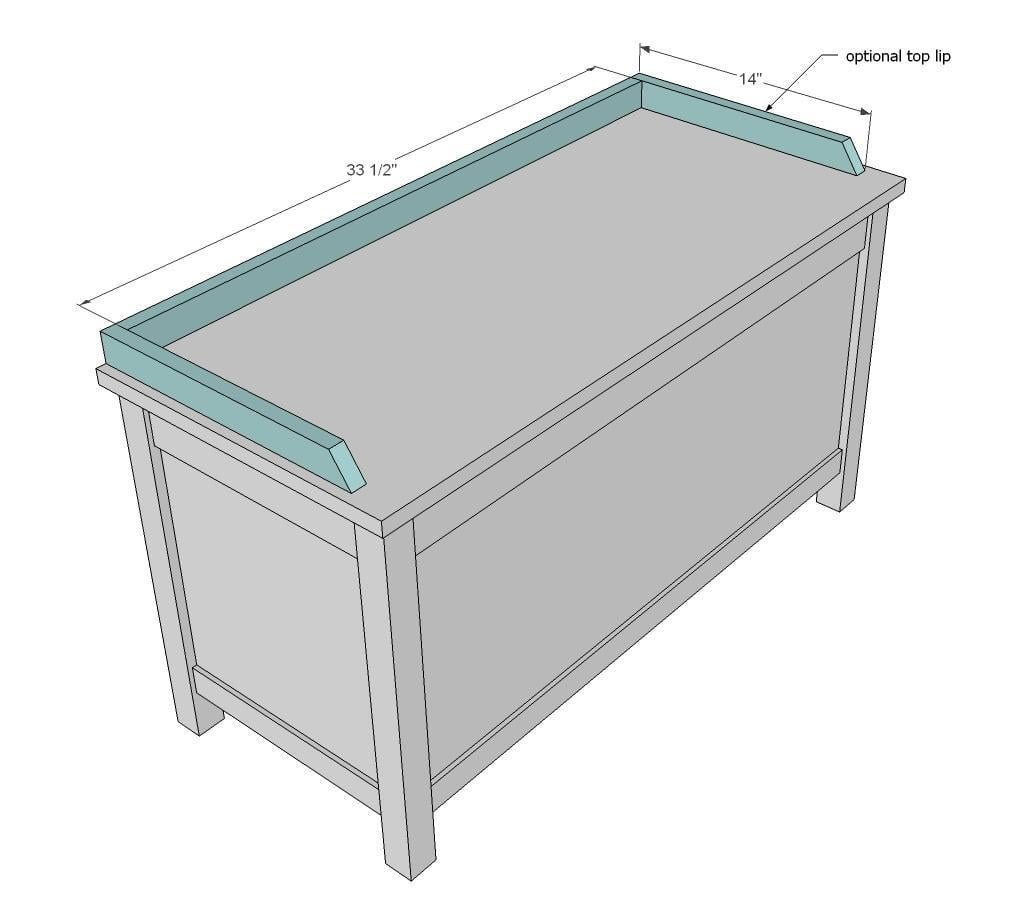
- 1 - 1x2 @ 33 1/2”
- 2 - 1x2 @ 14”
Tools
- measuring tape
- square
- pencil
- safety glasses
- hearing protection
- kreg-jig
- drill
- circular saw
- jigsaw
- sander
Step-by-step Instructions
Step 1
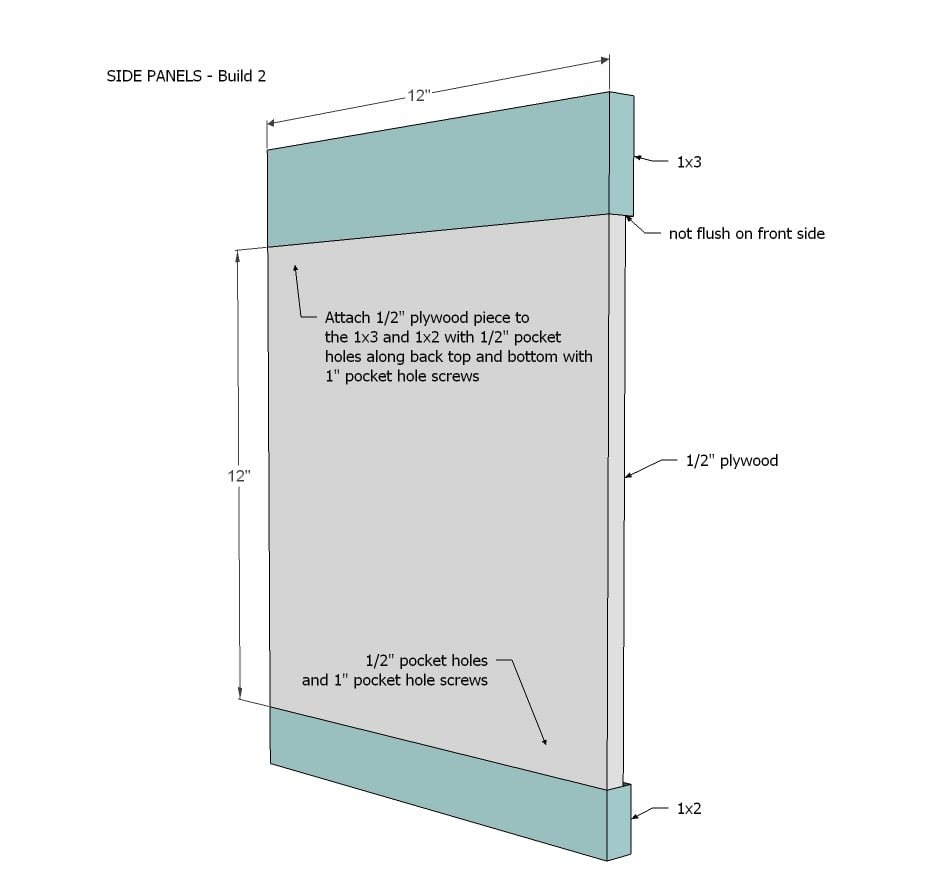
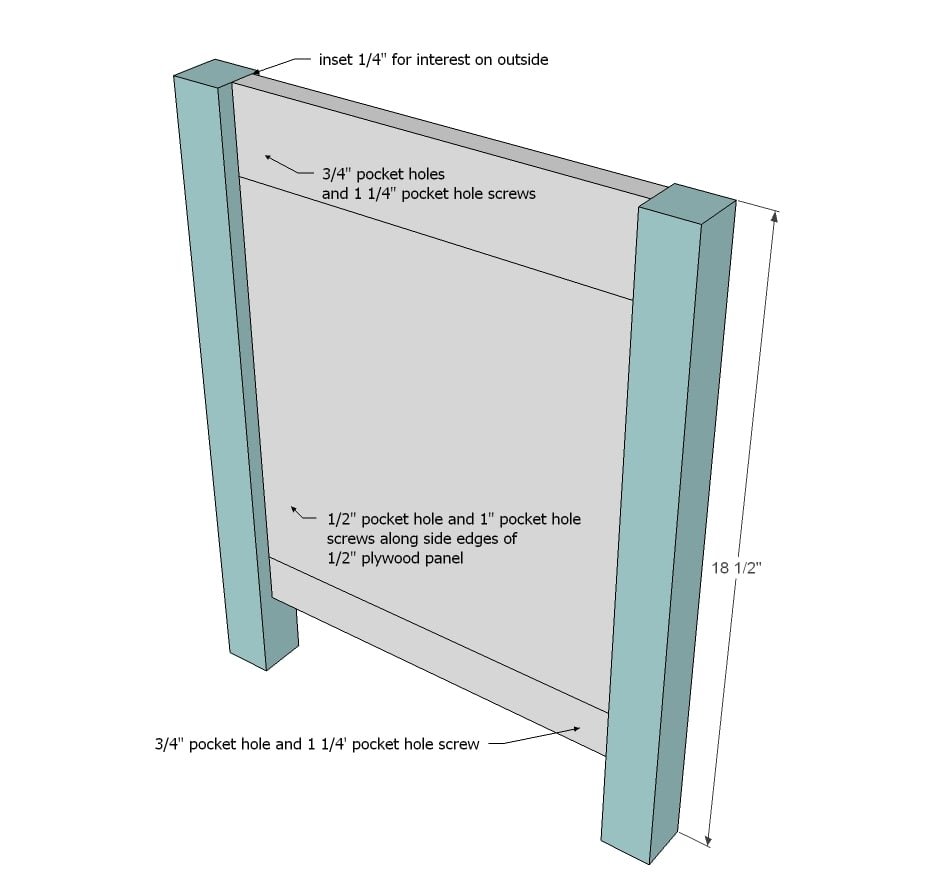
TIP: Drill all 1/2” pocket holes first (basically, just drill 1/2” pocket holes around all sides of 1/2” plywood pieces) and then drill the 3/4” pocket holes so you don’t have to reset your jig multiple times. I designed this toy box a little different - more like how I build doors - to conserve space inside, and keep it light, and also because 1/2" plywood (used for the panels) is so much easier to work with than 3/4". This means you'll need to use 1/2" pocket holes for attaching the 1/2" plywood (with 1" pocket hole screws), and then 3/4" pocket holes for attaching the 1x boards (1 1/4" pocket hole screws). This type of construction requires very straight plywood cuts. Make sure you use a straight edge to guide your cuts or a Rip Cut is what I use. It's a miracle tool. Start by building your side panels. Make sure the side panel edges are flush and the two panels match. If not, you may need to trim the whole side panel edge down.
Step 2
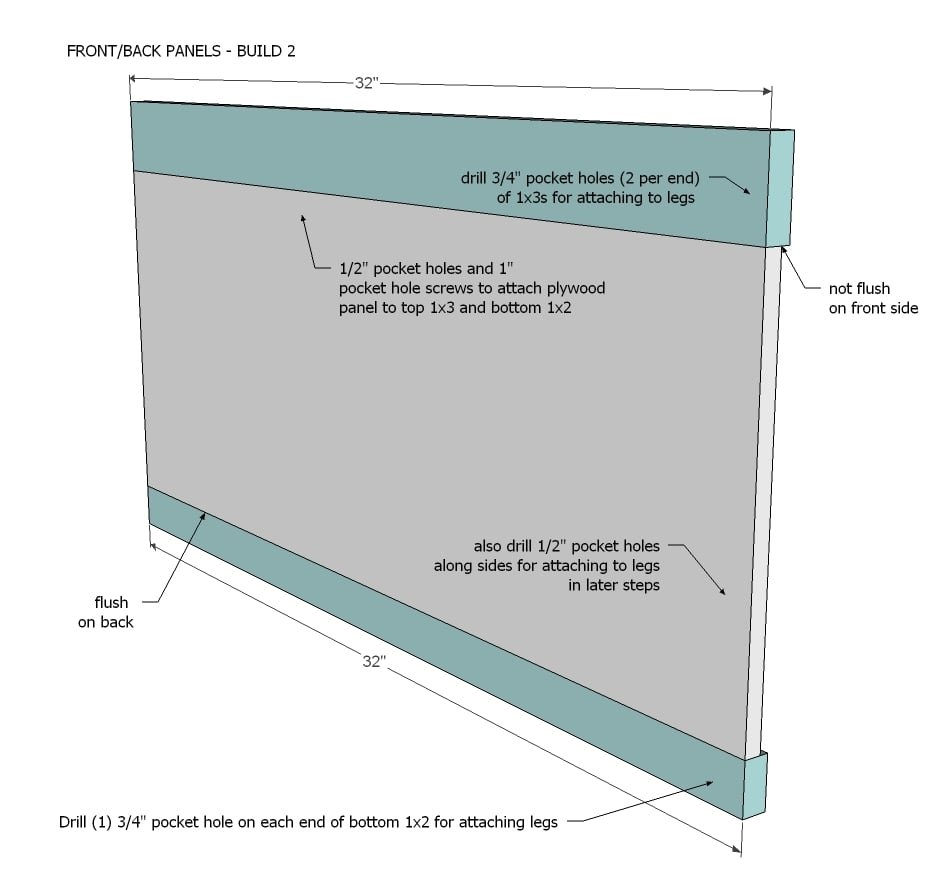
Then build the two front and back panels.
Attach side panels to legs.
TIP: Fill any pocket holes that you can now instead of later when it's tough to reach inside.
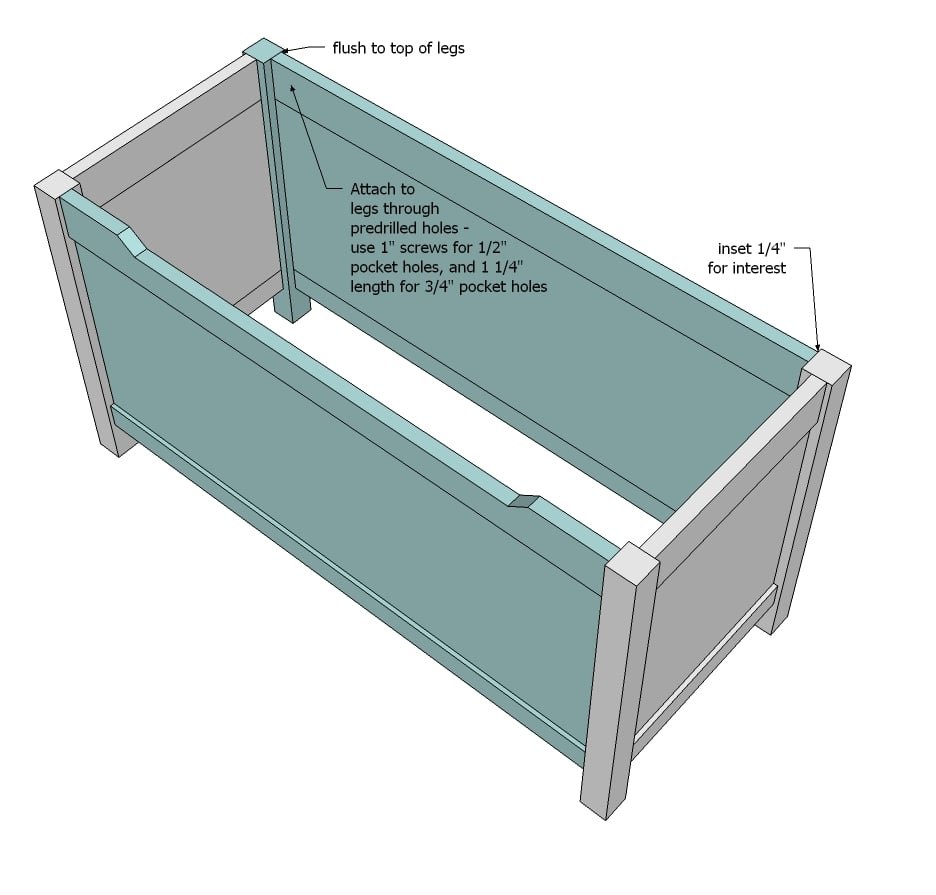
Step 4
And then the front and back panels to the side panels.
Step 5
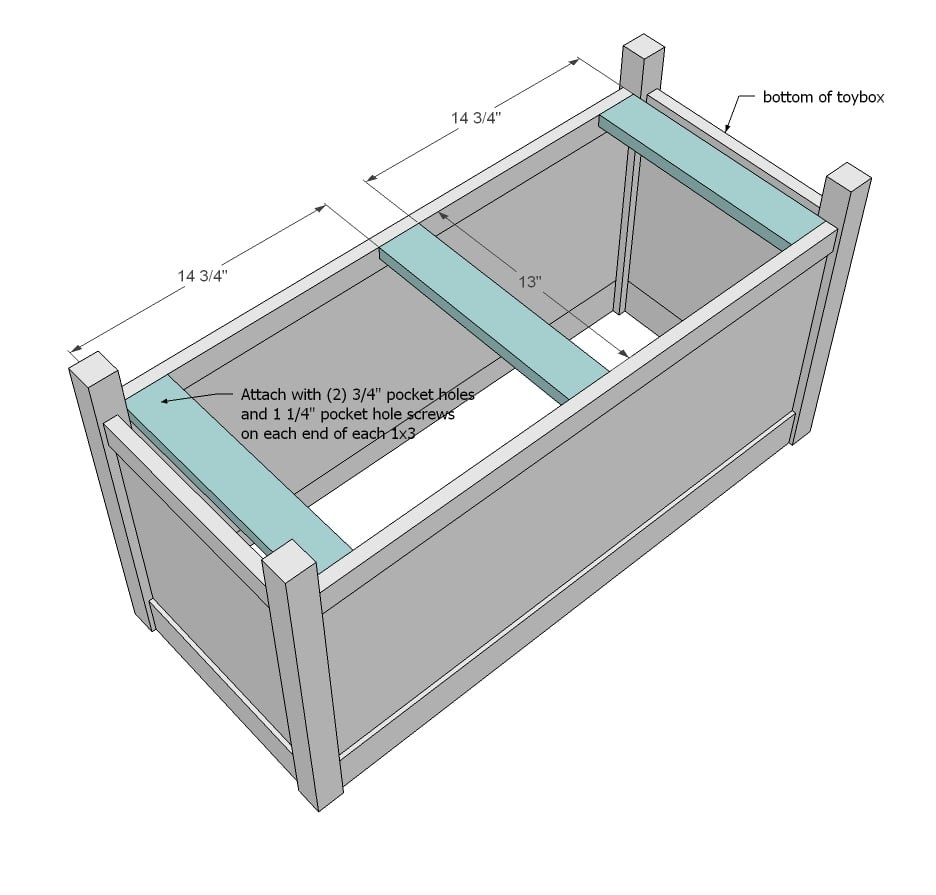
Step 6
Then the bottom can rest inside. For even more support and to help square things up, I recommend attaching the plywood to the sides with 1/2" pocket holes and 1" pocket hole screws.
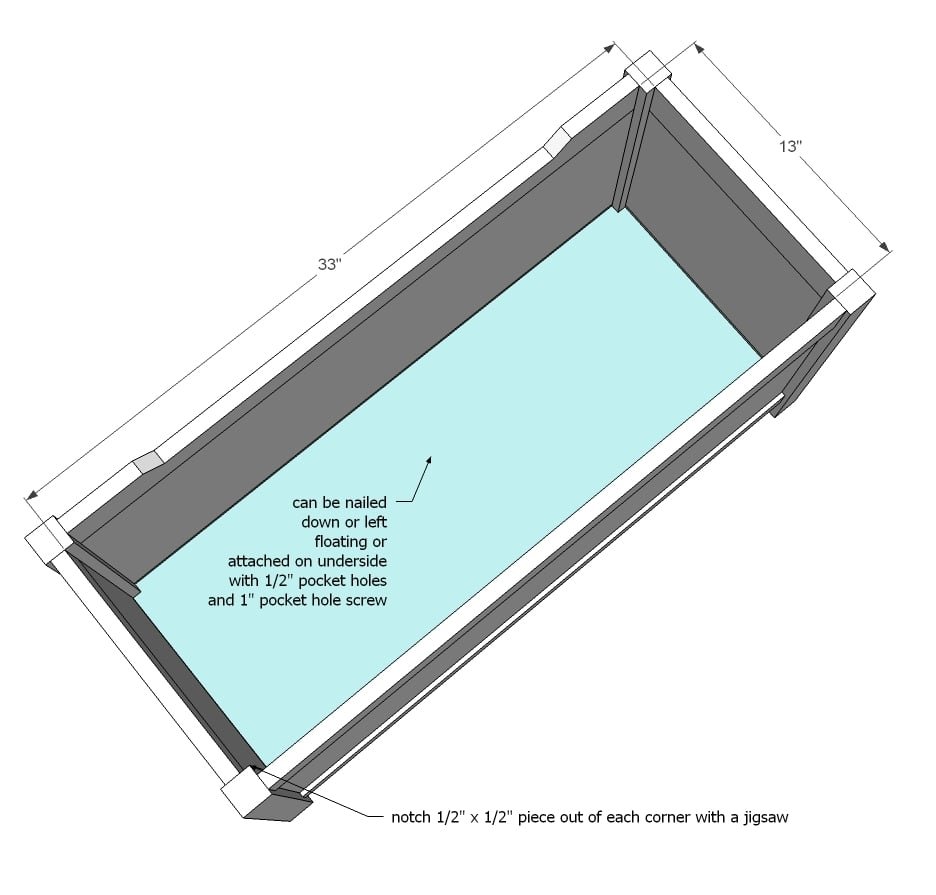
Step 7
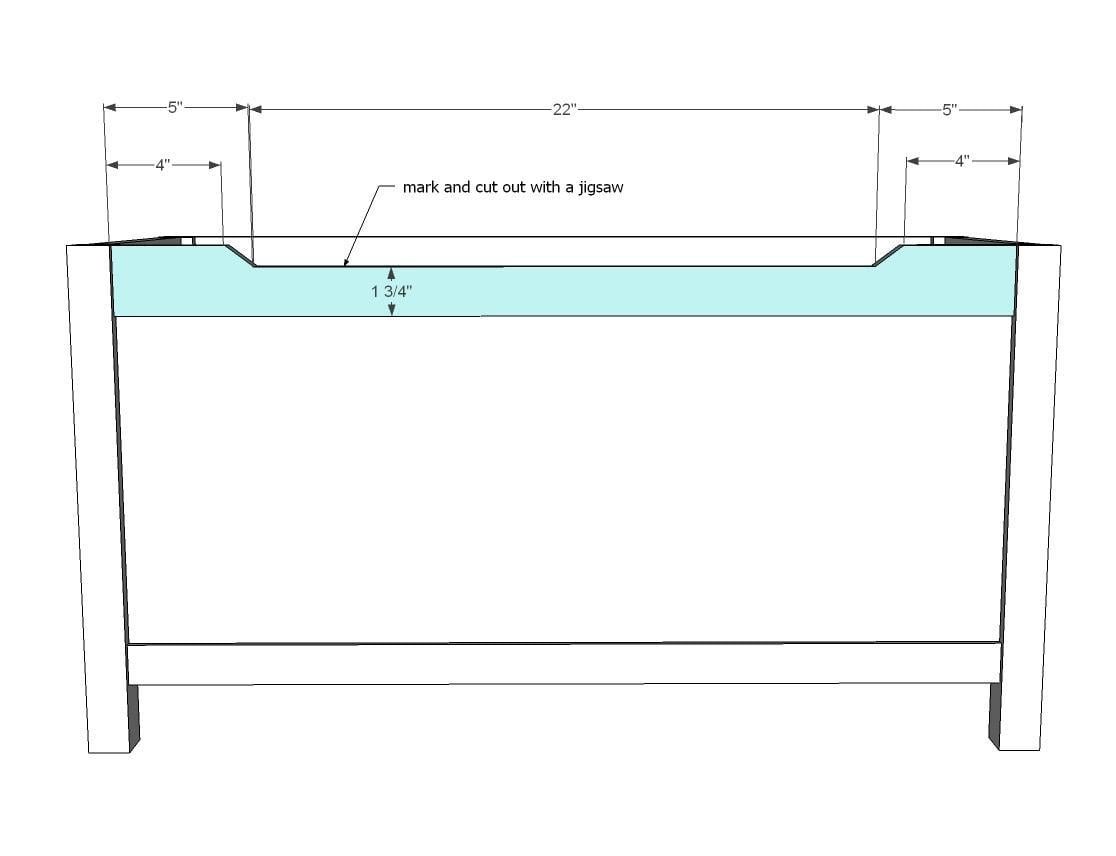
Now cut the front edge out with a jigsaw. Sand the cut edge until smooth.
Step 8
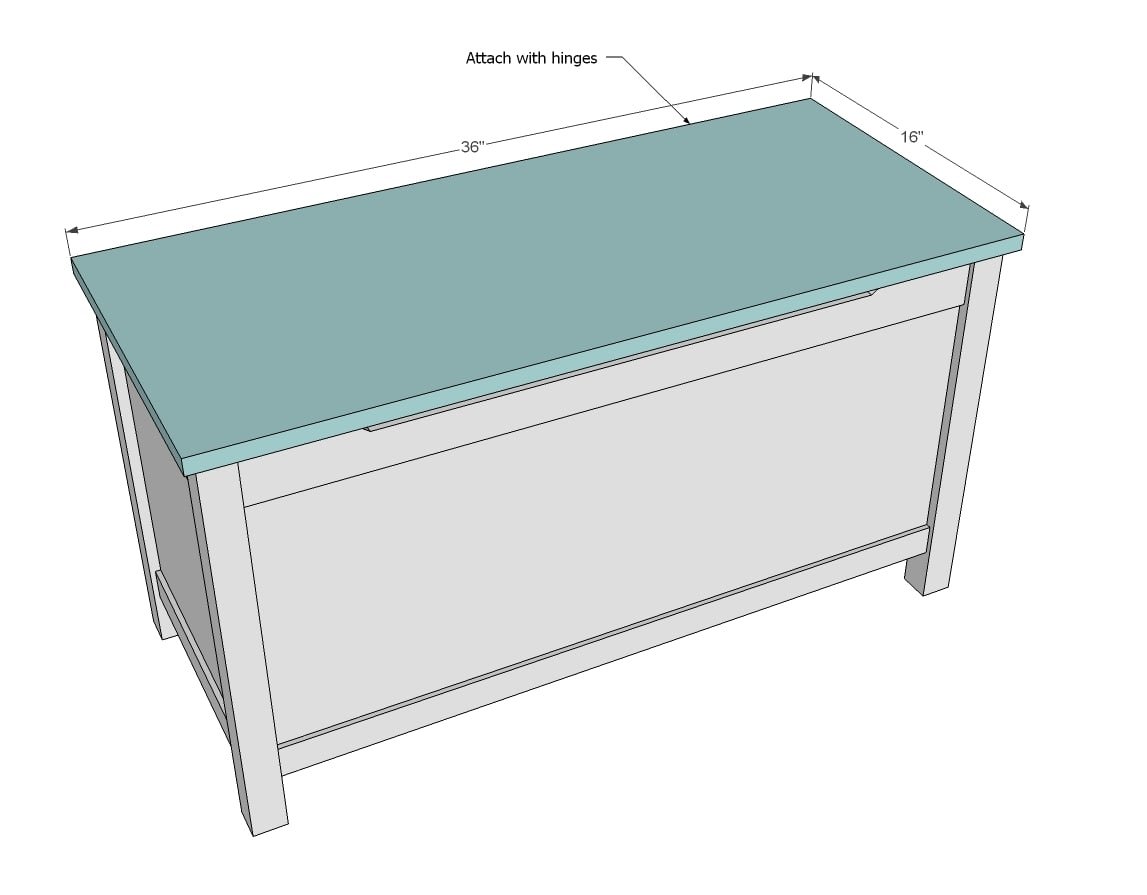
Attach top - Jaime has more details on what type of hardware she used here. Remember, you'll want to take steps to prevent little fingers from getting pinched from the toy box top.
Step 9
If you want to add a top lip, you can do that too - for example, to place a top cushion on. Here's what I recommend but this is optional of course.
Finishing
Sand all surfaces, starting with a medium grit and finishing with fine. Wipe off the dust, fill any holes or gaps with wood filler, and sand smooth once dry. Apply primer if you're painting, then finish with your choice of paint or stain and seal with a durable clear topcoat. For outdoor projects, use exterior-rated primer, paint or stain, and sealer so the piece stands up to the weather.
Source (temporary): https://www.ana-white.com/woodworking-projects/simple-modern-toy-box-lid