Simple Open Top Wood Toy Box
Build a wood toy box in no time with from Use cedar fence pickets to save money, or use 1x6 boards for a beautiful wood finish. Add casters to roll it away, customize with any paint or stain, add handles - make it your own! This is a with detailed diagrams, shopping and cut lists from
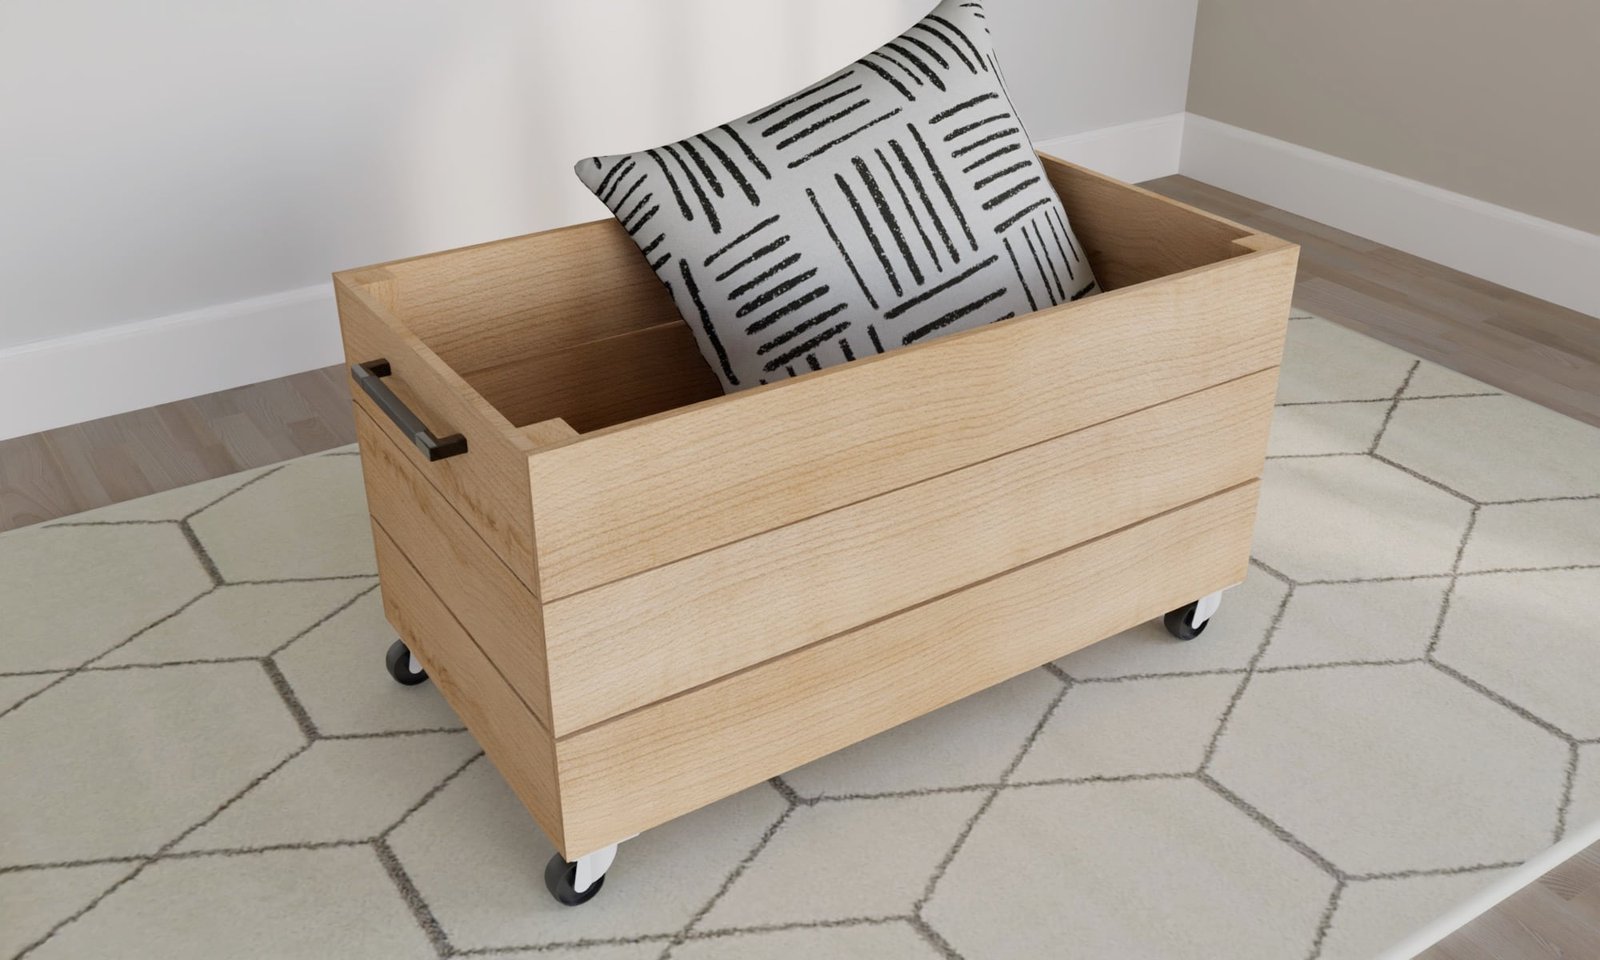
Specifications
| Project type | Toys |
|---|---|
| Room | Bedroom |
| Style | Farmhouse Furniture |
| Difficulty | Starter Projects |
| Estimated cost | Under $20 |
Dimensions
Use the size-specific shopping and cut lists below.
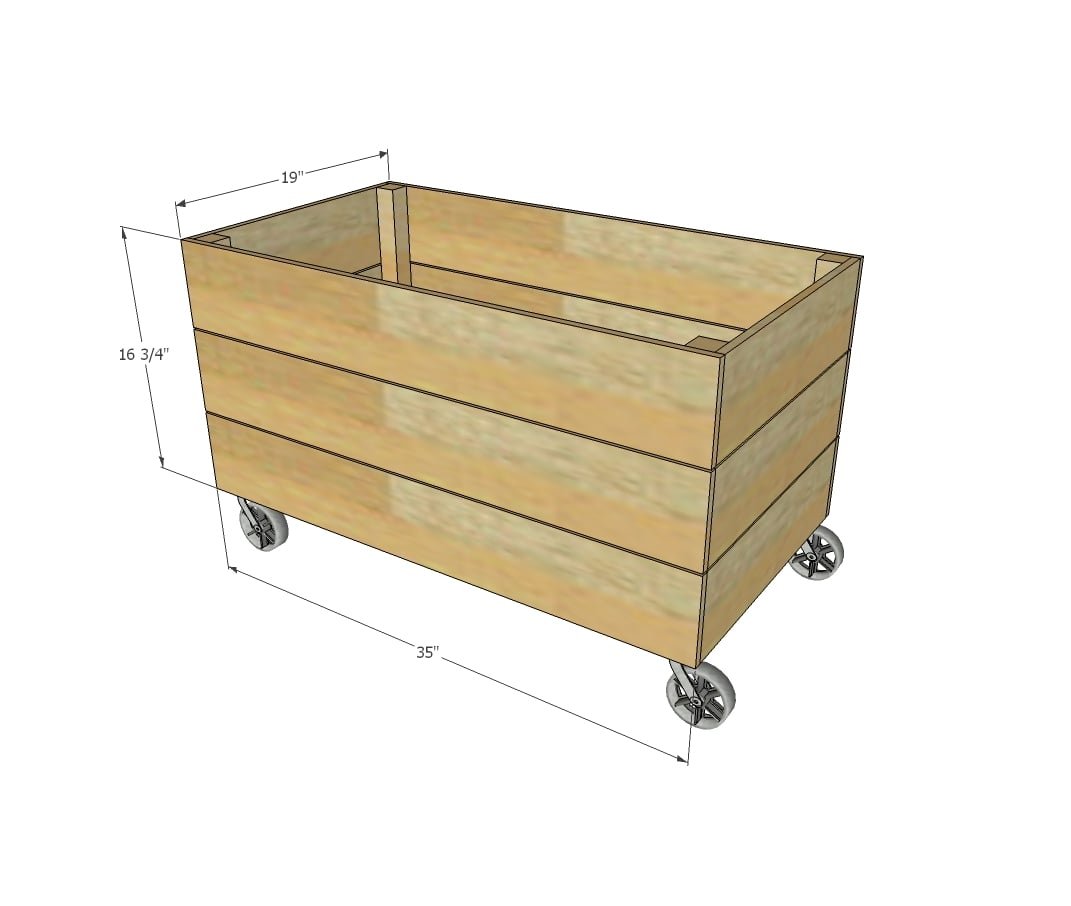
Shopping List
- 1 - 1/2" plywood @ 34" x 18"
- 1 - 2x2 @ 6 feet long
- 5 - cedar fence pickets, not dog eared or 5 - 1x6x8 feet long
- 4 - non marking caster wheels with screws 1/2" long for attaching - make sure the screws have a big enough head for the caster wheels or purchase washers as well
If using the cedar fence pickets, make sure you sand the boards well to avoid any possible splinters. Wear a respirator or mask while sanding the cedar.
Cut List
- 1 - 1/2" plywood @ 34" x 18"
- 4 - 2x2 @ 16-1/4" long
- 6 - cedar fence pickets or 1x6 @ 18"
- 6 - cedar fence pickets or 1x6 @ about 35" - measure and cut to fit
Tools
- measuring tape
- square
- pencil
- safety glasses
- hearing protection
- drill
- circular saw
- sander
Step-by-step Instructions
Step 1
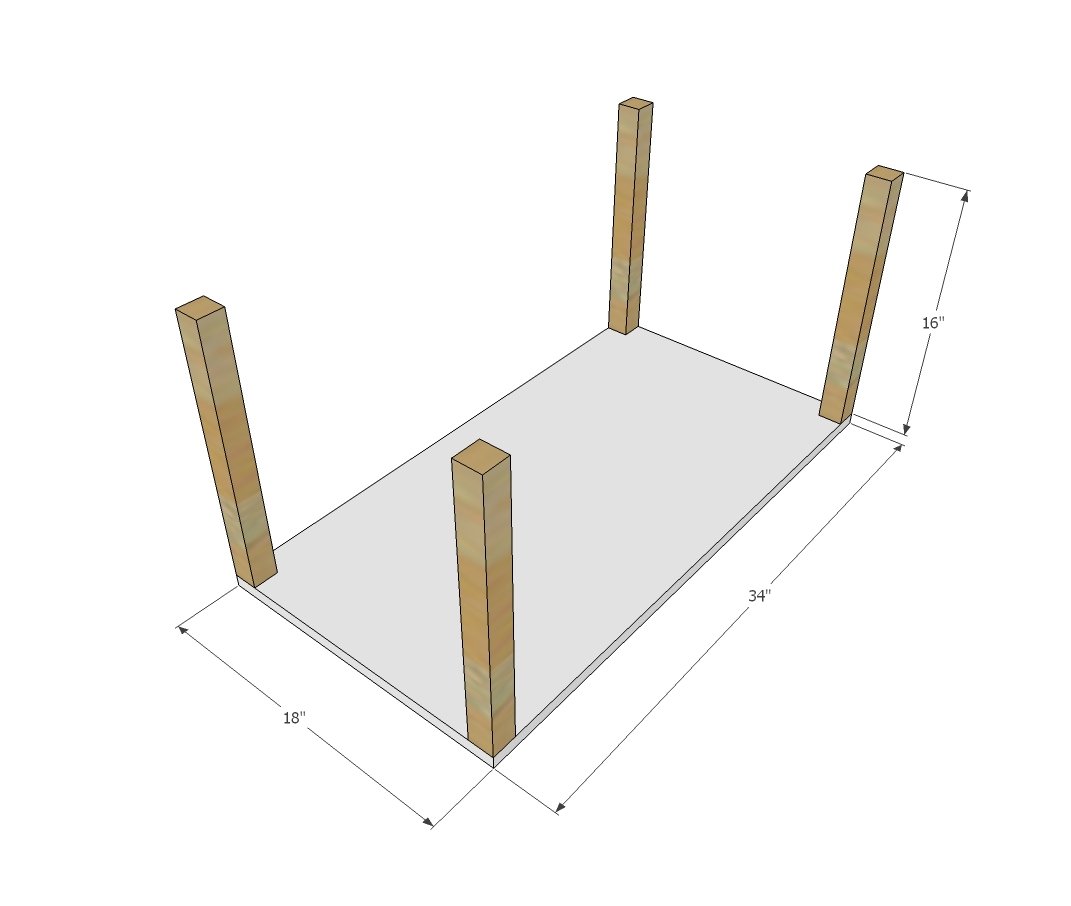
Attach legs to base with 2" wood screws and wood glue from underside. You will only need one screw per leg.
Step 2
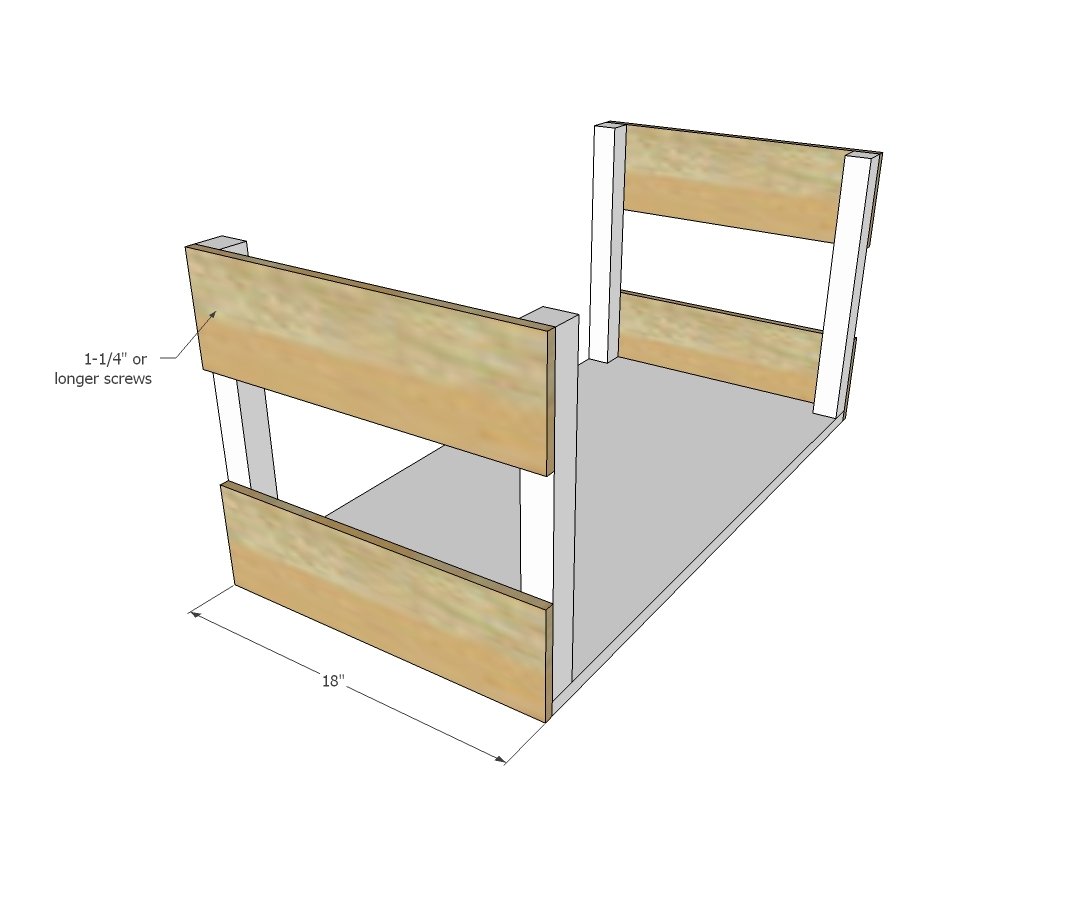
Attach end cedar fence pickets to legs with 1-1/2" screws, two per end of each fence picket for a total of four screws per fence picket. Make sure the 2x2 legs are square with the fence pickets as you attach, especially the top fence picket.
Step 3
Repeat these steps for the side fence pickets.
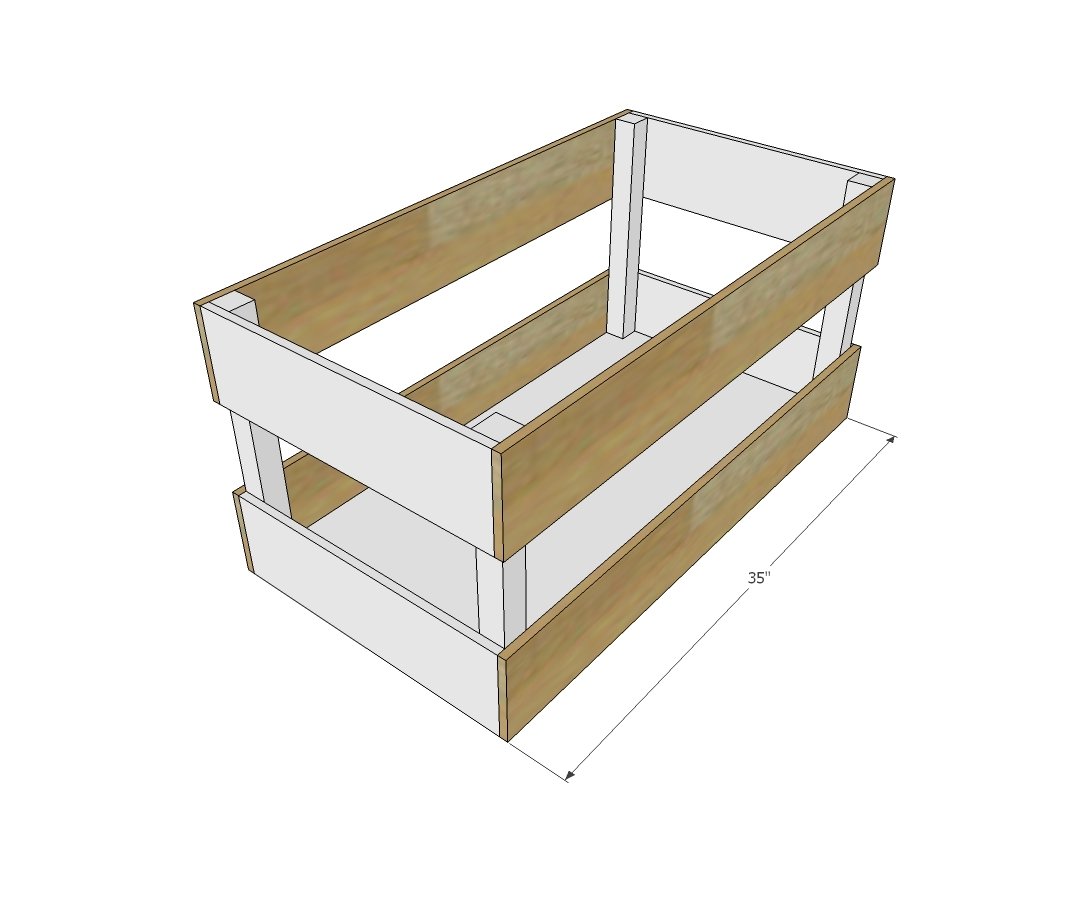
Step 4
Center remaining fence pickets in middle, even gap on both sides, and attach with 1-1/2" screws, two per end of each fence picket.
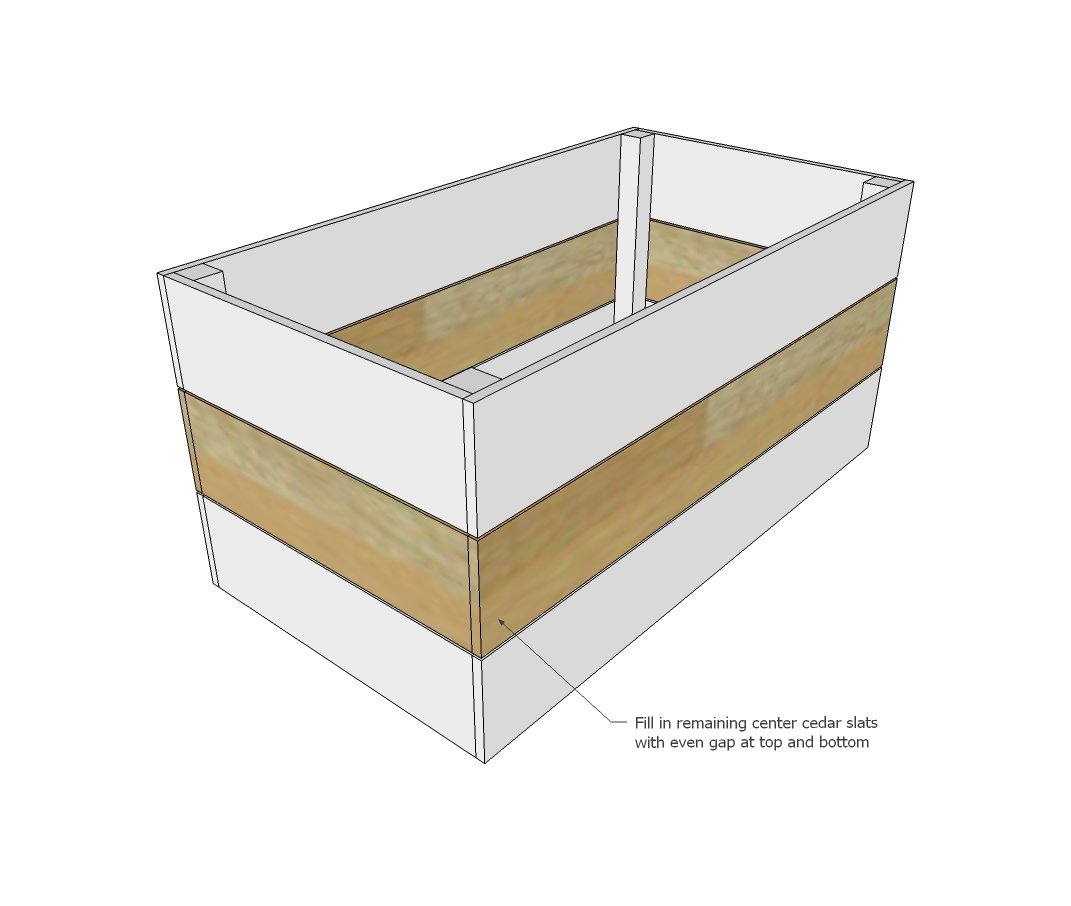
Step 5
Attach caster wheels to the base with the caster wheel screws.
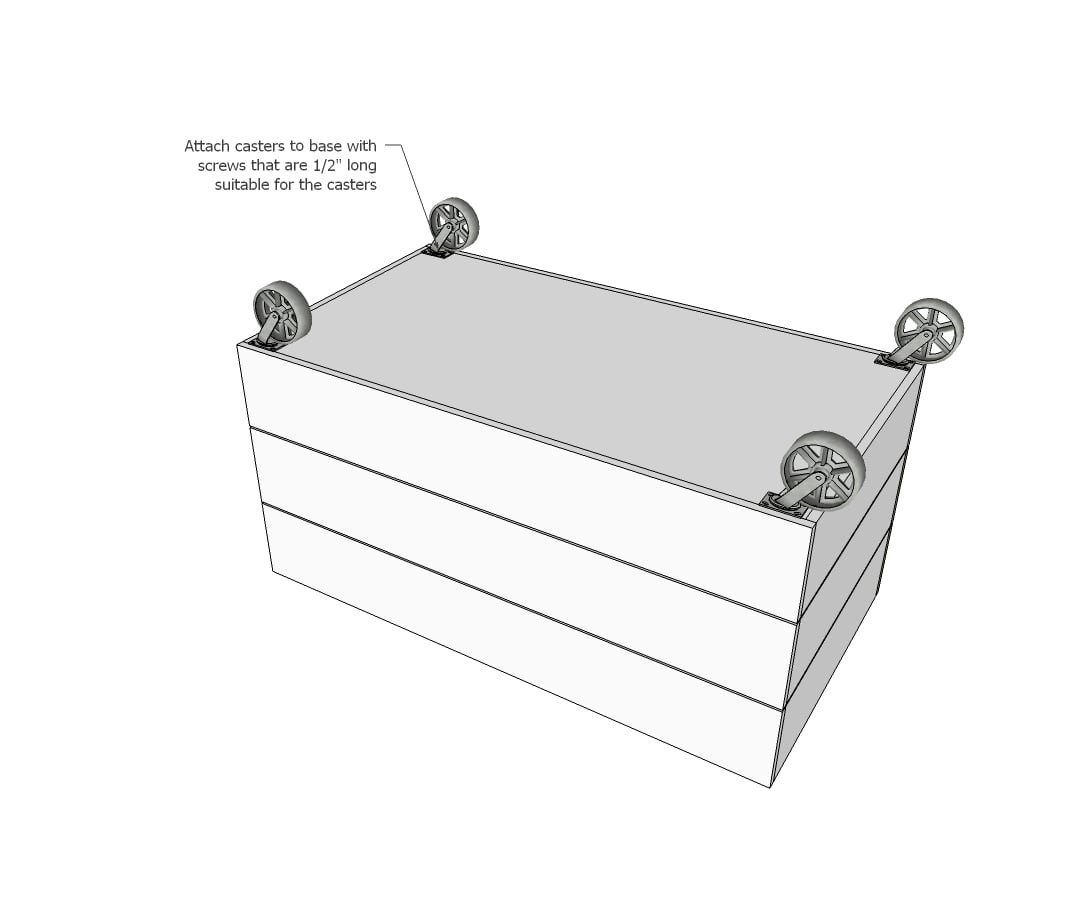
Finishing
Sand all surfaces, starting with a medium grit and finishing with fine. Wipe off the dust, fill any holes or gaps with wood filler, and sand smooth once dry. Apply primer if you're painting, then finish with your choice of paint or stain and seal with a durable clear topcoat. For outdoor projects, use exterior-rated primer, paint or stain, and sealer so the piece stands up to the weather.
Source (temporary): https://www.ana-white.com/woodworking-projects/simple-open-top-wood-toy-box