Simple Panel Bed (All Mattress Sizes)
You can build this simple panel bed frame (or just the headboard) with just a circular saw and a drill for about $120 in materials. This free tutorial includes video, step by step diagrams, shopping list and a cut list for Twin, Full, Queen, King and California king mattress sizes. Also check out our nightstand plans, browse other bed plans, and read our wood finishing post.
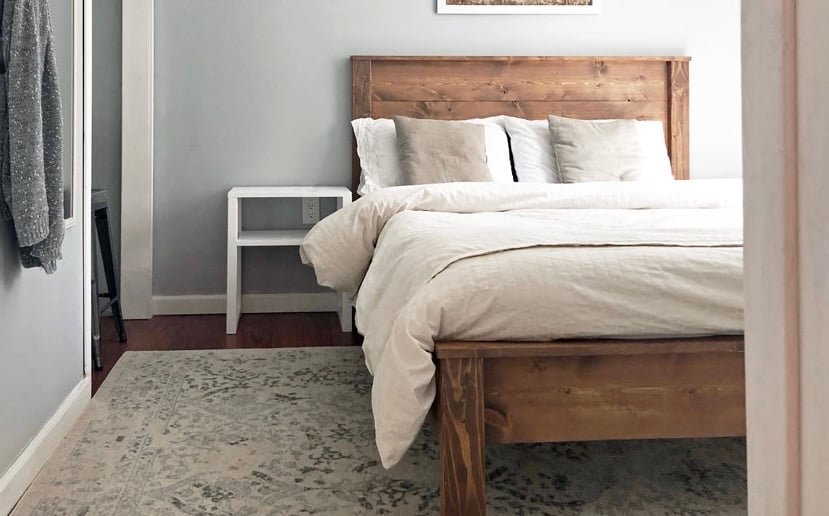
Specifications
| Project type | Headboard |
|---|---|
| Room | Bedroom |
| Style | Farmhouse Furniture |
| Difficulty | Beginner Projects |
| Estimated cost | $100-$150 |
Dimensions
Use the size-specific shopping and cut lists below.
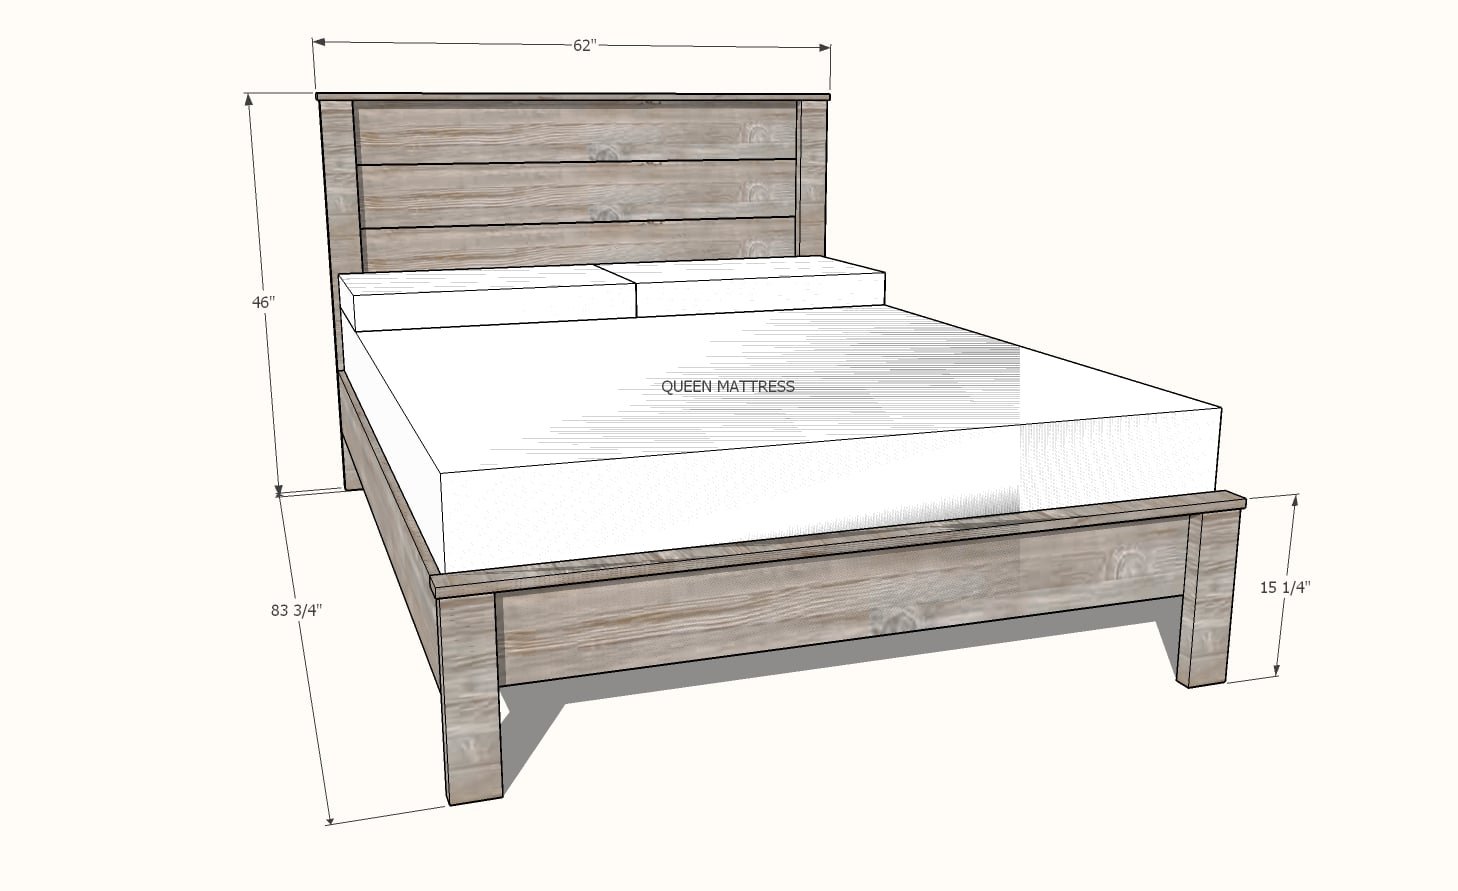
Shopping List
SHOPPING LIST FOR QUEEN - for other sizes, see the downloaded PDFs above
2 - 1x8 @ 10 feet long (can cut in half for transport)
2 - 1x8 @ 8 feet long (use on siderails)
2 - 1x3 @ 6 feet long
11 - 2x4 @ 8 feet long (includes 6 2x4s used for the bed slats)
50 - 1-1/4" brad nails OR 2" self tapping wood screws
40 - 3" self tapping wood screws (can substitute for 2-1/2" or 2-3/4" lengths)
Cut List
CUT LIST FOR QUEEN - for other sizes, see the downloaded PDFs above
4 - 1x8 @ 57" - panel boards
2 - 2x4 @ 45-1/4" - headboard legs
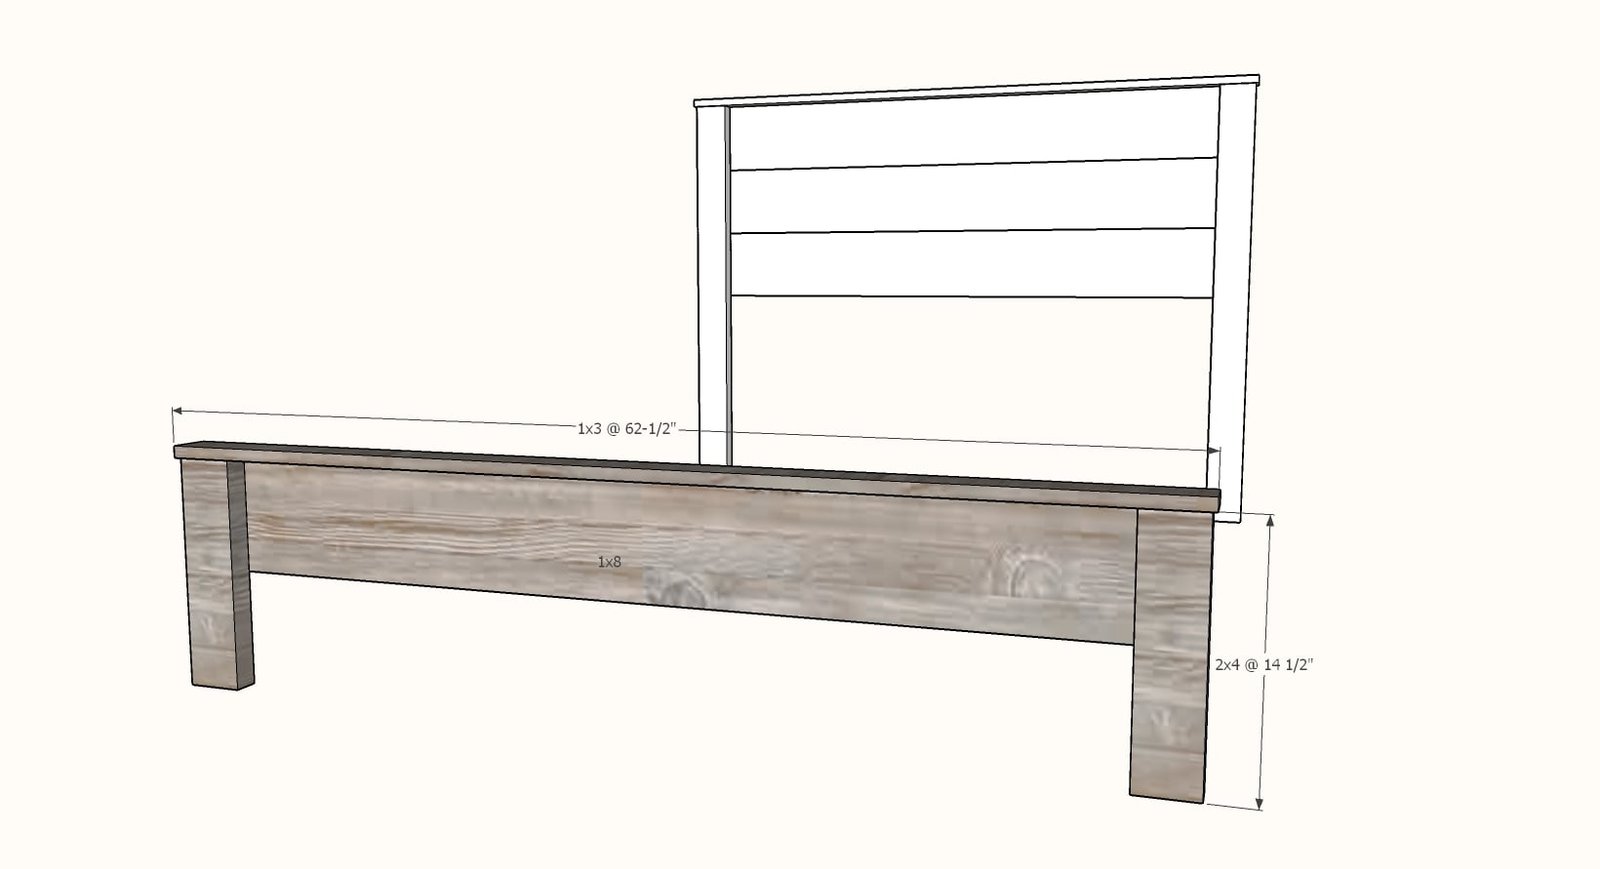
2 - 1x3 @ 62-1/2" - tops
2 - 2x4 @ 14-1/2" - footboard legs
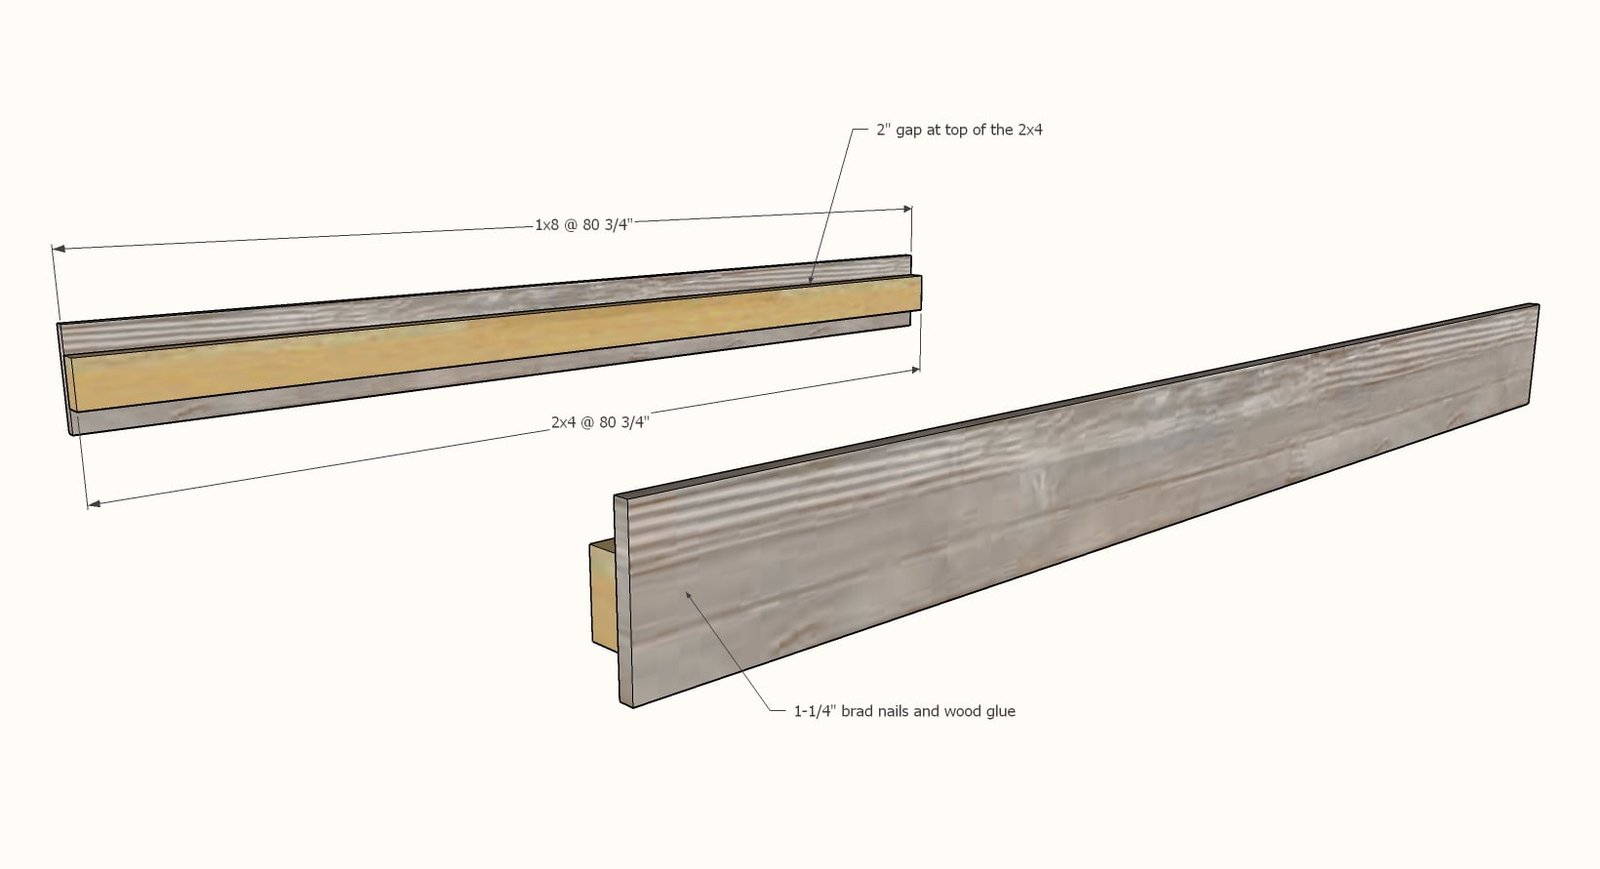
2 - 1x8 @ 80-3/4" - sidrails
2 - 2x4 @ 80-3/4" - siderail cleats
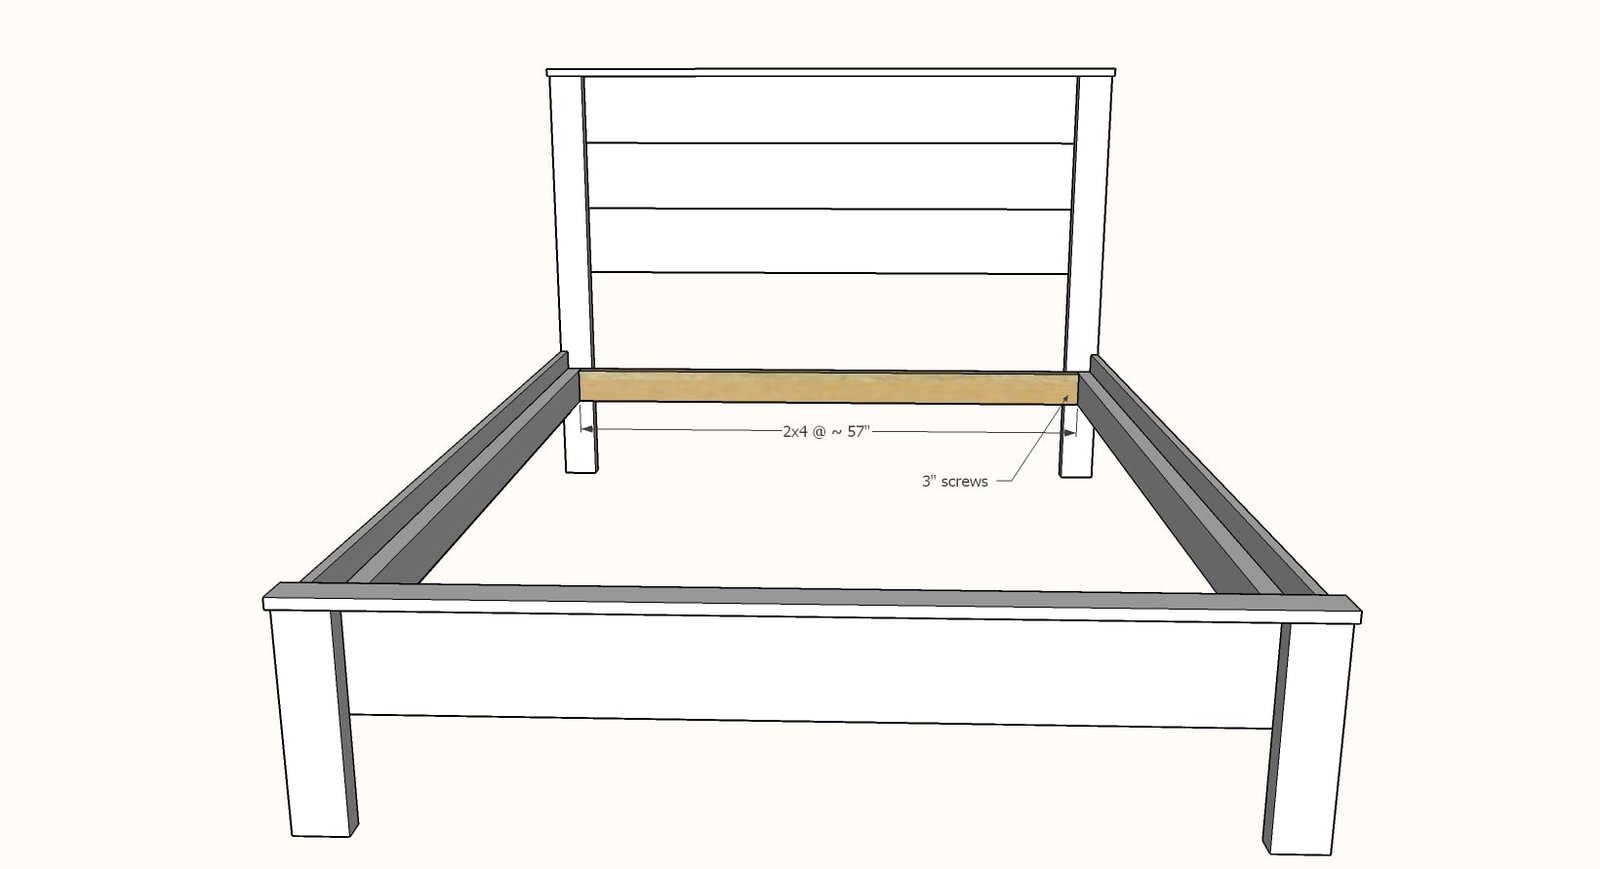
1 - 2x4 @ ~57" - cut to fit - headboard bed frame
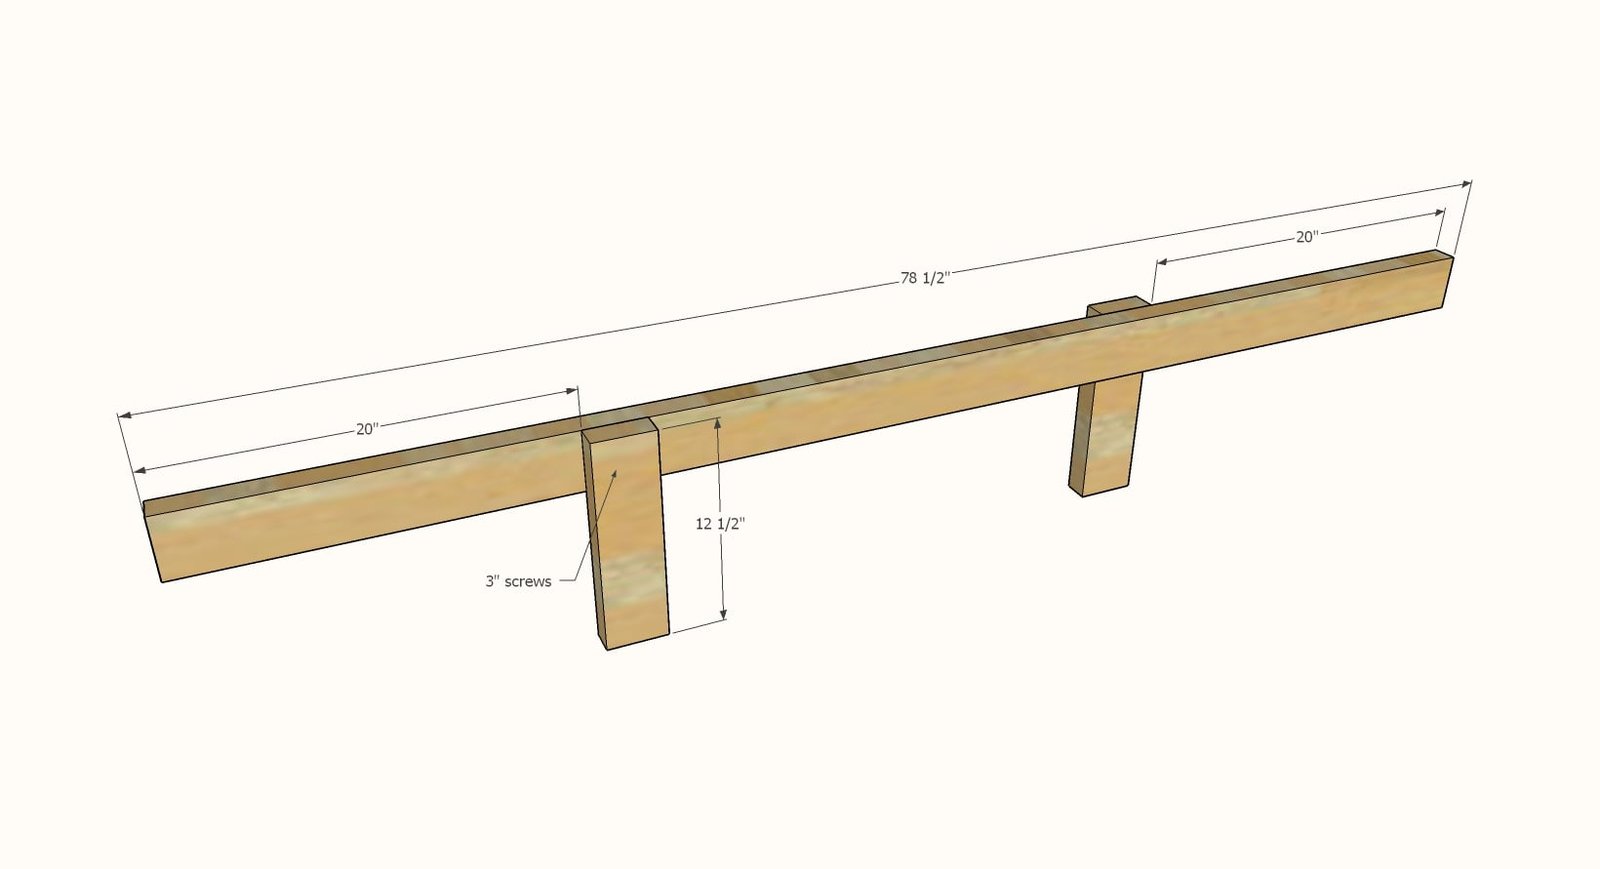
1 - 2x4 @ 78-1/2" - bed frame center
2 - 2x4 @ 12-1/2" - bed frame legs
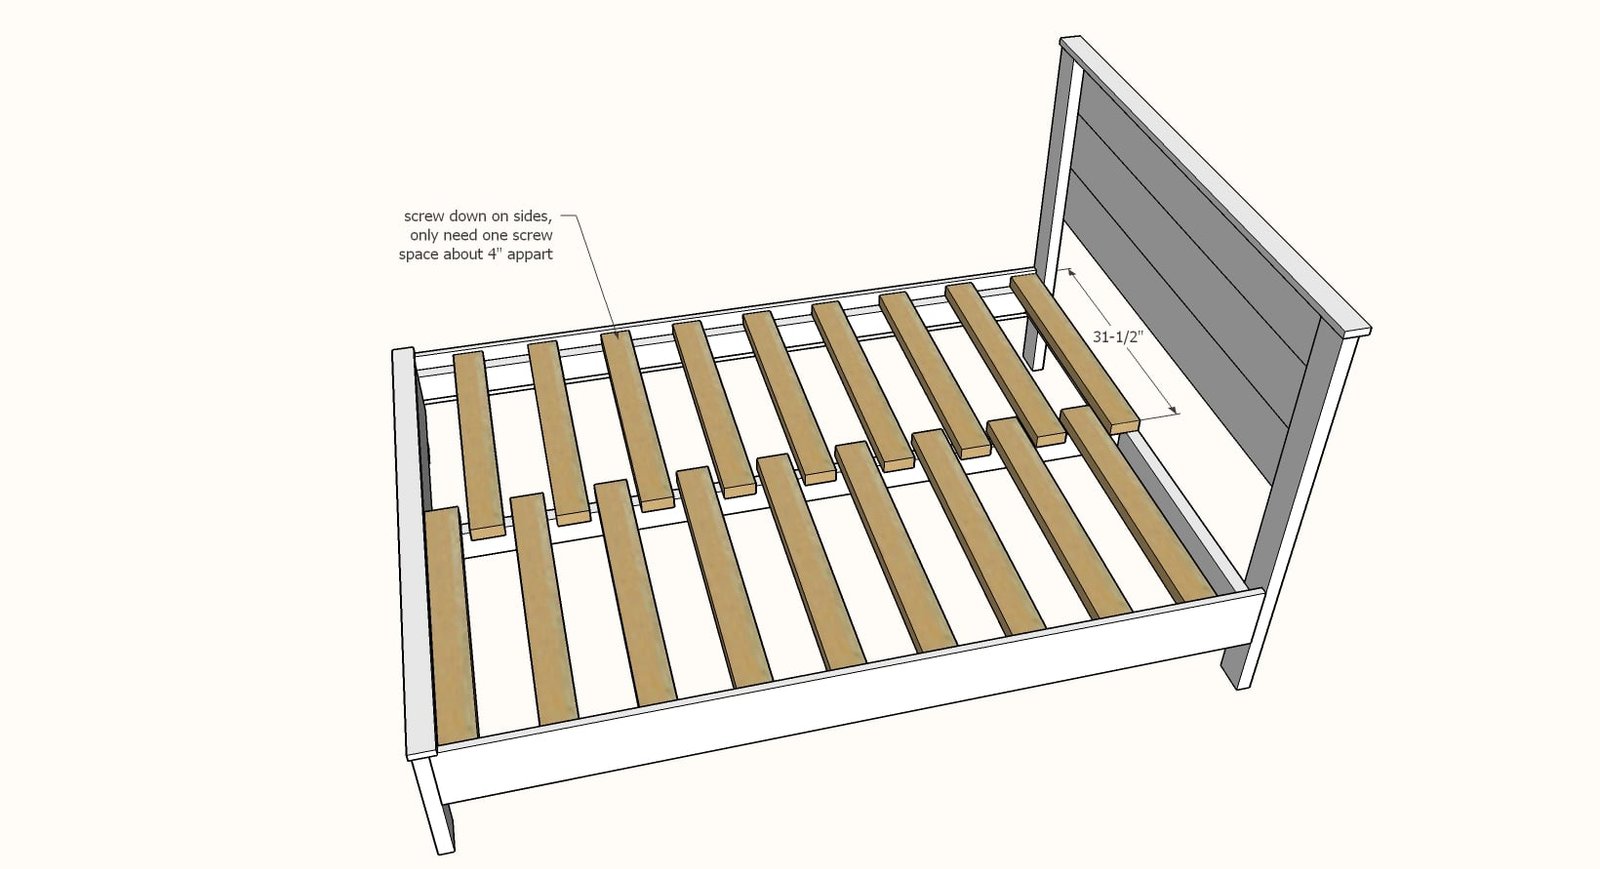
18 - 2x4 @ 31-1/2" - bed frame slats (can also use 1x4s or 1x3s or other materials if less expensive/have on hand)
Tools
- measuring tape
- square
- pencil
- safety glasses
- hearing protection
- drill
- circular saw
- sander
Step-by-step Instructions
Layout the two headboard legs.
Mark a line all the way down each 2x4 leg, 2-1/4" in from the outsides. Dryfit the panel boards for the headboard on the legs. Then attach the top 1x8 to the legs, with glue and screws or nails. Repeat, working downward, for all the 1x8s - just make sure you apply a bead of glue between the 1x8 boards as you go.
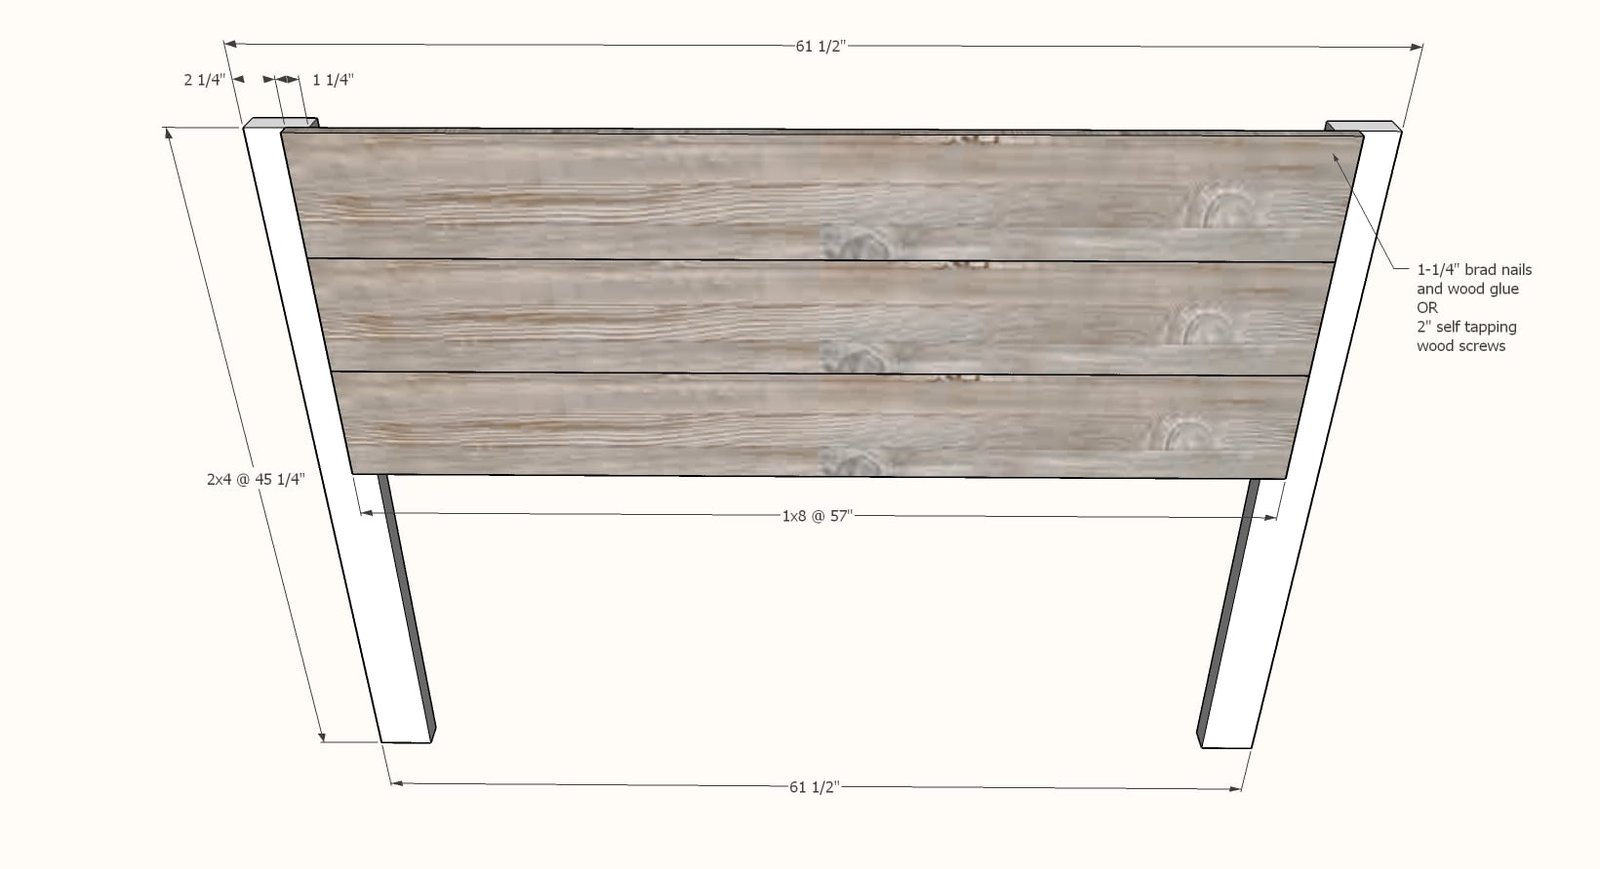
Apply glue to all top edges of the headboard.
Place 1x3 on top, even overhang on ends, flush to the back 1x8 on back. Nail or screw down - nails are easier to hide, so use if you have a brad nailer.
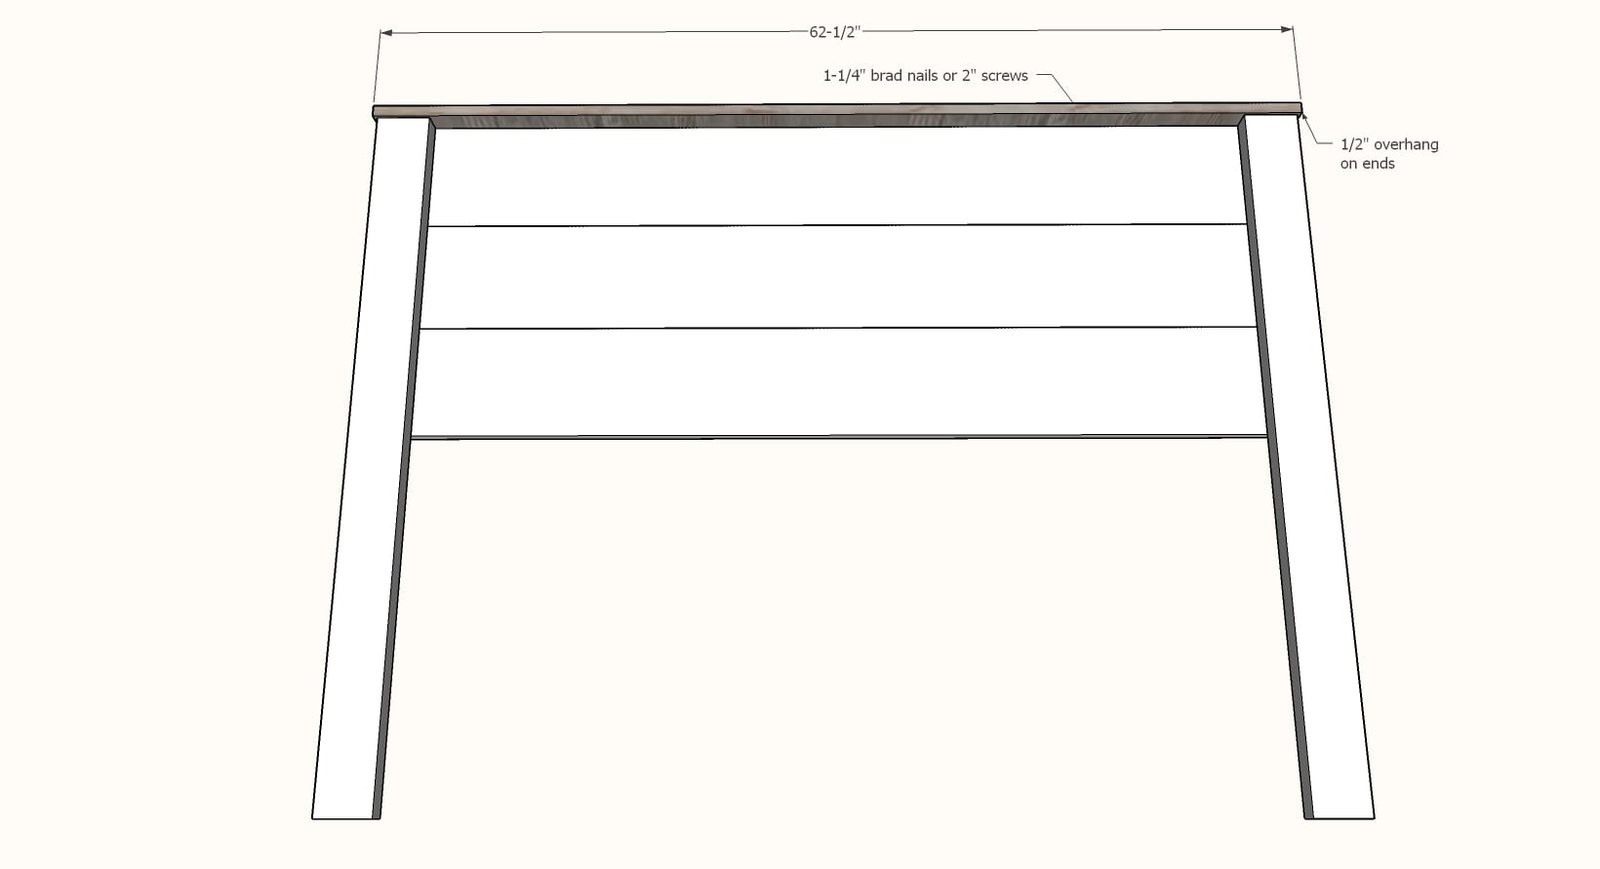
Step 3
Repeat steps for footboard, with only one panel board used.
Step 4
Apply glue to 2x4 cleats and place 1x8 siderail on top. Screw or nails siderail to cleat form outside. Nails will be easier to hide, so use if you can.
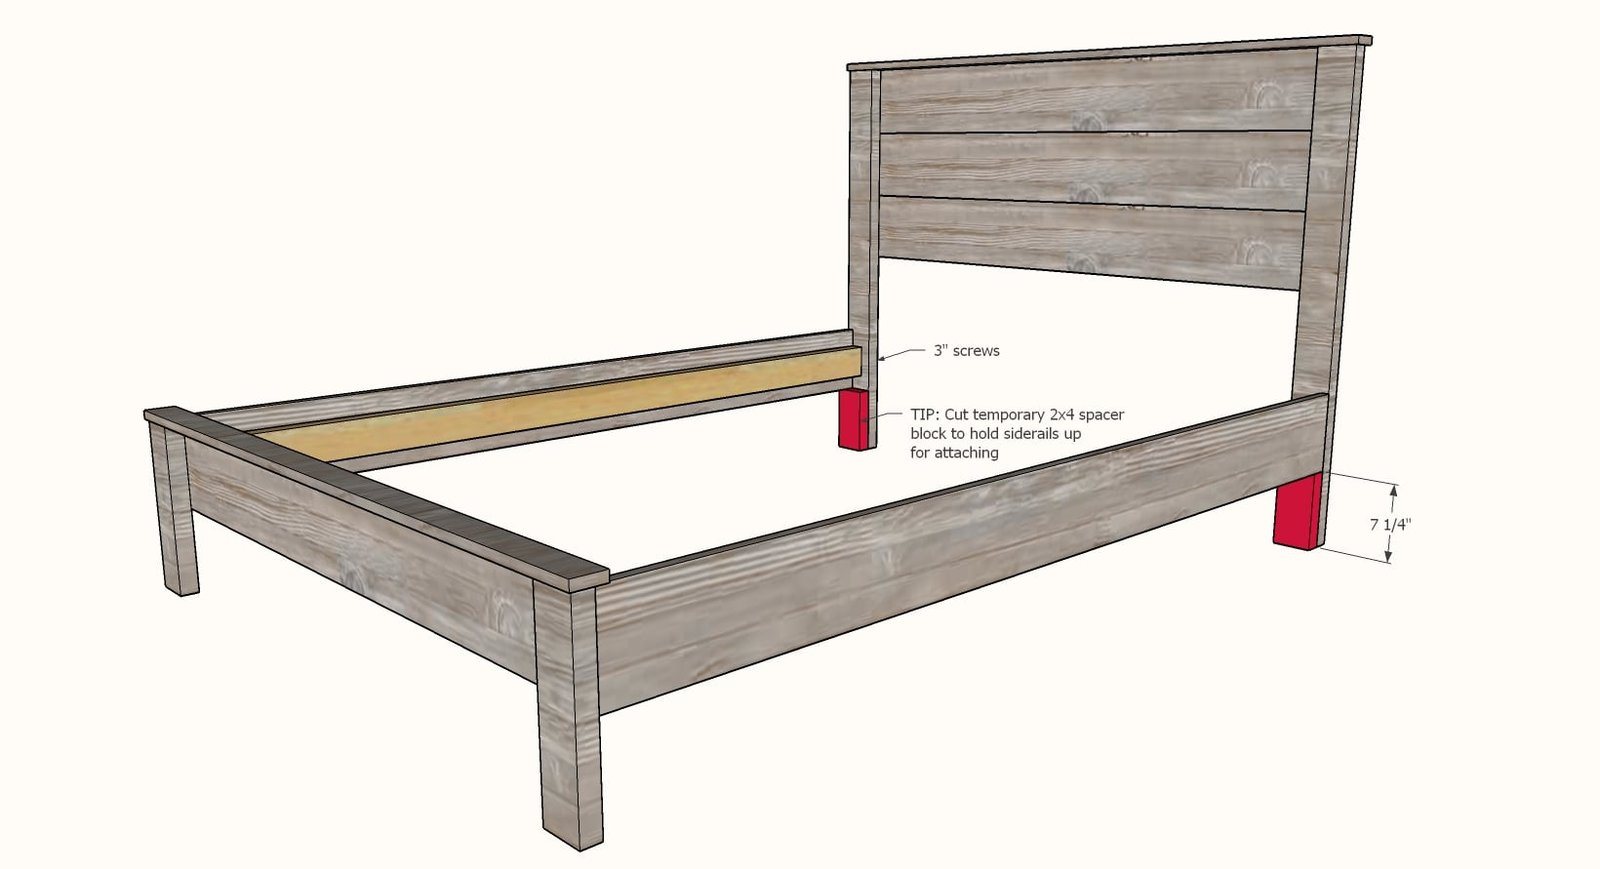
Attach the siderails to the headboard and footboard with 3" screws.
A spacer block cut from scrap 2x4s will make assembly much easier.
Step 6
Screw the headboard bed frame piece to the headboard.
Step 7
Attach bed frame legs to center bed frame support with 3" screws.
Step 8
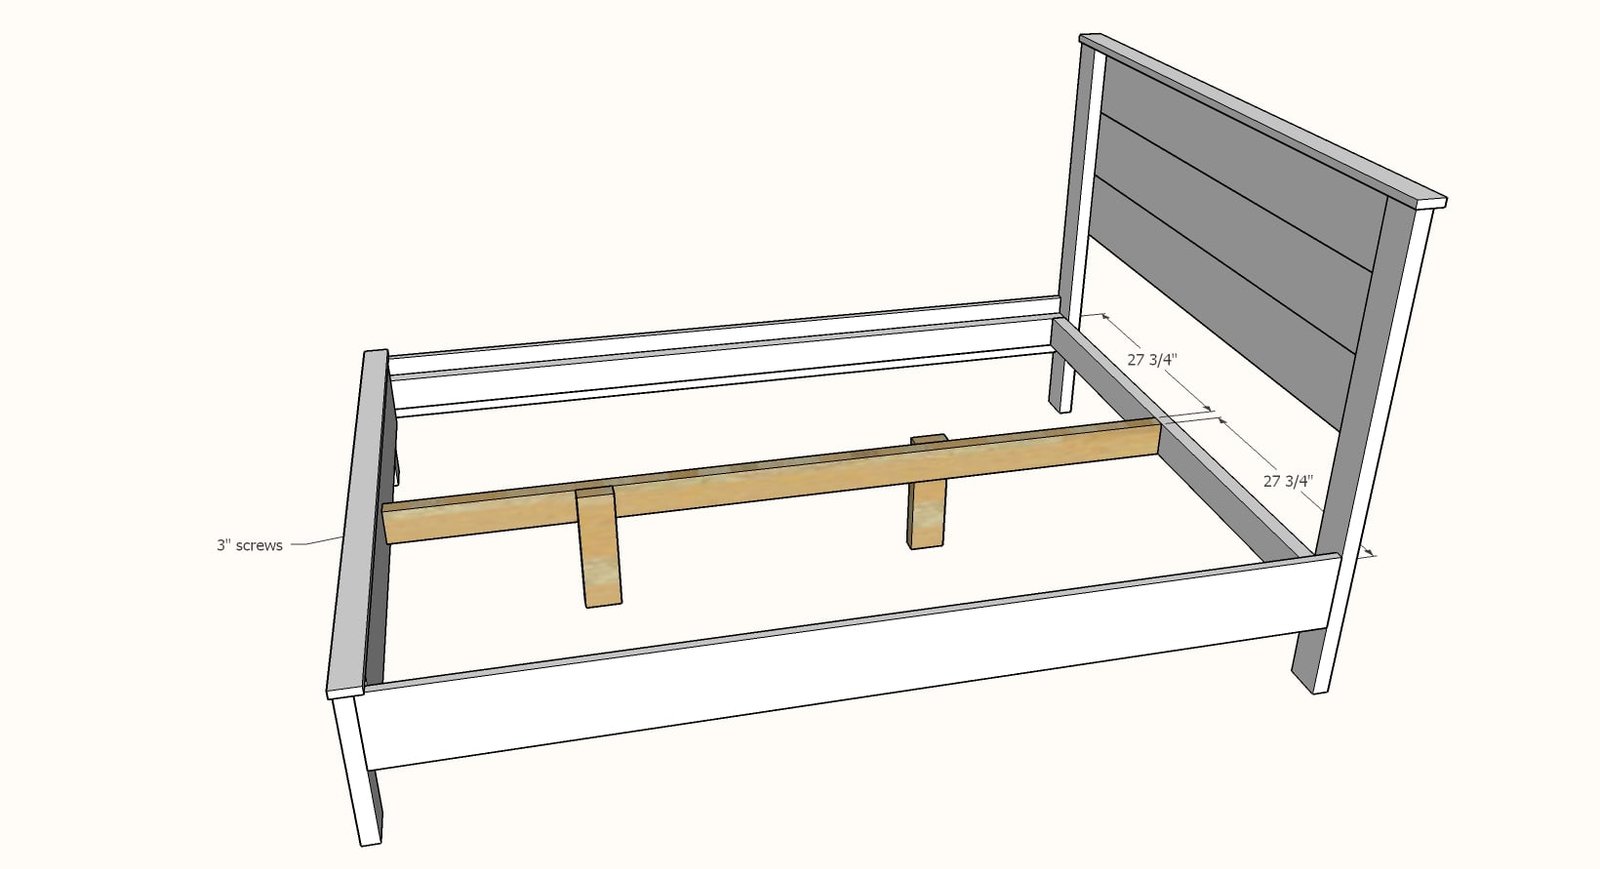
Screw bed frame center to the headboard and footboard with 3" screws, centered on the bed.
Place slats on bed frame, space about 4" apart.
Screw down using the 3" screws.
Finishing
Sand all surfaces, starting with a medium grit and finishing with fine. Wipe off the dust, fill any holes or gaps with wood filler, and sand smooth once dry. Apply primer if you're painting, then finish with your choice of paint or stain and seal with a durable clear topcoat. For outdoor projects, use exterior-rated primer, paint or stain, and sealer so the piece stands up to the weather.
Source (temporary): https://www.ana-white.com/woodworking-projects/simple-panel-bed-all-mattress-sizes-no-pocket-holes