Simple Play Kitchen Sink and Stove
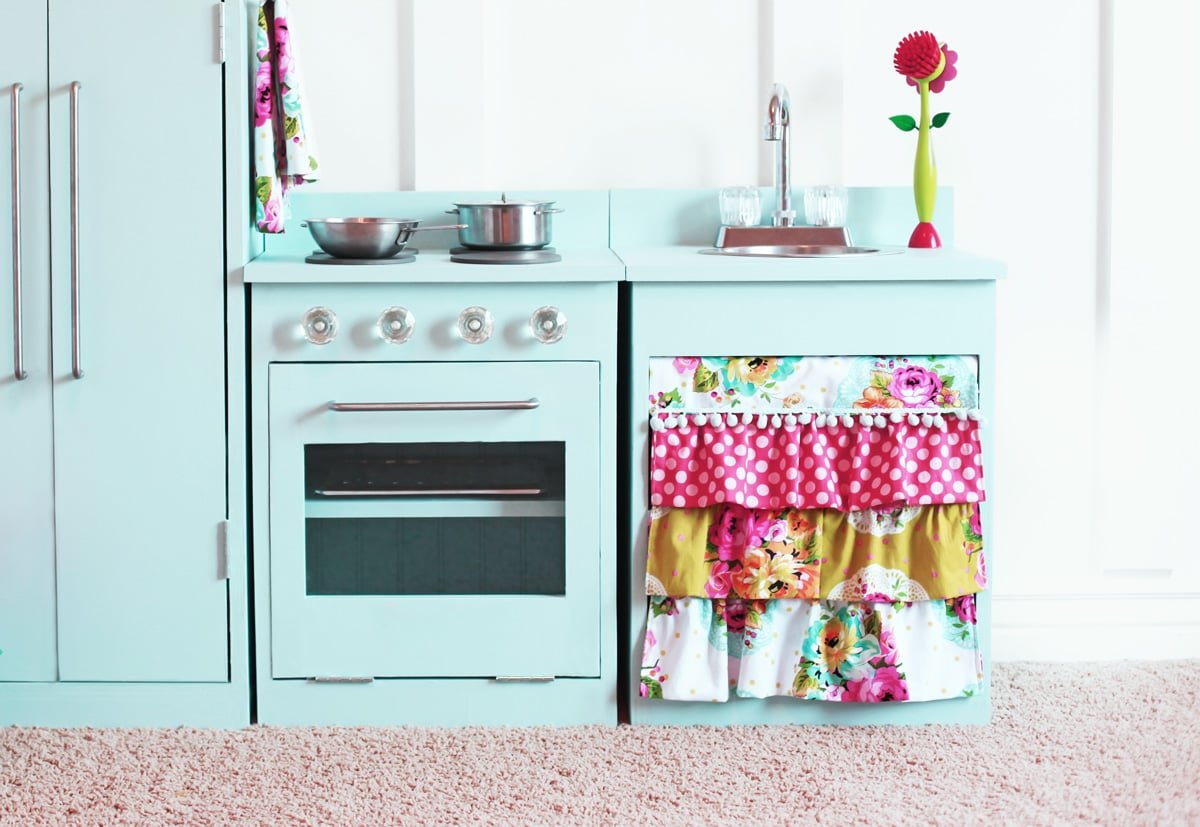
Build your own play kitchen and customize and accessorize to match your home. This childrens kitchen is so adorable! use off shelf materials and simple building skills. This plan is for the play kitchen sink and stove. We also have for the matching play kitchen fridge. Step by step diagrams, shopping and cut list from
Specifications
| Project type | Play Kitchen Collection |
|---|---|
| Room | Kids and Toys |
| Style | Children's and Kid's Room Furniture and Toy Plans |
| Difficulty | Beginner Projects |
| Estimated cost | Under $20 |
Dimensions
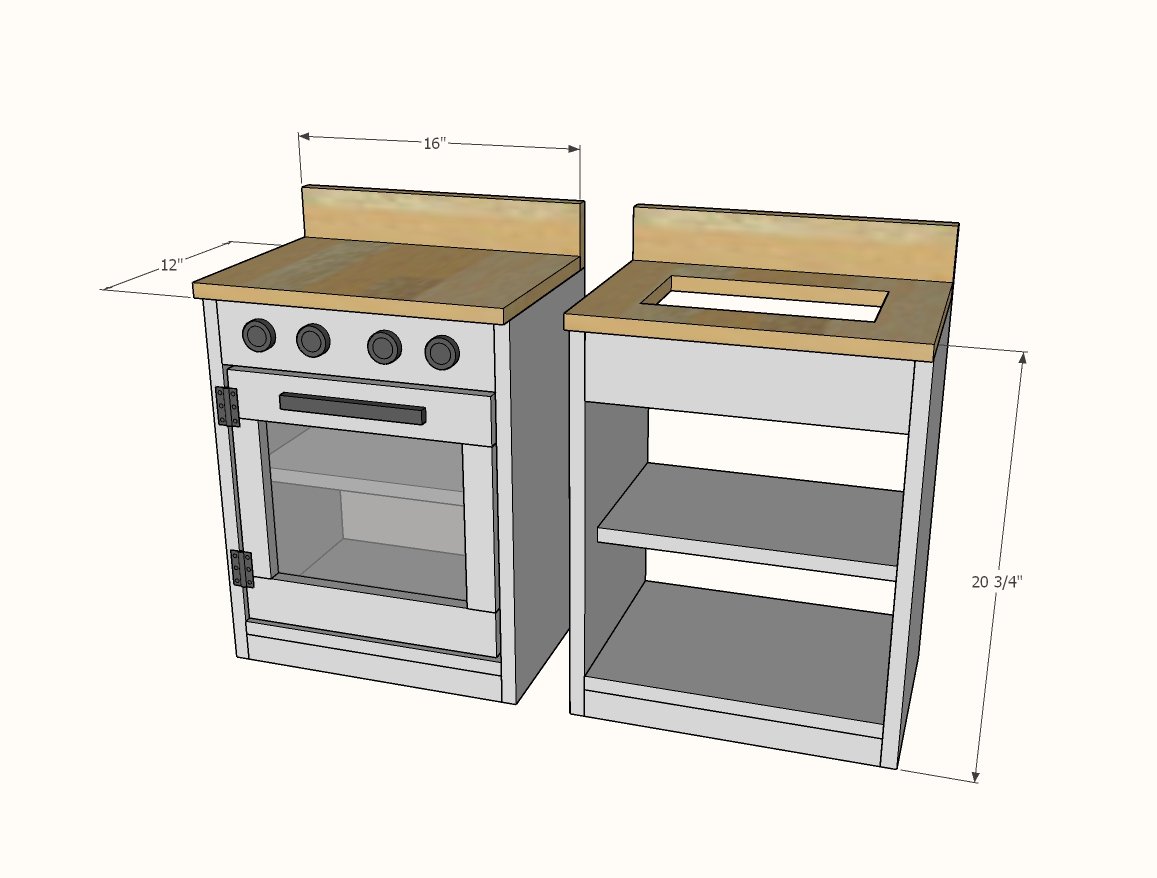
Use the size-specific shopping and cut lists below.
Shopping List
- 1 - 1x12 @ 8’ long
- 1 - 1x10 @ 14-1/2" long
- 1 - 1x2 @ 30"
- 1 - 1x4 @ 30"
- 1 – scrap piece of plywood (I use beadboard) 16"x20". You could omit this if needed.
Additional Supplies for Stove
- 1 - 1x3 @ 30"
- 2 - 1x2 @ 18"
- 4 knobs
- 1 set of hinges
- 1 magnetic clasp
- 1 - 11" x 20" piece of acrylic glass
Cut List
Base for Both Sink and Stove (cut list is for one)
- 2 - 1x12 @ 20” Sides
- 2 - 1x2 @ 14 1/2” Toekick
- 1 - 1x12@ 14 1/2” Bottom Shelf
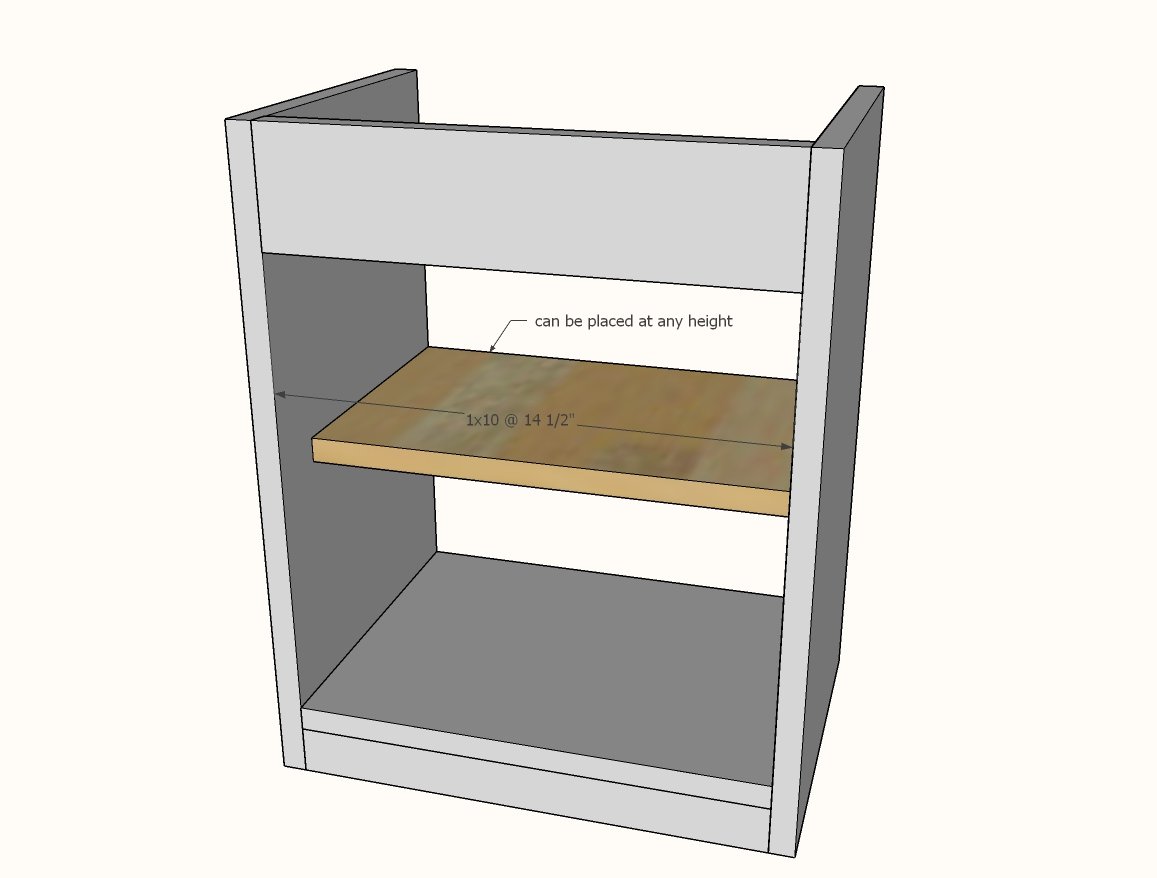
- 1 - 1x10 @ 14-1/2" Middle Shelf
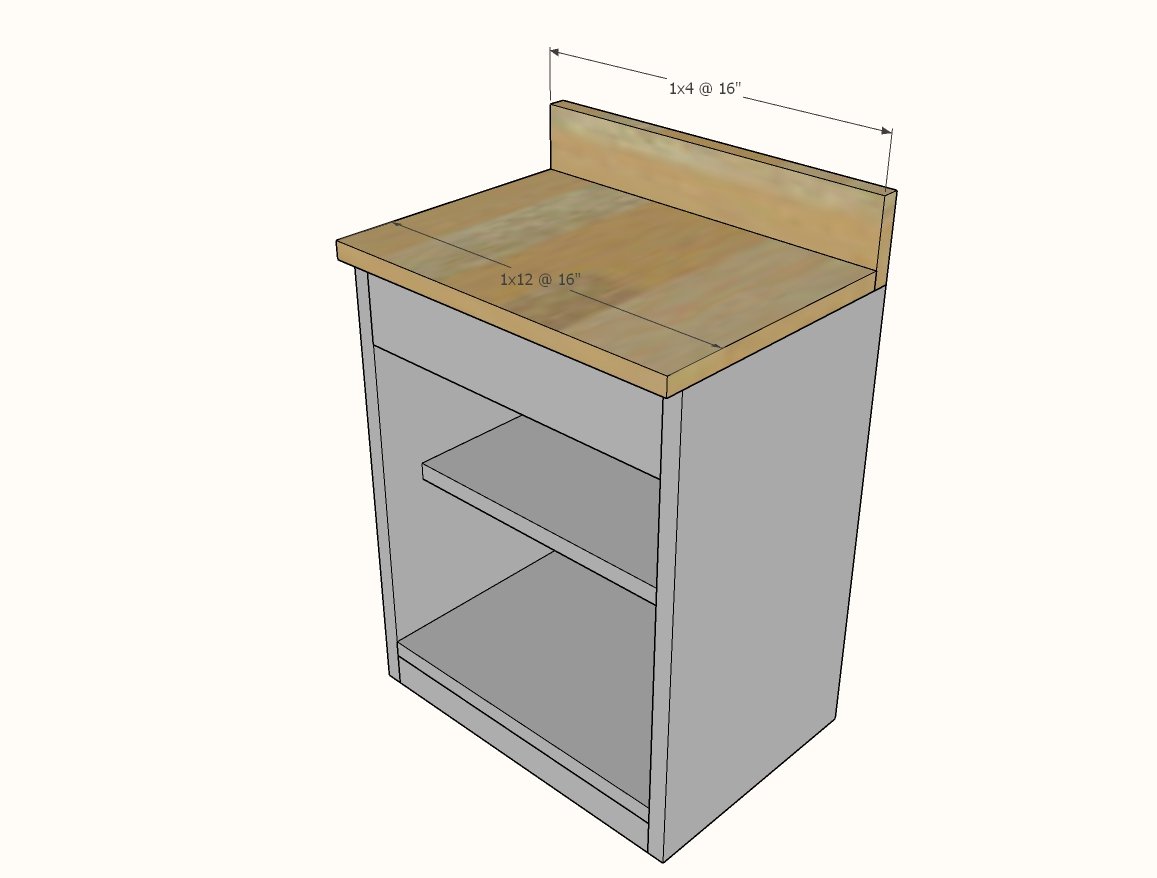
- 1 - 1x12@ 16 1/2” Countertop
- 1 - 1x4 @ 16 1/2” Backsplash
- 1 - 1x4 @ 14 1/2" Front of Sink
- 1 - 16" x 20" piece of plywood for the back (optional)
Stove Door (large gaps)
- 2 - 1x3 @ 14"
- 2 - 1x2 @ 8-3/4"
Stove Door (small gaps)
- 2 - 1x3 @ 14-1/4"
- 2 - 1x2 @ 9"
Tools
- measuring tape
- square
- safety glasses
- hearing protection
- compound miter saw
- nailer
- sander
Step-by-step Instructions
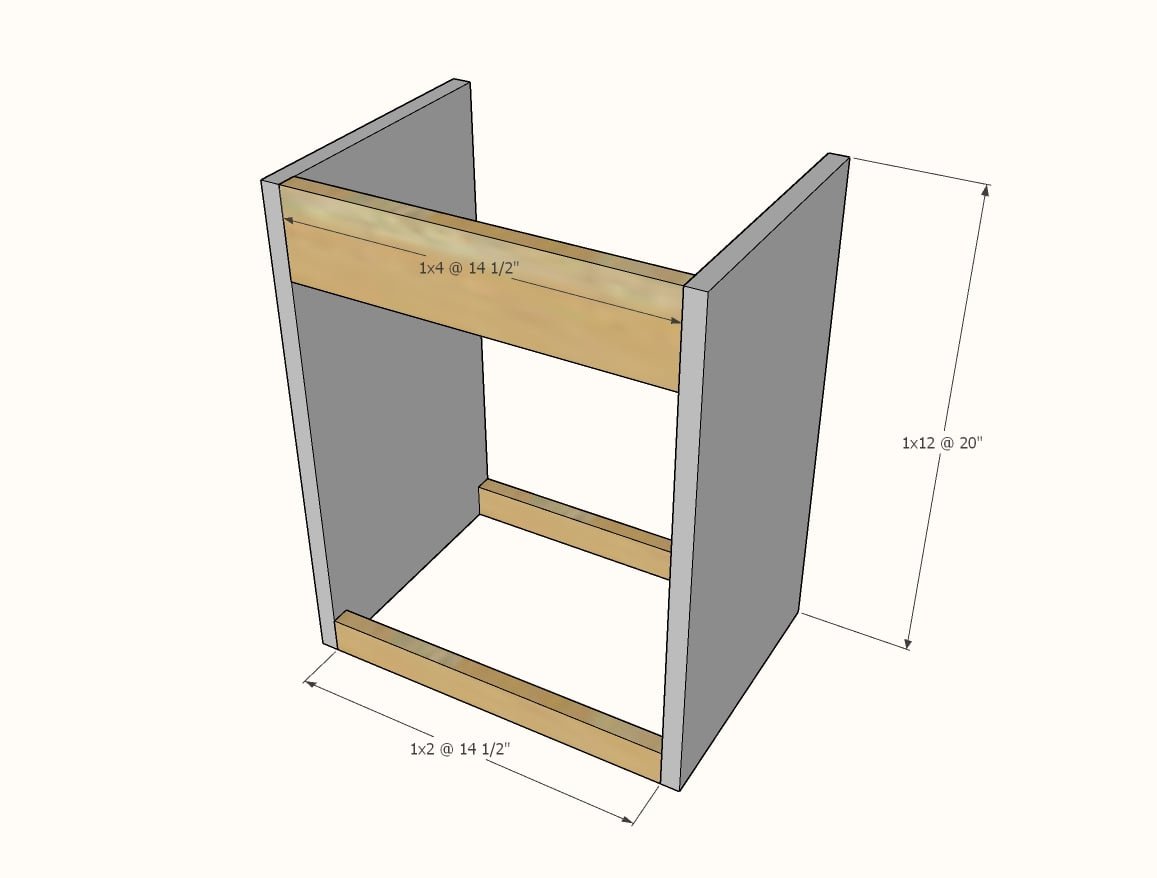
Attach the 1x2 and 1x4 apron to the sides.
Recommend: 1-1/4" brad nails and glue.
Step 2
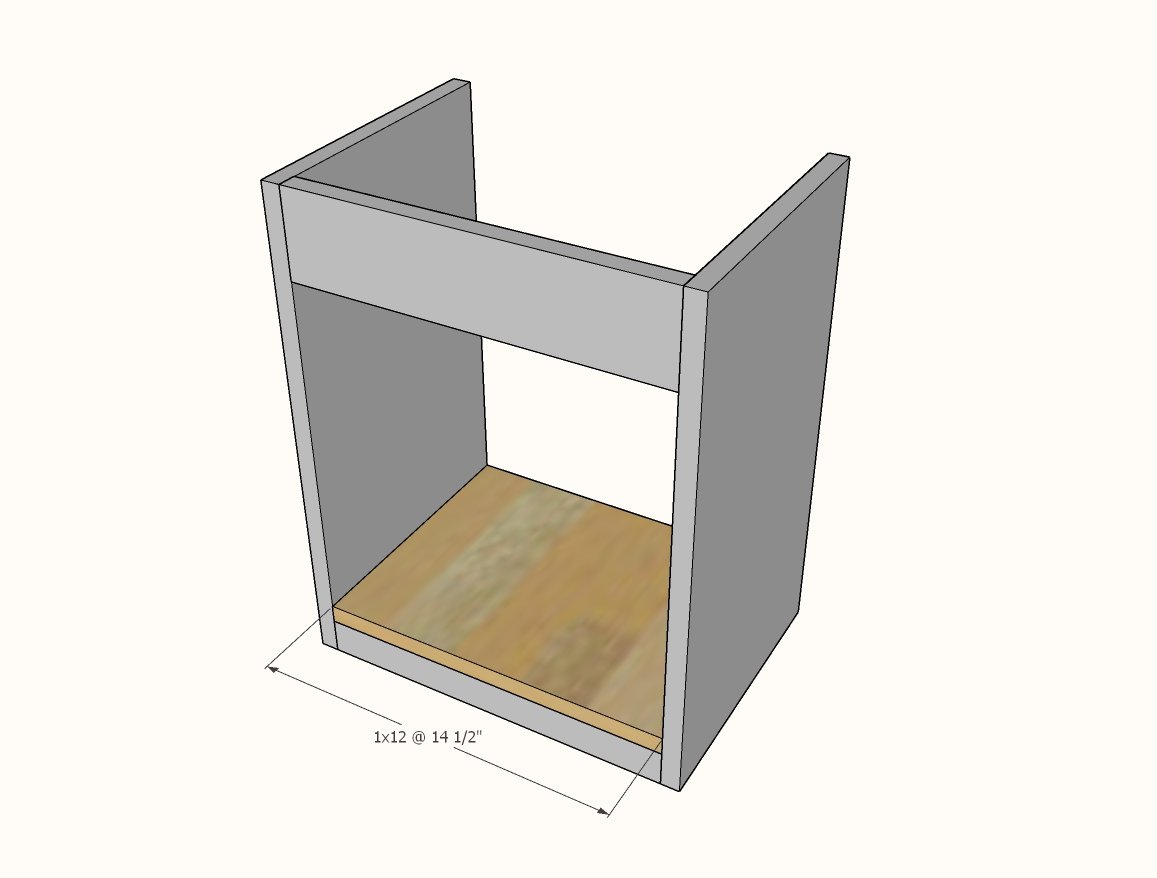
Add the bottom shelf, fasten to both the sides and the 1x2s.
Step 3
The shelf can be placed at any height.
Attach the backsplash to the top first.
Then attach the entire top to the base.
Build the door with 3/4" pocket holes and 1-1/4" pocket hole screws.
Attach acrylic glass to the back with either craft glue or hot glue or predrill holes and attach with screws. Just make sure the screws DO NOT have a bevel on the back of the screw head. This completes the sink base build. You can now accessorize by adding a sink bowl, curtains, faucet - the options are endless.
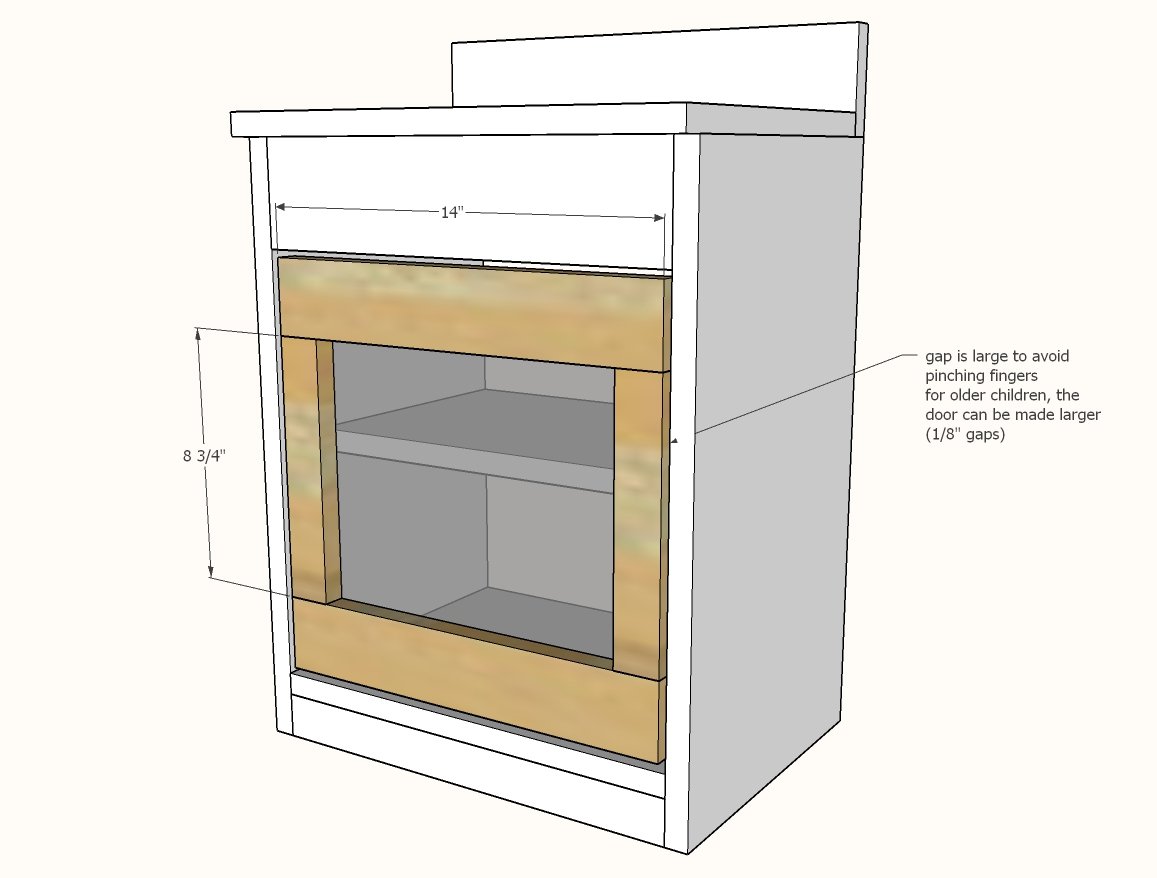
To make the base into a play kitchen stove, you'll need to add a stove door.
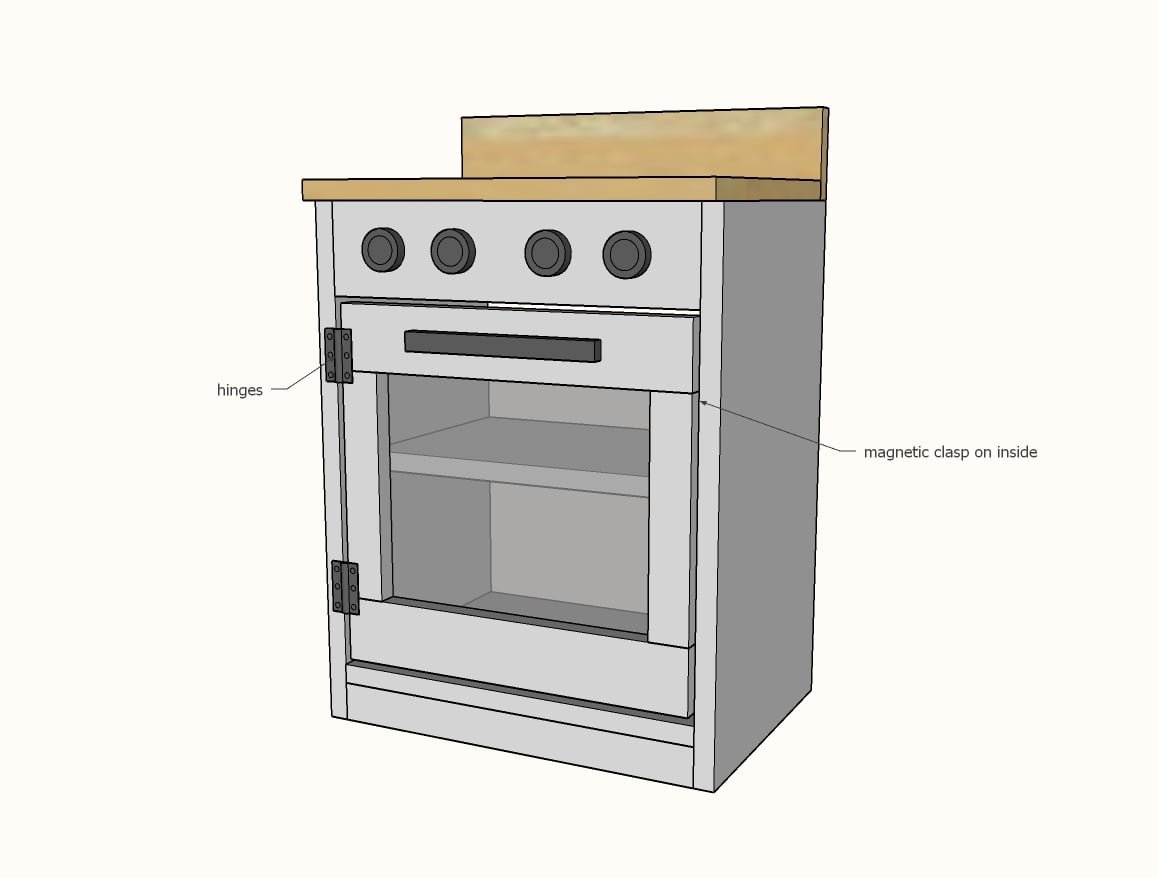
Install the stove door. I recommend a side swing so no little toes get bruised with a up and down swing. Install a magnet to keep the door closed. Install handle and four knobs.
Finishing
Sand all surfaces, starting with a medium grit and finishing with fine. Wipe off the dust, fill any holes or gaps with wood filler, and sand smooth once dry. Apply primer if you're painting, then finish with your choice of paint or stain and seal with a durable clear topcoat. For outdoor projects, use exterior-rated primer, paint or stain, and sealer so the piece stands up to the weather.
Source (temporary): https://www.ana-white.com/woodworking-projects/simple-play-kitchen-sink-and-stove