Simple Playhouse
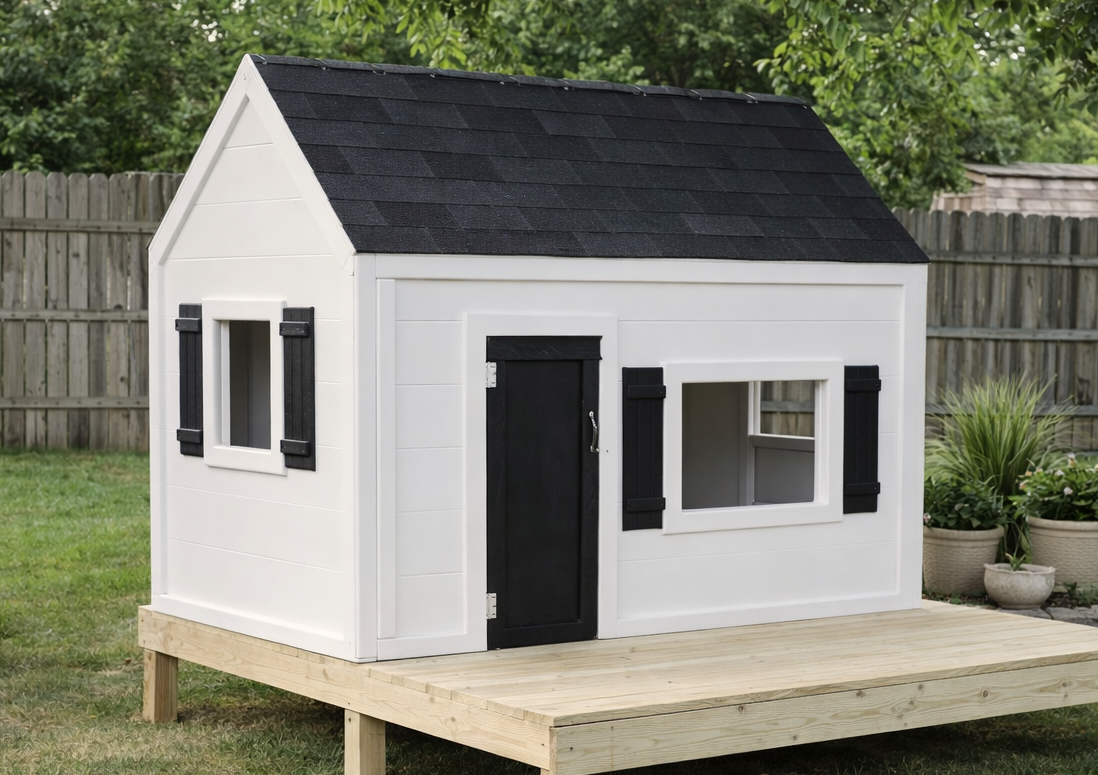
You can build your own playhouse! This simple back wall is designed to come from a single sheet of plywood. Easy to build and very sturdy, yet inexpensive and well planned to integrate with the side walls and roof. from
Specifications
| Project type | Playhouse |
|---|---|
| Room | Outdoor |
| Style | Children's and Kid's Room Furniture and Toy Plans |
| Difficulty | Beginner Projects |
| Estimated cost | $20 - $50 |
Dimensions
Use the size-specific shopping and cut lists below.
Shopping List
- 1 – 1/4″ Sheet of Plywood
- 6 – 2×2 Furring Strips 8 feet long
- 2 – 1×3 Furring Strips 8 feet long
- 1 – 1×2 Furring Strip 8 feet long
- 2 1/2″ Self Tapping Screws
- 1 1/4″ Nails Glue
Cut List
Cut List is just for the Back Wall
- 2 – 2×2 @ 90″ (Top and Bottom Plates for Walls)
- 7 – 2×2 @ 45″ (Wall Studs)
- 1 – 1/4″ Plywood @ 48″ x 90″ (Back Panel)
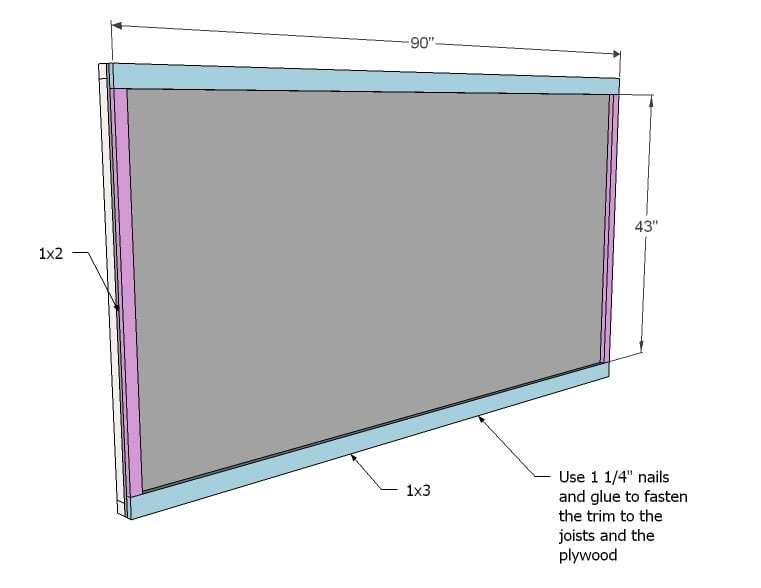
- 2 – 1×3 @ 90″ (Top and Bottom Trim)
- 2 – 1×2 @ 43″ (Side Trim)
Tools
- measuring tape
- square
- pencil
- hammer
- safety glasses
- hearing protection
- drill
- circular saw
- nailer
- sander
Step-by-step Instructions
FRAME YOUR WALL
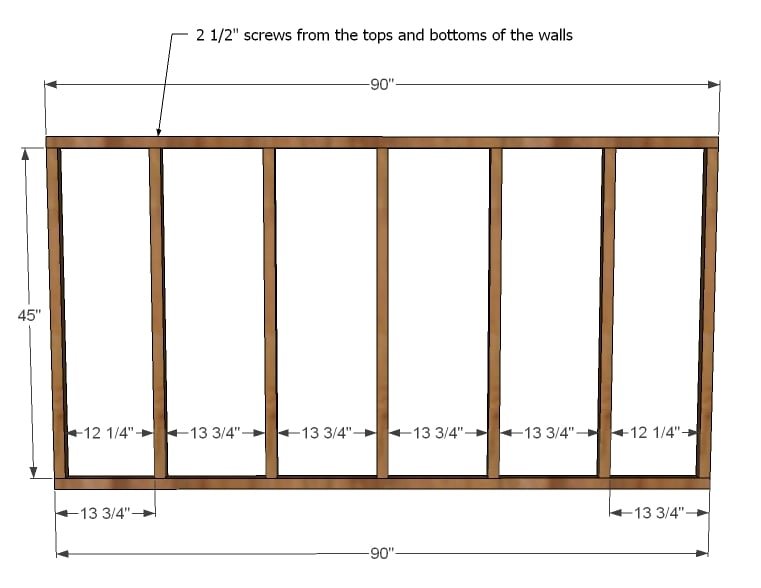
Well, I guess it did come in handy that I helped frame a few houses. Begin by marking on both the top and bottom plates where the joist will got (click diagram for a larger view). Then predrill all the holes in the top and bottom plates. Then begin fastening the studs to the top and bottom plates. Check for square when all boards have been fastened.
SHEATHING
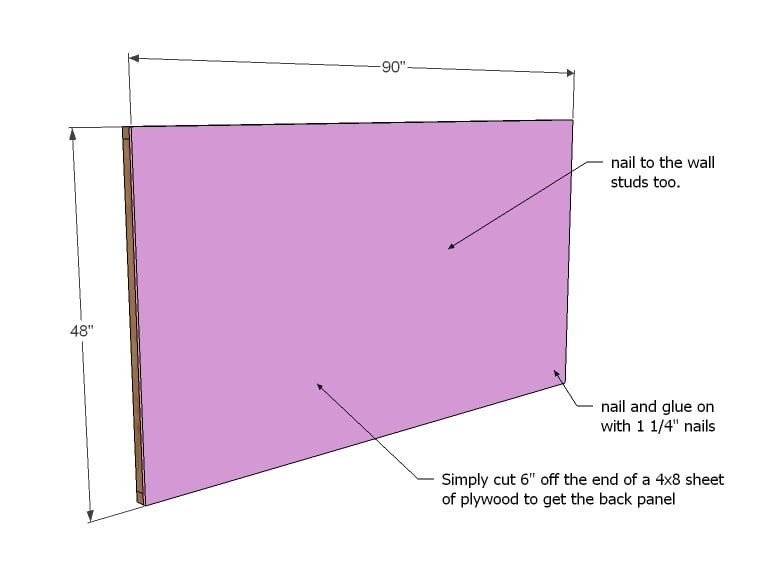
I was thinking about you (and me) when I designed this plan. Simply take a full sheet of plywood and trim 6″ off the end to get a piece 90″x48″. The reason you have to trim the 6″ off is because the overall dimensions need to be less than 96″ to fit on a standard 8′ 2×6 deck (again, to save you money and unnecessary cuts). Glue and fasten on with 1 1/4″ nails.
TRIM
Cut your longer trim first and glue and nail down with 1 1/4″ nails. Then add the 1×2 trim to the ends, keeping outside edges flush.
ASSEMBLY
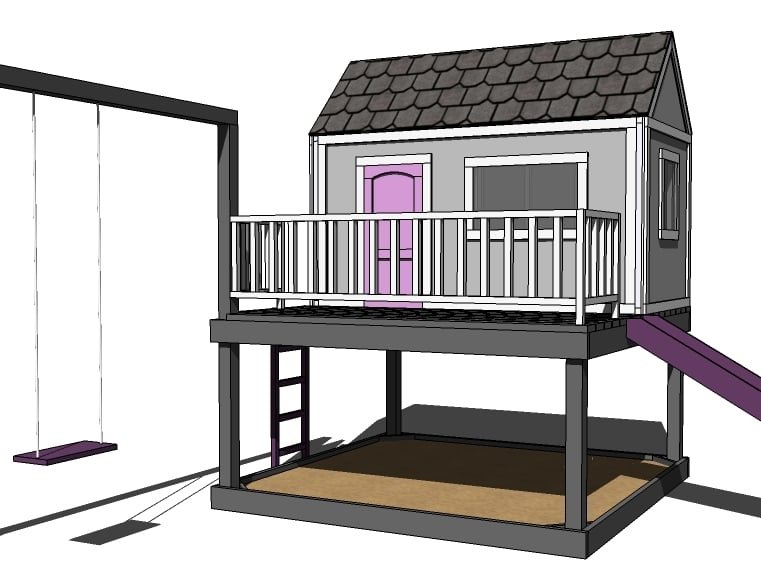
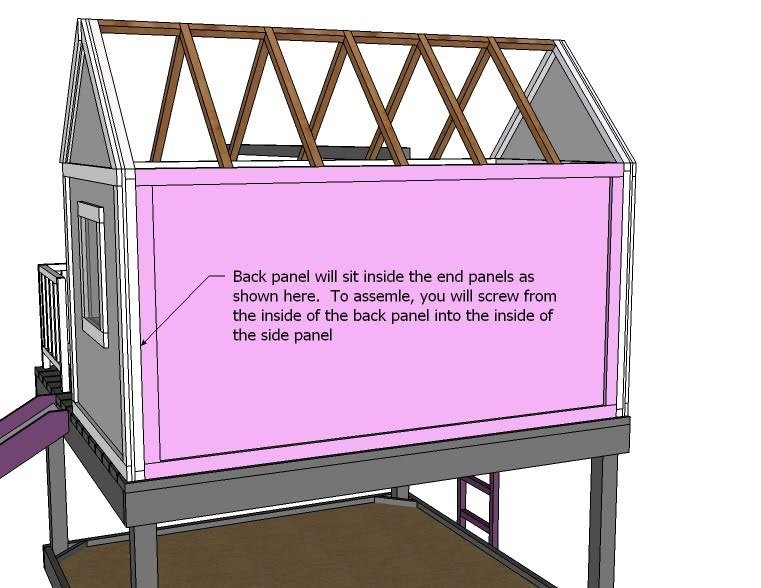
When you go to assemble the playhouse, the wall will sit inside the gable end wall as shown above. You will need to screw with 3″ screws from this inside of the back wall into the gable end wall (the screw will need to be fastened at a slight angle).
Finishing
Sand all surfaces, starting with a medium grit and finishing with fine. Wipe off the dust, fill any holes or gaps with wood filler, and sand smooth once dry. Apply primer if you're painting, then finish with your choice of paint or stain and seal with a durable clear topcoat. For outdoor projects, use exterior-rated primer, paint or stain, and sealer so the piece stands up to the weather.
Source (temporary): https://www.ana-white.com/woodworking-projects/simple-playhouse-back-wall-part