Simple Playhouse Deck
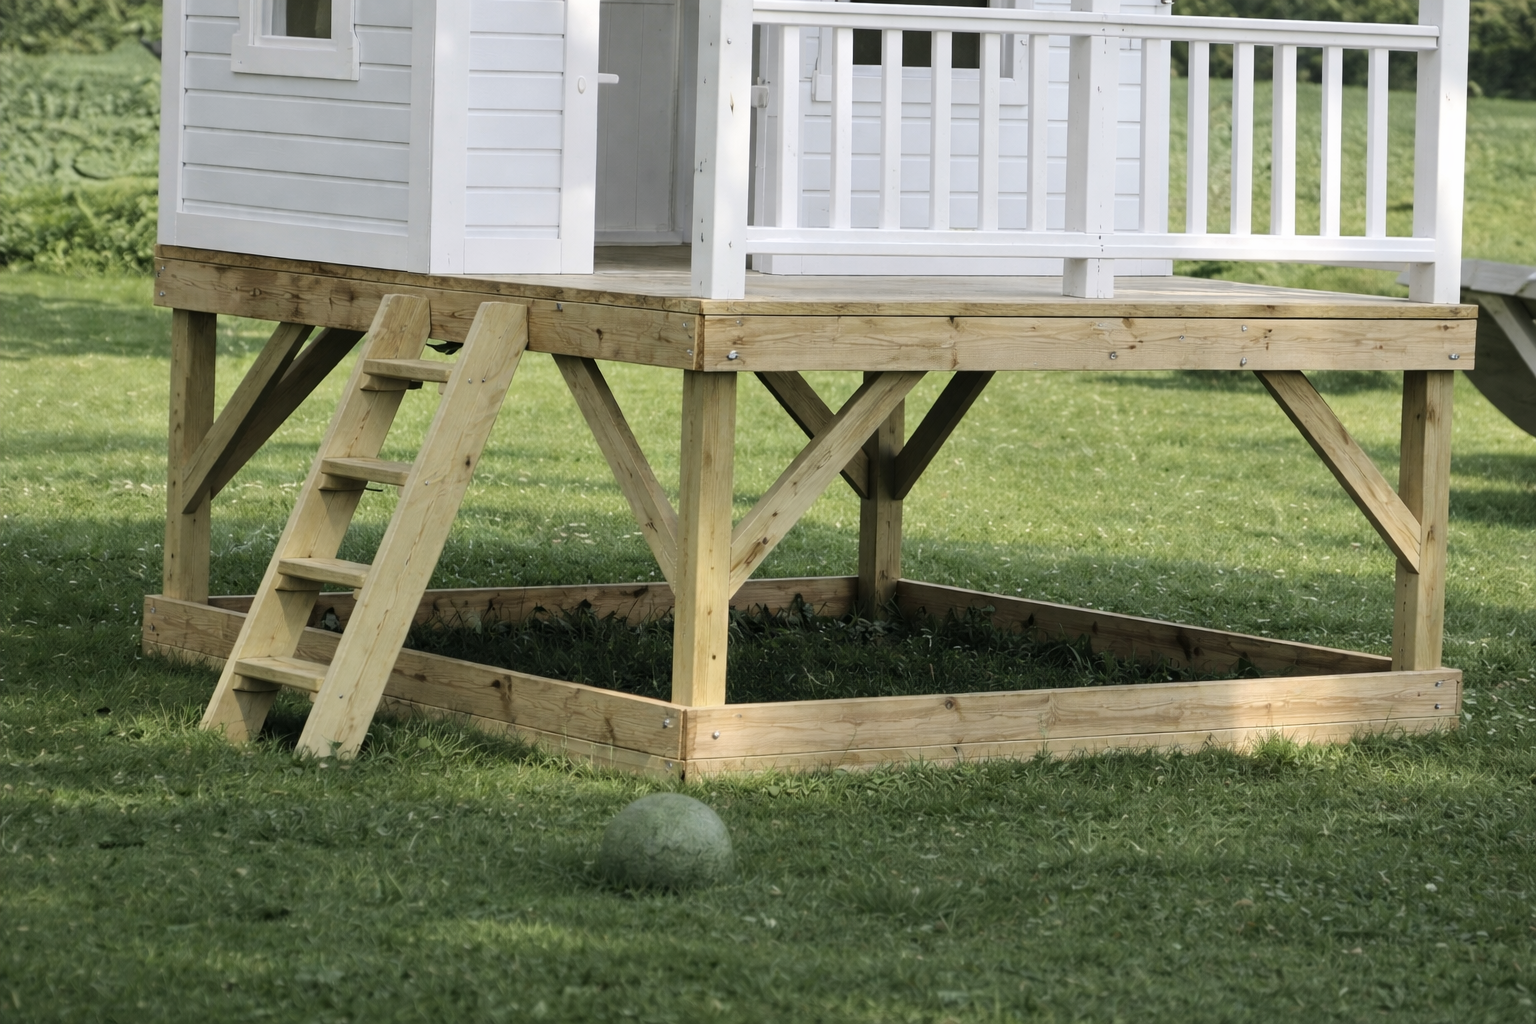
This playhouse deck uses standard 2x6 boards and minimizes scraps. Four feet off the ground, there is just enough clearance underneath to store toys under! Build a playhouse on top. from
Specifications
| Project type | Playhouse |
|---|---|
| Room | Kids and Toys |
| Style | Children's and Kid's Room Furniture and Toy Plans |
| Difficulty | Advanced |
| Estimated cost | $100-$150 |
Dimensions
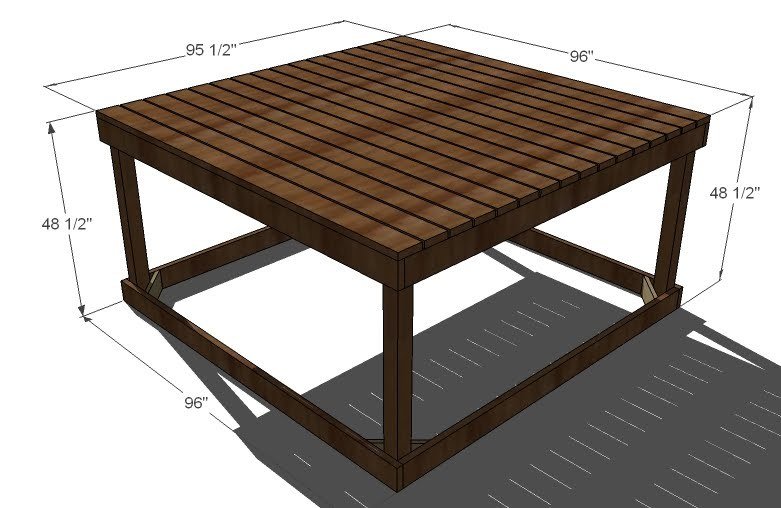
Use the size-specific shopping and cut lists below.
Shopping List
- 2 – 4×4 Posts 8′ Long (3 if you are using the swingset option)
- 29 – 2×6 Boards, 8′ Long (8 of these can be stud length 92 5/8″ if stud length is cheaper)
- 4 - 2x4 @ 8 feet long (use for cross bracing)
- 2-1/2″ Exterior Self Tapping Deck Screws
- 2″ Exterior Self Tapping Deck Screws
- Outdoor Paint or Stain
Cut List
- 4 – 4×4 Posts @ 47″ (OR 2 @ 47″ and 2 @ 96″ for the swingset option)
- 8 – 2×6 @ 92 1/2″ (Shorter Sides)
- 4 – 2×6 @ 96″ (Longer Sides)
- 8 – 2×6 @ 12″ (Diagonal Supports, both ends mitered down 45 degrees)
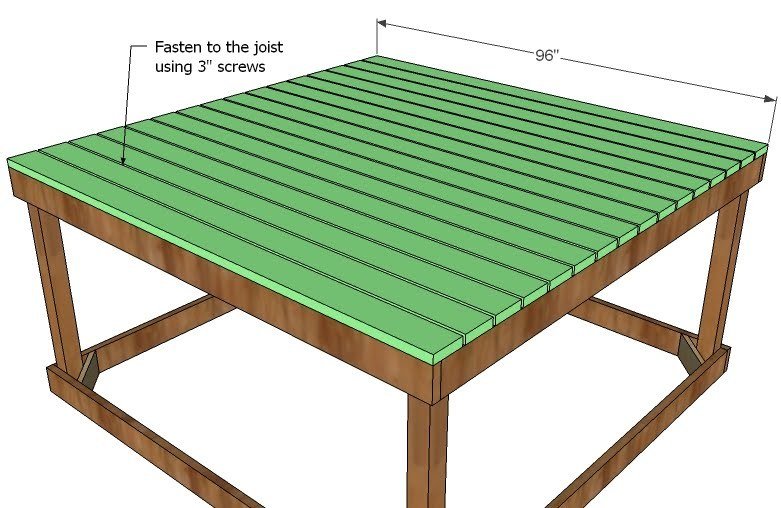
- 16 – 2×6 @ 96″ (Deck Boards)
Tools
- measuring tape
- square
- pencil
- hammer
- safety glasses
- hearing protection
- drill
- circular saw
- sander
- level
Step-by-step Instructions
Step 1
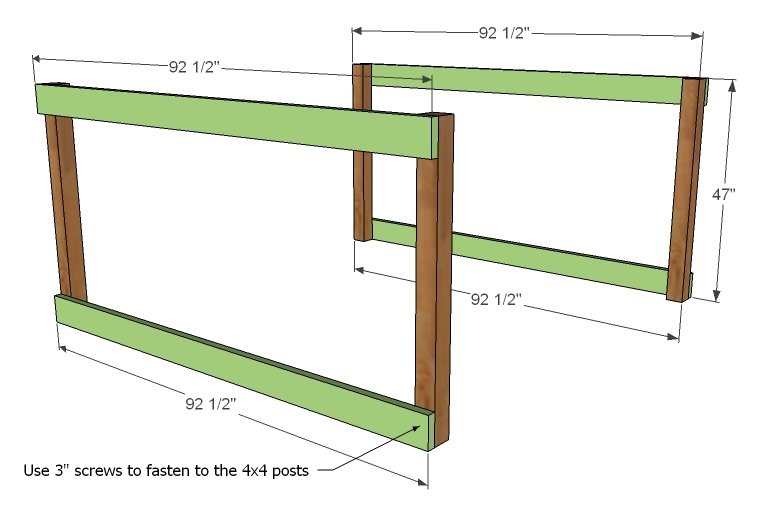
Sides { Part 1 } Lay the 4×4 posts flat and attach the posts as shown above to the sides. Use 3″ screws. Also note that if you are building the swing arm, ONE of each of the posts on each side will be 96″ long.
Step 2
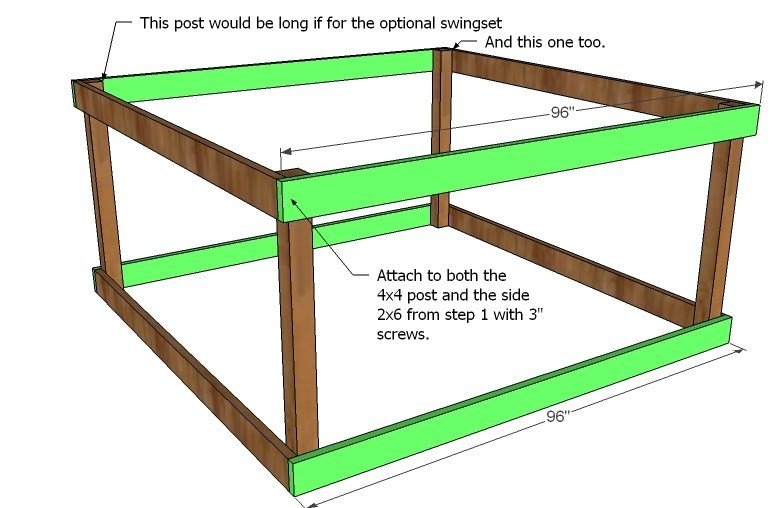
Sides { Part 2 } Now attach the remaining sides to the posts and sides as shown above. Use 3″ screws. Level the frame and adjust for square. Trust me, it will be a miracle if it’s square without adjustment.
Step 3
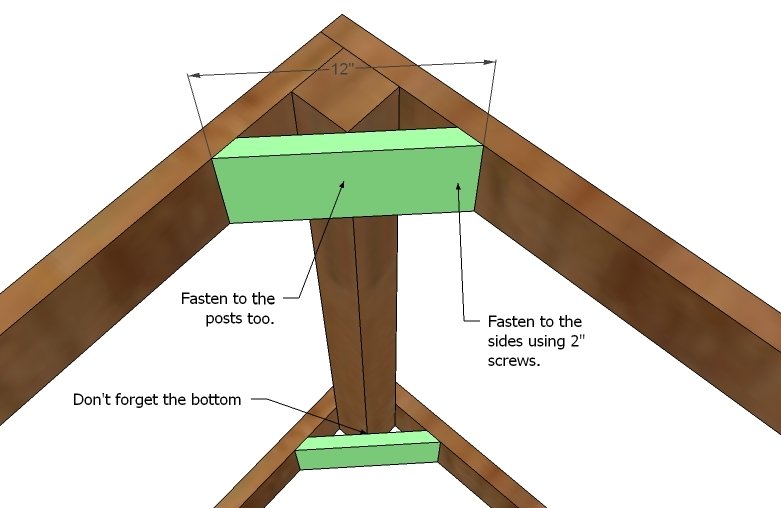
Diagonal Supports With the box nice and square and level, fasten the diagonal supports to each corner as shown above. This should stiffen up the corners considerably.
Step 4
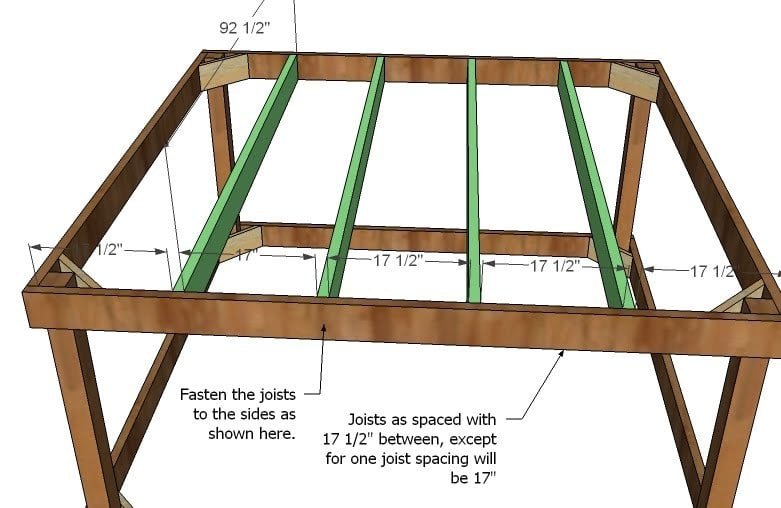
Joists Mark out all of your joists on the sides, (the long sides) as shown above. Then screw the joists to the sides as shown above. Use 3″ screws.
Step 5
Step 6
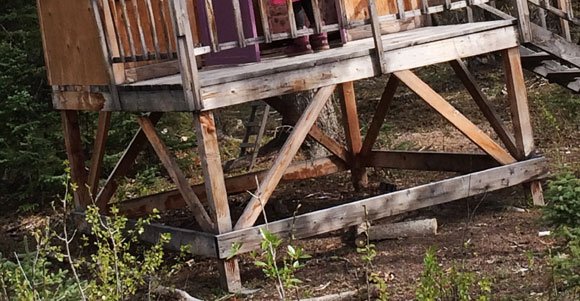
Cross brace the base with 2x4s as shown in diagram, attaching with at screws into the framing.
Finishing
Sand all surfaces, starting with a medium grit and finishing with fine. Wipe off the dust, fill any holes or gaps with wood filler, and sand smooth once dry. Apply primer if you're painting, then finish with your choice of paint or stain and seal with a durable clear topcoat. For outdoor projects, use exterior-rated primer, paint or stain, and sealer so the piece stands up to the weather.
Source (temporary): https://www.ana-white.com/woodworking-projects/simple-playhouse-deck-free-plans