Simple Playhouse
You can build your own playhouse and we are here to help! Just build the four walls in panels. The Gable End Walls feature a window and full trim work. from
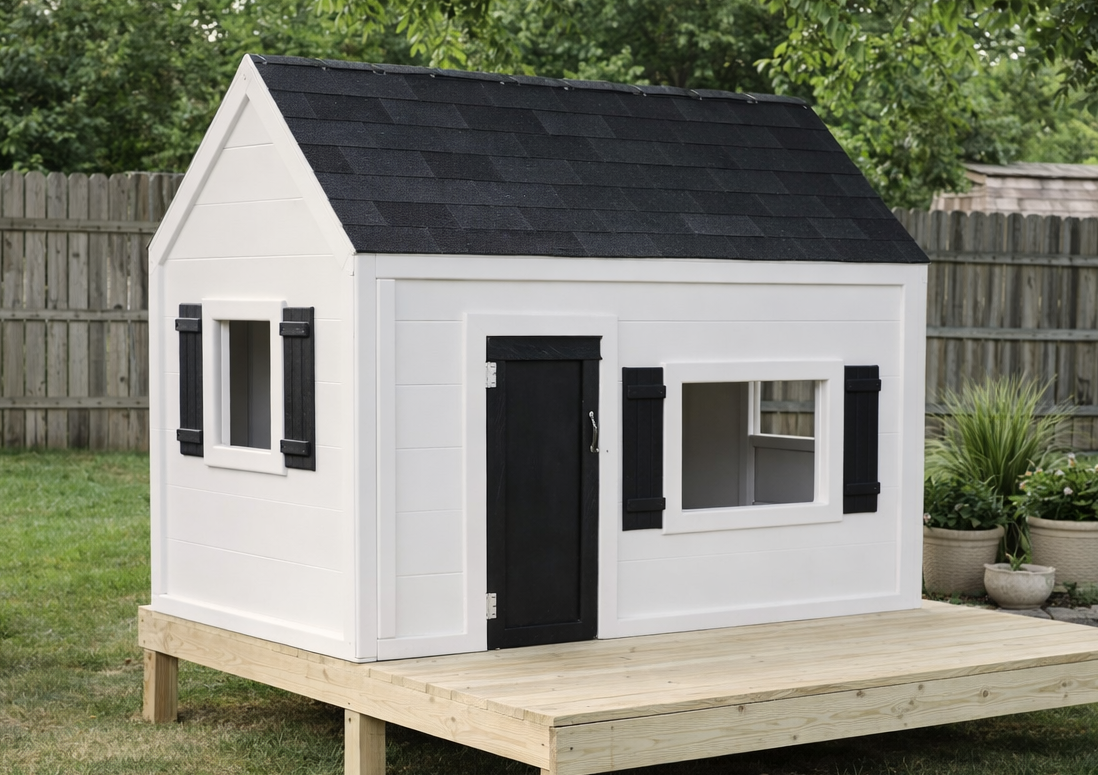
Specifications
| Project type | Playhouse |
|---|---|
| Room | Kids and Toys |
| Style | Children's and Kid's Room Furniture and Toy Plans |
| Difficulty | Beginner Projects |
| Estimated cost | $50 - $100 |
Dimensions
Use the size-specific shopping and cut lists below.
Shopping List
Shopping List for TWO End Gable Panels
- 2 – Sheets of Plywood Sheathing (I’m using 1/4″ Lauan because it’s water resistant and finished on two sides
- 1 1/2″ nails or Screws (for fastening the sheathing to the studs)
- 2 1/2″ Self Tapping Exterior Screws (for fastening the studs together)
- Wood Glue
- 8 – 2×2 Boards, 8′ Length
- 2 – 1×3 Boards, 8′ Length
Cut List
Cut List for TWO Gable End Walls
- 8 – 2×2 @ 45″ (Wall Studs)
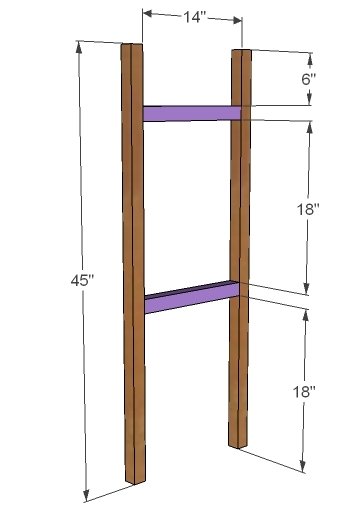
- 4 – 2×2 @ 14″ (Window Framing)
- 4 – 2×2 @ 48″ (Top and Bottom Plate, cut (1) 48″ and (1) 45″ board from an 8′ 2×2)
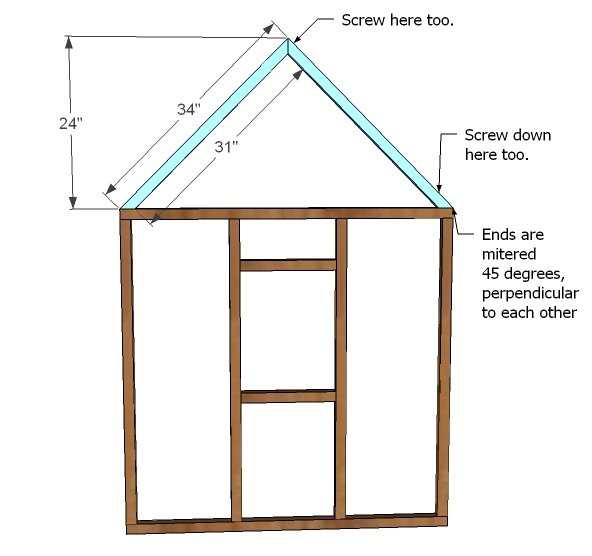
- 4 – 2×2 @ 34″ (Both ends mitered down 45 degrees, ends will run perpendicular to each other)
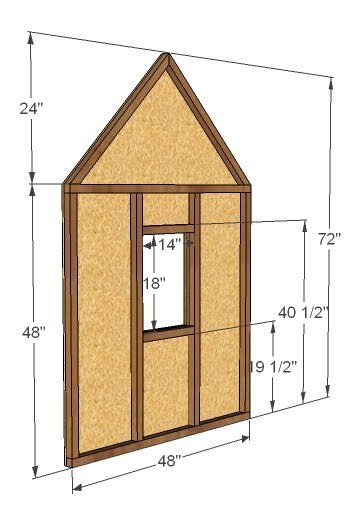
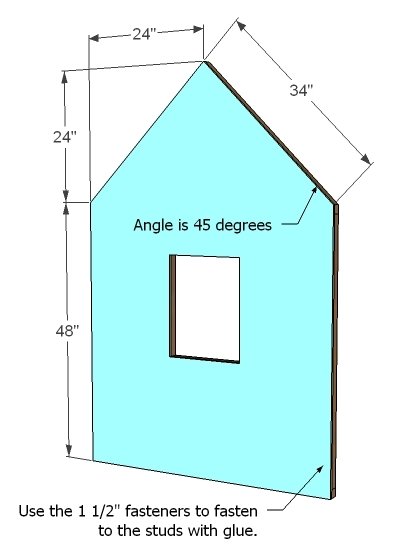
- 2 – Sheets of Sheathing Overall 48″ wide x 72″ tall, top angled down to match rafters
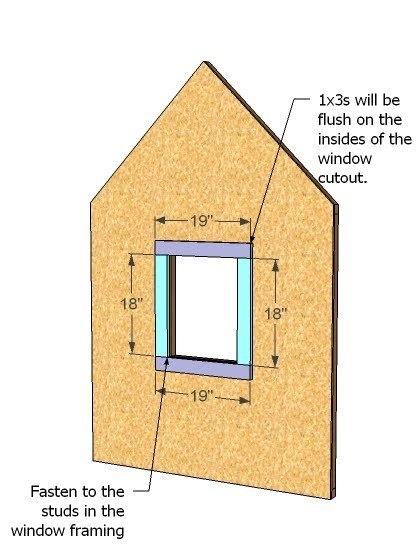
- 4 – 1×3 @ 19″ (Window Trim)
- 4 – 1×3 @ 18″ (Window Trim)
Tools
- measuring tape
- square
- pencil
- hammer
- safety glasses
- hearing protection
- kreg-jig
- drill
- circular saw
- nailer
- sander
Step-by-step Instructions
Window Framing
So this is not how you would frame a window in a real house, but because our walls are only 4′ tall and we’re just building a little playhouse, this will be plenty strong. And despite the way the frame looks, the load bearing walls are actually the side walls. Use the 2 1/2″ screws and glue to fasten the studs to the window frame.
Wall Framing
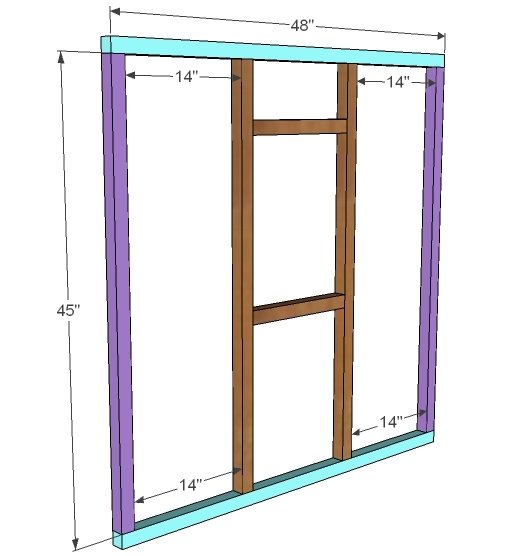
Now add the top and bottom plates to the window studs, and also screw the end studs to the top and bottom plates. Use 2 1/2″ screws and glue.
Rafters
Cut your rafters by mitering the ends at 45 degrees. Then use 2 1/2″ glue and nails to fasten the rafters together and to the wall as shown above.
Sheathing
Cut out the sheathing as shown above. Refer to the dimensional diagram for window cutout dimensions. Fasten the sheathing to the studs using 1 1/2″ fasteners and glue.
Step 5
Step 6
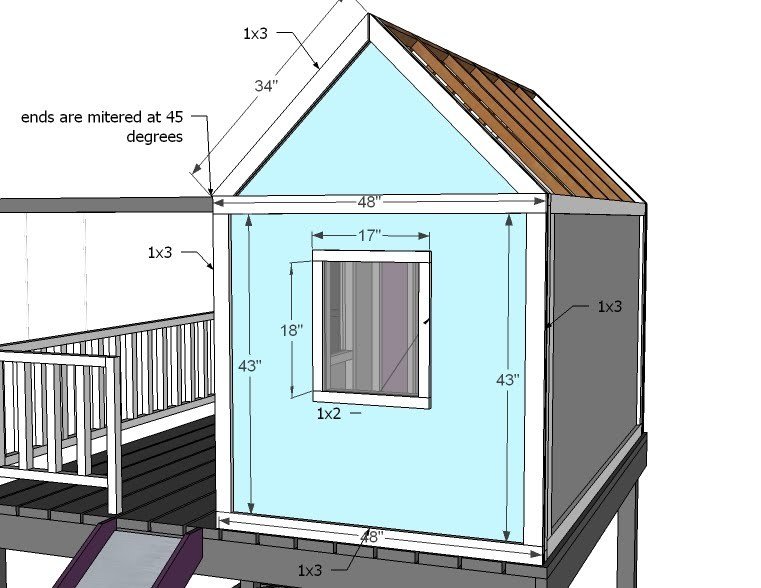
I ended up using 1x2s for the window trim because I felt like when the window itself is put in, the frame will be quite thick. Use the measurements above to guild you when trimming out the gable ends for the playhouse. 4 – 1×2 @ 17″ 4 – 1×2@ 18″ 4 – 1×3 @ 48″ 4 – 1×3 @ 43″ 4 – 1×3 @ 34″ (Both ends mitered down 45 degrees) You will need to in addition to the above cut list purchase (to trim out 2 gable end walls) 2 – 1x2s 6 – 1x3s
Finishing
Sand all surfaces, starting with a medium grit and finishing with fine. Wipe off the dust, fill any holes or gaps with wood filler, and sand smooth once dry. Apply primer if you're painting, then finish with your choice of paint or stain and seal with a durable clear topcoat. For outdoor projects, use exterior-rated primer, paint or stain, and sealer so the piece stands up to the weather.
Source (temporary): https://www.ana-white.com/woodworking-projects/simple-playhouse-gable-end-walls-part