Simple Playhouse
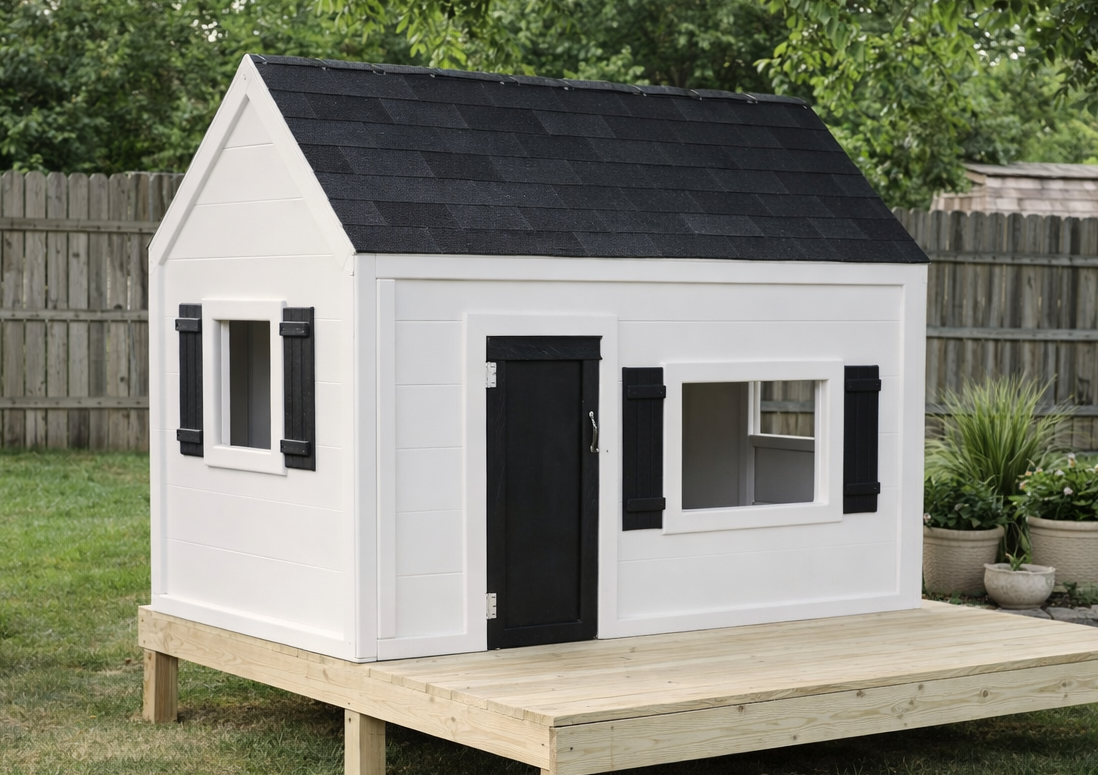
Think putting up a roof on a playhouse is difficult? Reconsider with this plan. This simple roof design will take all of the confusion out of rafters. We've had this playhouse up through a windy Alaska summer (and winter), through rainstorms, and even with lots of snow! Free
Specifications
| Project type | Playhouse |
|---|---|
| Room | Kids and Toys |
| Style | Children's and Kid's Room Furniture and Toy Plans |
| Difficulty | Intermediate |
| Estimated cost | $50 - $100 |
Shopping List
- 2 – 3/4″ Plywood or OSB 4×8 Sheets (Can be the builder grade stuff)
- 6 – 2×2 Furring Strips
- 50 Square Feet of Roofing - cedar shinges would be adorable
- 8′ Roofing Ridge Material
- Roofing Nails or other Roofing fasteners
- 2″ self tapping wood Screws
- 1 1/4″ self tapping wood screws
Cut List
10 – 2×2 @ 34″, Both Ends Mitered down 45 degrees perpendicular (Rafters)
1 – 2×2 @ 93″ (Ridge Pole)
2 – 3/4″ Plywood or OSB @ 96″ x 35″
Tools
- measuring tape
- square
- pencil
- hammer
- safety glasses
- hearing protection
- drill
- compound miter saw
- nailer
- staple gun
Step-by-step Instructions
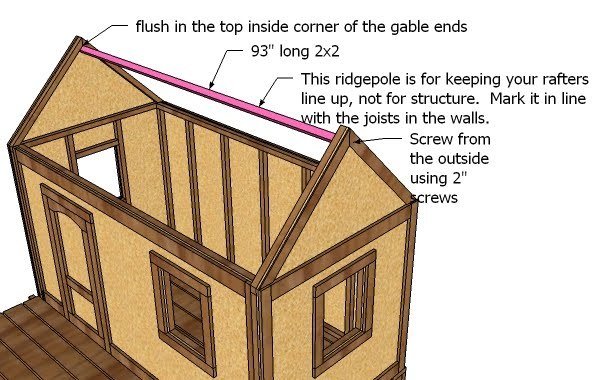
RIDGEPOLE
Line your ridgepole up with the back side wall and quickly mark the placement of each stud in the back wall. Then, attach your ridgepole as shown above, screwing from the outsides of the gable end walls with 2″ screws.
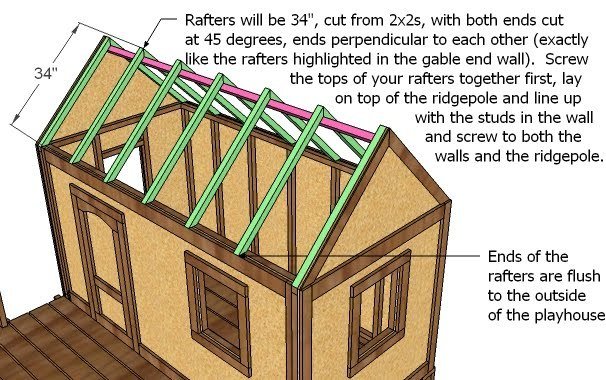
RAFTERS
Build your trusses by screwing the tops of the trusses together using the 2″ screws and glue. Lay your trusses on top of the ridgepole and line up with the markings from step 1. The ends of the rafters should be flush with the outsides of the front and back walls, matching the trusses built into the gable end walls (also highlighted in green above). Screw to both the front and back walls and to the ridgepole.
SHEATHING
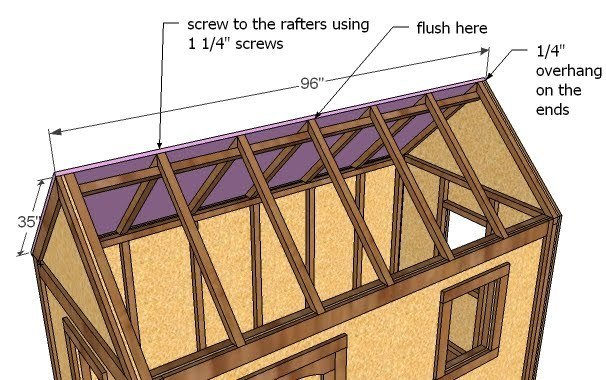
Use the 1 1/4″ screws to attach the sheathing to the rafters, as shown above.
Step 4
The roof sheathing should look like this, with slight overhangs on the ends.
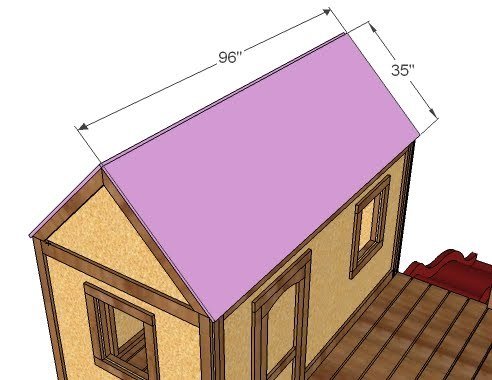
Step 5
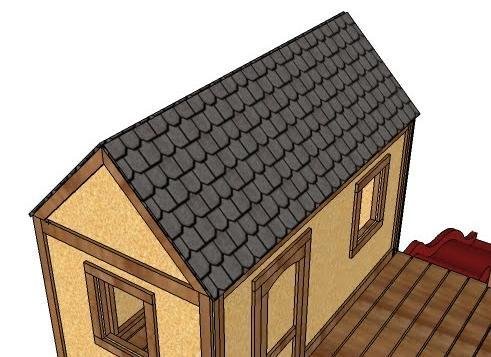
Finishing
Sand all surfaces, starting with a medium grit and finishing with fine. Wipe off the dust, fill any holes or gaps with wood filler, and sand smooth once dry. Apply primer if you're painting, then finish with your choice of paint or stain and seal with a durable clear topcoat. For outdoor projects, use exterior-rated primer, paint or stain, and sealer so the piece stands up to the weather.
Source (temporary): https://www.ana-white.com/woodworking-projects/simple-playhouse-roof-part