Simple Potting Bench
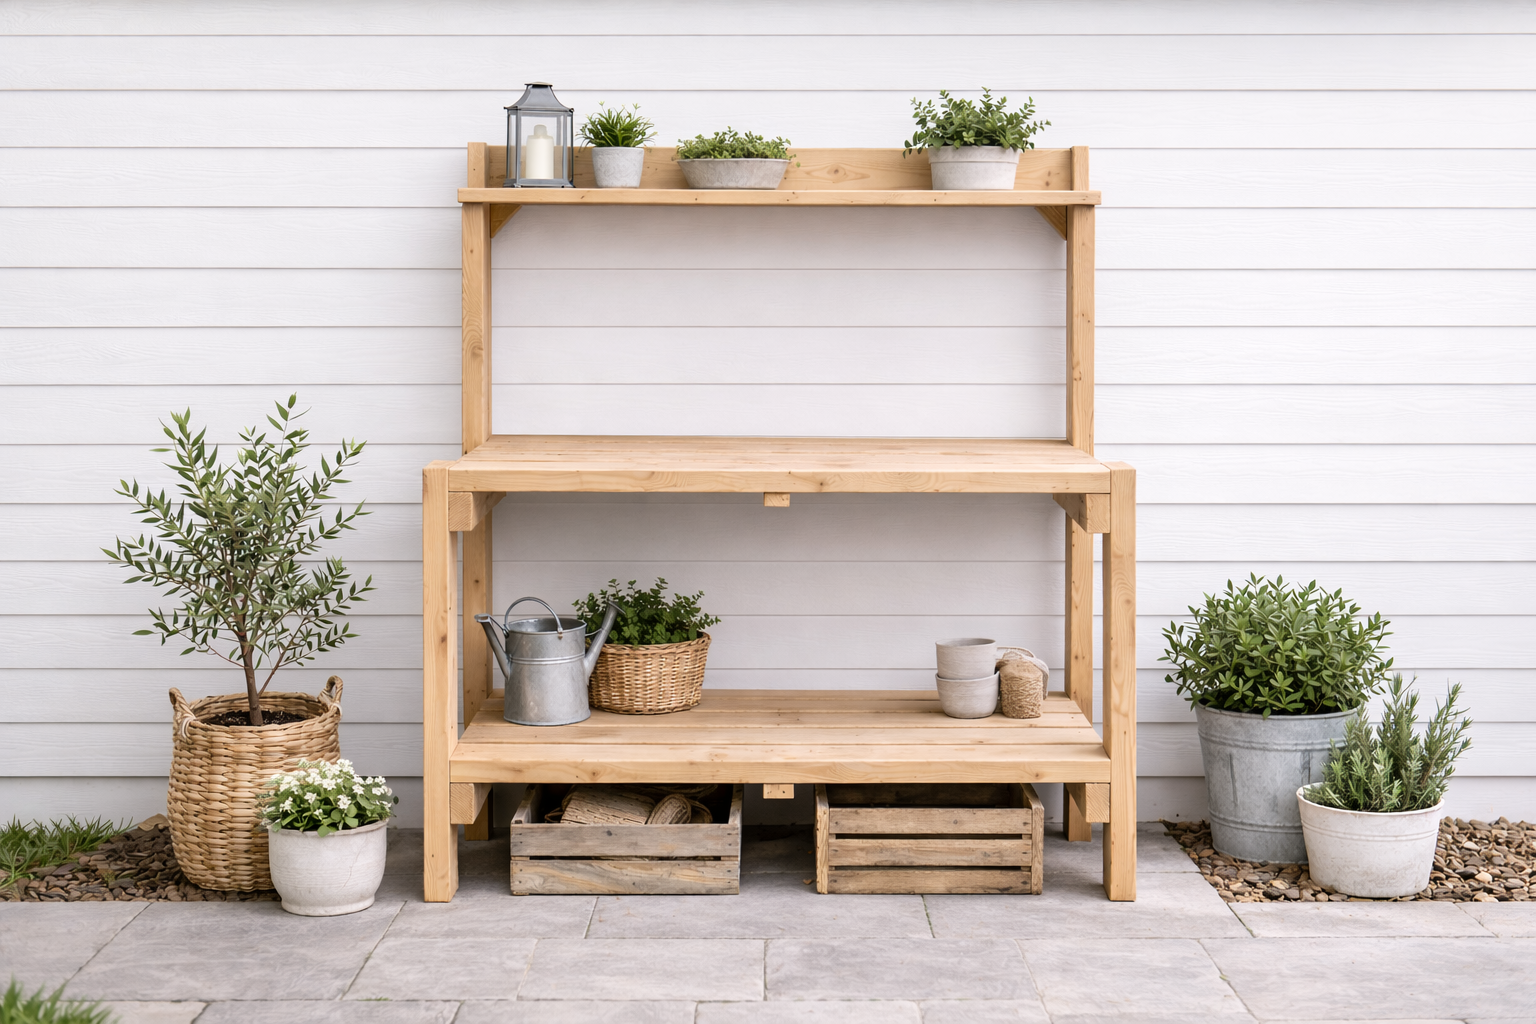
DIY Potting bench plans - very easy to build basic potting bench made out of 2x4s. from
Specifications
| Project type | Planters, Garden Beds, and Greenhouses |
|---|---|
| Room | Outdoor |
| Style | Farmhouse Furniture |
| Difficulty | Intermediate |
| Estimated cost | $50 - $100 |
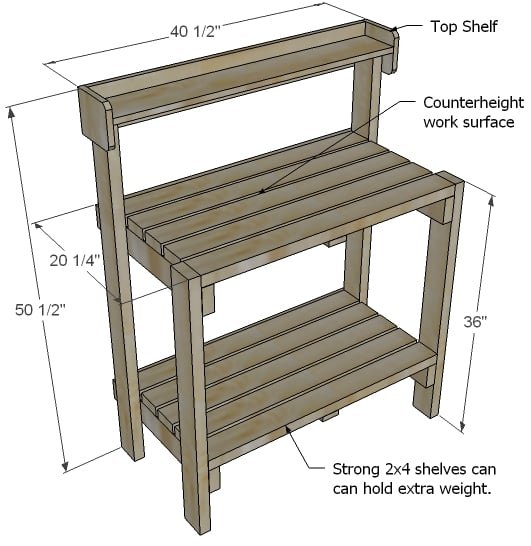
Dimensions
Use the size-specific shopping and cut lists below.
Shopping List
- 7 - 2x4 @ 8 feet long (Cedar or exterior treated works best for exterior applications, but painted or stained standard lumber can also work if properly treated and maintained)
- 1 - 1x6 @ 8 feet long
- 1 - 1x3 @ 8 feet long
- 1 - 1x2 @ 4 feet long
Cut List
- 10 - 2x4 @ 36" (Shelf Boards)
- 4 - 2x4 @ 19 1/2" (Shelf Supports)
- 2 - 1x2 @ 19 1/2" (Center Shelf Support)
- 2 - 2x4 @ 36" (Front Legs)
- 2 - 2x4 @ 48" (Back Legs)
- 2 - 1x6 @ 39" (Top Shelf)
- 2 - 1x3 @ 39" (Back Supports)
Tools
- measuring tape
- square
- pencil
- safety glasses
- hearing protection
- drill
- circular saw
- sander
- level
- countersink drill bit
Step-by-step Instructions
Step 1
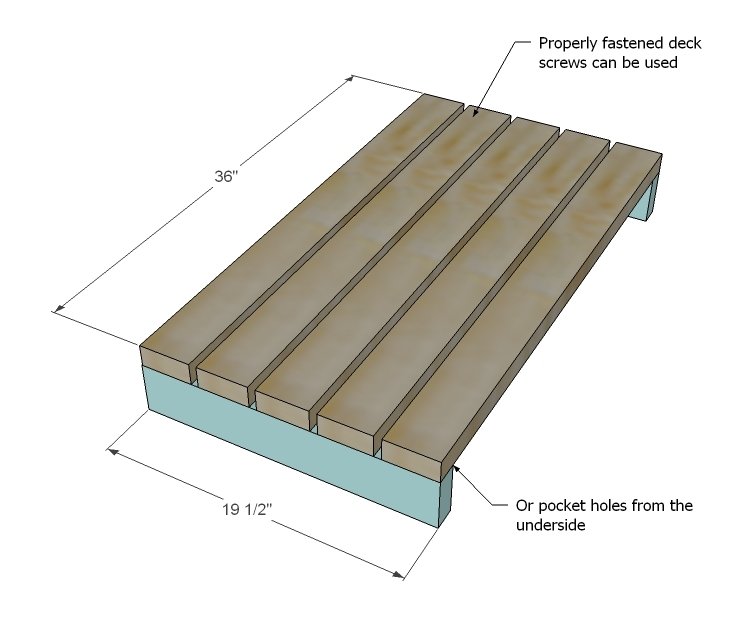
Begin by attaching the shelf boards to the side supports as shown above. Choose exterior decking screws installed correctly (see packaging) to prevent water damage. If you have a Kreg Jig™, you could also fasten from the underside and completely hide all screw holes. Take care to ensure that both (Yes, make two) shelves are square. Glue is advisable.
Step 2
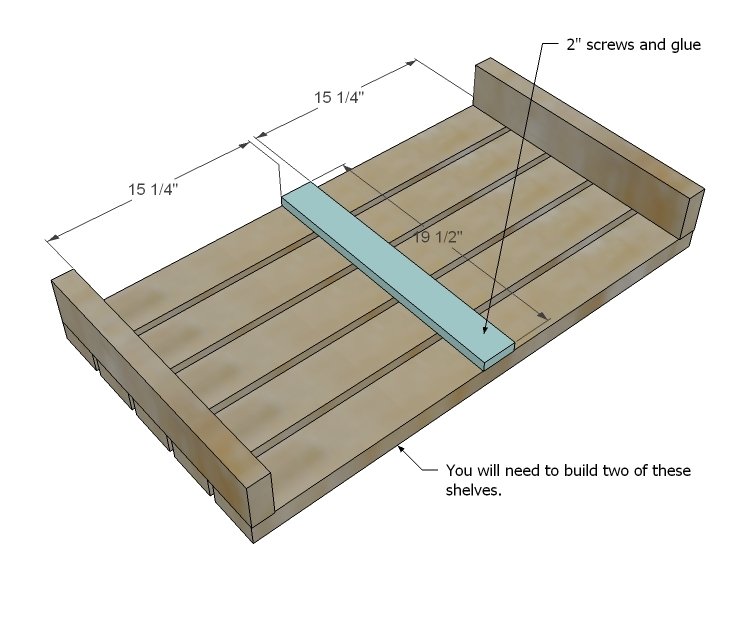
Mark the center underside of the shelves as shown above. Attach the center support with 2" screws.
Step 3
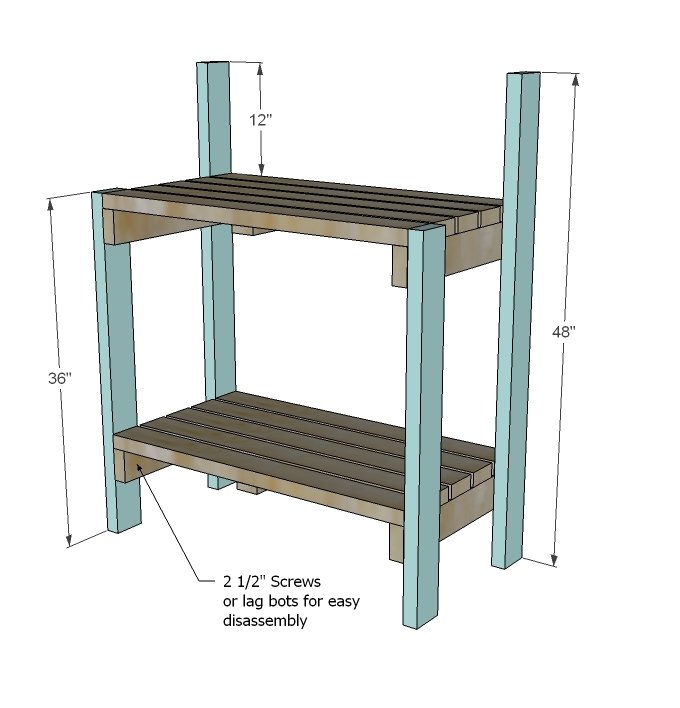
Mark the back legs 36" from the bottoms. Then to hide your screw holes, attach the shelves to the legs as shown above from the insides. Predrill and countersink all screws.
Step 4
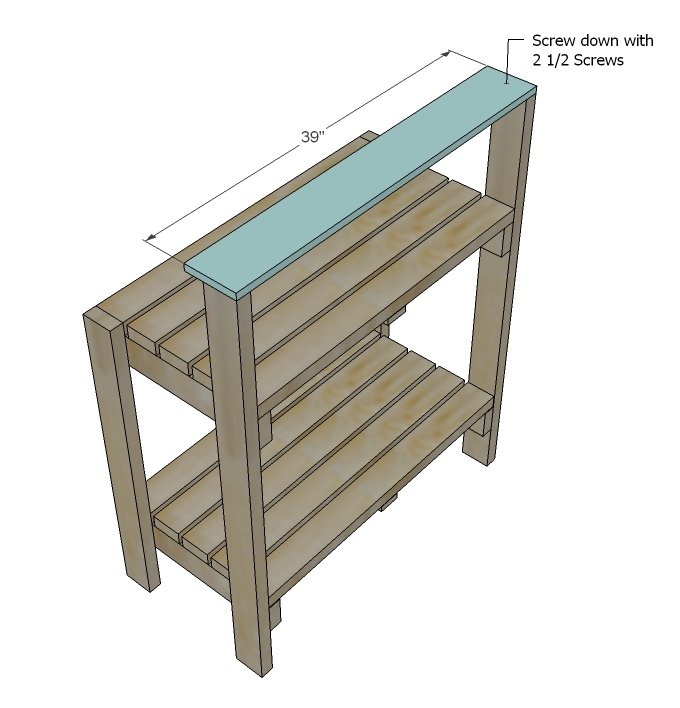
First things first, make sure that you potting bench is square by measuring diagonally accross the back and leveling the legs with a level. You should do this at every step.
Step 5
Step 6
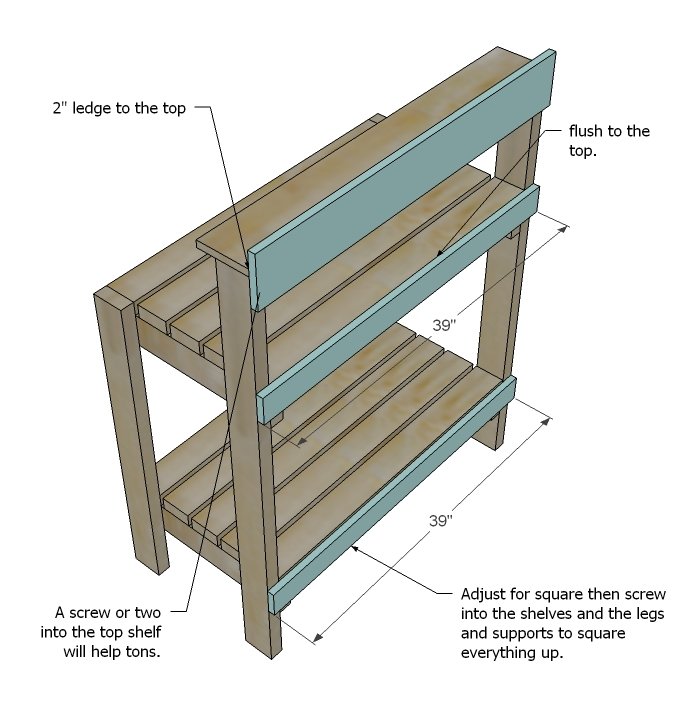
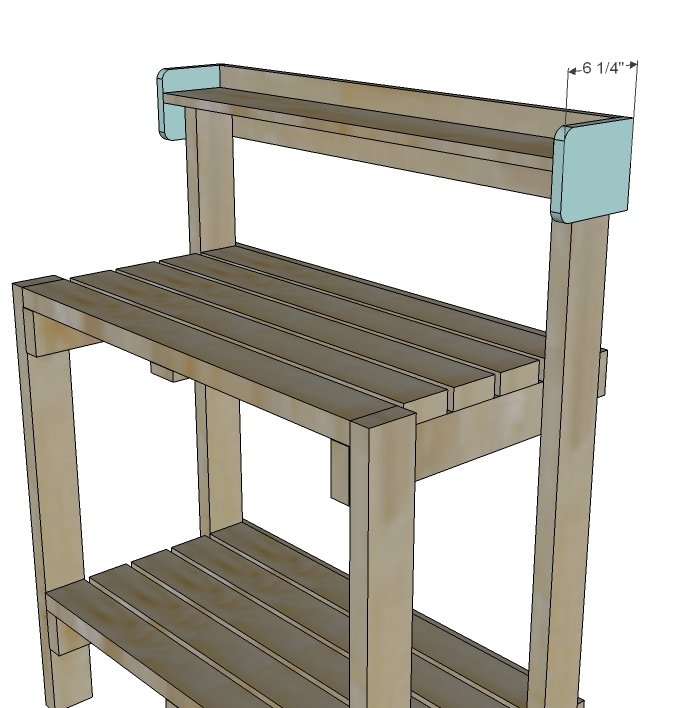
Attach the top shelf side supports to the top shelf as shown above. Trim corners off to avoid a sharp outside edge. And your potting bench or gardening station is done!
Finishing
Sand all surfaces, starting with a medium grit and finishing with fine. Wipe off the dust, fill any holes or gaps with wood filler, and sand smooth once dry. Apply primer if you're painting, then finish with your choice of paint or stain and seal with a durable clear topcoat. For outdoor projects, use exterior-rated primer, paint or stain, and sealer so the piece stands up to the weather.
Source (temporary): https://www.ana-white.com/woodworking-projects/simple-potting-bench