Simple Quilt Rack Console Table
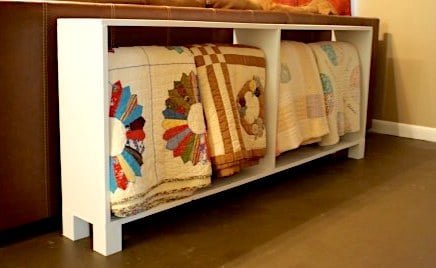
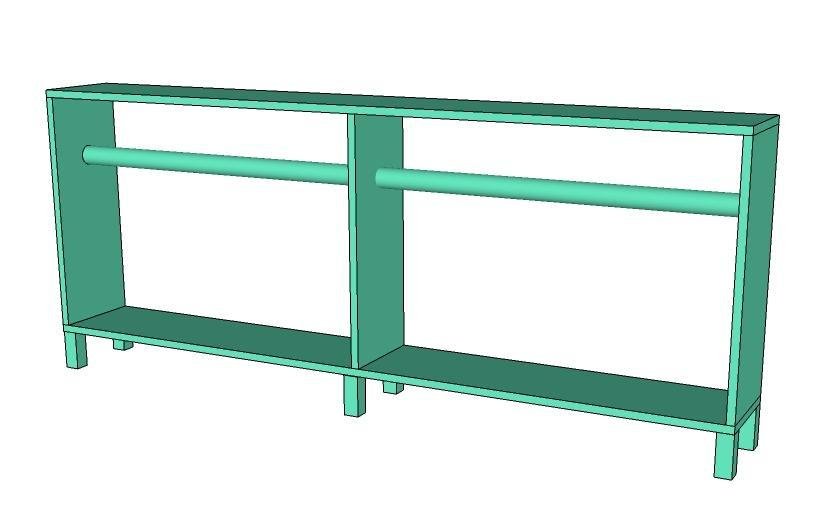
Build your own console table quilt rack! This simple plan holds quilts and serves as a console tabletop. with diagrams, shopping and cut list from
Specifications
| Project type | Console Table Plans |
|---|---|
| Room | living room |
| Style | Modern Style Furniture Plans |
| Difficulty | Beginner Projects |
| Estimated cost | $20 - $50 |
Dimensions
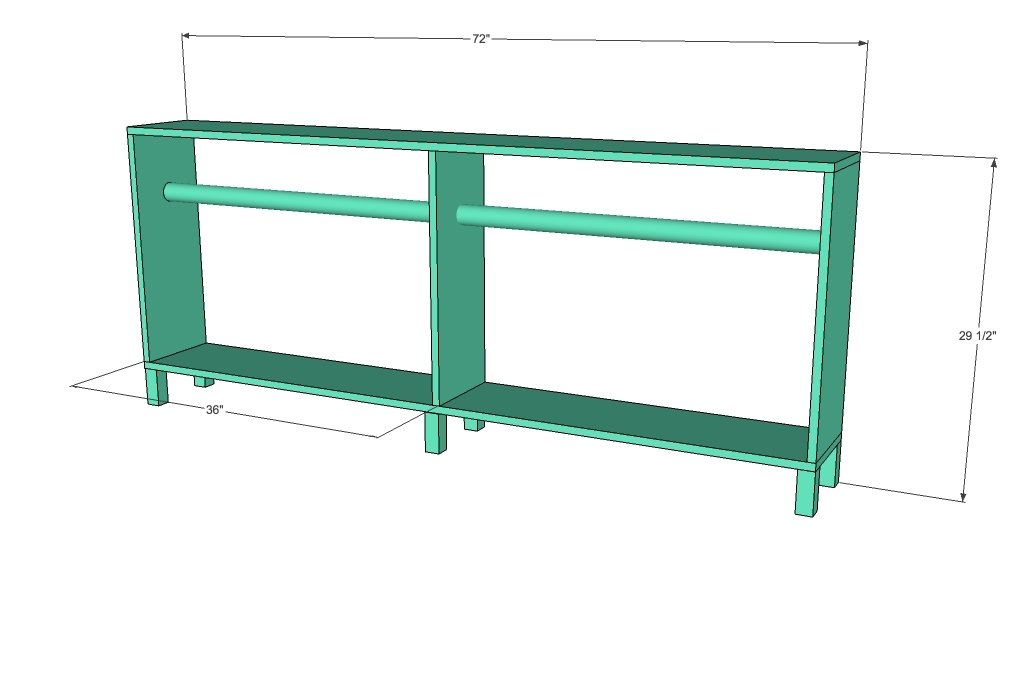
Use the size-specific shopping and cut lists below.
Shopping List
- 3 – 1x10x6′ boards
- 1 – 6′ long dowel rod (I chose the 1″ thickness)
- 1 – 2×2 @ 24″ (you can use scrap 2×2′s, 4×4′s, or whatever else for the feet. You’ll need six 4″ long pieces)
- 3/4″ screws (about 50)
Cut List
- 2 – 1×10′s @ 72″ (no cutting on these, yay!)
- 3 – 1×10 @ 24″
- dowel @ 70.5″ (I’d cut this last, and measure the distance just to be safe)
Tools
- measuring tape
- square
- pencil
- hammer
- safety glasses
- hearing protection
- drill
- circular saw
- sander
- level
- countersink drill bit
Step-by-step Instructions
Step 1
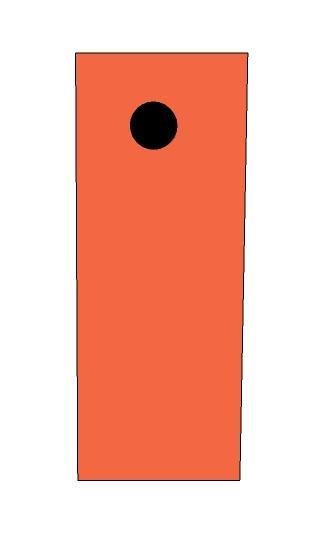
*If you have a hole saw bit (we happened to have one available that was 1 1/4″ thick) this step is easier. If you don’t, you can trace the edge of your rod onto the board and use a jigsaw. Please don’t judge me and my hole. It’s not centered, or 4 1/2″ down in this image. I just tried to whip up a visual really quick, and Sketchup hates me. Grab one of your 24″ long 1×10′s. Find the center of the board, and measure 4 1/2″ down. Mark the center of your hole. Drill it out, and make sure your rod fits through. While you’re measuring, you should go ahead and find that same center dot on your two 24″ long end boards that aren’t getting a hole. Predrill/Countersink the holes, this is what will secure your dowel.
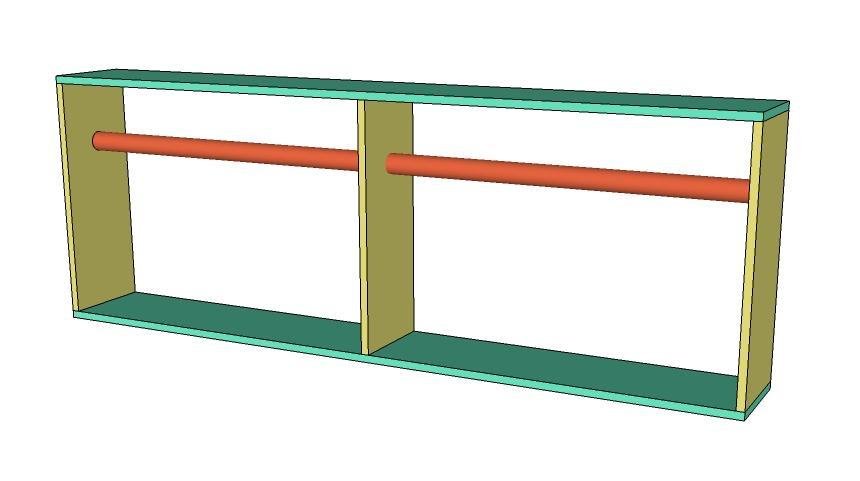
Build the box.
Start by pre-drilling/countersinking your holes on the two ends. Then measure 36″ to the center and predrill for your center (the one with the cutout) board. • IMPORTANT! Screw your 2 end boards in first, then slide your dowel through the middle board before drilling it in place. It is nearly impossible to fit it in after you screw the center board down. The easiest way I found to piece it together was by laying one of the long boards on the ground, stacking the 3 short boards on top (only 1 end has to be in the right position right now, so the rest are just to balance and level it) and setting the second long board on top. Screw in the two ends, slip your dowel through your center board, then drill it in too. Flip over, and repeat on the bottom board. Using the marks you made in step 1, line up your dowel and drill a screw in from the outside into the dowel, check for level on both ends.
Step 3
Attach your feet. I used 3 screws per foot, so they wouldn’t twist. But my feet were 3×3 table legs, so you can probably get away with just 1 or 2 if you’re using a 2×2. I propped the box up on the four feet, then just drilled down into them. Voila! Now you have a slim-lined, modern way to display quilts or store afghans and throws for your couch. you can even stack bins on the bottom shelf, or use it for shoe storage. Toss a basket and a few candles on top, and you’re ready to go!
Finishing
Sand all surfaces, starting with a medium grit and finishing with fine. Wipe off the dust, fill any holes or gaps with wood filler, and sand smooth once dry. Apply primer if you're painting, then finish with your choice of paint or stain and seal with a durable clear topcoat. For outdoor projects, use exterior-rated primer, paint or stain, and sealer so the piece stands up to the weather.
Source (temporary): https://www.ana-white.com/woodworking-projects/simple-quilt-rack-console-table