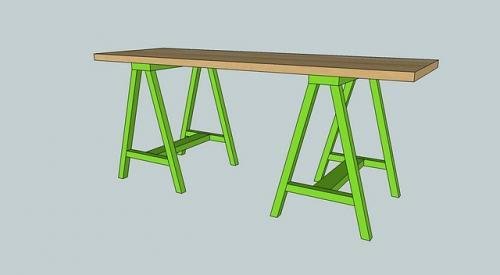
Simple Sawhorse Table
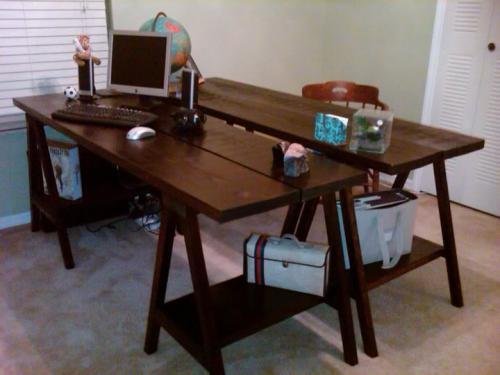
From Cindy: Thank you so much for this amazing DIY instructions! I just completed 2 desks! One for me and one for Hubby! It took me a little while longer than 2 hours…but well worth it! Even with no experience it turned out amazing! I attached pictures of the ones I made! Thanks again! Hubby & I are very excited about our new desks! Oh BTW! 2 Desks = $80!!!!
Specifications
| Project type | Kids Tables and Chairs |
|---|---|
| Room | Craftroom |
| Style | Modern Style Furniture Plans |
| Difficulty | Intermediate |
| Estimated cost | Under $20 |
Dimensions
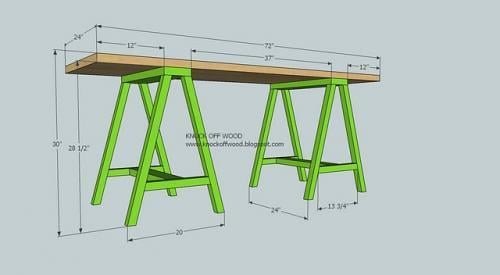
Use the size-specific shopping and cut lists below.
Shopping List
3 – 2″x2″ 8 foot length
1 – 2″x6″
24″ x 72″ x 1 1/2″ Thick Project Panel/Tabletop (Can be found at Lowe’s or Home Depot in the woodworking section) OR 2 - 2x12 @ 6 feet long (like Cindy did)
Cut List
8 2x2s @ 29″ (cut at 29″, then we will cut these at an angle again for the legs)
4 2x2s @ 13 3/4″ (we will cut these at an angle for the bottom support)
2 – 2×6 @ 24″ (Tops of the sawhorses)
2 – 2x6s @ 21″ (Stretcher between the bottom supports)
Tools
- measuring tape
- square
- safety glasses
- hearing protection
- circular saw
- compound miter saw
- sander
Step-by-step Instructions
Step 1
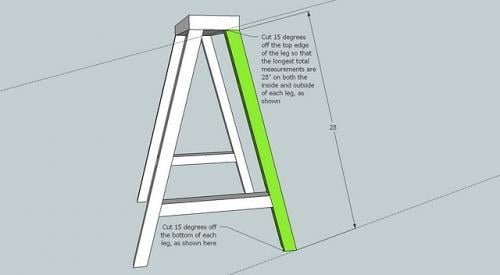
Cut the 8 legs as shown above. Take 15 degrees off the bottom and the top of the legs, so that the overall length on both ends is 28″, with the angle. This is shown above. It is a good idea to mark your boards first before cutting so that you are sure of how the angles are set.
Step 2
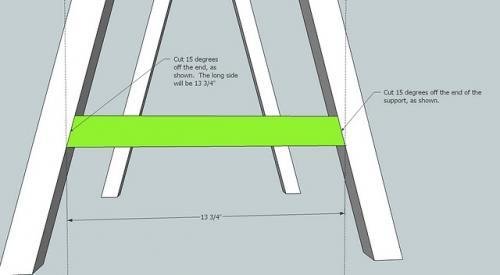
Cut the 4 bottoms supports as shown above. Again, follow the diagram above, taking 15 degrees off both ends to get the above cuts.
Step 3
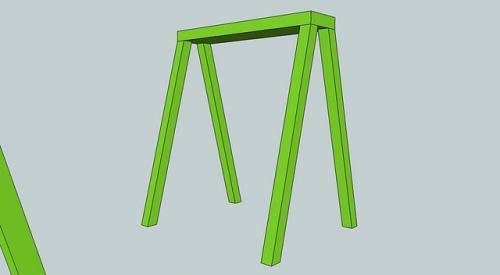
Start with the top of the sawhorse board, the 2×6 cut at 24″ and screw through the top of it into each of the legs. Keep the outside edges flush, as shown above.
Step 4
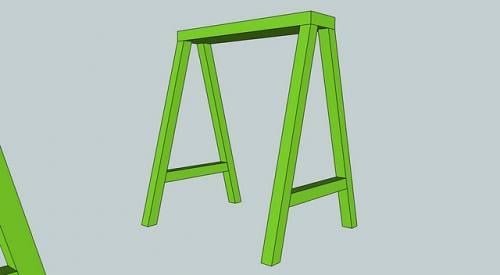
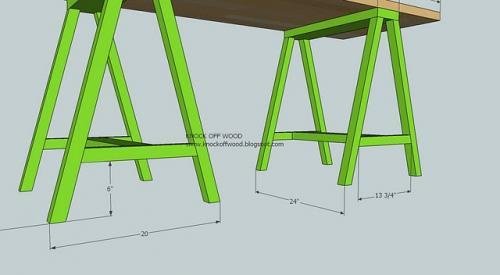
Add the bottom supports as shown above. See the below diagram for exact measurements.
Step 5
Step 6
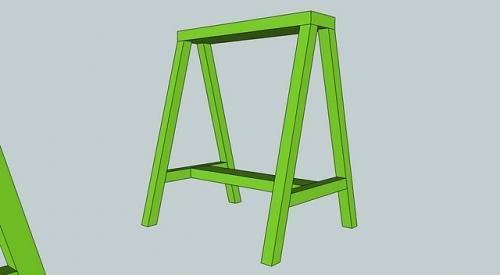
Center the stretcher on the bottom support and predrill and screw into the stretcher, as shown above. Your sawhorses are done!
Step 7
Attach the finished tabletop using 2 1/2″ screws and predrilling and screwing through the underside of the top of the sawhorses into the underside of the countertop. Using this method, you can easily transport the table just by unscrewing the tabletop. To make life easier, trace the top of the sawhorse on to the underside of the tabletop to mark where the sawhorse screws to the tabletop. As Cindy did, you can use the 2 - 2x12s for the top.
Finishing
Sand all surfaces, starting with a medium grit and finishing with fine. Wipe off the dust, fill any holes or gaps with wood filler, and sand smooth once dry. Apply primer if you're painting, then finish with your choice of paint or stain and seal with a durable clear topcoat. For outdoor projects, use exterior-rated primer, paint or stain, and sealer so the piece stands up to the weather.
Source (temporary): https://www.ana-white.com/woodworking-projects/simple-sawhorse-table