Simple Stackable Outdoor Chairs
These simple chairs stack! And match our Simple Modern Outdoor Collection. Build a few to match the tables, or just extra seating for outdoors.
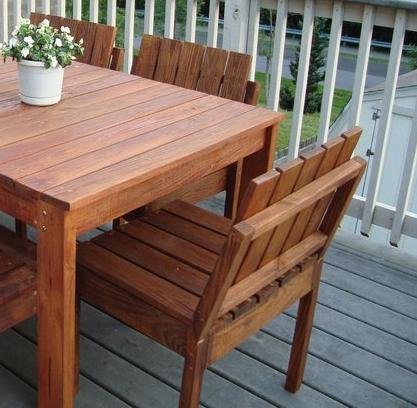
Specifications
| Project type | Chairs |
|---|---|
| Room | Outdoor |
| Style | Modern Style Furniture Plans |
| Difficulty | Advanced |
| Estimated cost | Under $20 |
Dimensions
Use the size-specific shopping and cut lists below.
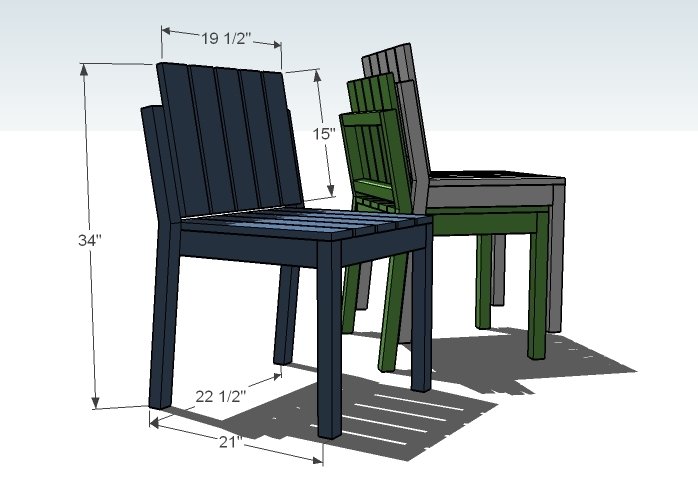
Shopping List
2 – 1×4 Boards, 8′ Long
1 – 2×2 Board, 8′ Long
1 – 2×4 Board, 8′ Long
1 – 1×3 Board, 8′ Long
2″ Screws
2 1/2″ Screws
Wood Glue
Wood Filler
Paint suitable for exterior applications
Cut List
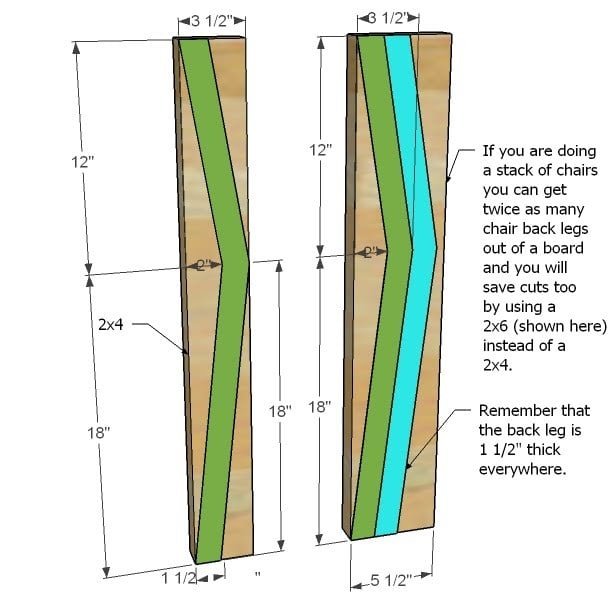
2 – 2×4 @ 30″, Chair Backs cut from these boards (see step 1 if you are making multiple chairs)
2 – 2×2 @ 19 1/2″ (Chair Back Supports)
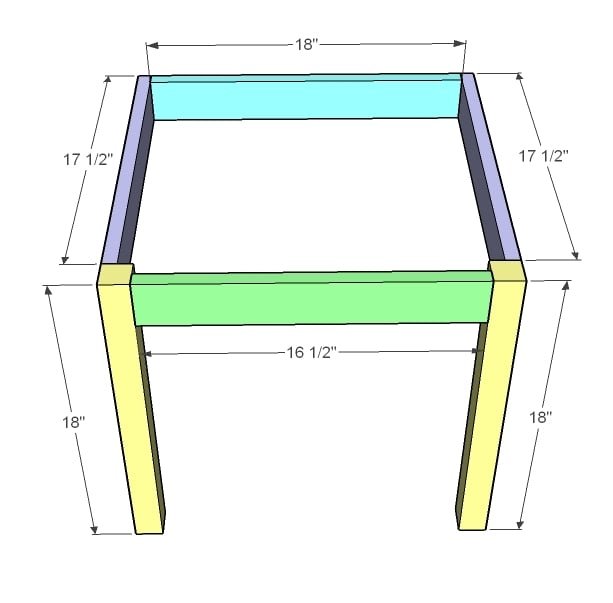
2 – 2×2 @ 18″ (Chair Front Legs)
2 – 1×3 @ 17 1/2″ (Side Aprons)
1 – 1×3 @ 16 1/2″ (Front Apron)
1 – 1×3 @ 18″ (Back Apron)
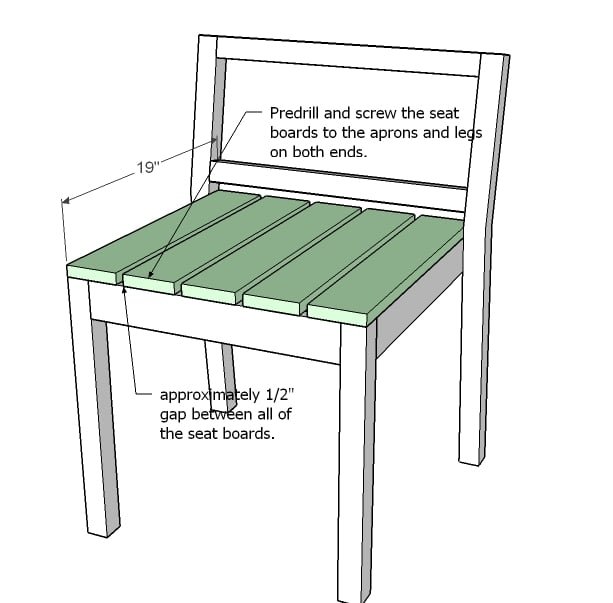
5 – 1×4 @ 19″ (Seat Boards)
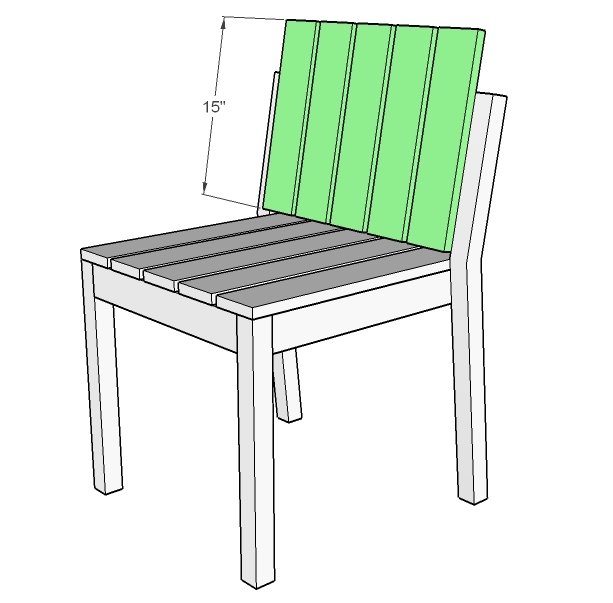
5 – 1×4 @ 15″ (Back Boards)
Tools
- measuring tape
- square
- pencil
- hammer
- safety glasses
- hearing protection
- kreg-jig
- drill
- circular saw
- jigsaw
- sander
Step-by-step Instructions
Step 1
Chair Back Legs. From the 2×4, mark out your chair back legs. Keep in mind that the back legs will be 1 1/2″ wide everywhere, and one leg takes up the entire 2×4. If you are building multiple chairs, it may make sense to use a 2×6 as shown above on the right to get more legs per less board and cuts.
Step 2
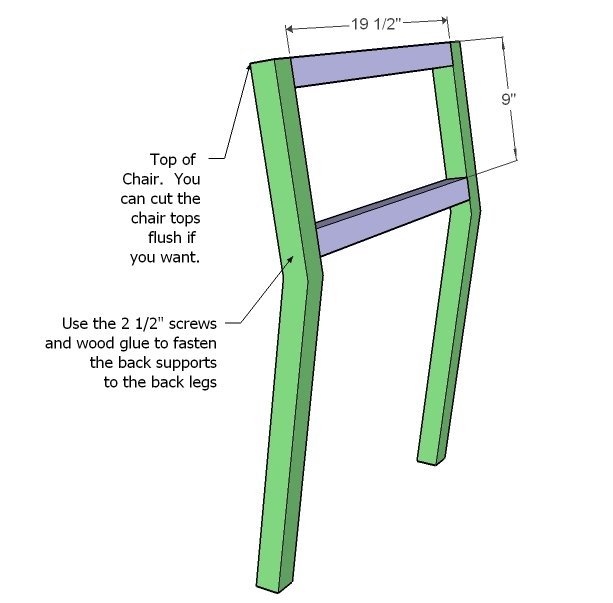
Chair Backs. Build the chair back as shown above. Fasten with 2″ screws and glue.
Step 3
Chair Seat and Front Legs. Build the aprons and front legs as shown above. Start on the back apron and work your way forward. If you have a Kreg Jig™, it would come in super handy here, or else you can just use screws and glue, 2″ screws.
Step 4
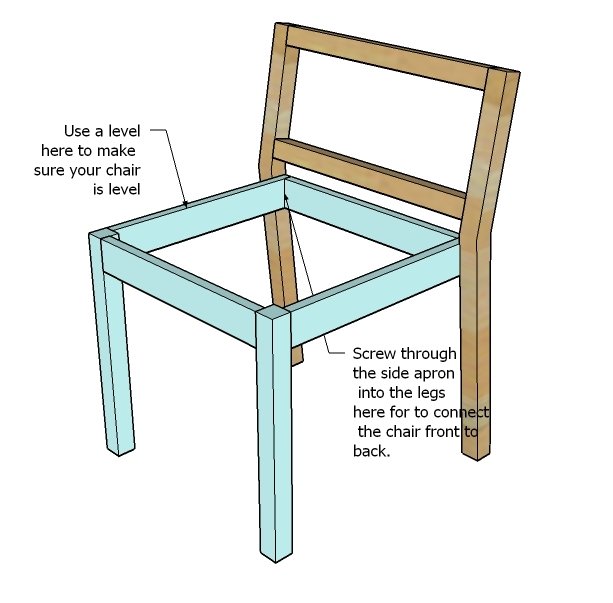
Chair Frame Assembly. Using a level on the side apron, attach the front of the chair to the back, as shown above, using 2″ screws and glue. You may wish to complete step 5, the seat boards first, but the above diagram illustrates how the chair is assembled.
Step 5
Step 6
Back Boards. As you did the seat boards, fasten the back boards to the back supports, as shown above.
Step 7
Finishing. Fill any holes with wood filler and sand and finish as desired.
Finishing
Sand all surfaces, starting with a medium grit and finishing with fine. Wipe off the dust, fill any holes or gaps with wood filler, and sand smooth once dry. Apply primer if you're painting, then finish with your choice of paint or stain and seal with a durable clear topcoat. For outdoor projects, use exterior-rated primer, paint or stain, and sealer so the piece stands up to the weather.
Source (temporary): https://www.ana-white.com/woodworking-projects/simple-stackable-outdoor-chairs