Simple Wood Stool
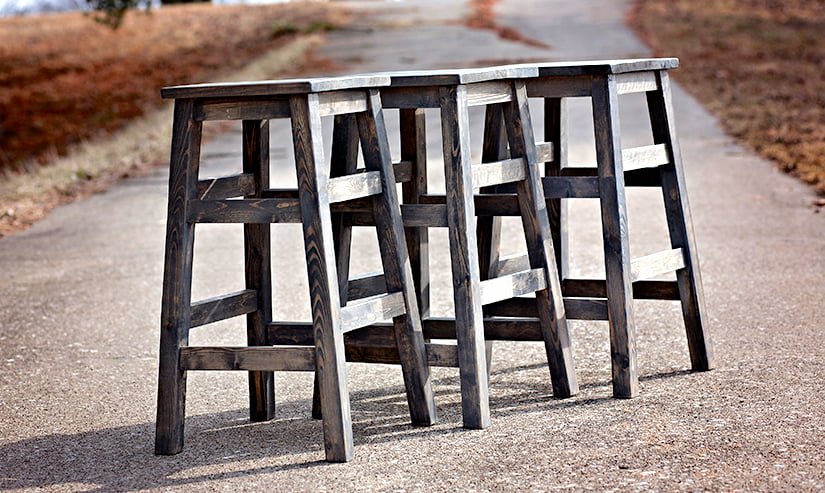
A very simple stool that can also be used as an end table. Try a round top, saddle seat or upholstered pad for a more comfortable stool. with diagrams from
Specifications
| Project type | Side and End Table Plans |
|---|---|
| Room | kitchen |
| Style | Cottage Style Furniture Plans |
| Difficulty | Intermediate |
| Estimated cost | Under $20 |
Dimensions
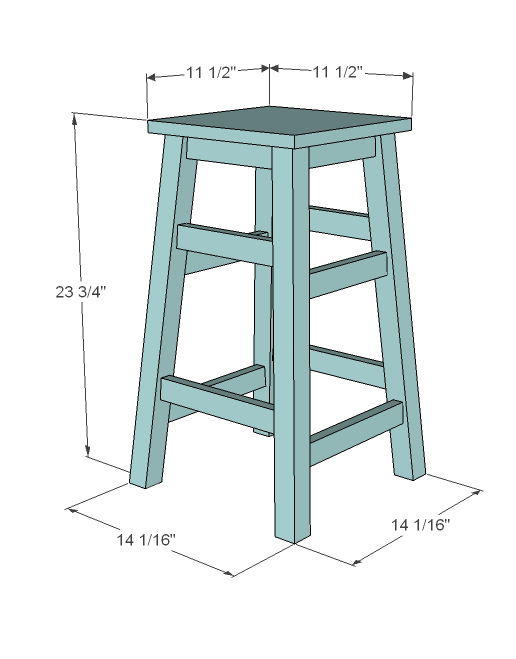
Use the size-specific shopping and cut lists below.
Shopping List
- 1 – 2×2 @ 8 feet long
- 1 – 1×2 @ 10 feet long
- 1 – 1×12 @ 11 1/2″ long or 12″ plywood round, 3/4″ thick
- 2 1/2″ screws (for countersinking) or 1 1/4″ pocket hole screws
- Wood glue, wood filler, sandpaper and finishing supplies
Cut List
- 4 – 2×2 @ 23 1/4″ long, ends cut at a 5 degree angle AND a 5 degree bevel
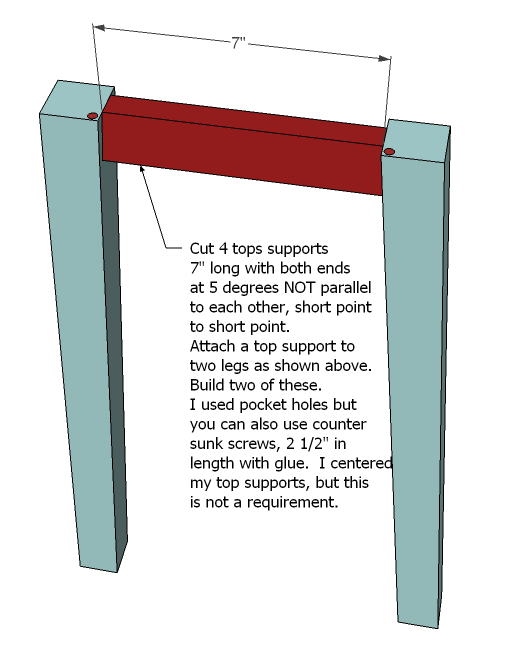
- 4 – 1×2 @ 7″, short point to short point, ends cut at a 5 degree angle NOT parallel to each other
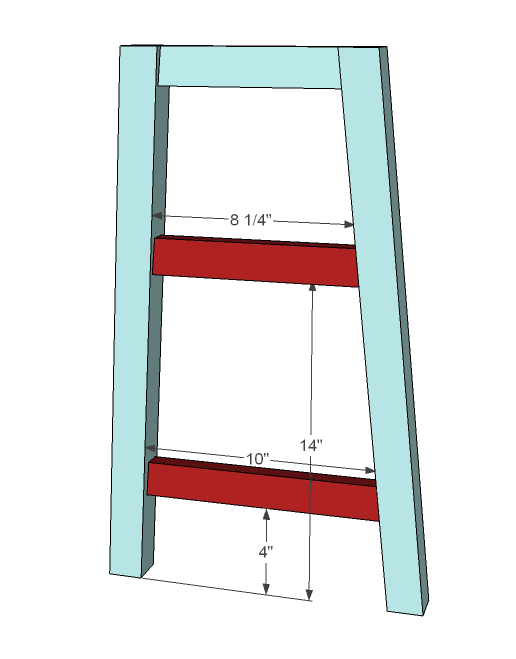
- 2 – 1×2 @ 10″ short point to short point, ends cut at a 5 degree angle NOT parallel to each other
- 2 – 1×2 @ 8 1/4″ short point to short point, ends cut at a 5 degree angle NOT parallel to each other
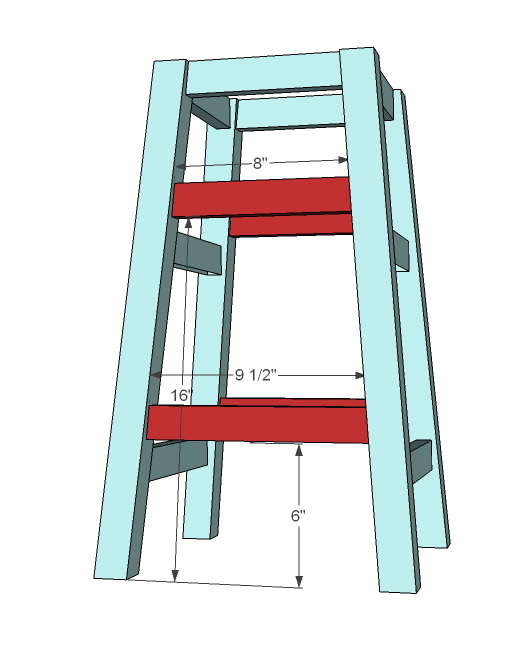
- 2 – 1×2 @ 9 1/2″ short point to short point, ends cut at a 5 degree angle NOT parallel to each other
- 2 – 1×2 @ 8″ short point to short point, ends cut at a 5 degree angle NOT parallel to each other
- 1 – 1×12 @ 11 1/2″ (cut to make a square, so measure the width of your 1×12)
Tools
- measuring tape
- square
- pencil
- safety glasses
- hearing protection
- drill
- compound miter saw
- sander
- level
- countersink drill bit
Step-by-step Instructions
Mark Legs
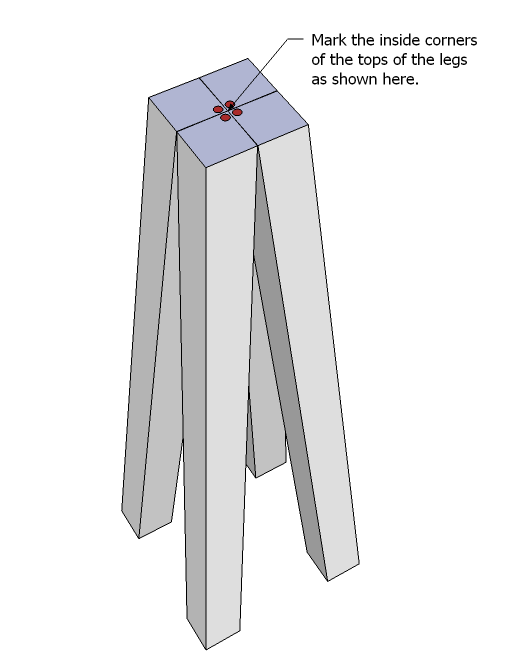
Because the angle on the legs is only five degrees and is a double bevel, it is easy to loose track of the correct position of your legs. Stand your legs up as shown above, and mark the inside corners. Always remember that these corners will be to the inside of the leg.
Top Supports
You will need to build two of the above legs sets, as shown above.
Additional Rungs
Add the additional rungs as shown above. Don’t forget the glue.
Top Supports
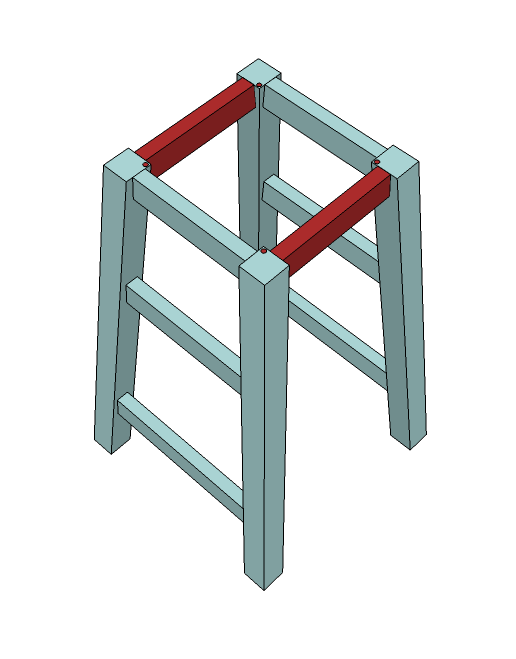
Attach the remaining top supports to join the two leg frames as shown above.
Step 5
Top
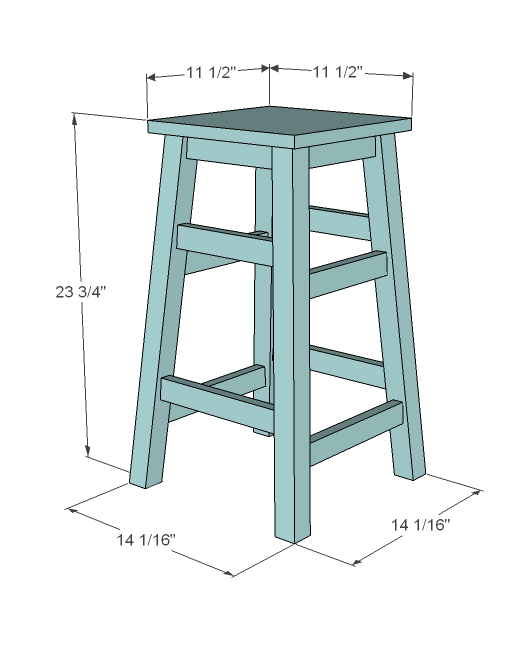
Attach the top as shown above. I screwed through the top supports into the underside of the top to hide screw holes.
Finishing
Sand all surfaces, starting with a medium grit and finishing with fine. Wipe off the dust, fill any holes or gaps with wood filler, and sand smooth once dry. Apply primer if you're painting, then finish with your choice of paint or stain and seal with a durable clear topcoat. For outdoor projects, use exterior-rated primer, paint or stain, and sealer so the piece stands up to the weather.
Source (temporary): https://www.ana-white.com/woodworking-projects/simple-wood-stool