Simple Writing Desk with Drawer
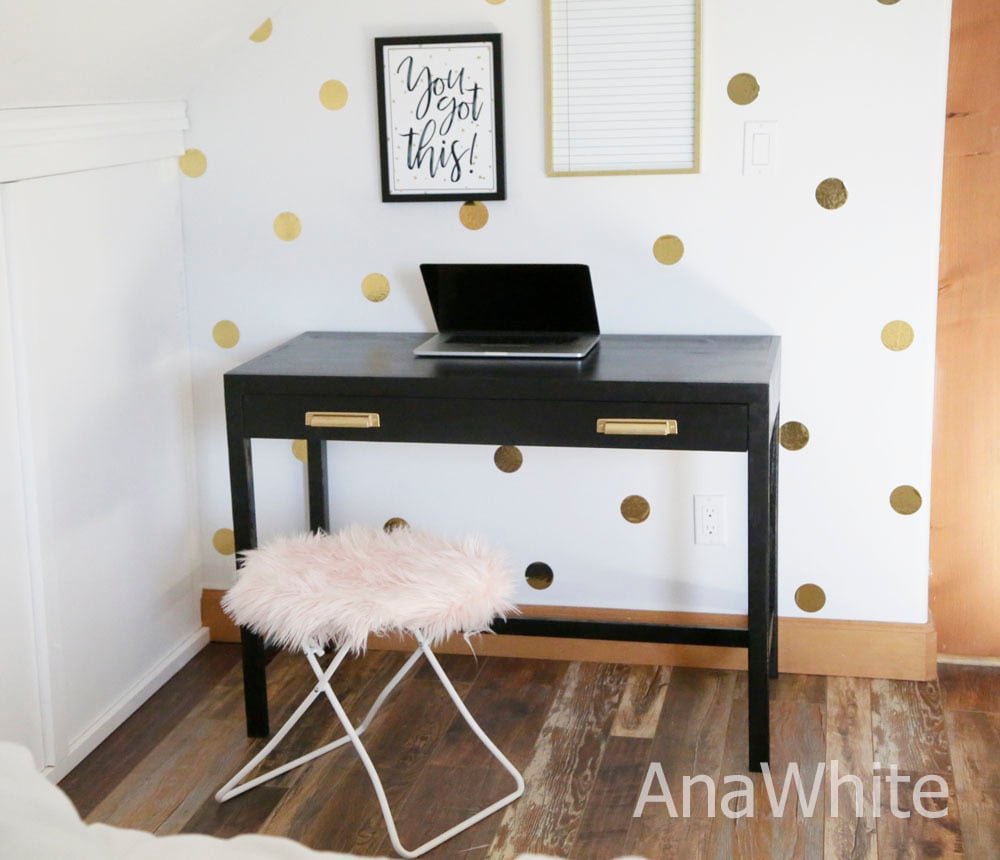
Build your own writing desk! Save hundreds off retail - free. Minimal design compliments any decor.
Specifications
| Project type | Desk, Desk Systems and Project Table Plans |
|---|---|
| Room | Teens |
| Style | Farmhouse Furniture |
| Difficulty | Intermediate |
| Estimated cost | $20 - $50 |
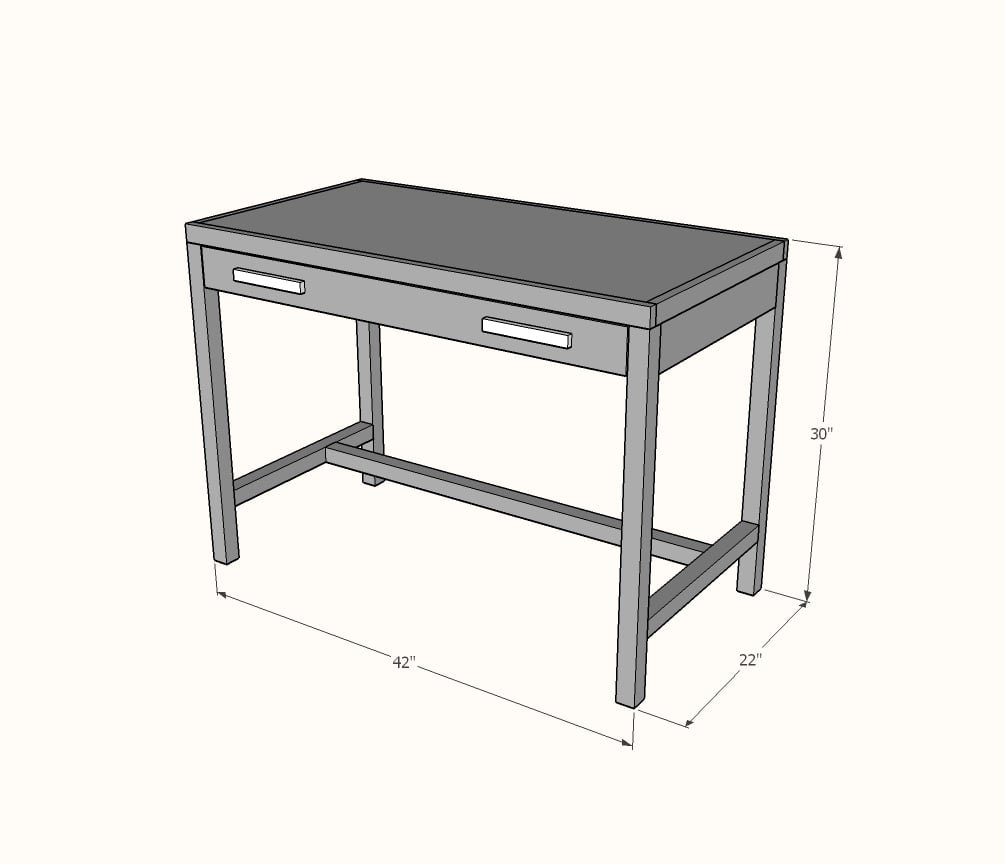
Dimensions
Use the size-specific shopping and cut lists below.
Shopping List
2 - 2x2 @ 8 feet - Cut two legs for each, and then cut remaining cuts from leftovers
1 - 1x4 @ 8 feet long
2 - 1x2 @ 8 feet long
2 - 1x3 @ 8 feet long
1 - 1x4 @ 4 feet long for drawer face
1 - 24" x 48" project panel or 3/4" plywood (must have one smooth surface)
1 - 1/4" plywood @ 16" x 36-1/2" - for drawer bottom
1 - 16" Euro Drawer Slide (the white bottom corner mount ones)
2 knobs or handles
Cut List
BASE
4 - 2x2 @ 28-1/4" - legs
2 - 1x4 @ 19" - side aprons
2 - 2x2 @ 19" - side stretchers
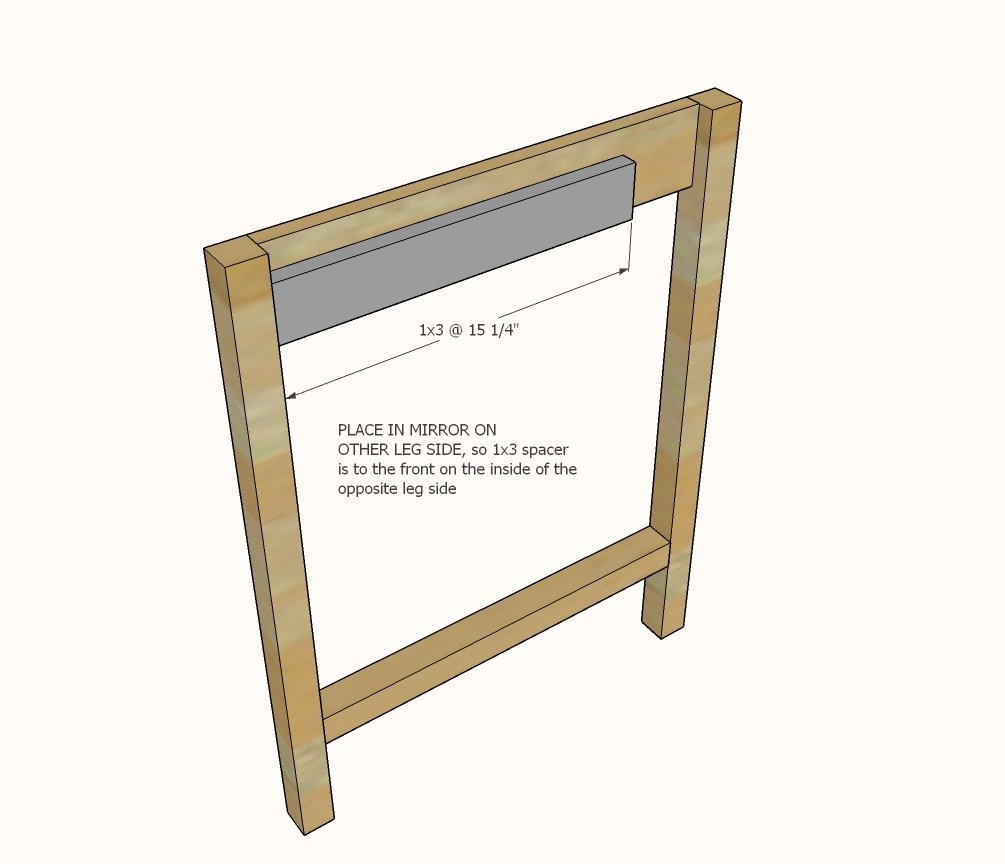
2 - 1x3 @ 15-1/4" - drawer slide spacer
1 - 1x4 @ 39" - back apron
1 - 2x2 @ 39" - bottom stretcher
TOP
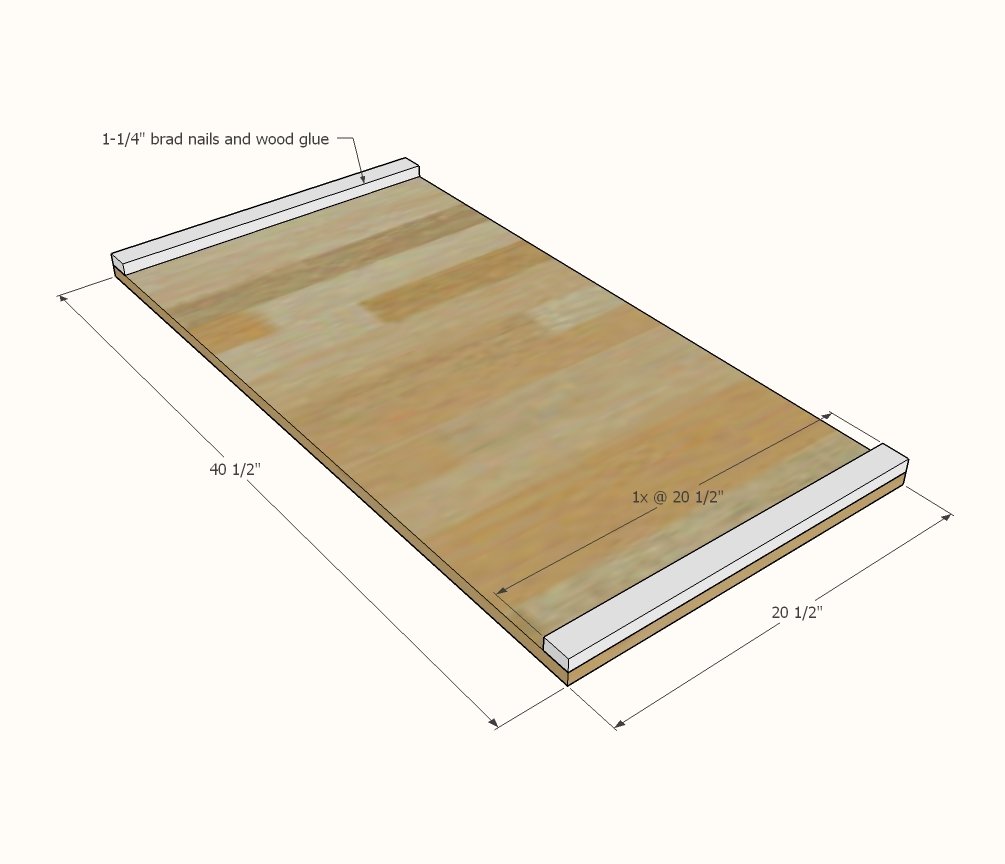
1 - 3/4" plywood cabinet grade or similar @ 40-1/2" x 20-1/2" - top
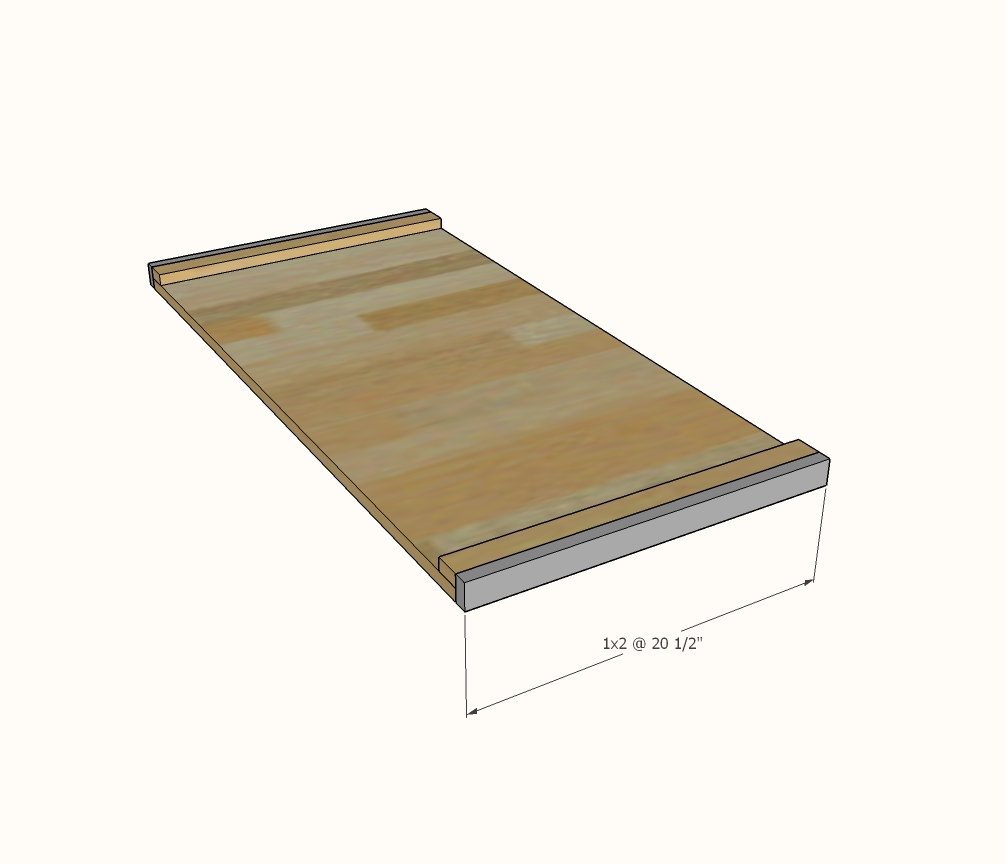
4 - 1x2 @ 20-1/2" - side trim
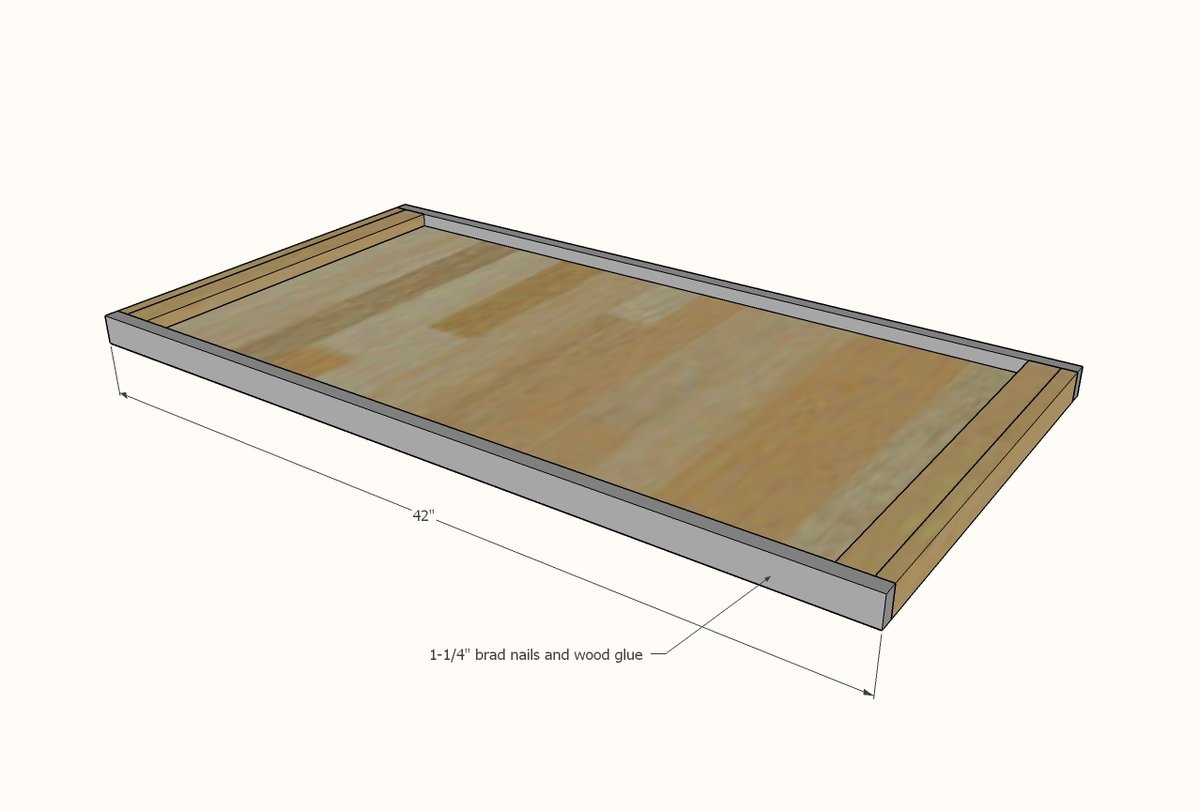
2 - 1x2 @ 42" - front trim
DRAWER
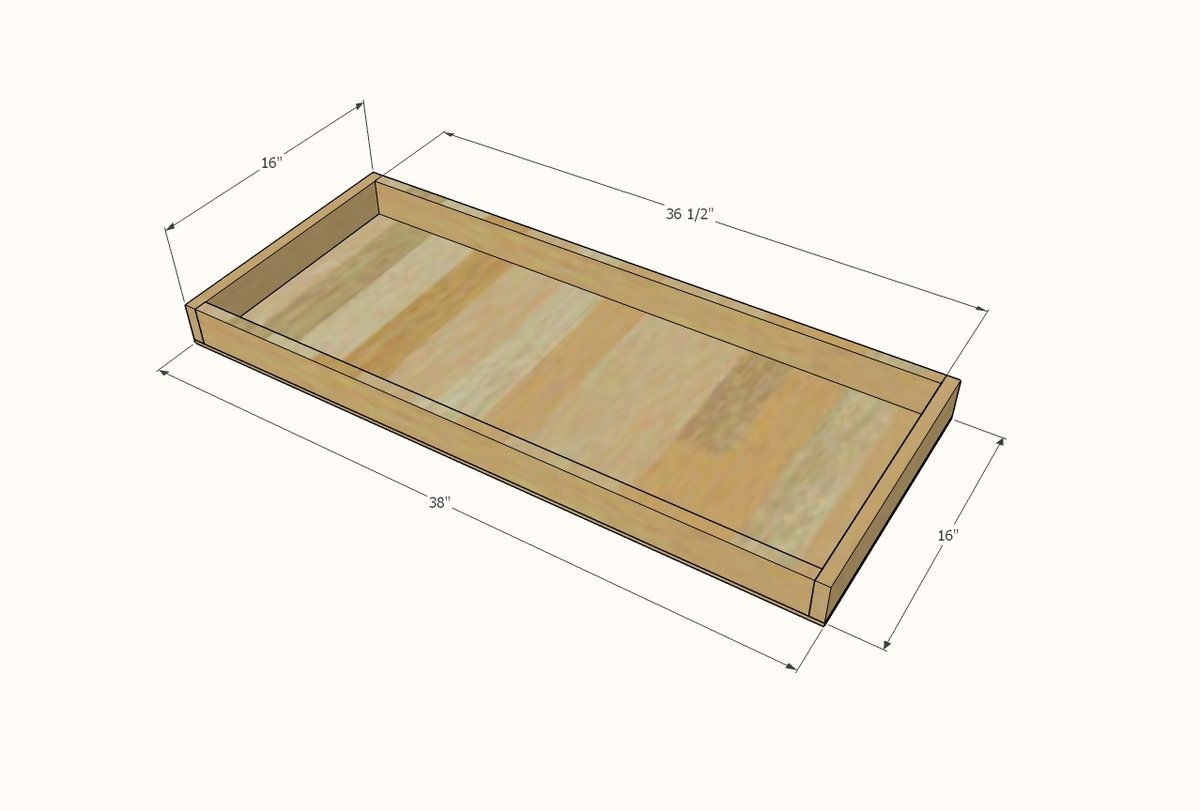
2 - 1x3 @ 16" - sides
2 - 1x3 @ 36-1/2" - front/back
1 - 1/4" plywood @ 38" x 18" - bottom
1 - 1x4 cut to fit for drawer face
Tools
- measuring tape
- square
- pencil
- safety glasses
- hearing protection
- kreg-jig
- drill
- circular saw
- compound miter saw
- nailer
- sander
Step-by-step Instructions
Step 1
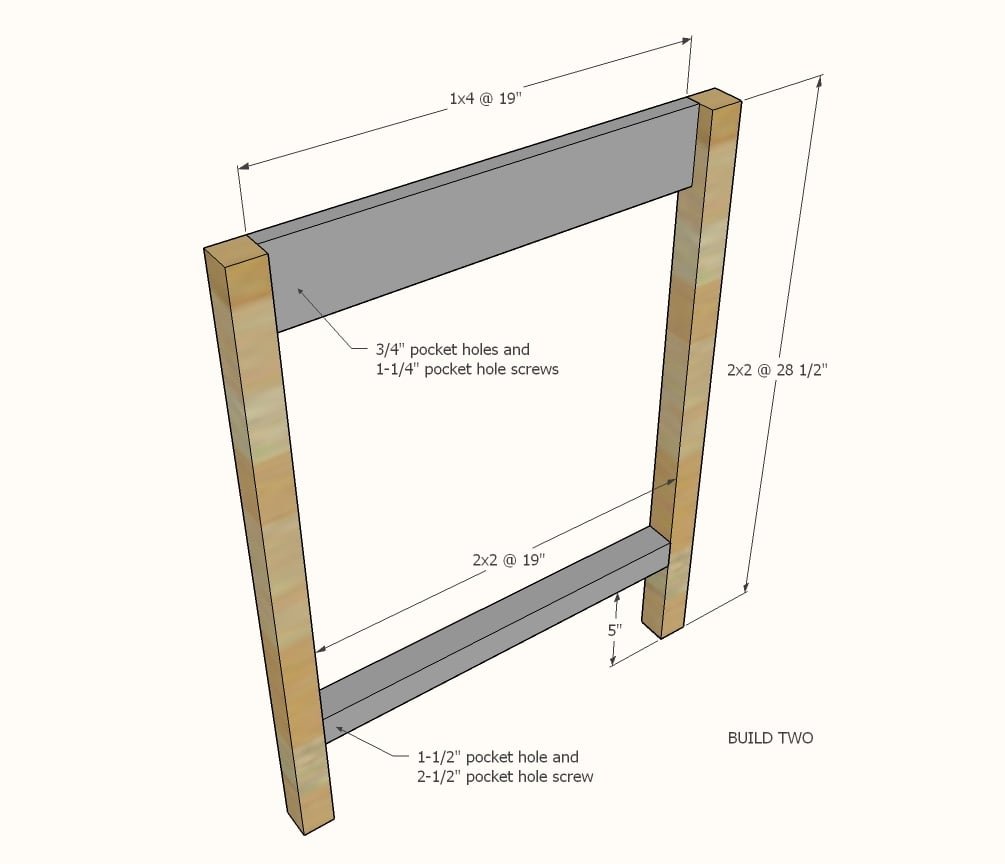
Drill one 1-1/2" pocket hole on each end of the 2x2 stretcher. (NOTE: You may wish to also drill the 2x2 pocket holes for the bottom stretcher in step 3 at the same time to avoid having to readjust your Kreg Jig). Attach with 2-1/2" pocket hole screws and glue with pocket holes on underside of 2x2. Drill 3/4" pocket holes on each end of the 1x4s, two per end. Also drill two pocket holes facing upward for attaching tabletop in later steps. Attach to the legs with 1-1/4" pocket hole screws and glue, making sure the pocket holes for attaching the top are facing upward.
Step 2
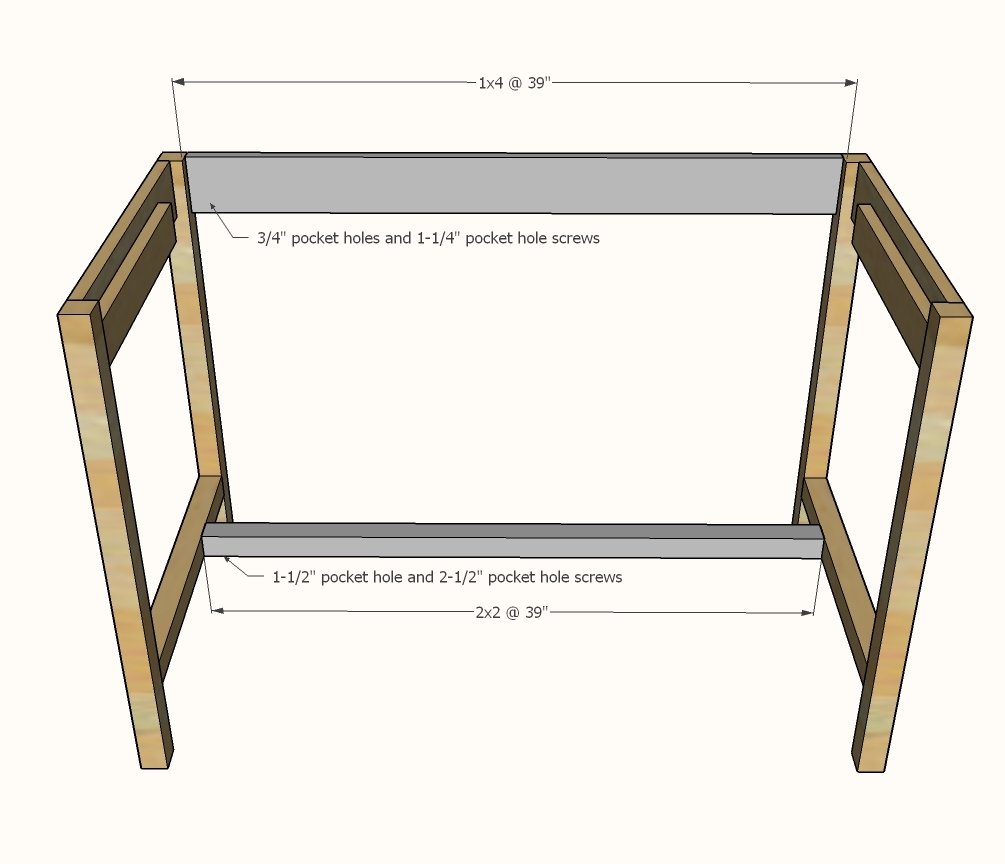
Drill two pocket holes on each end of 1x4 back apron. Also drill 3/4" pocket holes facing upward for attaching the tabletop in later steps. Attach back apron to the legs - make sure the pocket holes you drilled for attaching the tabletop are facing upward on inside. Attach the 2x2 base support with 2-1/2" pocket hole screws, pocket holes are on the bottom hidden on underside.
Step 3
Glue and nail 1x2, flush on all outside edges, to underside of tabletop.
Step 4
Glue and nail side trim to tabletop.
Step 5
Step 6
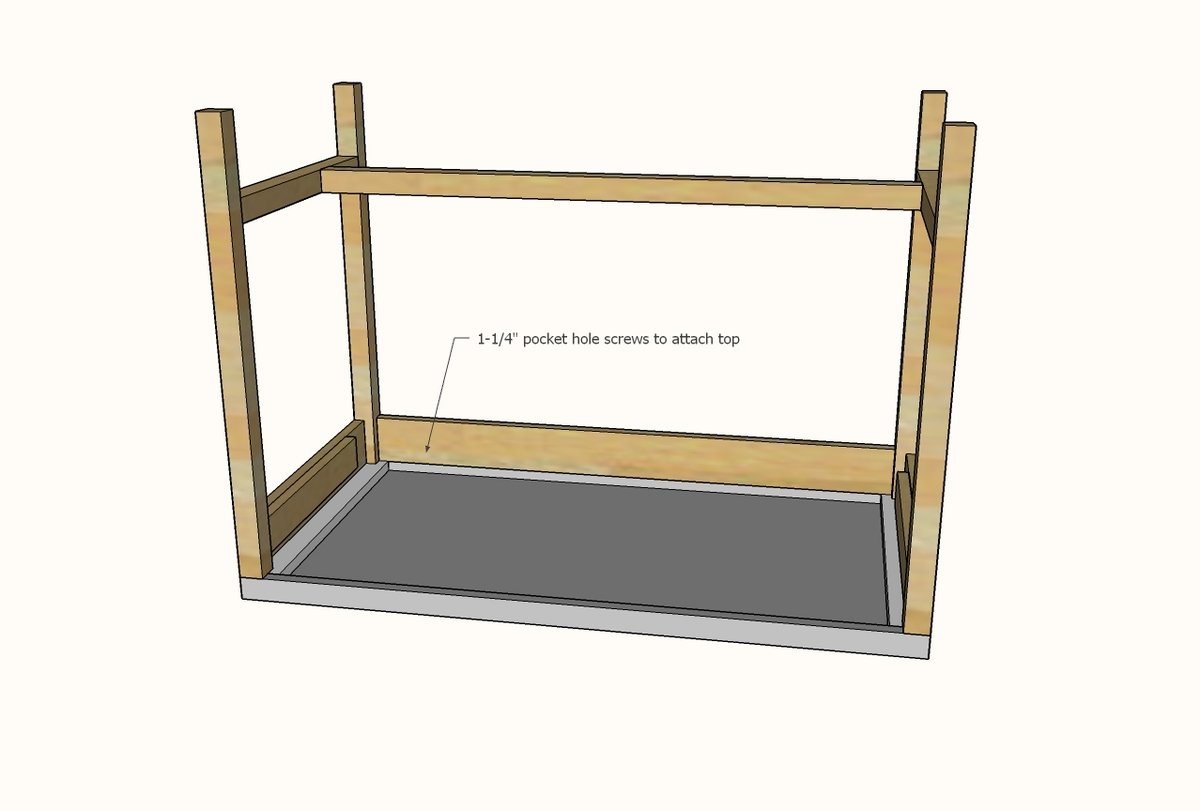
Attach base to tabletop with 1-1/4" pocket hole screws.
Step 7
Drill two pocket holes on each end of longer 1x3 boards. Attach to the shorter 1x3 boards with 1-1/4" pocket hole screws - place pocket holes on outsides of drawer. You can add dividers to the drawer at this step using 1x3s or 1x2s. Attach 1/4" plywood to the bottom with 3/4" brad nails and glue.
Step 8
The sides of the base need to be furred out for the drawer slide. I used a 1x3 and nailed on with 1-1/4" brad nails and glue.
Step 9
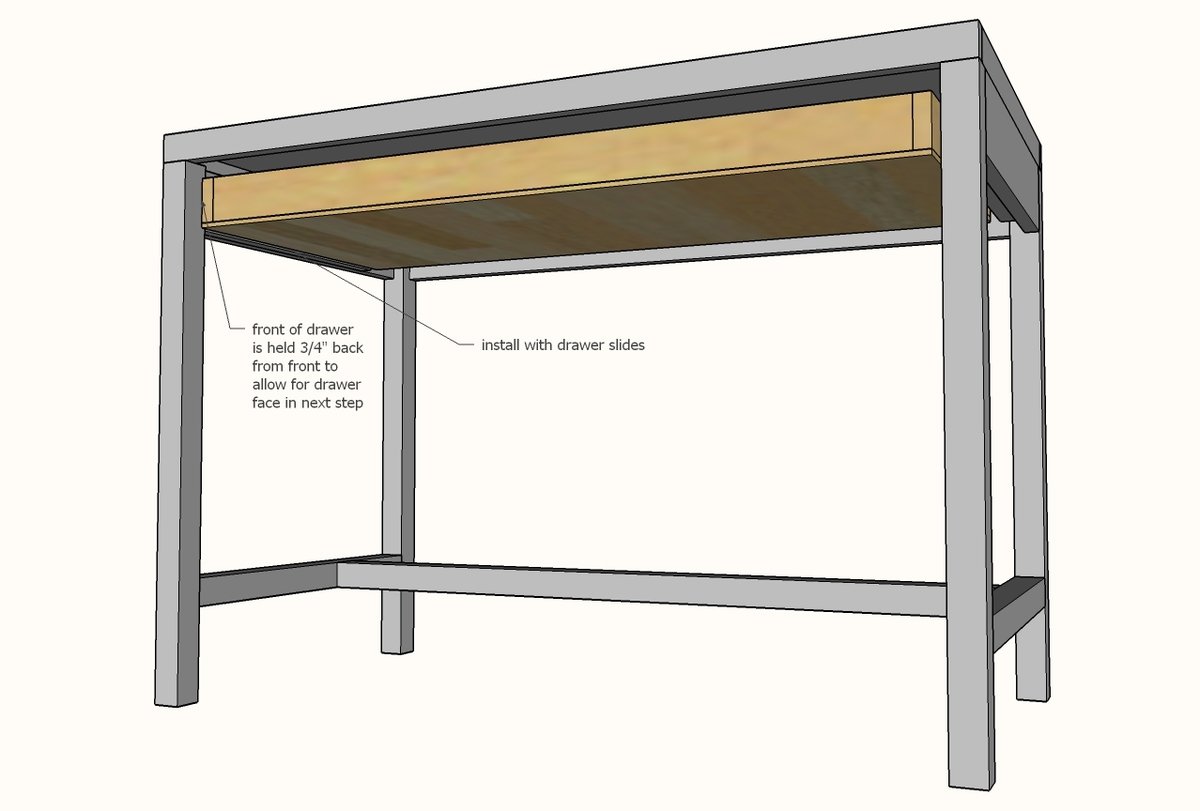
Install drawer slides and fit drawer in desk.
Step 10
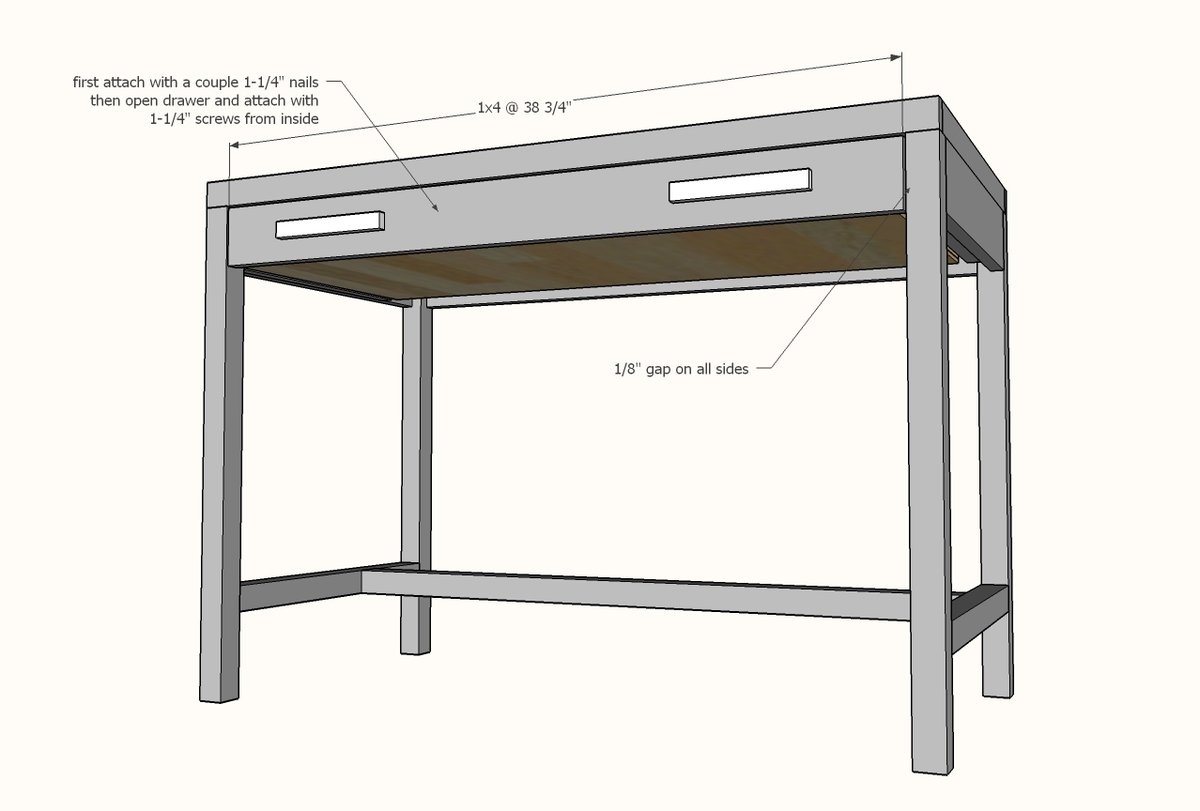
Cut drawer face and place on drawer. Nail on with a couple of 1-1/4" brad nails (avoid areas where you are drilling out for hardware) Remove drawer and secure with 1-1/4" screws from inside of drawer (you can use pocket hole screws)
Finishing
Sand all surfaces, starting with a medium grit and finishing with fine. Wipe off the dust, fill any holes or gaps with wood filler, and sand smooth once dry. Apply primer if you're painting, then finish with your choice of paint or stain and seal with a durable clear topcoat. For outdoor projects, use exterior-rated primer, paint or stain, and sealer so the piece stands up to the weather.
Source (temporary): https://www.ana-white.com/woodworking-projects/simple-writing-desk-drawer