Simplest Kids Play Table
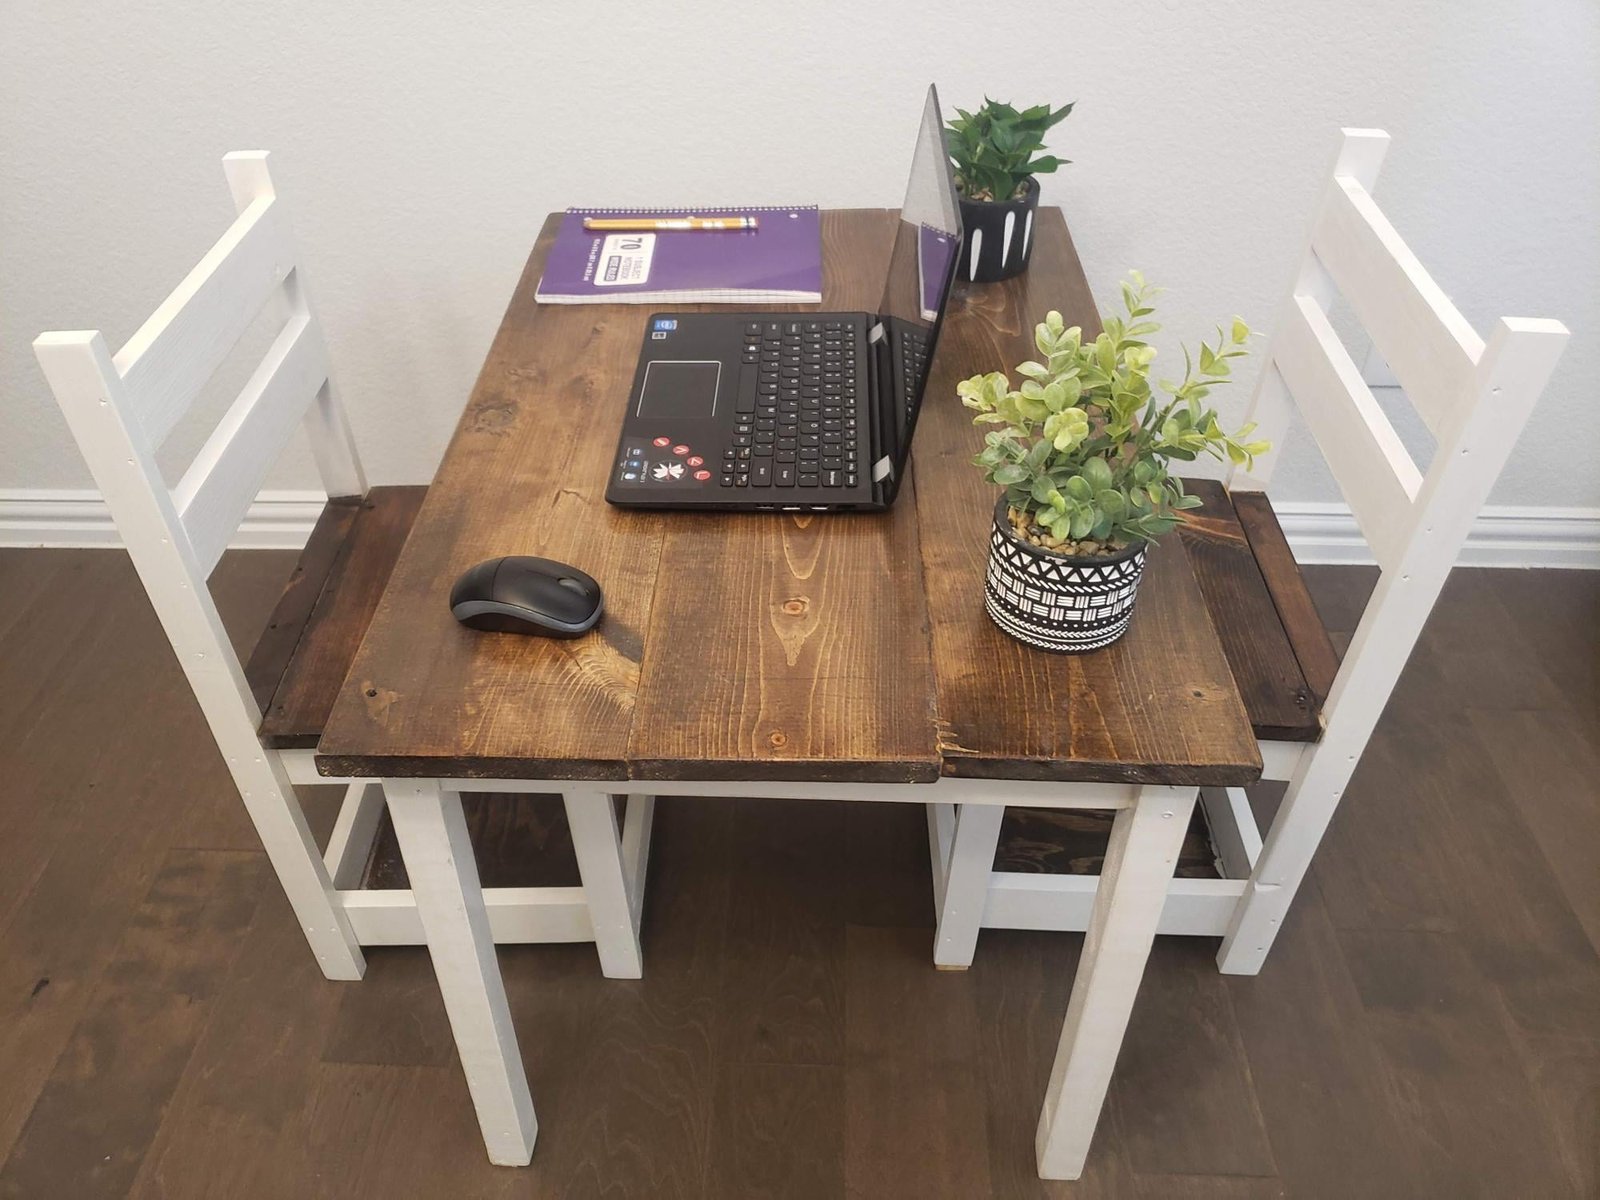
This simple children's play table is easy and economical to build, at the perfect height for toddlers and preschoolers. Use pine boards to build. from
Specifications
| Project type | Kids Tables and Chairs |
|---|---|
| Room | Kids and Toys |
| Style | Children's and Kid's Room Furniture and Toy Plans |
| Difficulty | Beginner Projects |
| Estimated cost | Under $20 |
Dimensions
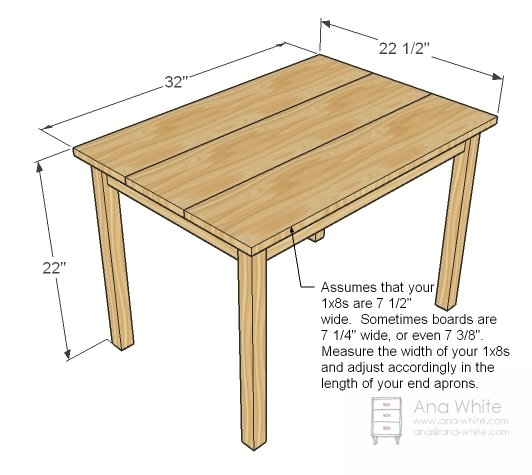
Use the size-specific shopping and cut lists below.
Shopping List
- 1 – 1×8, 8 feet long
- 1 – 2×2, 8 feet long
- 1 – 1×3, 8 feet long
- 1 1/4″ Pocket Hole Screws
- Wood Glue
Cut List
- 3 – 1×8 @ 32″ (if your 1×8 is 96″ long, cut these boards at 31 7/8″ to account for the saw blade waste (kerf))
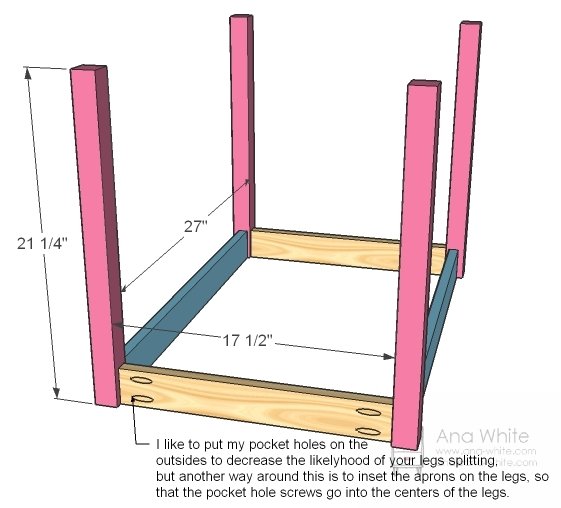
- 4 – 2×2 @ 21 1/4″ (legs)
- 2 – 1×3 @ 17 1/2″ (End Aprons)
- 2 – 1×3 @ 27″ (Side Aprons)
Tools
- measuring tape
- square
- pencil
- safety glasses
- hearing protection
- kreg-jig
- drill
- circular saw
- sander
- level
- countersink drill bit
Step-by-step Instructions
Cut your Boards and Drill Pocket Holes
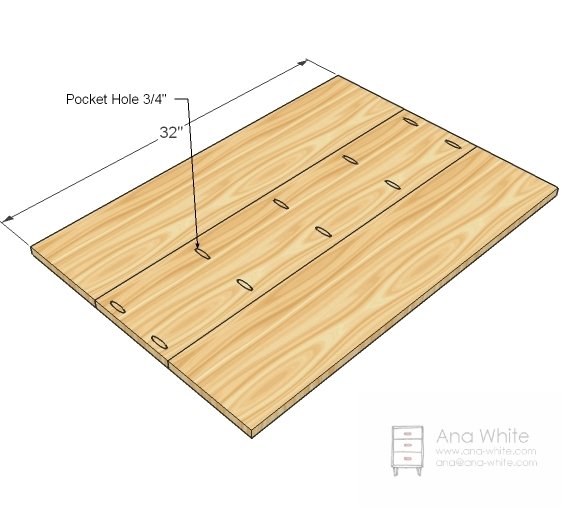
Many of you do not have a Kreg Jig™. My sister, who took wood shop in highschool, has built quite a bit of furniture, and showed me how to use a circular saw the first time, has never seen a Kreg Jig™. After this project, she’s getting one. Also consider this. A similar table and chair set runs around $240. My cost for this table? Seventeen dollars. Spend the cost differential on a Kreg Jig™. Its worth it. Cut your boards, according to the cut list. Measure the 1x8s and make sure they are in fact 7 1/2″ wide. Mine up here in Alaska are, but others say theirs are 7 1/4″ or 7 3/8″. If your 1x8s are narrower, take the difference, multiply it by three, and subtract that from the cut length of the 1×3 side aprons. Next, drill all your pocket holes. I like to make Xs where all the pocket holes go as I cut.
Build the Tabletop
There are other ways to build this tabletop without pocket holes, but in order to get a tabletop worthy of coloring and cheap, this was the answer. I love using solid wood in this application because you can always sand and refinish – and you just might have to. This table was left unfinished for about 3 hours. When I got the paint brush out, it was covered in very large awkwardly written Gs. A few minutes of sanding beats being upset any day.
Base
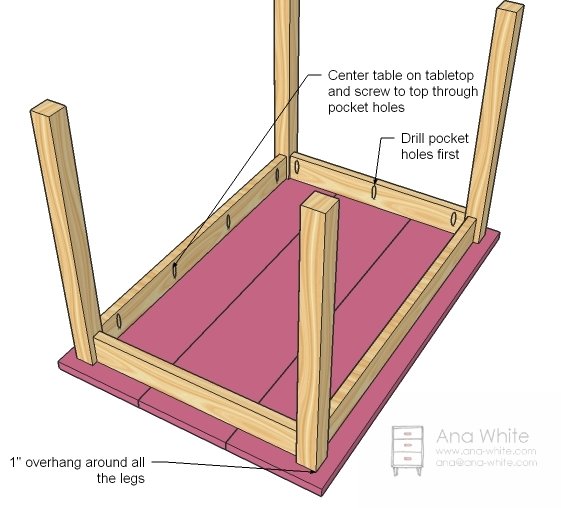
Drill all your pocket holes first (see step 4) and then attach the legs to the aprons. I like to either inset my aprons slightly or to drill my pocket holes on the outsides to keep the legs from splitting. Adjust for square.
Tabletop
Now is the fun part. Line the table top up with the base and screw together. The coolest thing about pocket holes is that it sucked up any differences in the tabletop. Sometimes when you join boards that are not perfectly square, your tabletop isn’t smooth. The pocket holes forced the tabletop square with the aprons.
Finishing
Sand all surfaces, starting with a medium grit and finishing with fine. Wipe off the dust, fill any holes or gaps with wood filler, and sand smooth once dry. Apply primer if you're painting, then finish with your choice of paint or stain and seal with a durable clear topcoat. For outdoor projects, use exterior-rated primer, paint or stain, and sealer so the piece stands up to the weather.
Source (temporary): https://www.ana-white.com/woodworking-projects/simplest-kids-play-table