Simplest Outhouse
Build the best off-grid outhouse with this beginner-friendly, budget-conscious plan! Designed for remote cabins, campsites, or emergency use, this compact outhouse is optimized to save you time, money, and materials—while still being super functional and easy to build. Free.
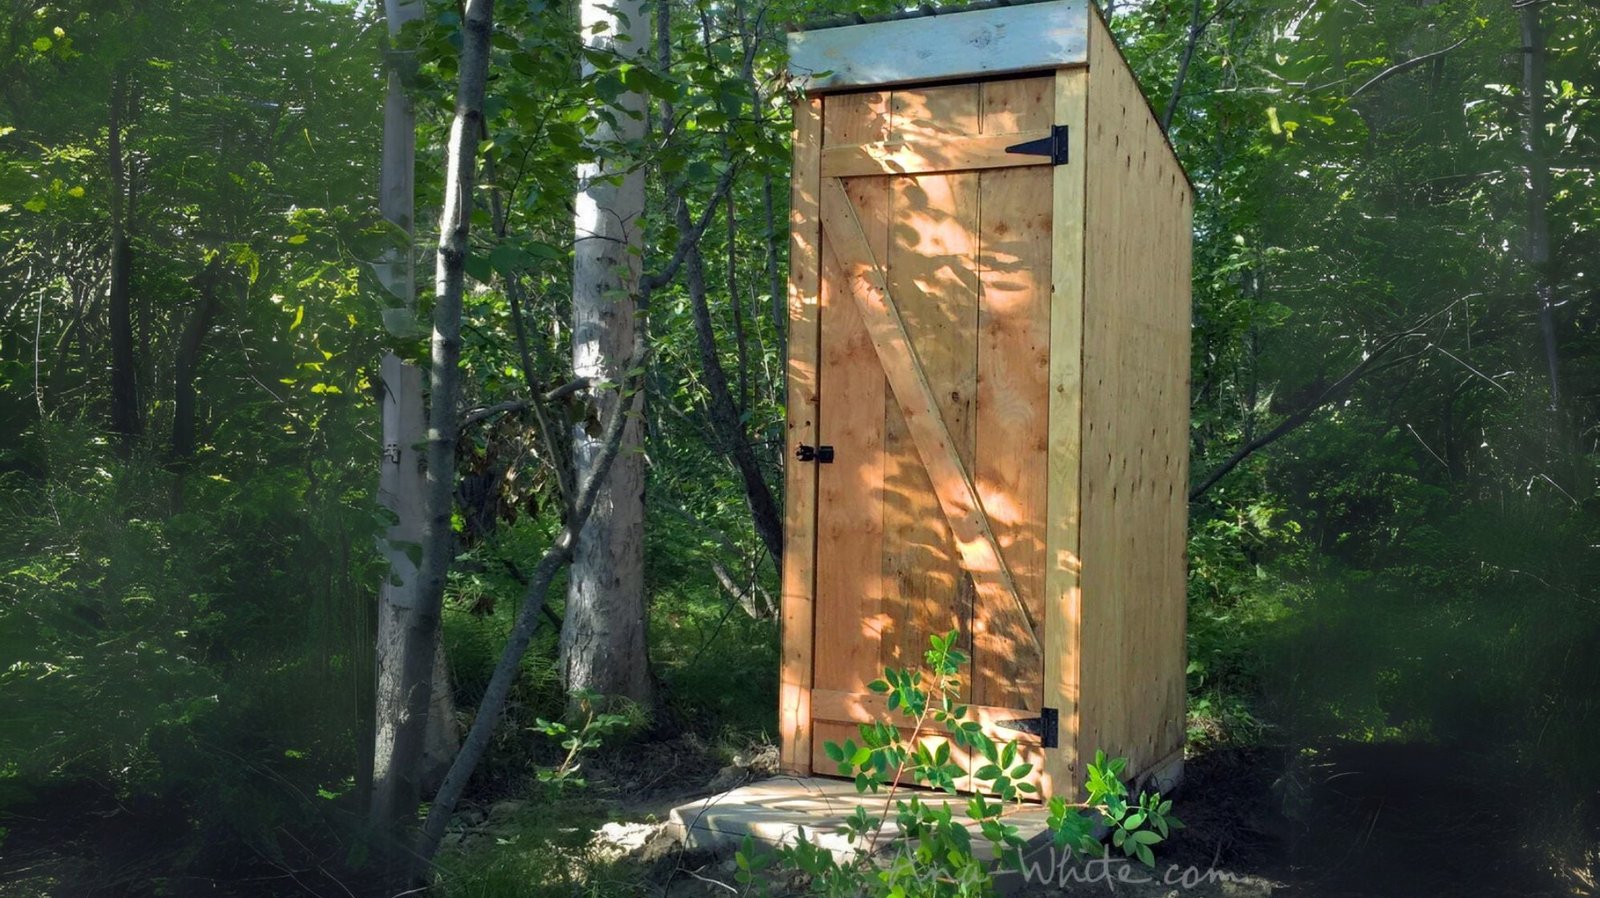
Specifications
| Project type | Buildings |
|---|---|
| Room | Outdoor |
| Style | Green or Eco-Friendly Style Furniture |
| Difficulty | Intermediate |
| Estimated cost | $100-$150 |
Dimensions
Use the size-specific shopping and cut lists below.
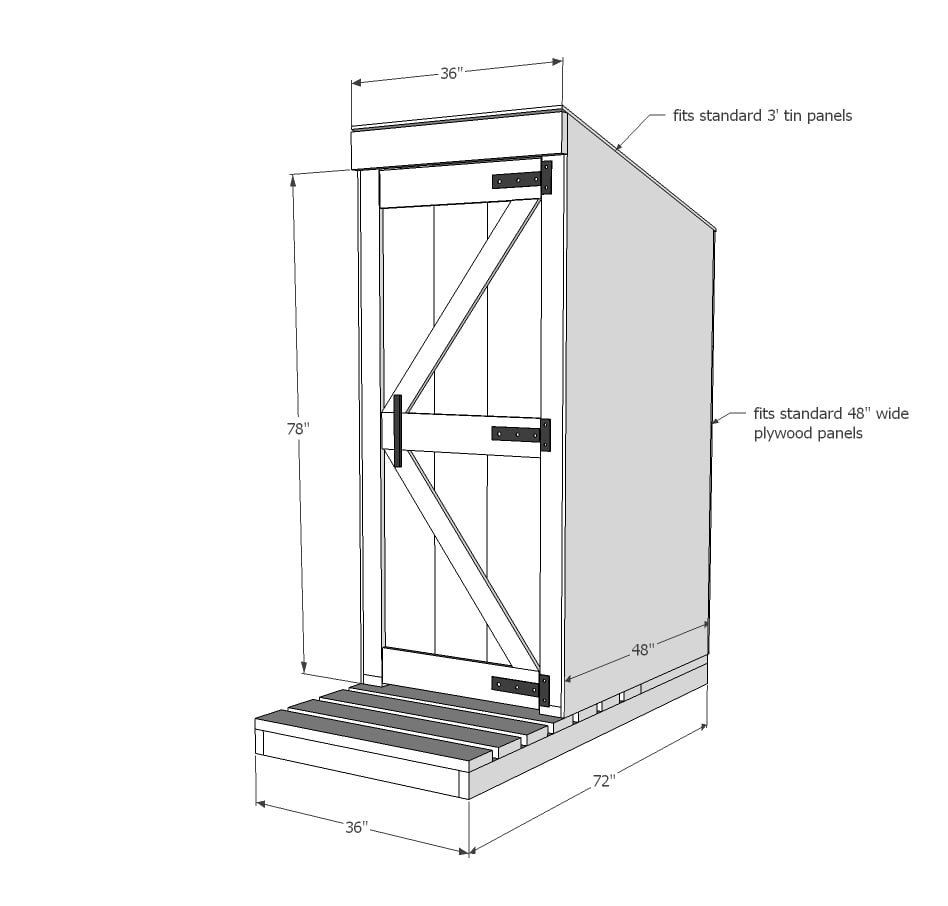
Shopping List
- 3 - sheets 1/2 exterior plywood
- 1 - 12' treated 2x4
- 1 - 10' treated 2x4
- 4 - 2x6 @ 6 feet long (recommend treated or weather resistant)
- 1 - 2x2 @ 29" (recommend treated or weather resistant, try using a railing spindle)
- 11 - 2x4 @ 8 feet long
- 3 - 1x10 @ 8 feet long
- 1 - 1x6 @ 8 feet long
- 1 - 1x4 @ 8 feet long
- 3 Gate Hinges
- Gate Latch and Handle
- 54" piece of 36" wide tin
- Roofing screws to match, roofing screws can be up to 2" in length
- 3" decking screws, self tapping
- Nails or staples for attaching plywood to framing (I used 8D galvanized but you can also use a finish nail, brad nail or staple or screws, depending on your tool)
- 1 - 1/4" exterior screws for buiding the doors
Cut List
BASE
- 2 - 2x4 @ 72"
- 3 - 2x4 @ 33"
- 7 - 2x6 @ 36" long
- 1 - 2x2 @ 29" long
- 2 - 2x4 @ 24-1/2" long
WALLS
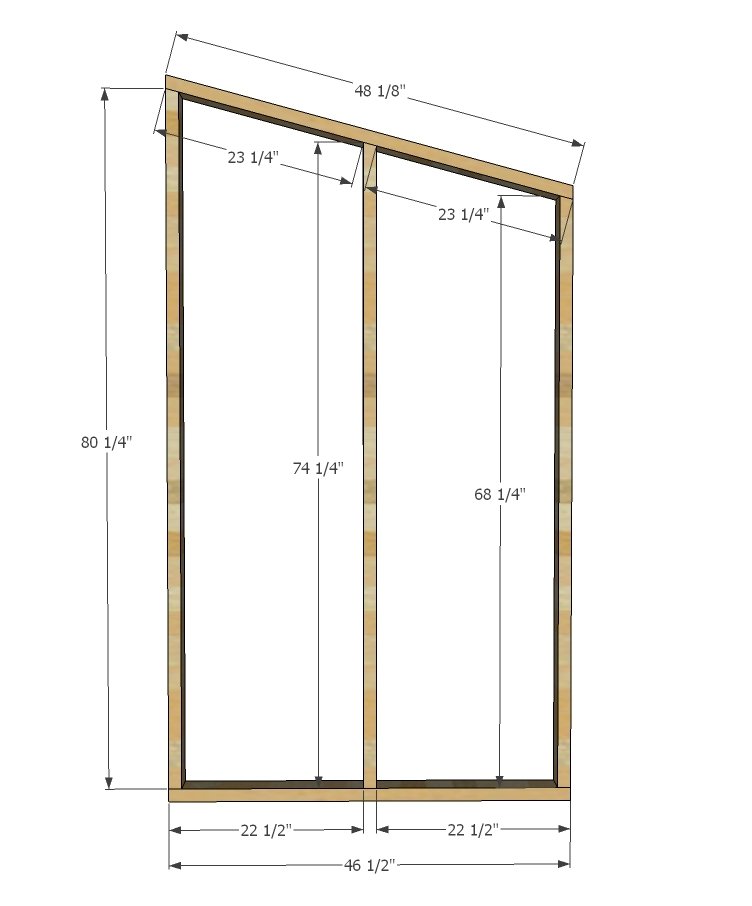
- 2 - 2x4 @ 48-1/8" (long point to short point, ends cut parallel at 15 degrees off square)
- 2 - 2x4 @ 80-1/4" ( longest point, one end cut at 15 degrees off square)
- 2 - 2x4 @ 74-1/4" ( longest point, one end cut at 15 degrees off square)
- 2 - 2x4 @ 68-1/4" ( longest point, one end cut at 15 degrees off square)
- 2 - 2x4 @ 46-1/2"
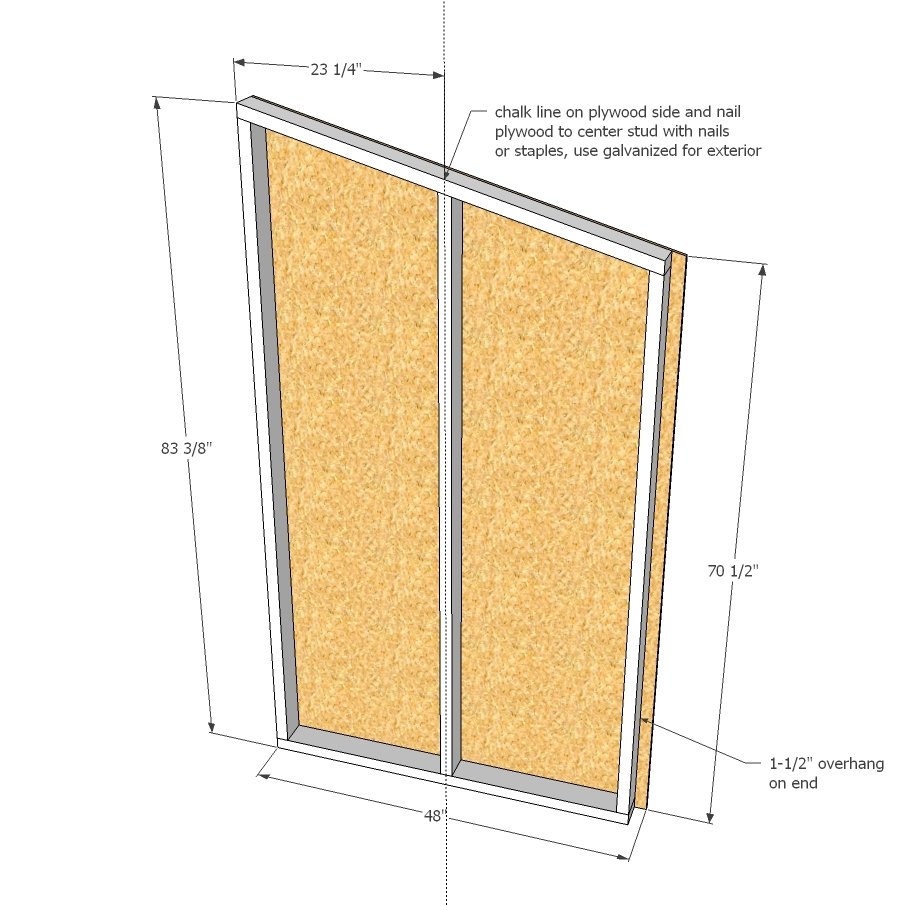
- 2 - 1/2" plywood @ 48" x 83-3/8" (longest point) cut down to 70-1/2" (shortest point)
TIE IN
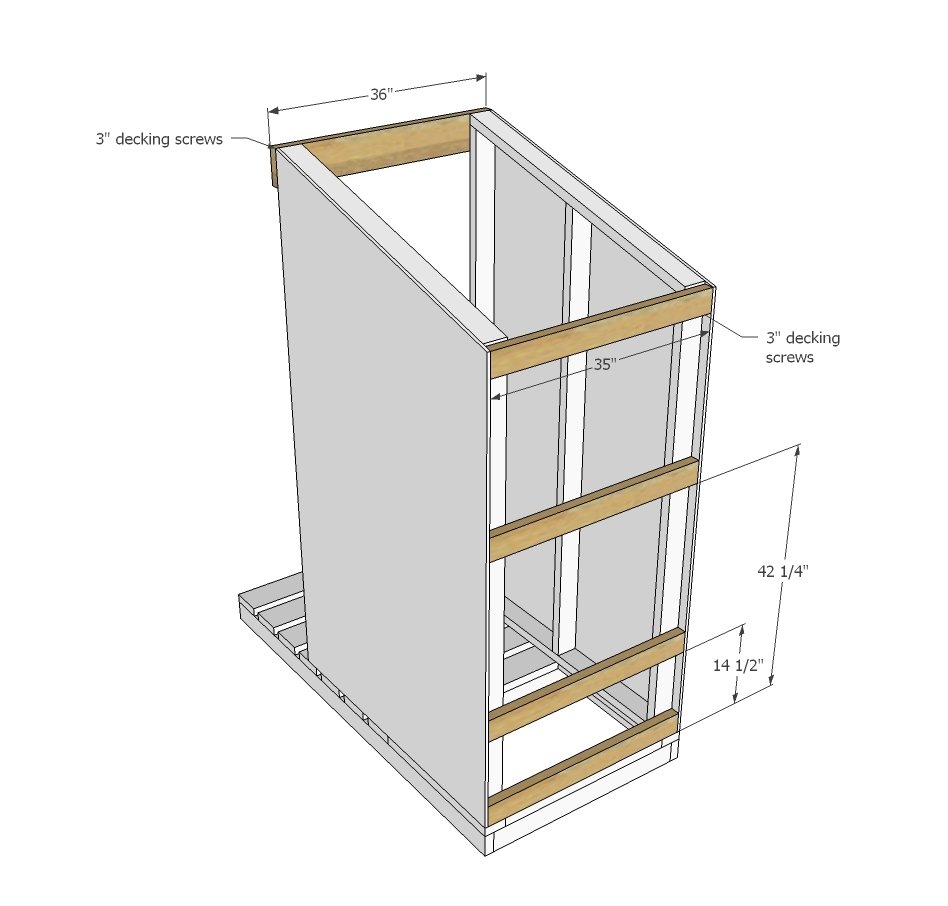
- 1 - 2x6 @ 36"
- 4 - 2x4 @ 35"
- 2 - 2x4 @ 28"
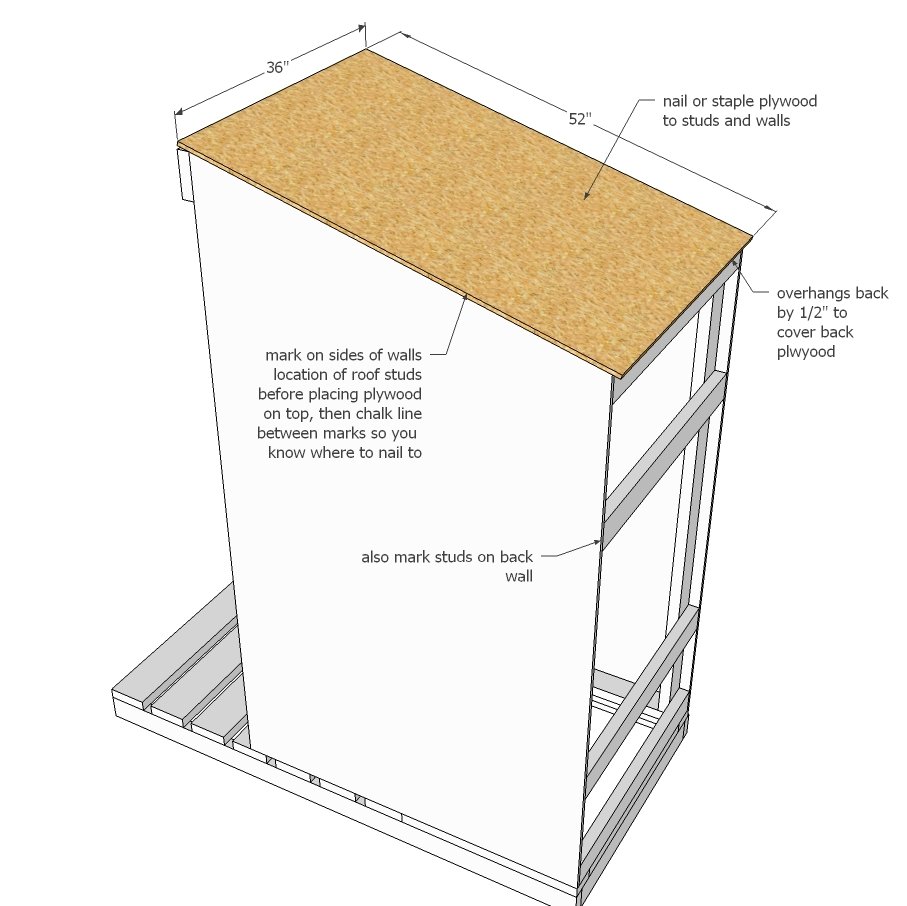
- 1 - 1/2" plywood @ 36" x 52" (roof plywood)
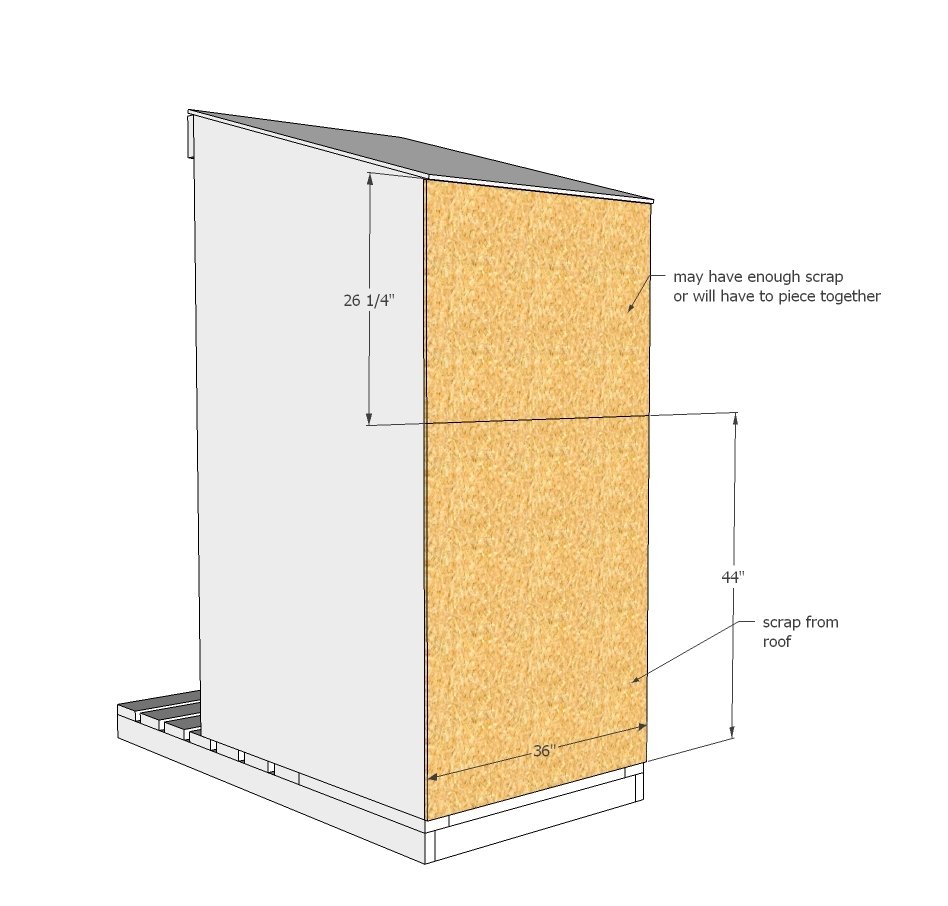
- 1 - 1/2" plwyood @ 36" x 44" (scrap from roof piece)
- 1 - 1/2" plywood @ 36" x 26-1/4" (may have to piece to use scraps)
DOOR
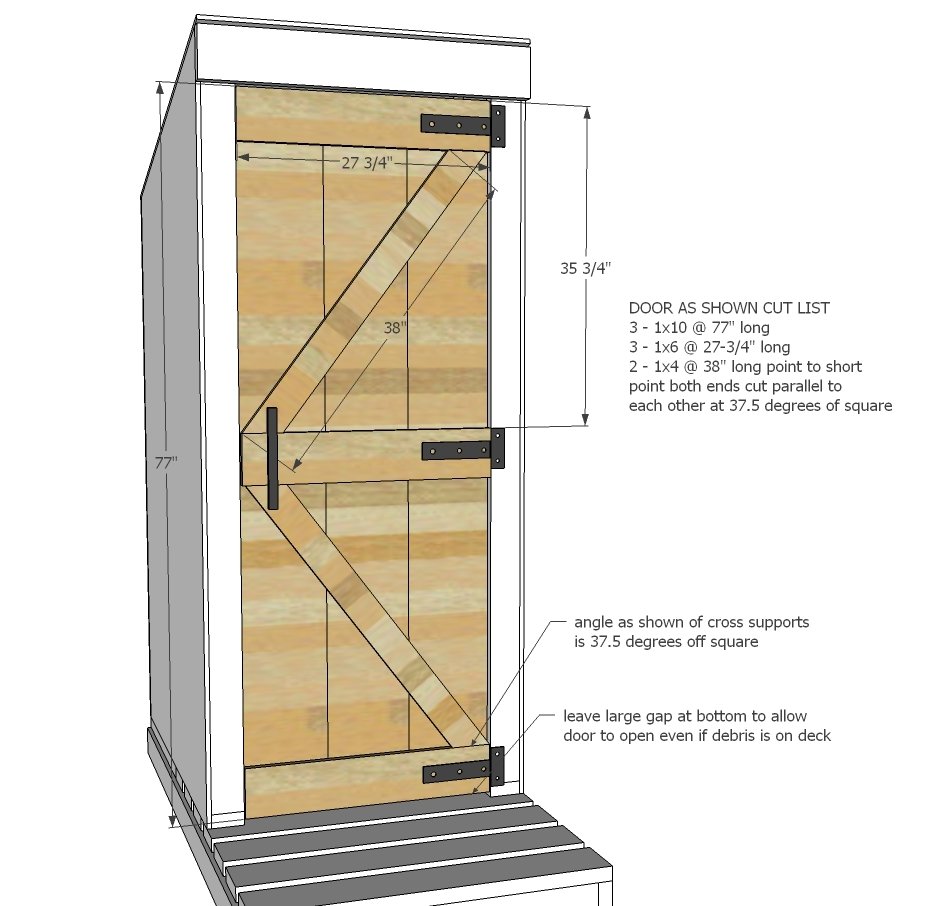
- 3 - 1x10 @ 77"
- 3 - 1x6 @ 27-3/4"
- 2 - 1x4 @ 38" - long point to short point, both ends cut at 37-1/2 degrees off square, end are parallel
Tools
- measuring tape
- square
- pencil
- hammer
- safety glasses
- hearing protection
- drill
- circular saw
- jigsaw
- compound miter saw
Step-by-step Instructions
Step 1
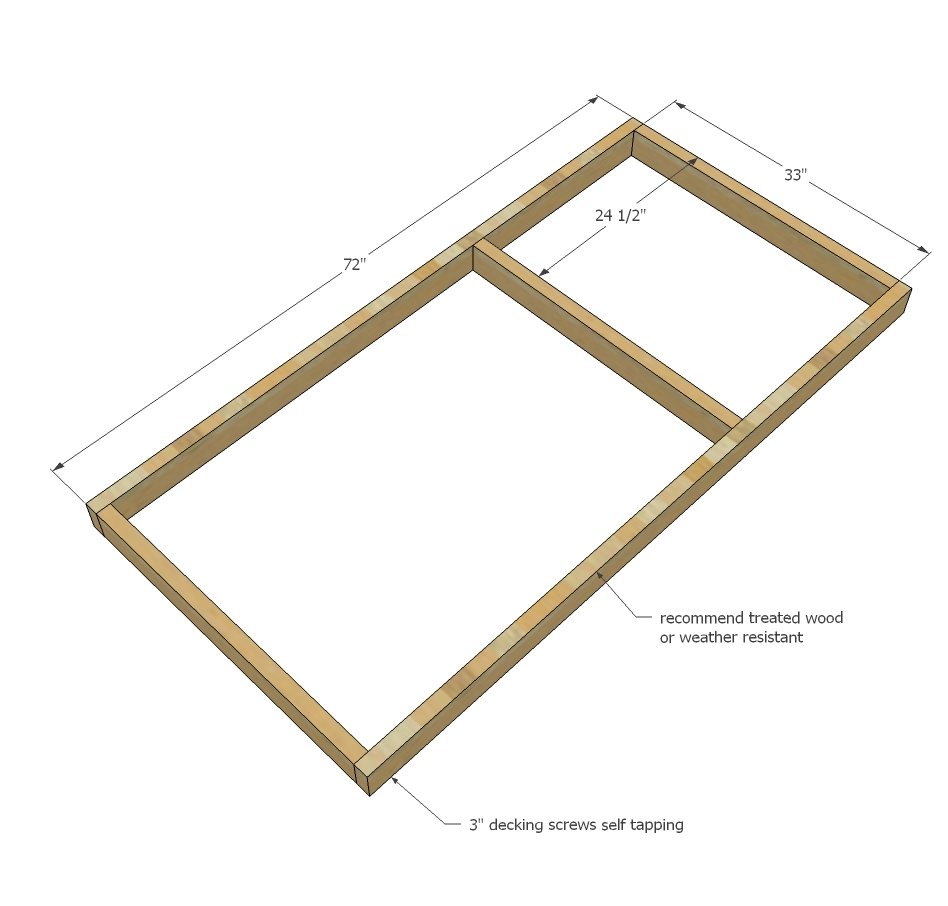
Build the base with treated or weather resistant 2x4s. If the base isn't fully supported on the ground or with beams, consider using 2x6 or larger boards for additional support.
Step 2
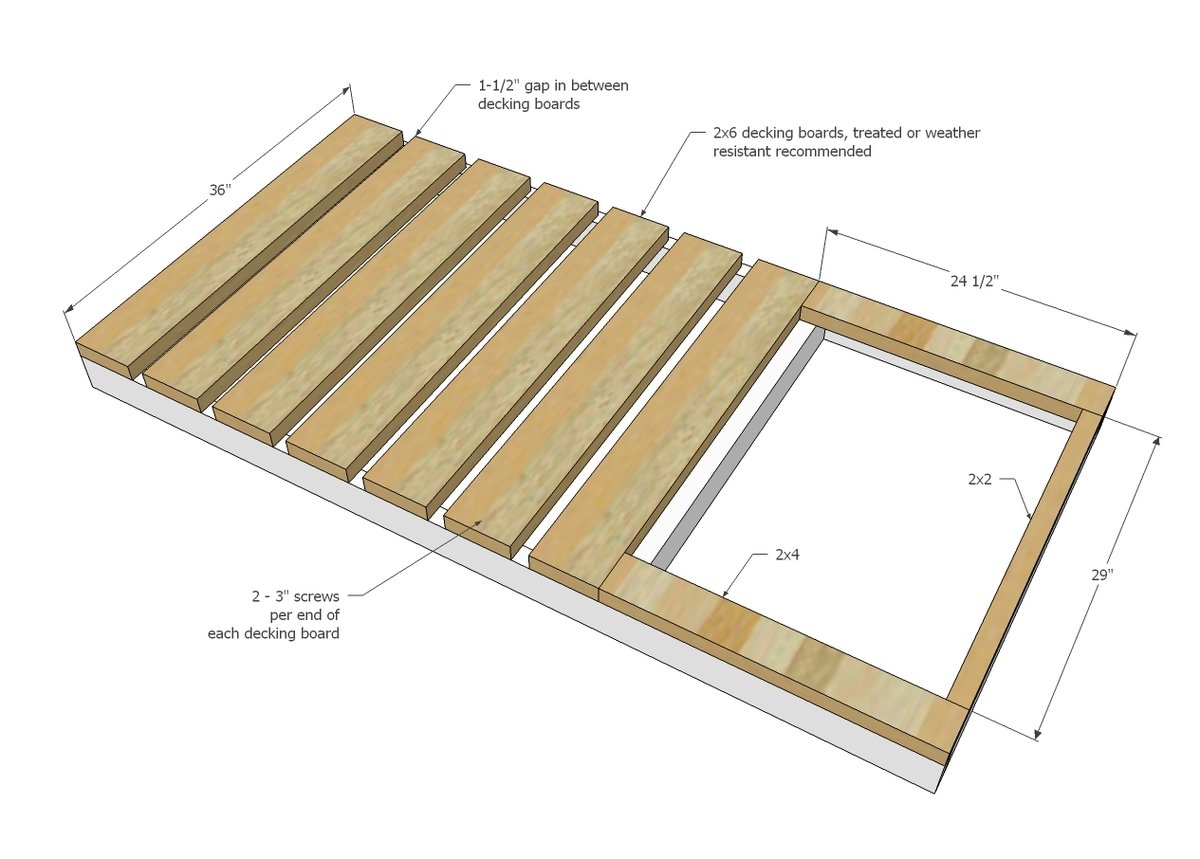
Screw decking to frame. I recommend weather resistant or treated wood for the decking, as the front decking is exposed to to weather.
Step 3
Build two of the walls.
Step 4
Attach plywood to the outsides of the walls, considering walls are to be built in mirror. On the short side of the wall, the plywood overhangs the back by 1-1/2".
Step 5
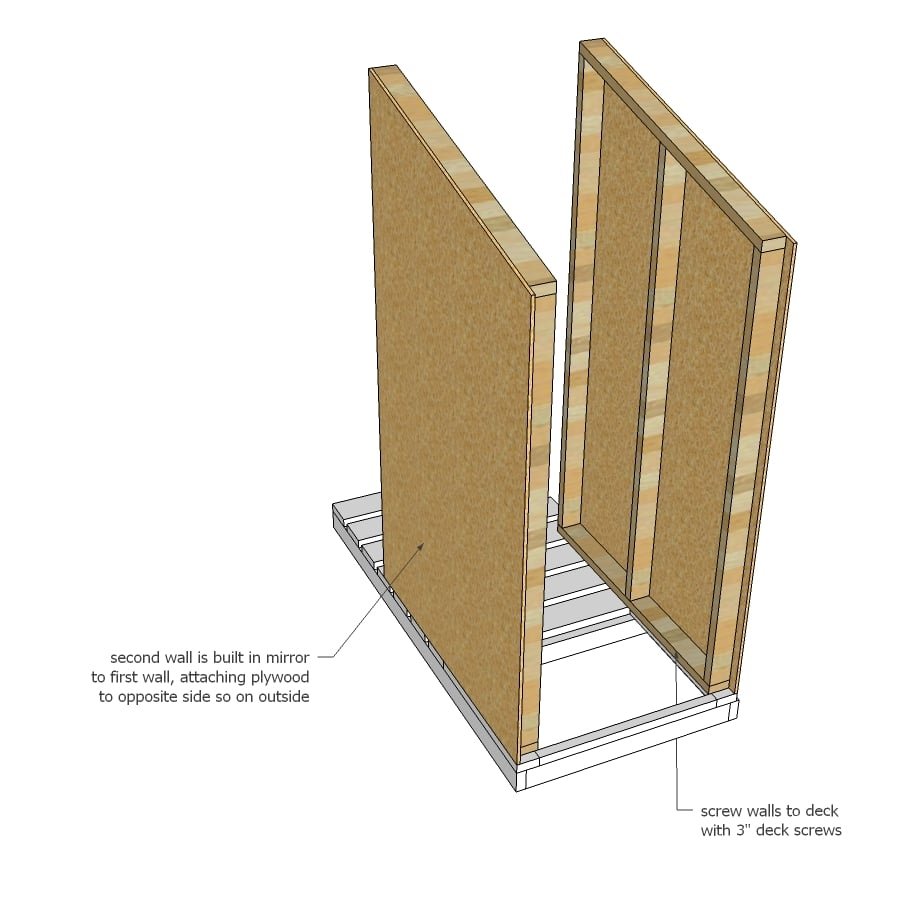
Step 6
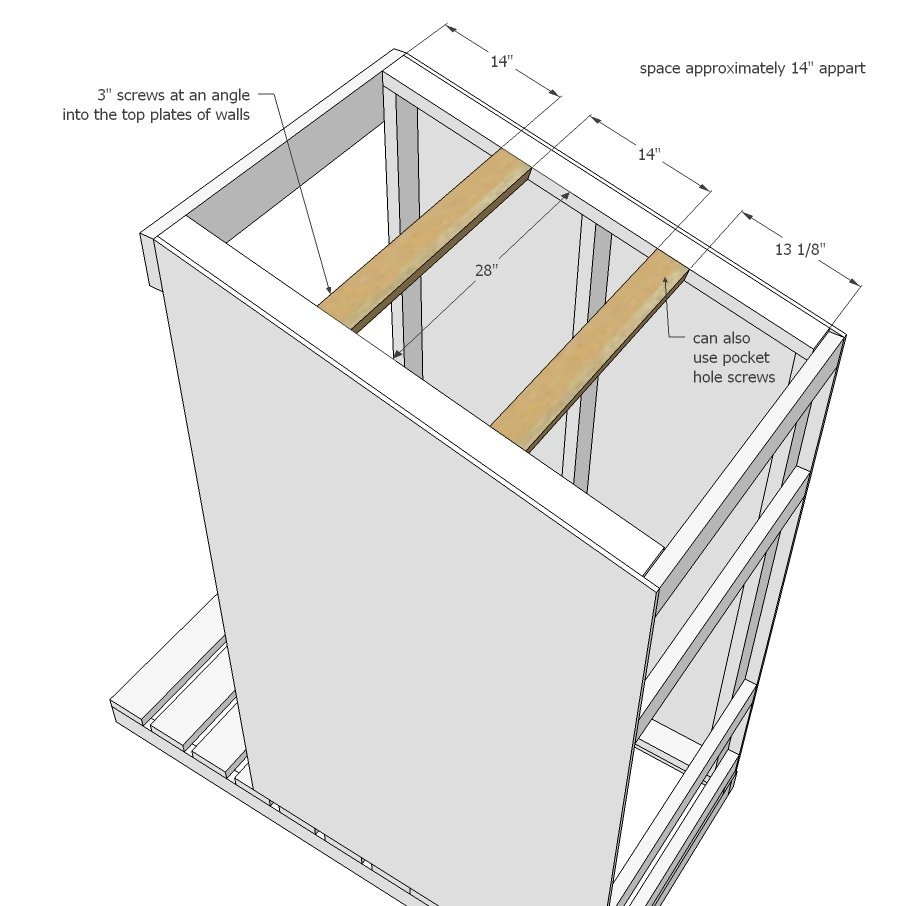
Attach 2x4 and 2x6 boards to walls to tie in the walls at the front and back.
Step 7
Additional supports recommended for supporting the roof.
Step 8
Attach plywood to roof, nailing or screwing to all availabe tie in points.
Step 9
Use scrap plywood pieces to cover back. I considered leaving the top panel open and covering with acrylic glass as well but ended up using plywood.
Step 10
Build the door and attach with gate hinges. If using a gate clasp, make sure there is a way for the door to be opened from the inside. We did this by drilling a hole and attaching a string to the clasp so it can be opened from the inside.
Finishing
Sand all surfaces, starting with a medium grit and finishing with fine. Wipe off the dust, fill any holes or gaps with wood filler, and sand smooth once dry. Apply primer if you're painting, then finish with your choice of paint or stain and seal with a durable clear topcoat. For outdoor projects, use exterior-rated primer, paint or stain, and sealer so the piece stands up to the weather.
Source (temporary): https://www.ana-white.com/woodworking-projects/simplest-outhouse-plans-beginner-friendly