Simplified 8' Barn Door Console
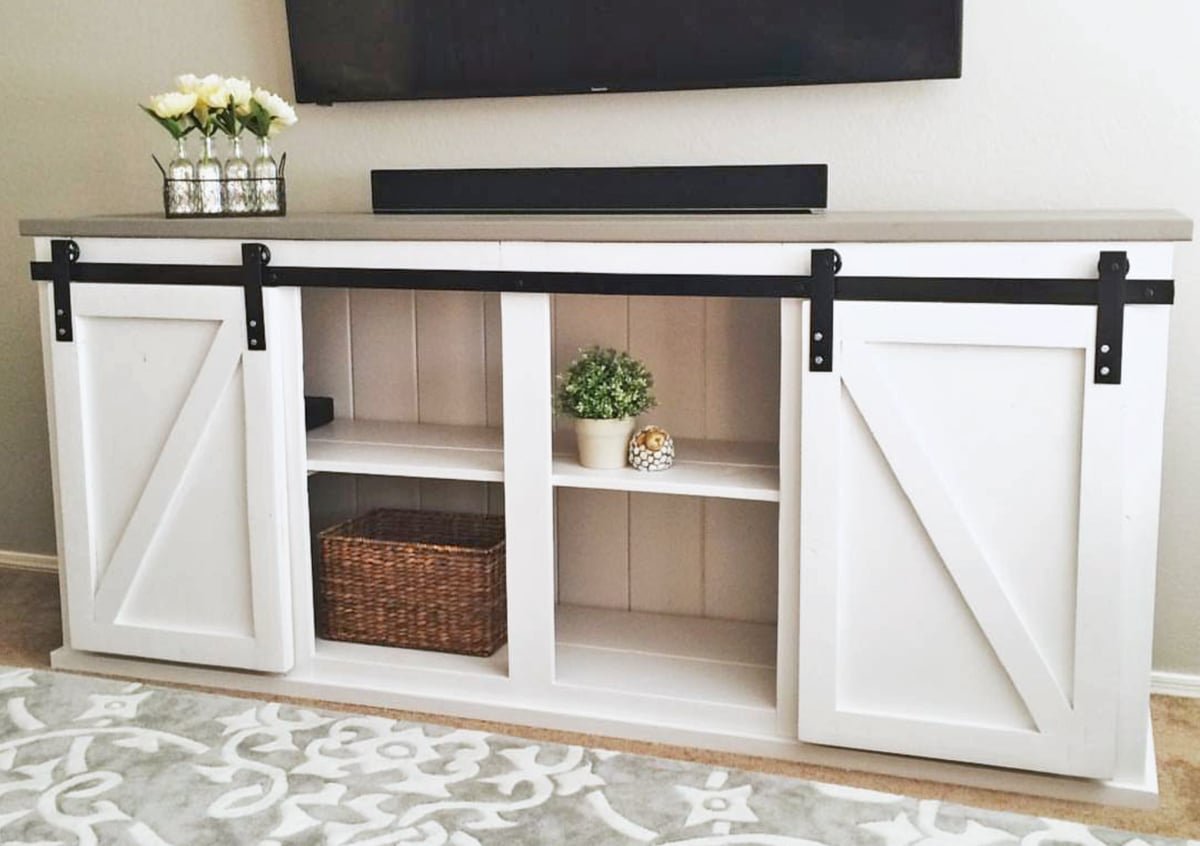
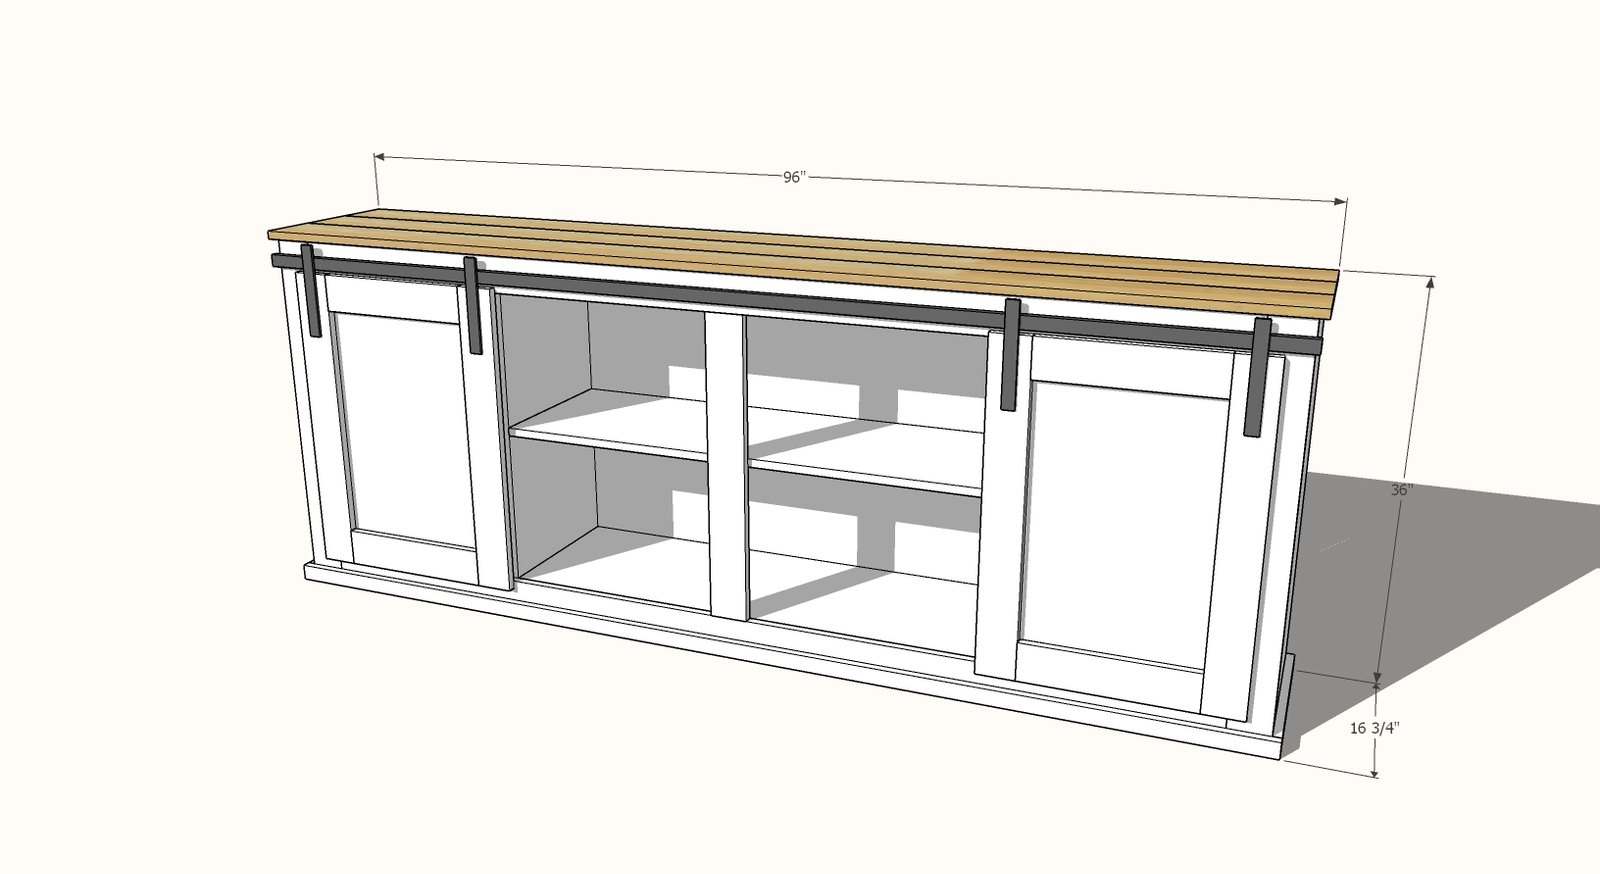
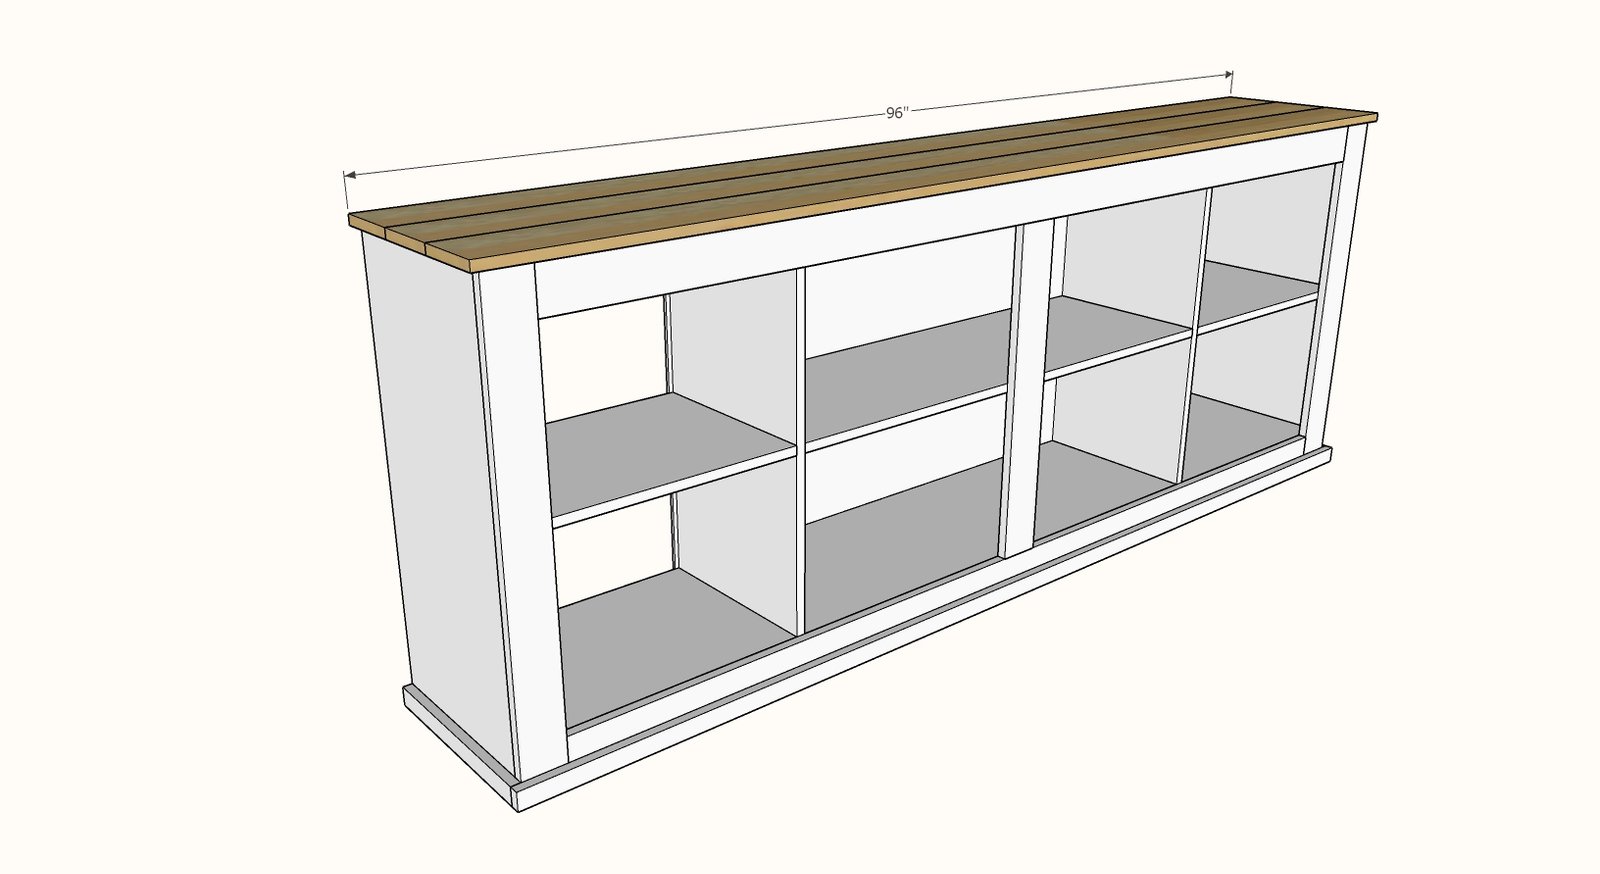
One of our most popular projects is this barn door console. But we wanted to make it even simpler and easier to build - and in a longer length! - so more people can have this amazing project in their home for about $350. The console in this plan is a whopping eight feet long, three feet tall and about 16" deep (it's BIG). Paint or stain any color. Free
Specifications
| Project type | Media and Entertainment Centers |
|---|---|
| Room | Storage Solutions |
| Style | Farmhouse Furniture |
| Difficulty | Intermediate |
Dimensions
Use the size-specific shopping and cut lists below.
Shopping List
- 2 sheets of 3/4" thick Hardwood Plywood, ripped into strips 15-1/4" wide x 8 feet long
- 30 feet of edge banding in matching veneer to the hardwood plywood
- 2 - 1x3 furring strips, 8 feet long
- 5 - 1x4 pine boards, 8 feet long
- 1 - 1x2 pine board, 8 feet long
- 1 - 1x2 pine board, 4 feet long
- 3 - 1x6 pine boards, 8 feet long
- 1 - ¼” plywood half sheet (4’x 4’) for half back, or full sheet (8’x4’) for full back
- 100 pack of 1-¼” coarse Kreg Pocket Hole Screws
- 100 - 1-¼” brad nails
- 100 - ¾” brad nails
- 8’ barn door mini kit for cabinets like this one or DIY your own
- Circular Saw
- Drill
- Kreg Jig
- 18 Gauge Brad Nailer
- Palm Sander with 120 grit sandpaper
- Measuring Tape
- Safety Glasses
Cut List
Carcass Pieces, cross cut from the 15-1/4" wide strips
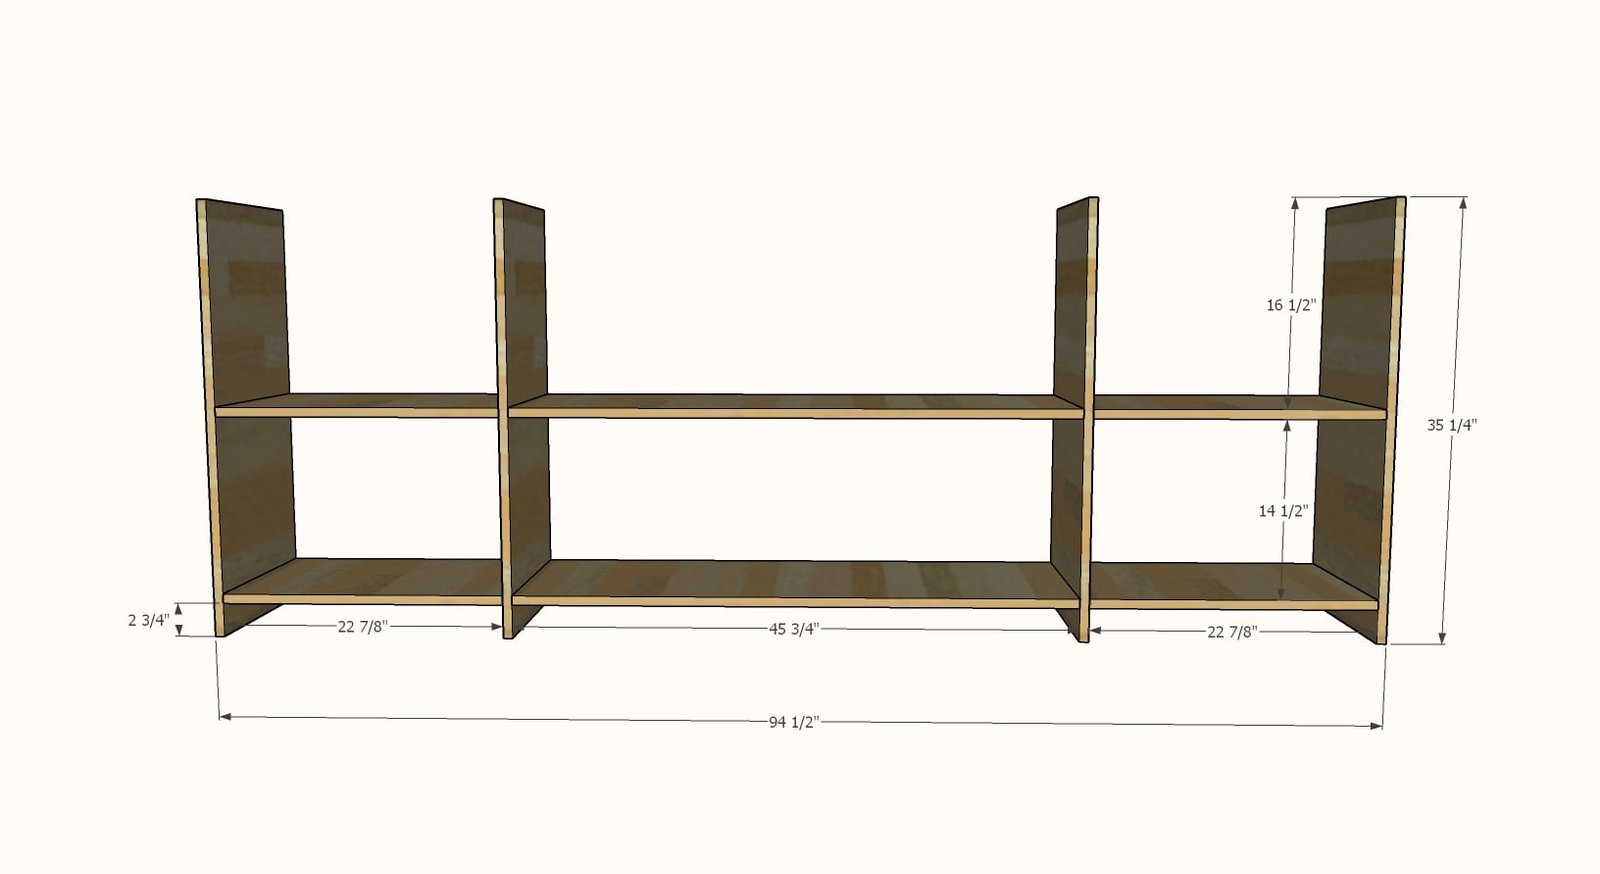
- 2 - 3/4" plywood @ 15-1/4" x 45-3/4"
- 4 - 3/4" plywood @ 15-1/4" x 22-7/8"
- 4 - 3/4" plywood @ 15-1/4" x 35-1/4"
Trim, Top, Back and Door Pieces
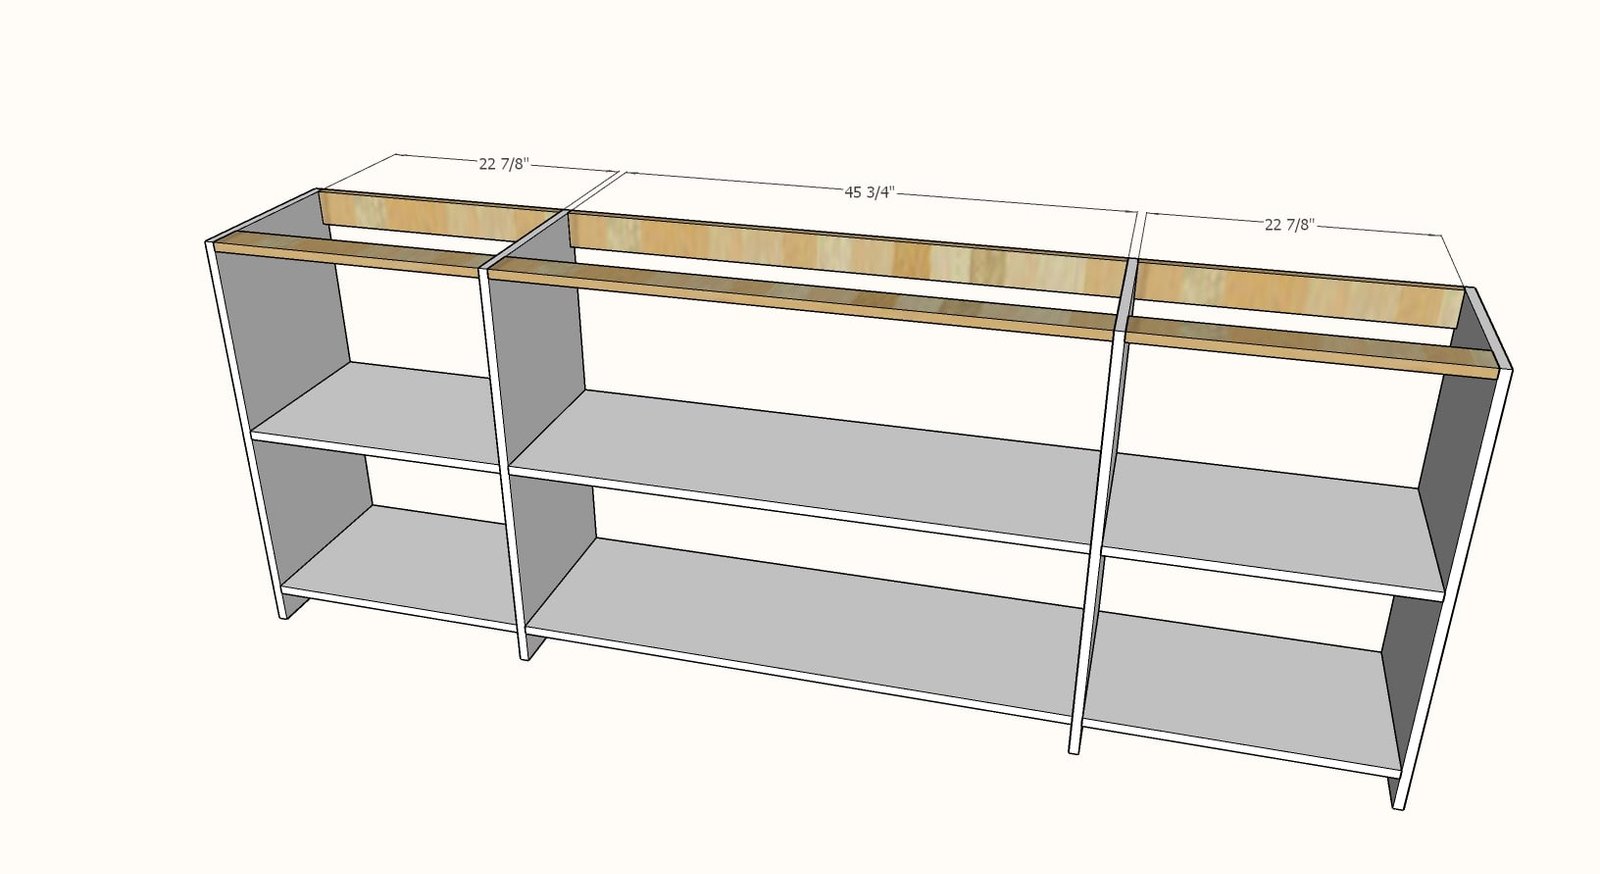
- 4 - 1x3 @ 22-⅞” Bay Supports
- 2 - 1x3 @ 45-¾” Bay Supports
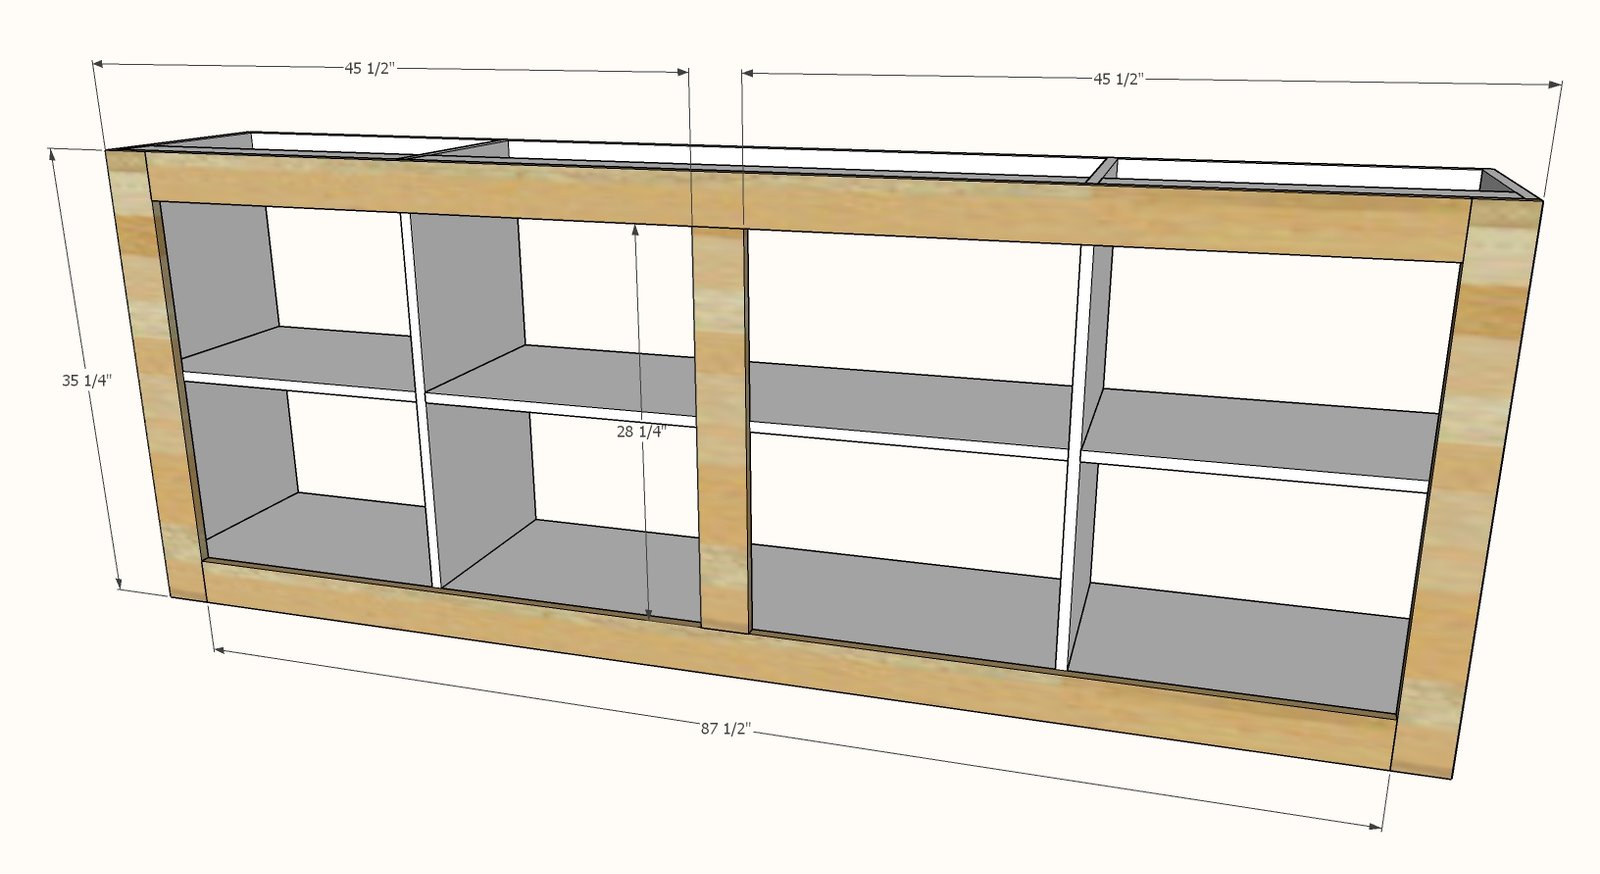
- 2 - 1x4 @ 35-¼” - Face Frame Stiles*
- 2 - 1x4 @ 87-½” - Face Frame Rails
- 1 - 1x4 @ 28-¼” - Face Frame Mid Stile
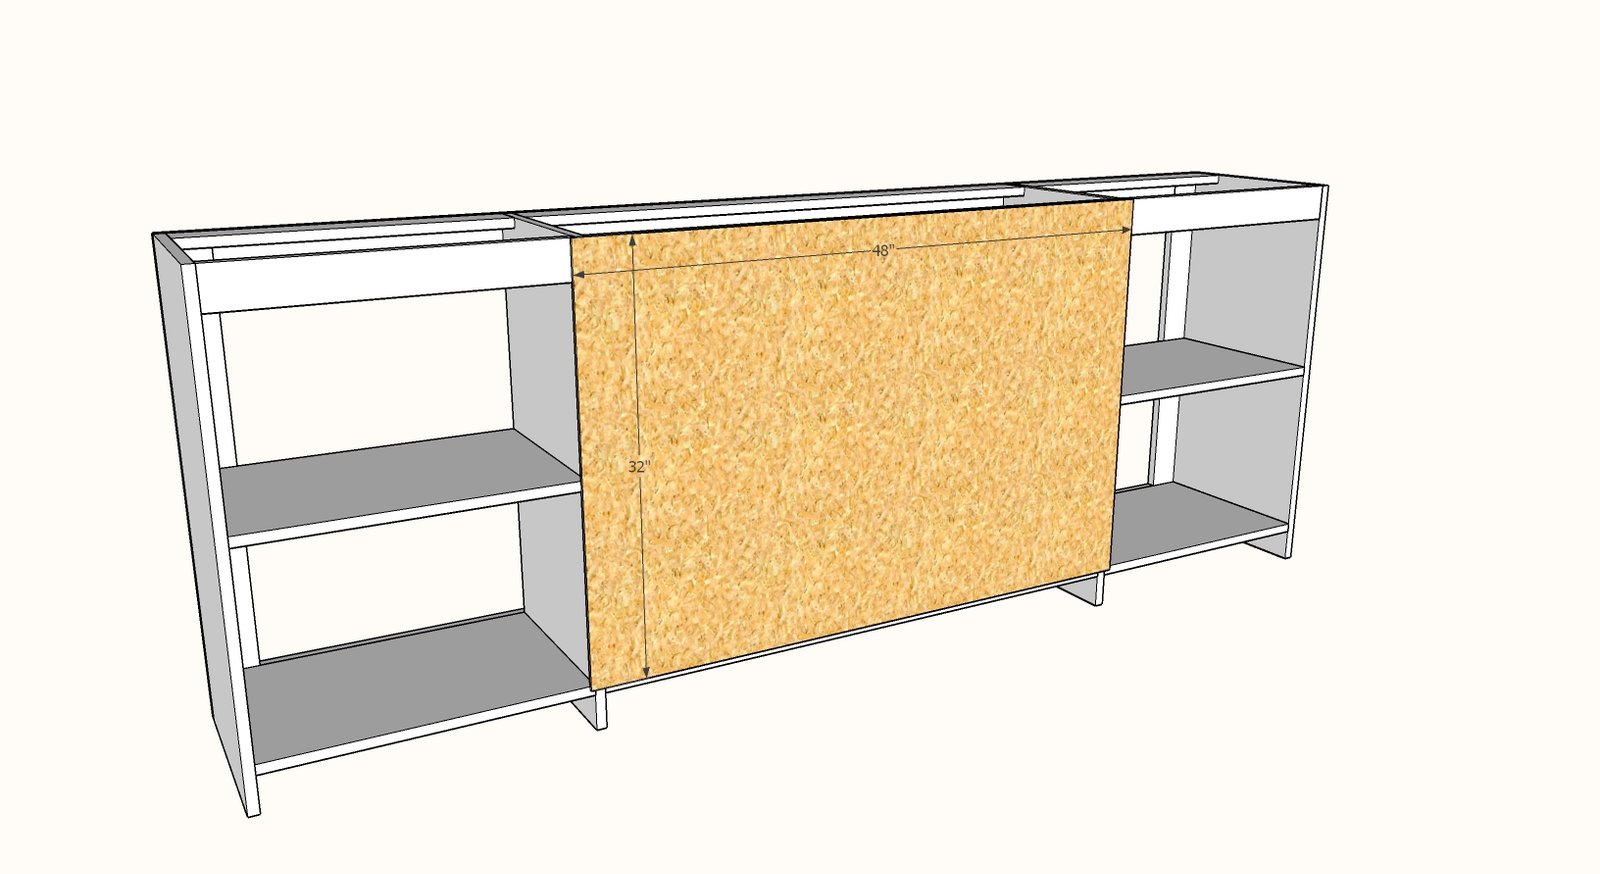
- 1 - ¼” plywood @ 48” x 32” - Back
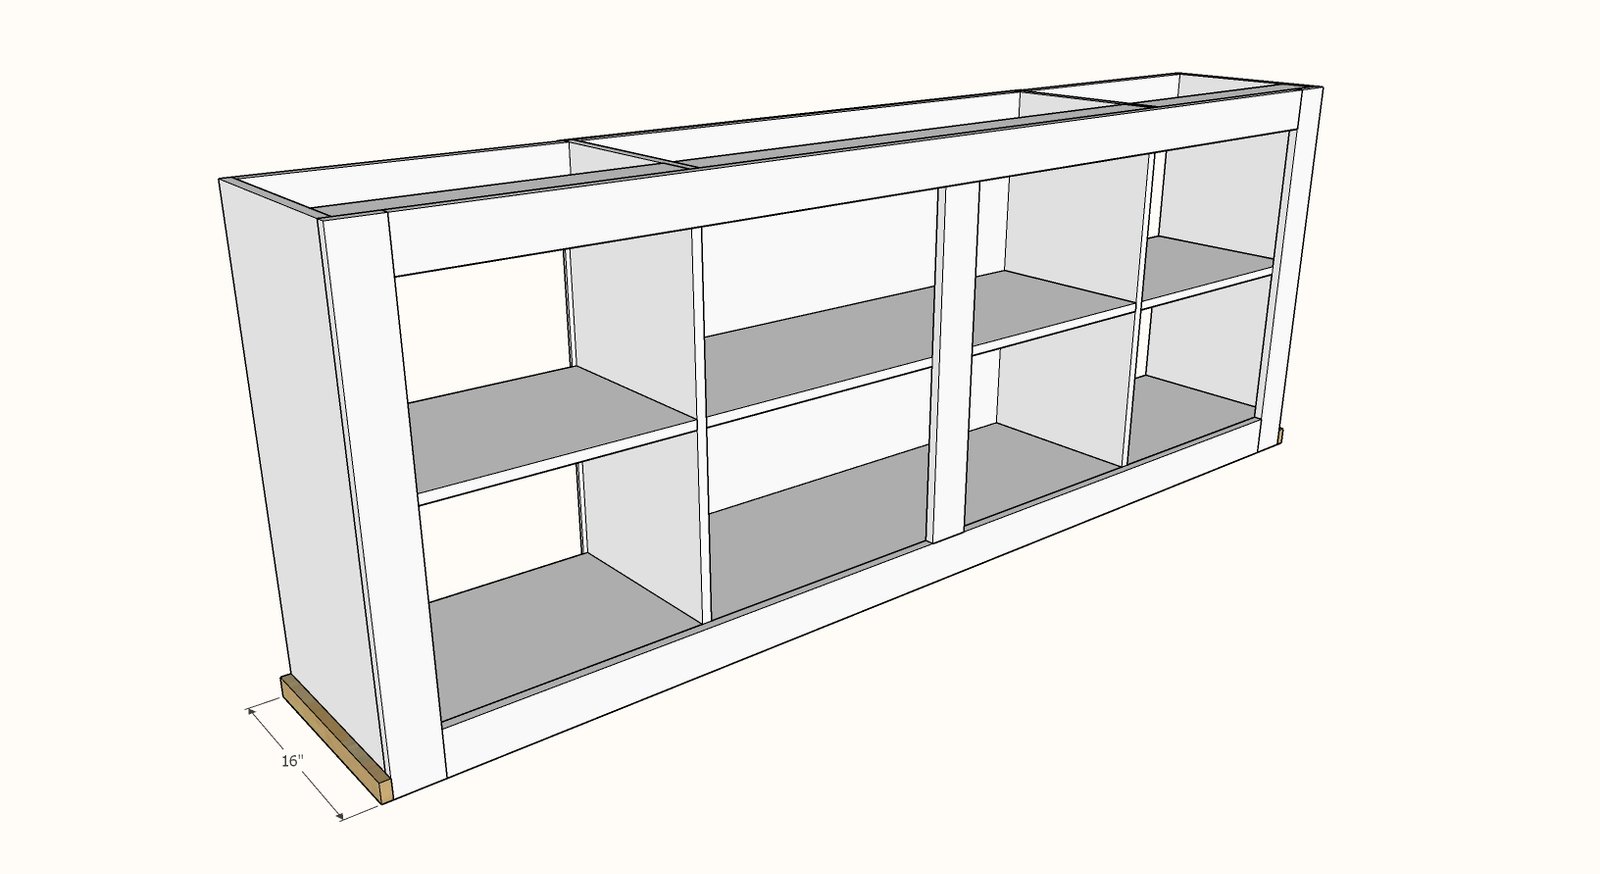
- 2 - 1x2 @ 16” - Base Ends
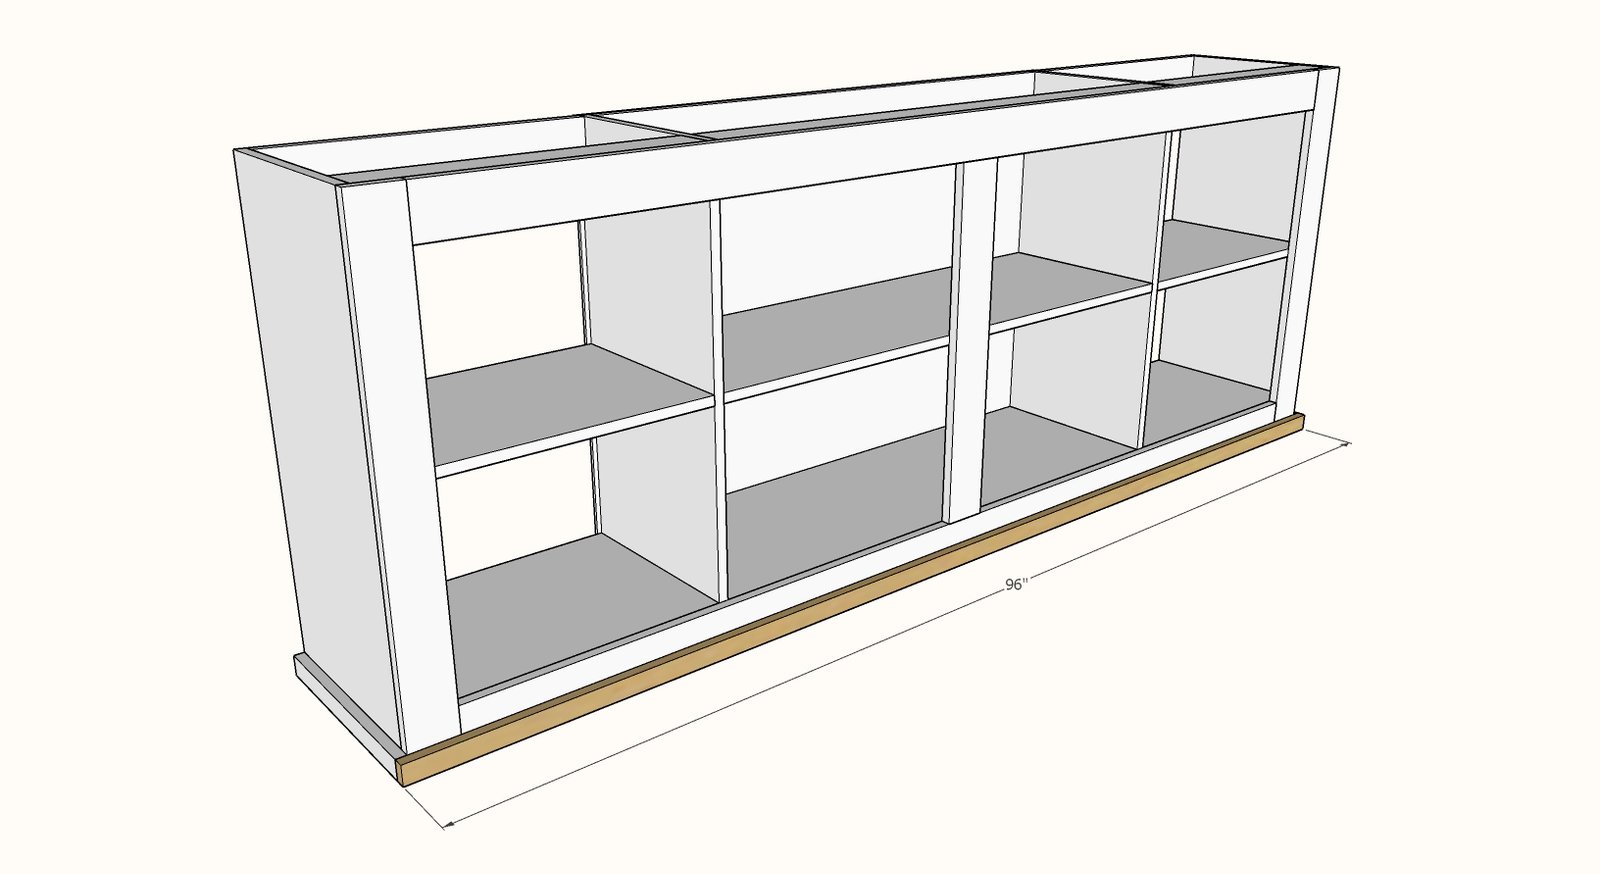
- 3 - 1x6 @ 8 feet long
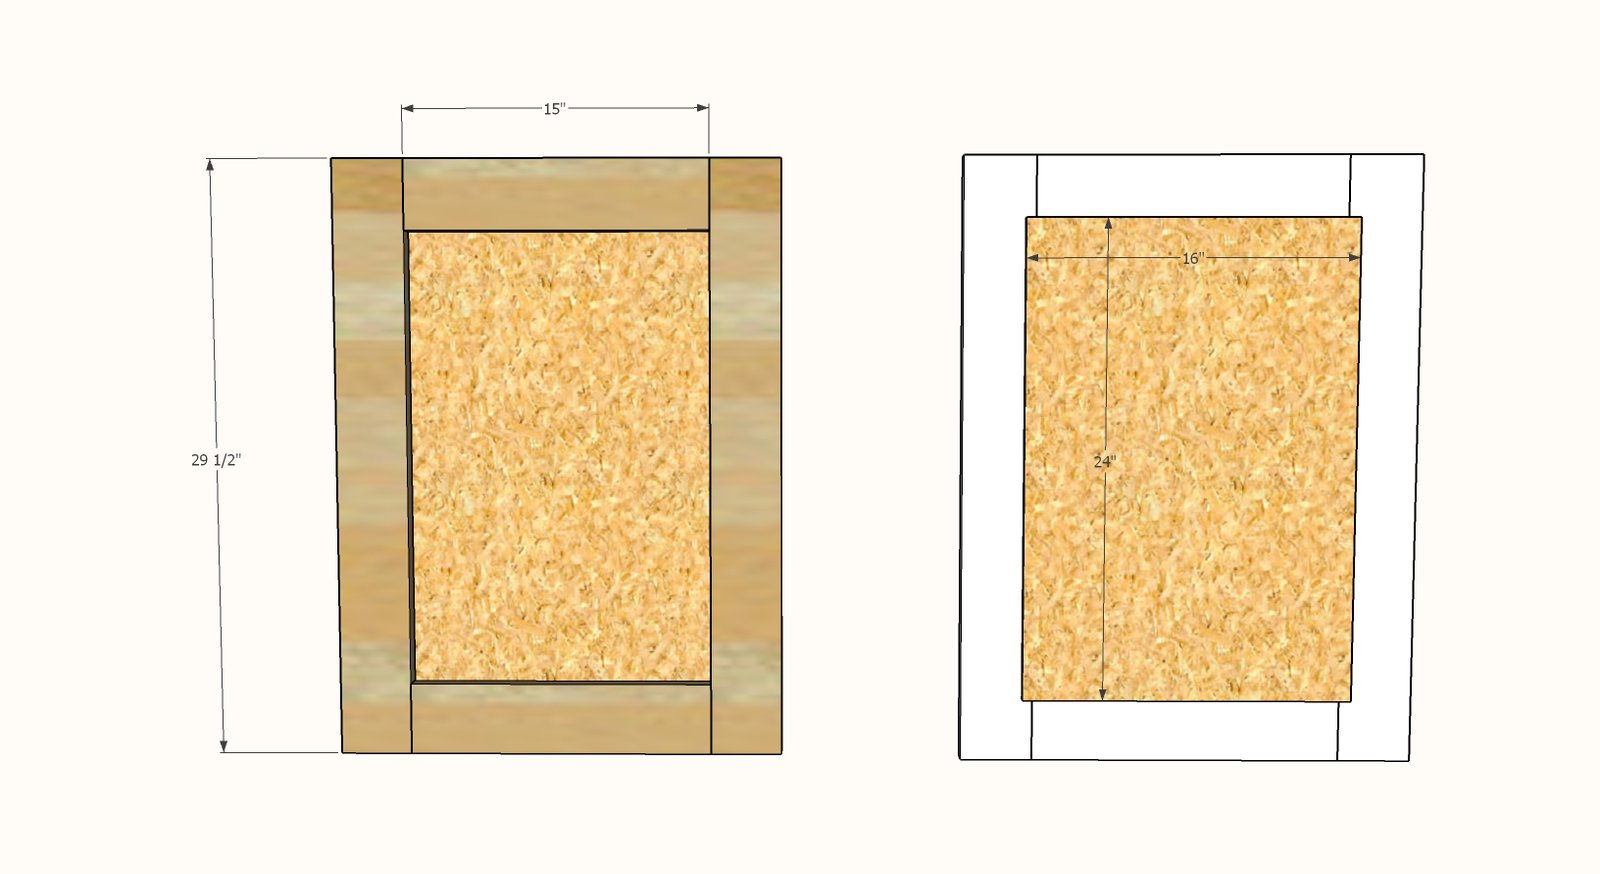
- 4 - 1x4 @ 29-½” - Door Stiles
- 4 - 1x4 @ 15” - Door Rails
- 2 - ¼” plywood @ 16” x 24” - Door backs
*Do not cut two 35-¼” pieces from the same 1x4 - instead cut | 35-¼” | 29-½” | 29-½” | so that all the cuts fit on your shopping list
Tools
- measuring tape
- pencil
- safety glasses
- kreg-jig
- drill
- circular saw
- nailer
- sander
Step-by-step Instructions
Step 1
Apply edge banding to all the plywood pieces, along the front edges. Trim excess edge banding and lightly sand the outside corners, so it is smooth. On all shelf (horizontal) plywood pieces, drill three ¾” pocket holes on each end. Attach to the side (vertical) plywood pieces with 1-¼” pocket hole screws, spacing as shown in the diagram.
Step 2
Drill two ¾” pocket holes on each end of the bay support pieces. Attach inside the bays with 1-¼” pocket hole screws as shown in the diagram.
Step 3
Drill two ¾” pocket holes on each end of the rails. Attach to the stiles with 1-¼’ pocket hole screws. Repeat for the mid stile, centering.
You can do a full back or half back as shown.
Cut with a circular saw, elevating the plywood off the floor with scrap wood pieces. Make sure you adjust your circular saw so the blade is about ⅜” cutting depth. Attach to back with ¾” brad nails and wood glue, to all shelves, sides, bay supports for maximum strength.
Measure and cut the base trim ends from the 1x2 @ 4 feet long.
Attach with glue and 1-¼” brad nails.
Measure and cut the front base trim.
Attach with 1-¼” brad nails and wood glue to the front.
Attach the 1x6 boards together with ¾” pocket hole screws and wood glue.
Position on top with even overhangs on the ends, flush to the back, and attach with glue and 1-¼” brad nails.
Step 8
Depending on your hardware specs, you may wish to size and build your drawers after hardware installation. Attach the door rails to the stiles with ¾” pocket holes and 1-¼” pocket hole screws. Then attach the back to the doors with ¾” brad nails and glue.
Step 9
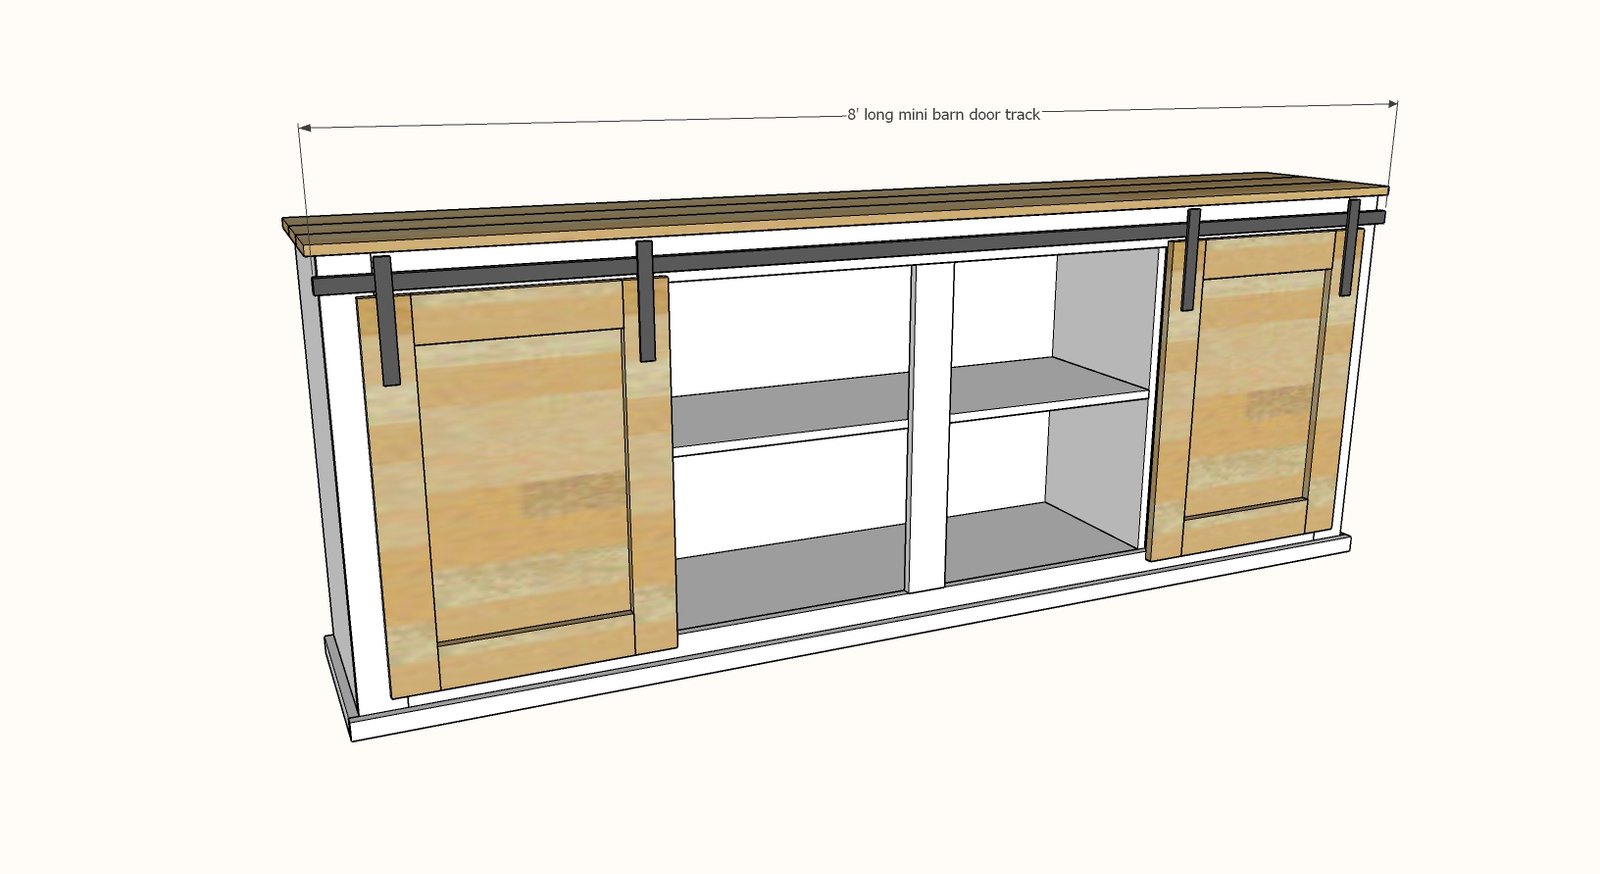
Hang doors with 8’ barn door hardware kit.
Finishing
Sand all surfaces, starting with a medium grit and finishing with fine. Wipe off the dust, fill any holes or gaps with wood filler, and sand smooth once dry. Apply primer if you're painting, then finish with your choice of paint or stain and seal with a durable clear topcoat. For outdoor projects, use exterior-rated primer, paint or stain, and sealer so the piece stands up to the weather.
Source (temporary): https://www.ana-white.com/woodworking-projects/simplified-8-barn-door-console-plans