Single DIY Entryway Drawer Bench
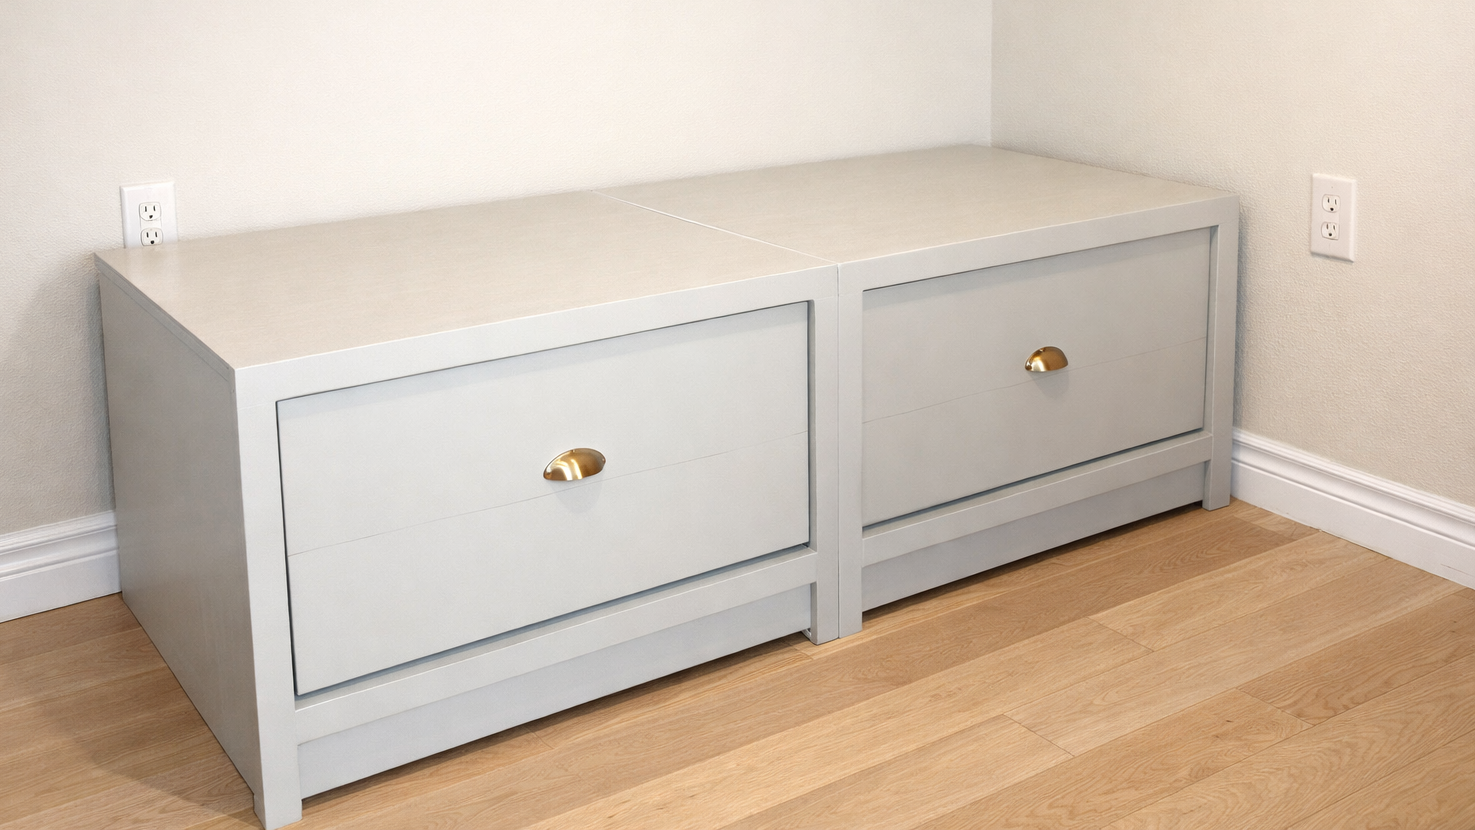
Single drawer bench plans - build your own modular bench stye, one drawer at a time! This is a to build your own entryway bench. Step by step diagrams, shopping and cut list and more. Tons of reader photos. Check it out! More plans in this collection including matching hutches
Specifications
| Project type | Bench |
|---|---|
| Room | Storage Solutions |
| Style | Farmhouse Furniture |
| Difficulty | Intermediate |
| Estimated cost | $20 - $50 |
Dimensions
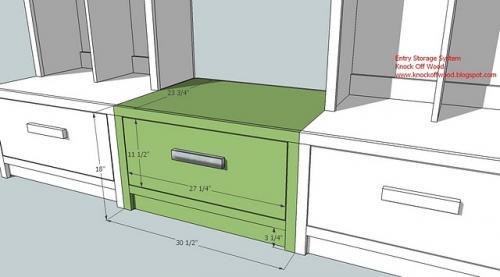
Use the size-specific shopping and cut lists below.
Shopping List
- 1 - sheet of 3/4" plywood
- 1 - 1x4 @ 30"
- 1 - 1x2 @ 8 feet long
- 1 - 1x10 @ 10 feet long
- 1 - 1x12 @ 6 feet long
Cut List
Cut List for 1 Drawer Bench
- A) 2 – 3/4″ plywood @ 23″ x 17 1/4″ (Sides of the bench)
- B) 1 – 3/4″ plywood @ 23″ x 28 1/2″ (Bottom of the bench)
- C) 1 – 3/4″ plywood @ 23 x 30 1/2″ (Top of the bench)
- D) 1 – 1×4 @ 28 1/2″ (Inset footer)
- E) 1- 1×2 @ 30 1/2″ (top front trim)
- F) 2 – 1×2 @ 16 1/2″ (Side trim)
- G) 1 – 1×2 @ 27 1/2″ (Bottom trim)
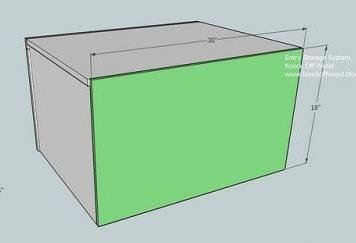
- H) 1 – 1/2 plywood @ 30″ x 18″ (Back of the Bench)
Drawer Pieces
- I) 1 – 3/4″ plywood cut at 27 1/4″ x 22 1/2″ (Drawer Bottom)
- J) 2 – 1×10 @ 22 1/2″ (Drawer Sides)
- K) 2 – 1×10 @ 25 3/4″ (Front and Back of Drawers)
- L) 2 – 1×12 @ 27 1/4″ (Drawer Face)
Tools
- measuring tape
- square
- safety glasses
- hearing protection
- drill
- circular saw
- nailer
- sander
Step-by-step Instructions
Step 1
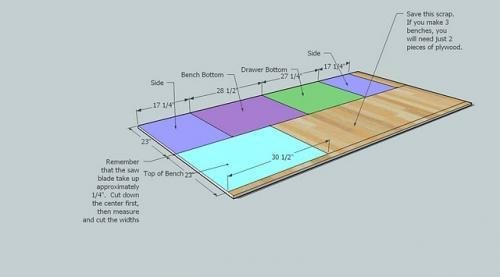
Don’t throw the scraps out! If you save your scrap and cut as shown above, when you make 3 benches, you will only need 2 pieces of plywood.
Step 2
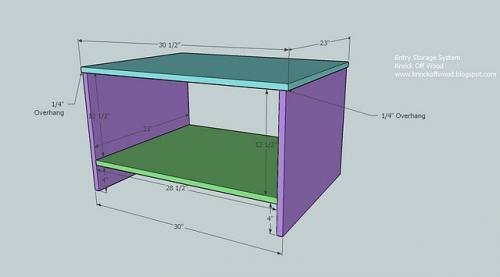
Use 2″ nails and glue to nail through the sides of boards A (shown in purple above) into the end edges of board B (shown in green above). Use the measurements in the above diagram to guide you. Then use 2″ nails and glue to nail the top, C (shown in blue above) to the sides. Notice how C (blue) overhangs A (purple) 1/4″ on both sides.
Step 3
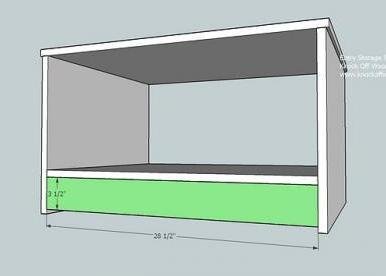
Nail in place board D, shown in green above, as shown above. Keep outside edges flush and use 2″ nails and glue to nail through boards A and B into the edges of D.
Step 4
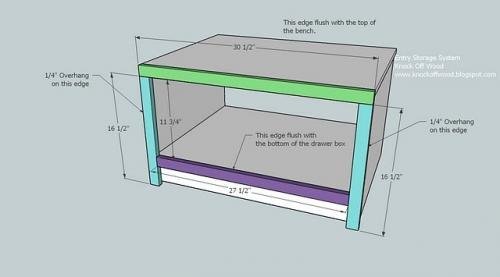
Begin by nailing board E (shown in green above) to the top and sides of the bench as shown above. Use 2″ nails and glue. Nail through the face of E into both the top edges and the side edges. Then nail boards F in place, shown in blue above, nailing into the side edges and the bottom edge and also board D, as shown above. When nailing into D, use 1 1/4″ nails. Complete the trimout by nailing board G, shown in purple above, to the bench. Use 2″ nails and glue to nail into C. Then use 1 1/4″ nails to nail into D as shown above.
Step 5
Step 6
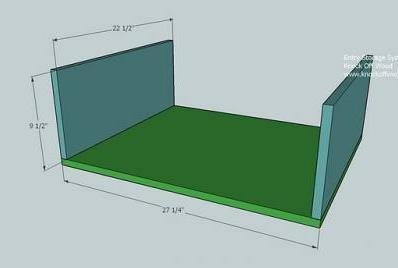
Use 2″ nails and glue to nail through the bottom, I (shown in green above) into the edges of the sides, J (shown in blue above).
Step 7
Place the fronts and the back in the drawer, as shown above in green, boards K. Use the 2″ nails to nail through the bottom of the drawer and the sides into the edges of K.
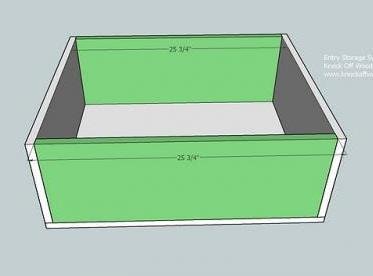
Step 8
Attach the drawer slides and insert the drawer, without the face, as shown above. Push the drawer into the bench, as shown above.
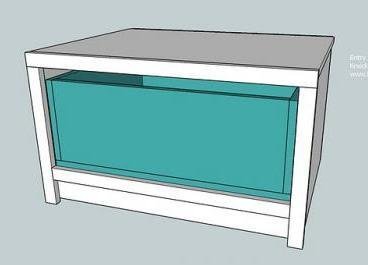
Step 9
Set the drawer face on the drawer. Position until there is an even gap around the drawer face, approximately 1/8″. Use glue and 1 1/4″ nails to nail the drawer face to the drawer. Just add 1 nail to each corner. Then pull the drawer out (lean it toward you) and from the inside of the drawer, nail into the back side of the face. This will hide most of your nail holes. You may wish to mark out where your handle will be placed and avoid putting any nails in this area.
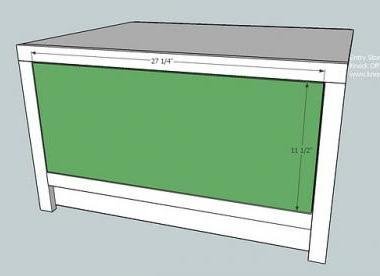
Finishing
Sand all surfaces, starting with a medium grit and finishing with fine. Wipe off the dust, fill any holes or gaps with wood filler, and sand smooth once dry. Apply primer if you're painting, then finish with your choice of paint or stain and seal with a durable clear topcoat. For outdoor projects, use exterior-rated primer, paint or stain, and sealer so the piece stands up to the weather.
Source (temporary): https://www.ana-white.com/woodworking-projects/single-diy-entryway-drawer-bench