Single Locker Cabinet
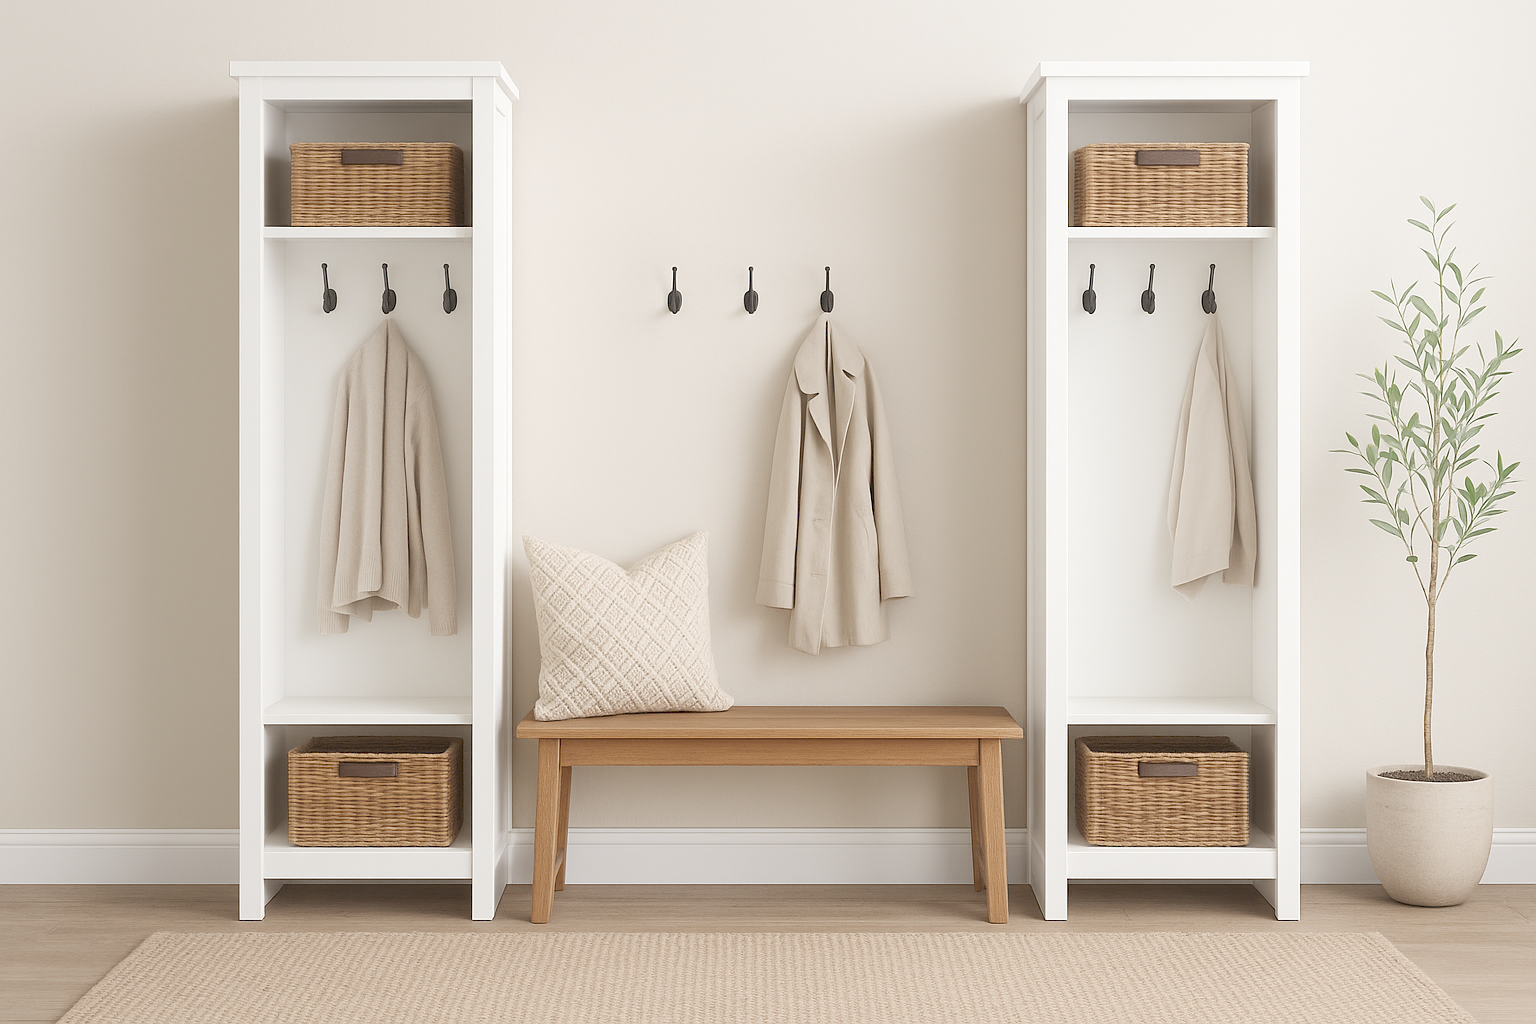
Free DIY Single Locker Mudroom Plans – Stylish, Space-Saving Entryway Storage Create a functional and beautiful drop zone with this single locker mudroom design, perfect for organizing coats, shoes, and everyday essentials. With clean lines, a timeless face-frame detail, and the warmth of woven baskets, this piece brings both style and practicality to your home. The tall, open design features: • Upper and lower cubbies for baskets or bins to store accessories, hats, gloves, and seasonal gear. • Generous hanging space with sturdy hooks for coats, bags, or scarves. • Compact footprint that works in small entryways, laundry rooms, or as part of a multi-locker setup. include step-by-step instructions, cut lists, and diagrams to help you build your own high-quality locker. Whether used alone or lined up in multiples with a shared bench, this design keeps clutter contained while adding a clean, modern farmhouse look to your home.
Specifications
| Project type | Lockers |
|---|---|
| Room | Entryway and Mudroom |
| Style | Cottage Style Furniture Plans |
| Difficulty | Beginner Projects |
| Estimated cost | $20 - $50 |
Dimensions
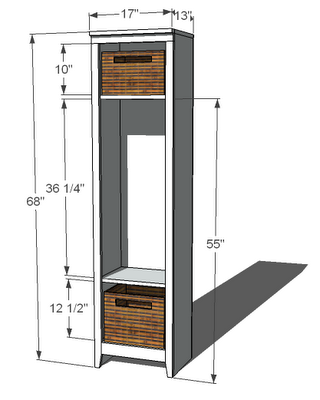
Use the size-specific shopping and cut lists below.
Shopping List
- 2 - 1x12 @ 10 feet long
- 2 - 1x2 @ 8 feet long
- 1 - 1x3 @ 14 feet long
- 1 - 1/4" Plywood or Beadboard (for the Back)
Cut List
- 2 - 1x12 @ 67 1/4" (Box Sides)
- 3 - 1x12 @ 15 1/2" (Shelves)
- 1 - 1x12 @ 17" (Top)
- 1 - 1/4" Plywood @ 17" x 68" (Back)
- 2 - 1x2 @ 65 3/4" (Legs)
- 2 - 1x2 @ 17" (Crown/Header)
- 1 - 1x3 @ 14" (Footer)
Tools
- measuring tape
- square
- pencil
- safety glasses
- hearing protection
- drill
- circular saw
- nailer
- sander
- countersink drill bit
Step-by-step Instructions
Step 1
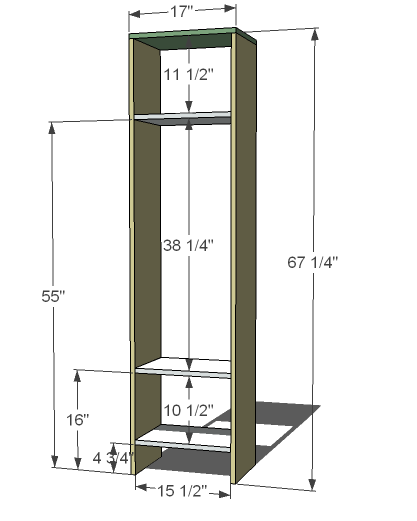
As you know, I’ve been limited on tools lately, and ended up building my locker cabinet with a Kreg Jig™ and a drill. I am so impressed with my Kreg Jig™ ( I have the $99 one, and it’s worth every penny). If you are using the Kreg Jig™, drill pocket holes (three per end) in both ends of each of the shelves and on one end of the sides. Mark the joints on the side boards, as shown in the above measurements. Glue and screw. If you don’t have a Kreg Jig™, you can use a countersink bit and 2″ screws and glue from the outsides of the sides to attach the shelves.
Step 2
I’m missing my nailer, so I hand pounded in the back of my locker cabinet. I used 1″ finish nails and glue. Make sure you also nail to the shelves, as the plywood back adds strength to the shelves and keeps the locker square.

Step 3
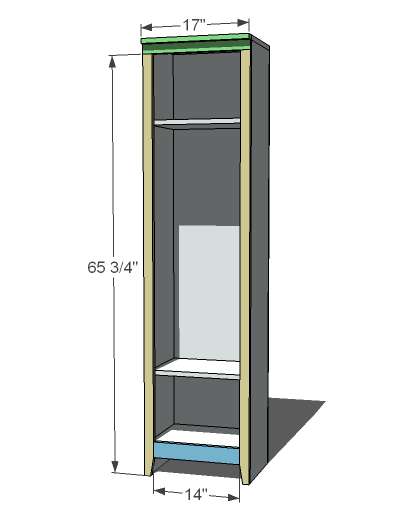
If you have a Kreg Jig™, build your face frame separate. Drill pocket holes in both ends of the footer board (blue above) and the top ends of the leg trim (yellow above). Attach the boards with glue and screws. Then use finish nails to secure to the face of the locker. If you don’t have a Kreg Jig™, you can start by attaching the leg trim, keeping outside edges flush. Then attach the footer and header, and finally the crown. Make sure you add a 2″ finish nail though the face of the crown into the 1×12 top piece of the locker.
Step 4
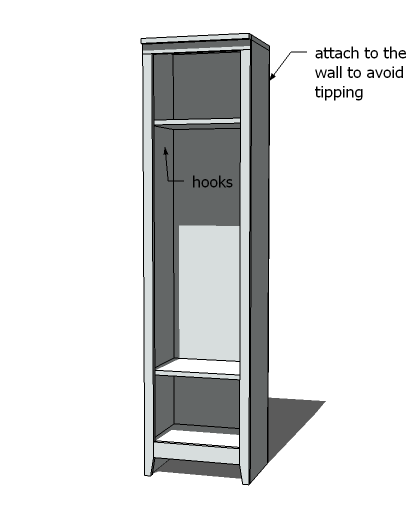
Add your hooks, and you are good to go! I also used a jigsaw to cut my leg bottoms at an angle because I liked to the look, but you can do whatever you like.
Finishing
Sand all surfaces, starting with a medium grit and finishing with fine. Wipe off the dust, fill any holes or gaps with wood filler, and sand smooth once dry. Apply primer if you're painting, then finish with your choice of paint or stain and seal with a durable clear topcoat. For outdoor projects, use exterior-rated primer, paint or stain, and sealer so the piece stands up to the weather.
Source (temporary): https://www.ana-white.com/woodworking-projects/single-locker-cabinet