Slatted Four Post Farmhouse Bed
Slatted Four-Post Farmhouse Bed – Free Queen Bed Plans Build this beautiful four-poster farmhouse bed with simple tools and basic materials! The clean slatted headboard and footboard give it a modern rustic look, while the sturdy 4x4 posts add timeless farmhouse charm. Designed to fit a standard queen mattress (60" x 80"), this DIY bed frame is strong, stylish, and affordable to build. Perfect for beginner to intermediate builders, the plans include step-by-step instructions, diagrams, and a full materials list. Customize the finish for a rustic wood tone, bright farmhouse white, or two-tone modern look.
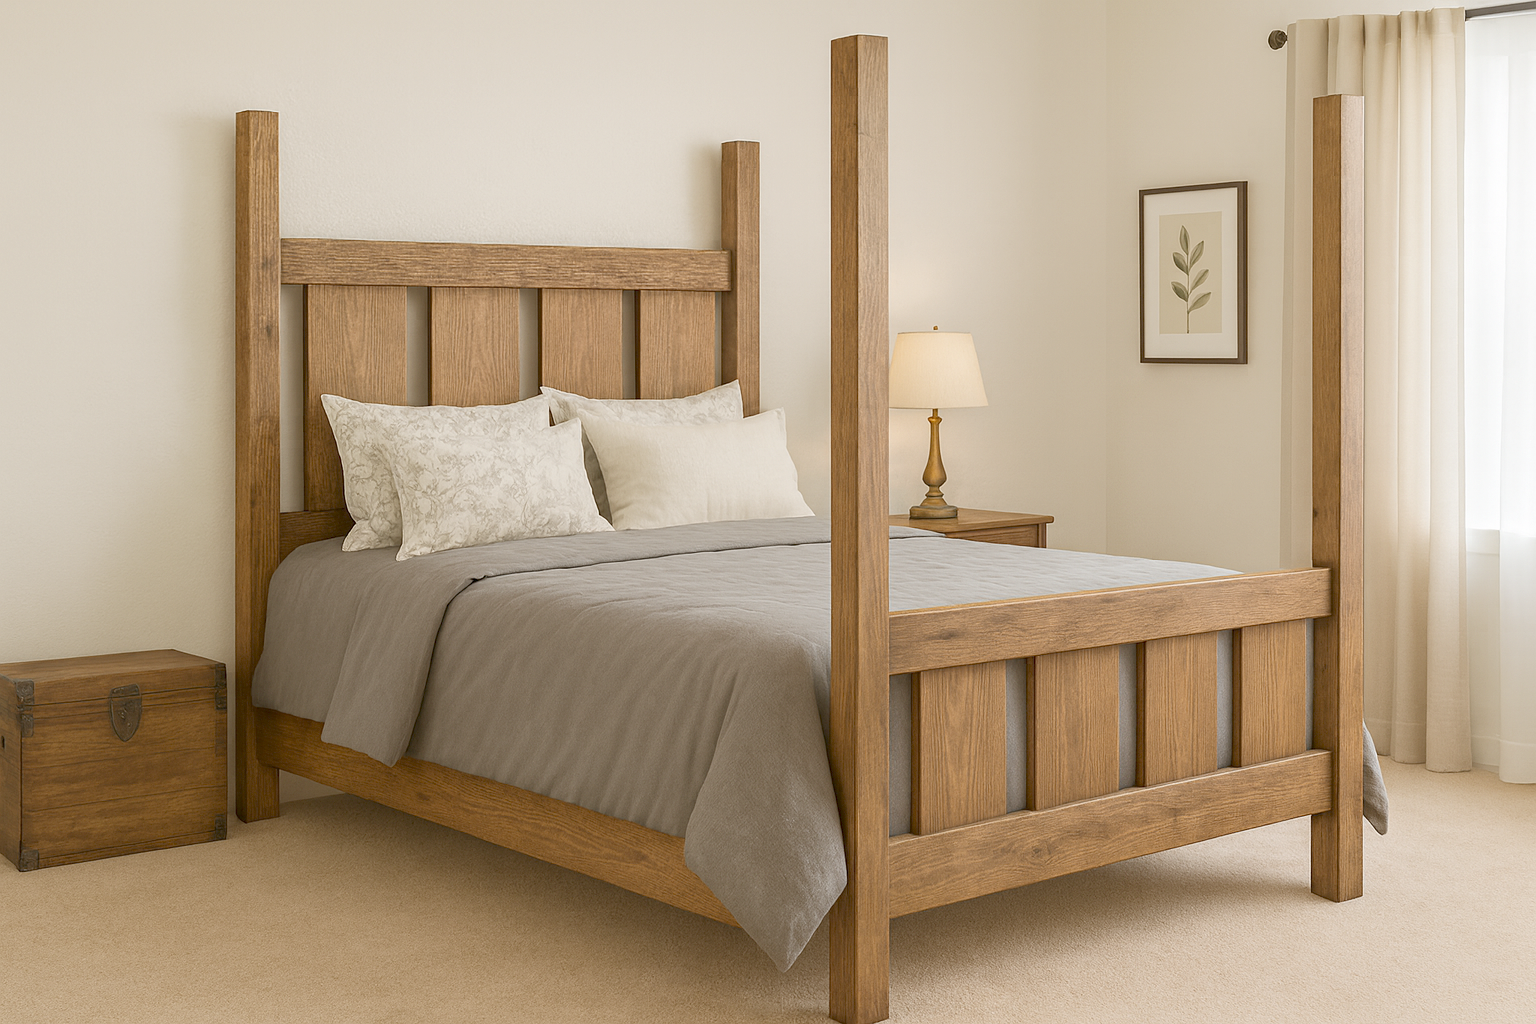
Specifications
| Project type | Beds and Bed Frames |
|---|---|
| Room | Bedroom |
| Style | Cottage Style Furniture Plans |
| Difficulty | Intermediate |
Dimensions
Use the size-specific shopping and cut lists below.
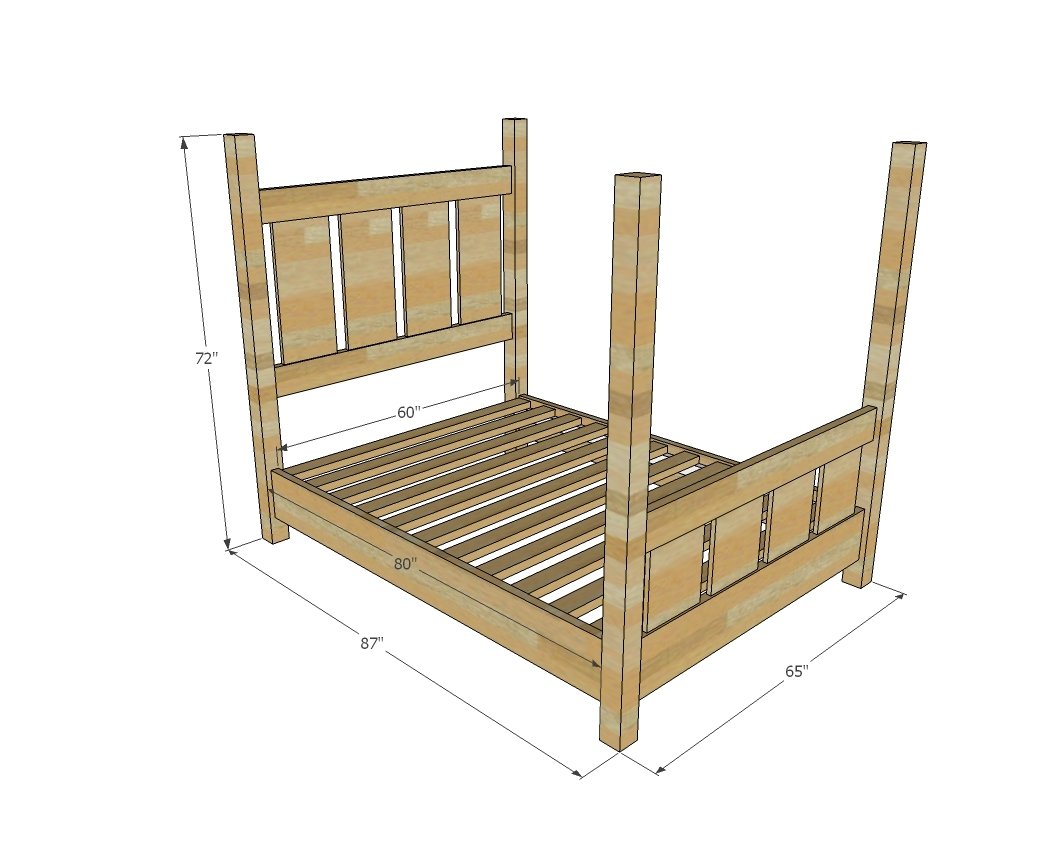
Shopping List
- 4 - 4x4 @ 72" long, not treated
- 3 - 2x6 @ stud length or 8 feet
- 2 - 1x12 @ 6 feet long
- 3 - 2x10 @ 8 feet long
- 2 - 2x4 @ 8 feet or stud length (for cleats)
Does not include lumber for slat system under mattress or additional center supports
Cut List
- 4 - 4x4 @ 72" long
- 3 - 2x6 @ 58" (headboard top and bottom and footboard top)
- 4 - 1x12 @ 23-3/4" (headboard slats)*
- 4 - 1x12 @ 12" (footboard slats)
- 1 - 2x10 @ 58" (footboard bottom)
- 2 - 2x10 @ 80" (siderails)
- 2 - 2x4 @ 80" (cleats - optional)
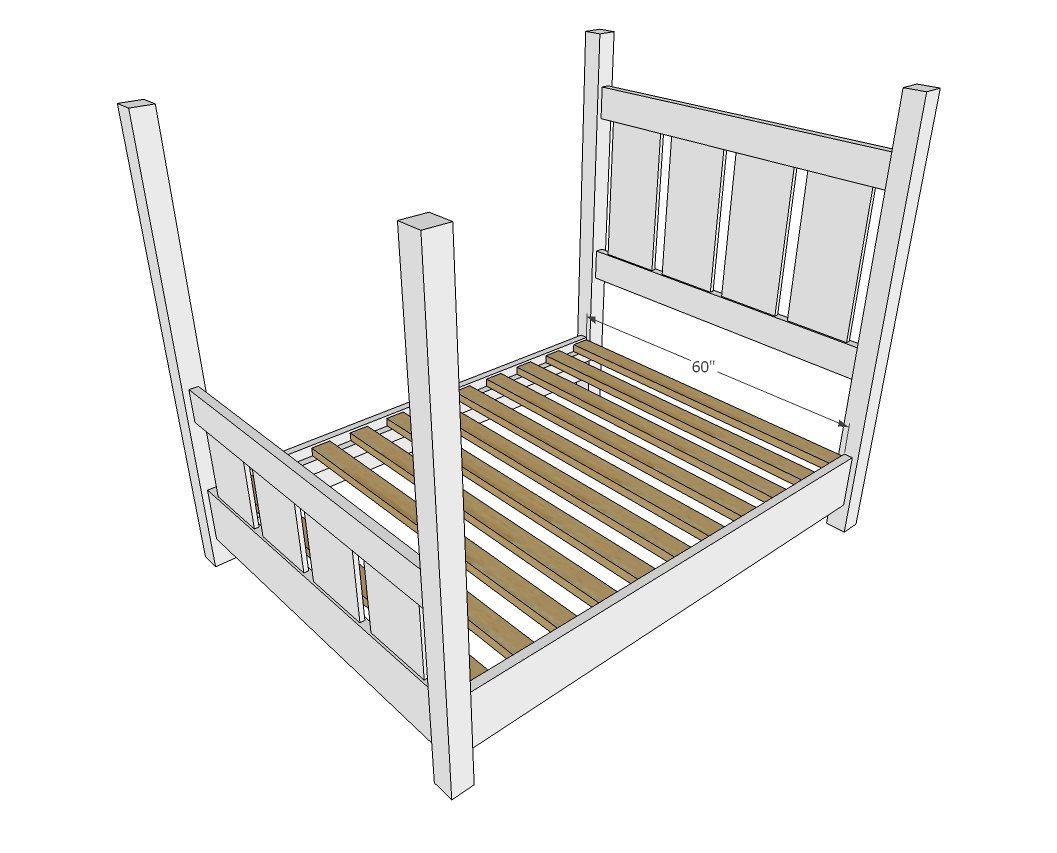
- 12 - 2x4 @ 60" (mattress slats - optional)
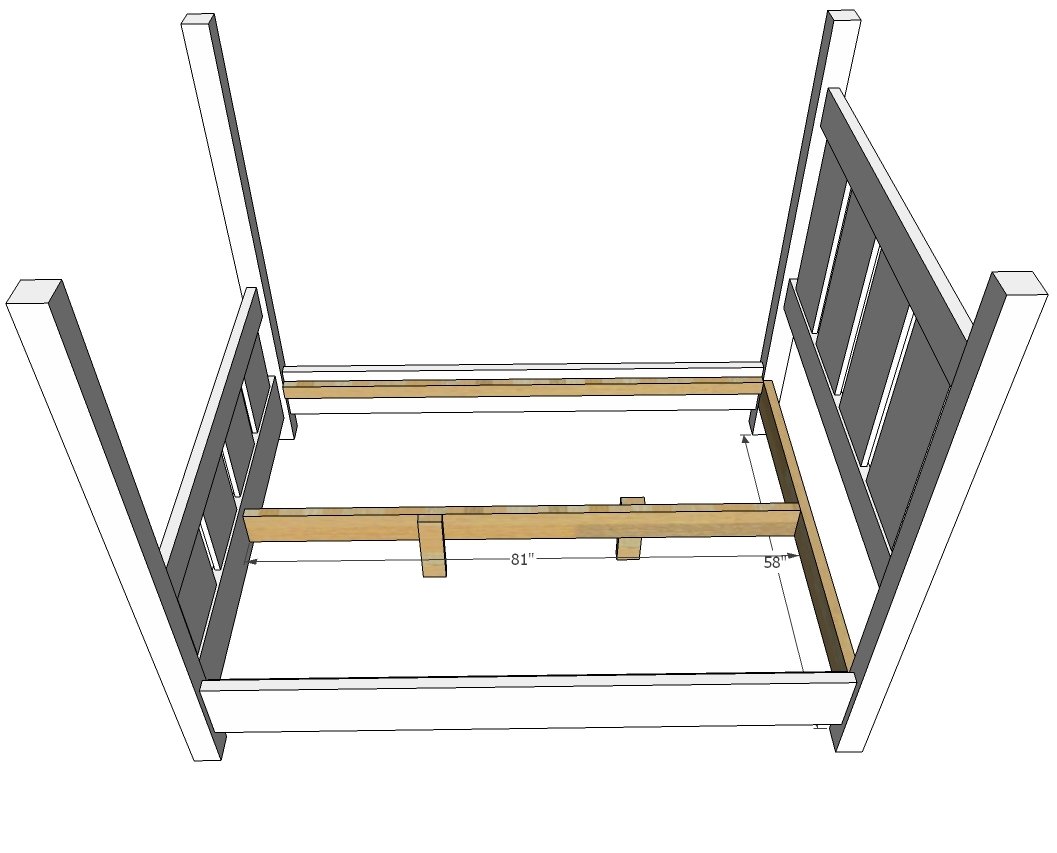
- 1 - 2x6 @ 81" (center support - optional)
- 1 - 2x6 @ 58" (headboard center support tie in - optional)
center leg pieces are cut to fit
*Adjusted this to 23-3/4" in the cut list to conserve wood, will not affect structural integrity of plans
Tools
- measuring tape
- square
- pencil
- safety glasses
- hearing protection
- kreg-jig
- drill
- circular saw
- sander
- countersink drill bit
Step-by-step Instructions
Step 1
Drill three 3/4" pocketholes on each end of all the 1x12 slatted boards. This is all of the 3/4" pocket holes, so you can set your jig now for 1-1/2" stock. Drill 1-1/2" pocket holes (two per end on 2x6s) on each end of the 2x6 headboard boards, three on the bottom footboard panel. Attach the slats to the headboard top and bottom pieces with 1-1/4" pocket hole screws and wood glue, 3/8" reveal on either side of the 1x12 where it attaches to the 2x6. Then attach headboard panel to legs. Adjust bottom spacing to 28-1/4" up from bottom of legs if you cut your headboard panel boards to 23-3/4" as noted in cut list.
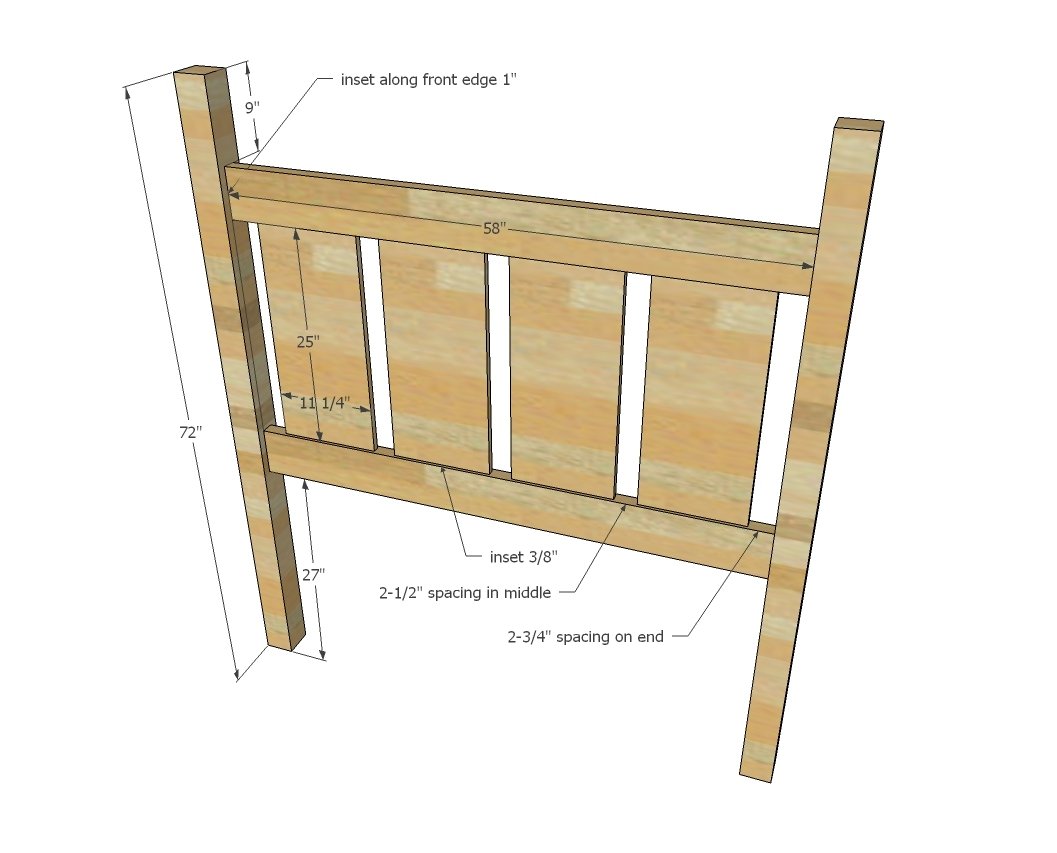
Step 2
Repeat steps to create the footboard.
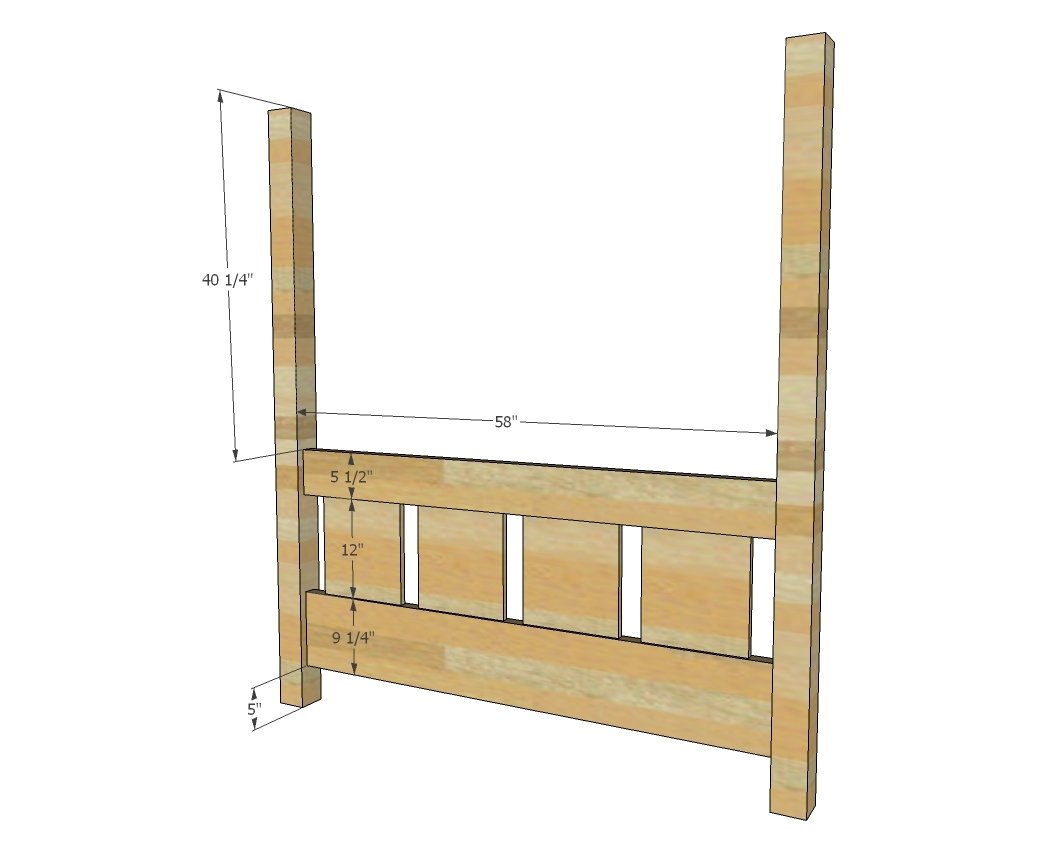
Step 3
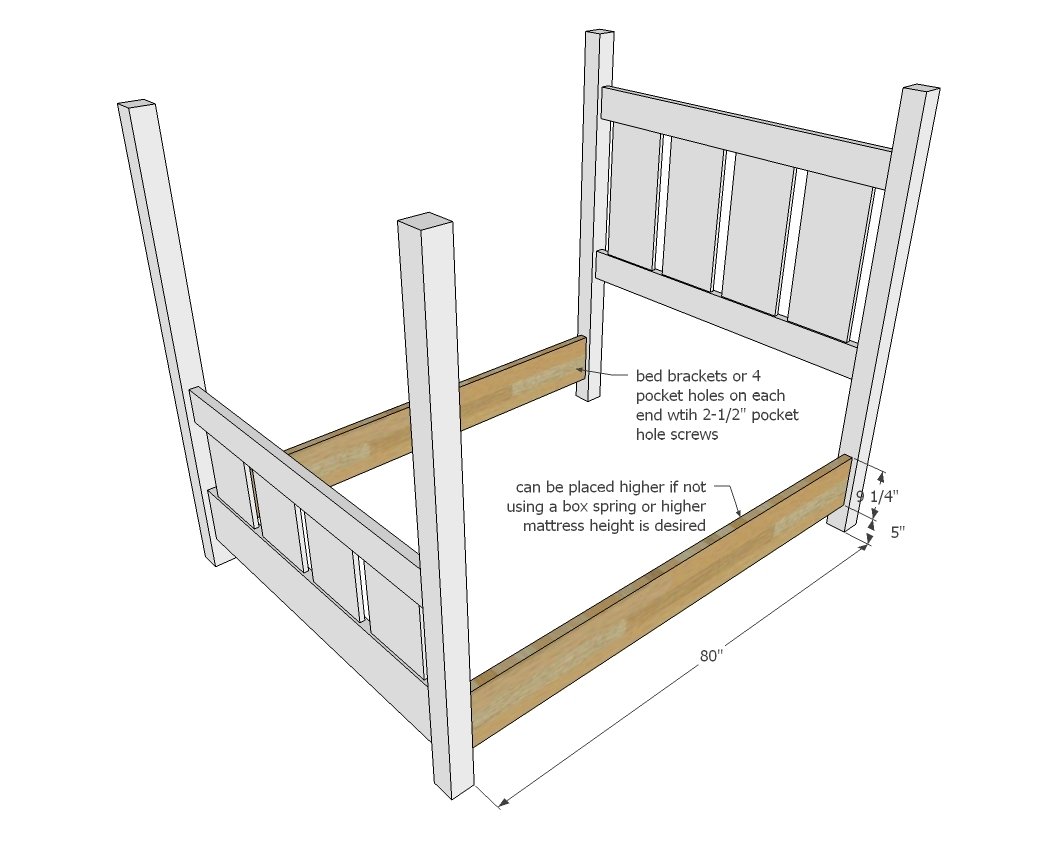
Use bed siderail attaching brackets or pocket holes to attach siderails to legs.
Step 4
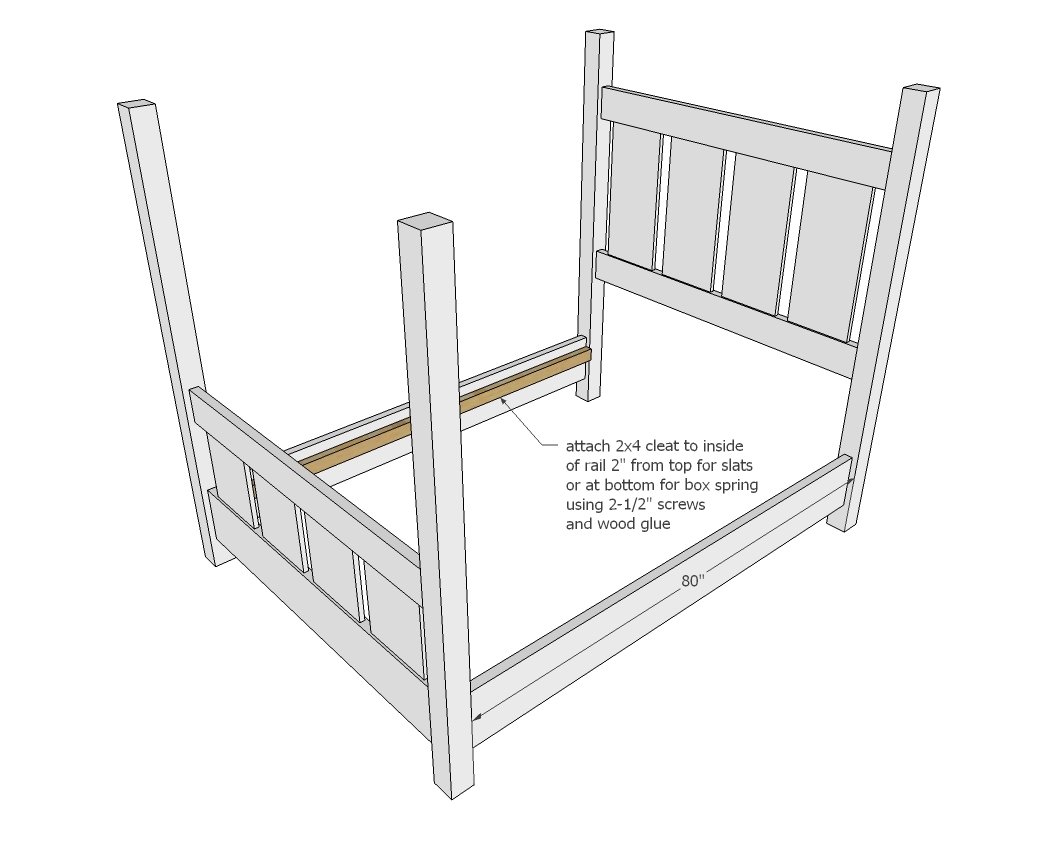
Attach cleats to inside of legs using glue and 2-1/2" screws, screwing every 8" approximately.
Step 5
Step 6
If additional support is required, the center of the bed can be supported as shown above.
Finishing
Sand all surfaces, starting with a medium grit and finishing with fine. Wipe off the dust, fill any holes or gaps with wood filler, and sand smooth once dry. Apply primer if you're painting, then finish with your choice of paint or stain and seal with a durable clear topcoat. For outdoor projects, use exterior-rated primer, paint or stain, and sealer so the piece stands up to the weather.
Source (temporary): https://www.ana-white.com/woodworking-projects/slatted-four-post-farmhouse-bed-queen