Slatted Outdoor Coffee Table
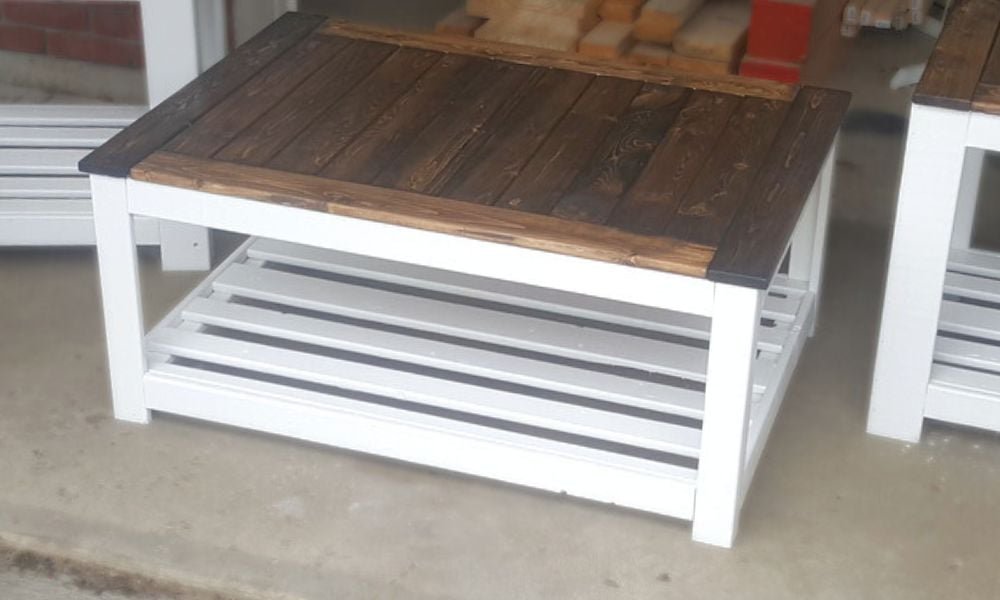
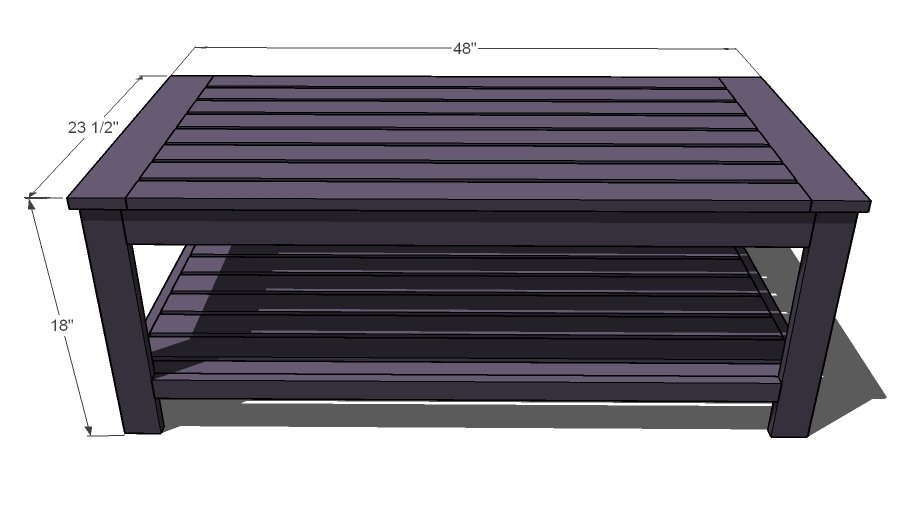
A slatted design coffee table that does not require pocket holes. Solid wood sturdy design, features full bottom shelf and open legs. Uses standard dimensional sized boards.
Specifications
| Project type | Coffee Tables |
|---|---|
| Room | Outdoor |
| Style | Cottage Style Furniture Plans |
| Difficulty | Intermediate |
| Estimated cost | $20 - $50 |
Dimensions
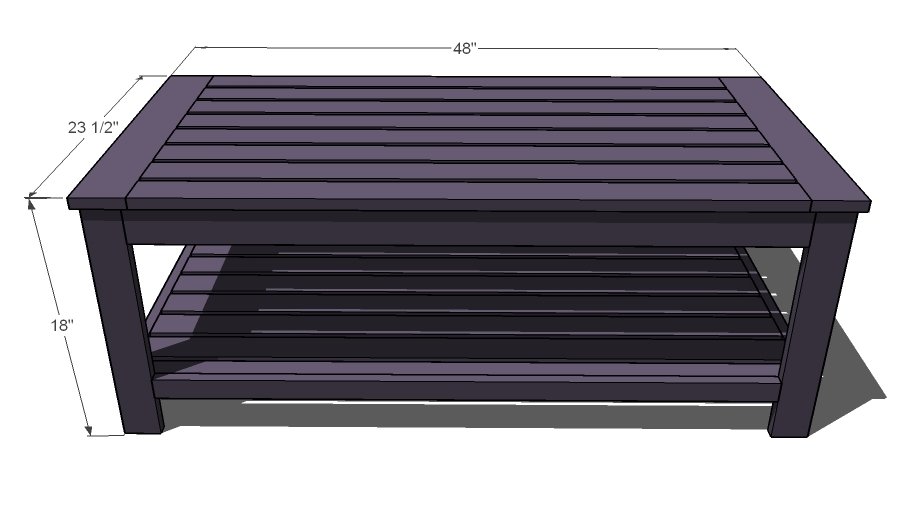
Use the size-specific shopping and cut lists below.
Shopping List
- 1 – 1×4 board ( you only need 4 feet)
- 9 – 1×2 boards (8′ Long) - Douglas Fir furring strips
- 10 – 1×3 boards (8′ Long) - Douglas Fir furring strips
- Wood Filler
- Wood Glue
- Outdoor Appropriate Paint or Stain and/or Topcoat
Cut List
- 2 – 1×4 @ 23 1/2″ (Breadboard Ends)
- 8 – 1×2 @ 45 1/2″ (Top Supports)
- 4 – 1×3 @ 17 1/4″ (Front and Back Legs)
- 4 – 1×2 @ 17 1/4″ (Sides of Legs)
- 2 – 1×3 @ 18 1/2″ (Top Side Apron)
- 2 – 1×3 @ 42″ (Top Front and Back Apron)
- 8 – 1×3 @ 41″ (Tabletop Boards)
- 2 – 1×2 @ 21 1/2″ (Bottom Shelf Supports)
- 2 – 1×2 @ 45 1/2″ (Bottom Shelf Top Pieces)
- 6 – 1×3 @ 45 1/2″ (Bottom Shelf Top Pieces)
- 2 – 1×2 @ 18 1/2″ (Bottom Shelf Aprons)
- 2 – 1×2 @ 42″ (Bottom Shelf Aprons)
Tools
- measuring tape
- square
- pencil
- hammer
- safety glasses
- hearing protection
- kreg-jig
- drill
- circular saw
- sander
Step-by-step Instructions
Step 1
Breadboard Ends and Supports. First mark you breadboard ends as shown above on the bottom side. This is important – the end supports will have a different gap than the middle supports. This is correct, just follow the measurements above. Remember that there is a 1 1/4″ inset on the support ends and the outside edge of the breadboard ends. This is shown above. Use 1 1/4″ screws and glue to fasten in place. Screws are recommended here.
Step 2
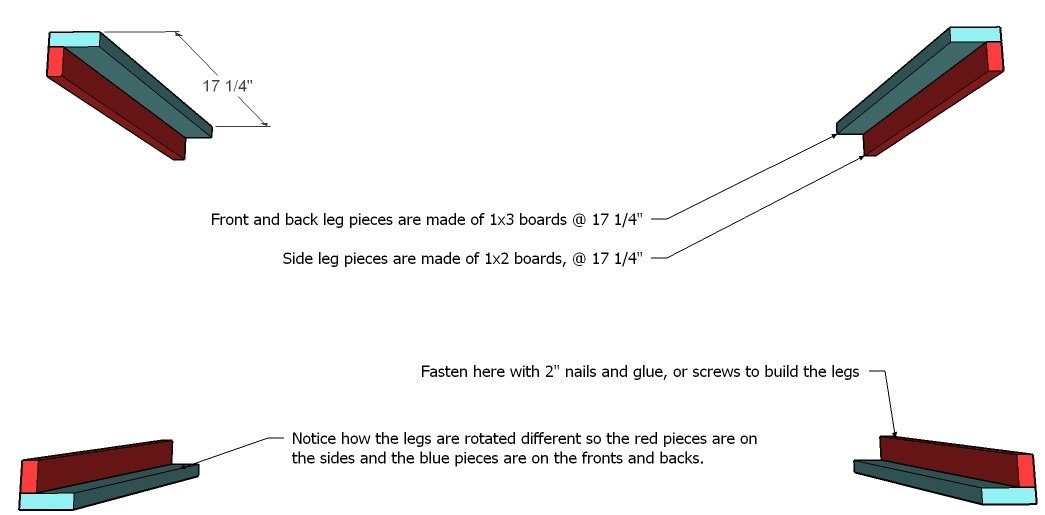
Legs. Build your legs as shown above.
Step 3
Putting Legs on the Table. As shown above, fasten the legs to the supports. You can use 2″ nails or screws, and of course, glue. You don’t need to fasten through the top. If at the end you want to “beef” up the table, you can screw through the breadboard ends into the tops of the legs.
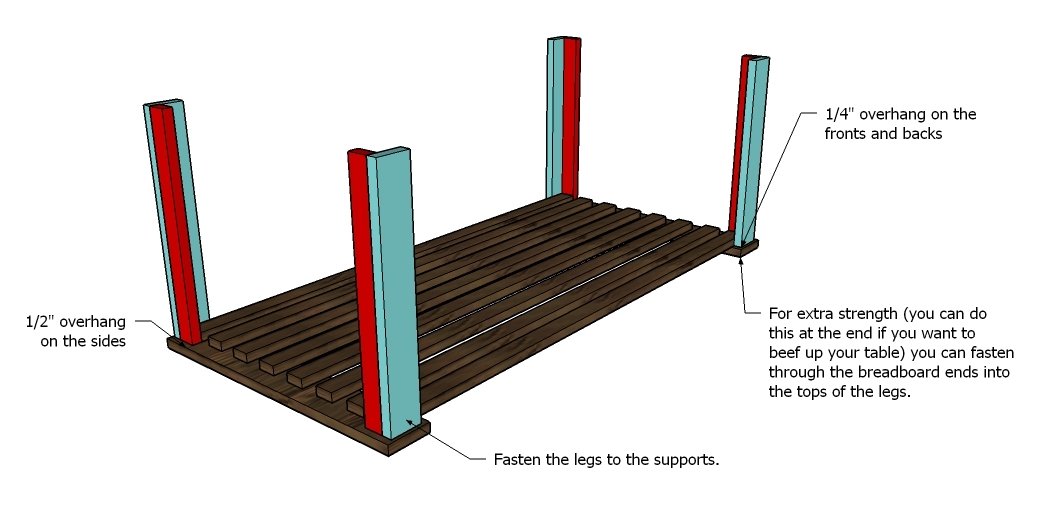
Step 4
Side Aprons. Fasten the side aprons in place as shown above.
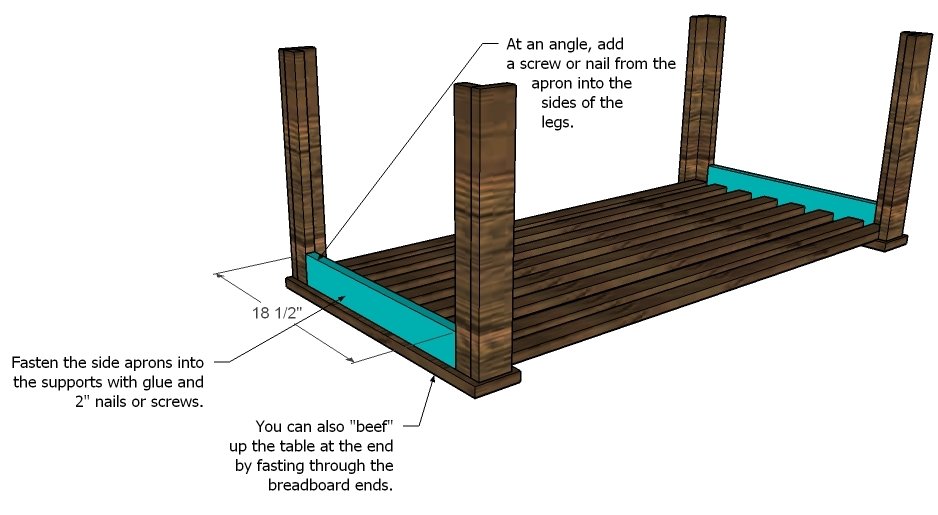
Step 5
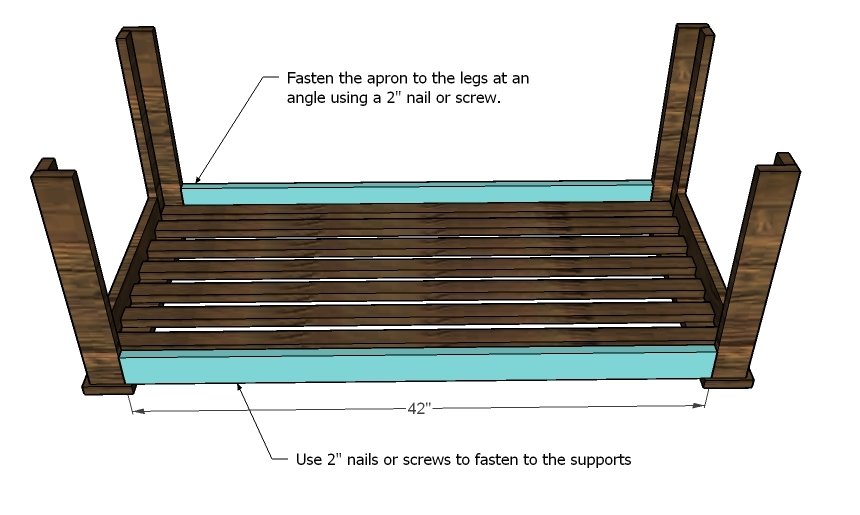
Step 6
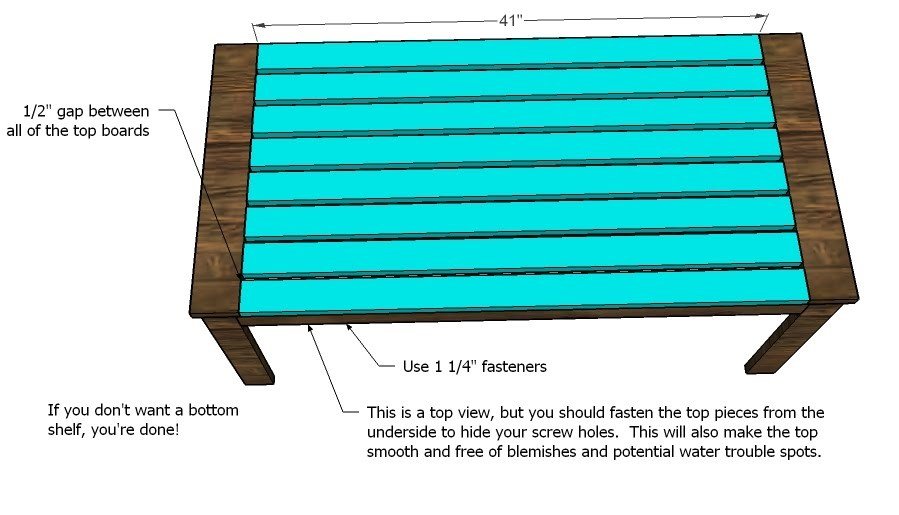
Tabletop Pieces. The table top pieces are spaced 1/2″ apart. Turn the table over and fasten through the supports into the bottoms of the tabletop pieces to hide your screw holes. Use glue and 1 1/4″ nails. If you don’t want a bottom shelf, you’re done! However, the bottom shelf will strengthen the table considerably if you are interested in a stronger table.
Step 7
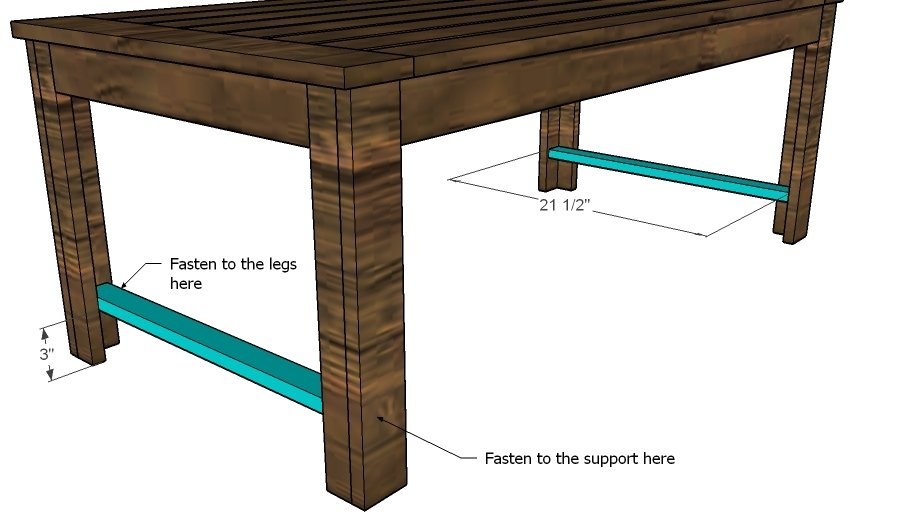
Bottom Shelf Supports. Fasten the bottom shelf supports as shown above to the legs.
Step 8
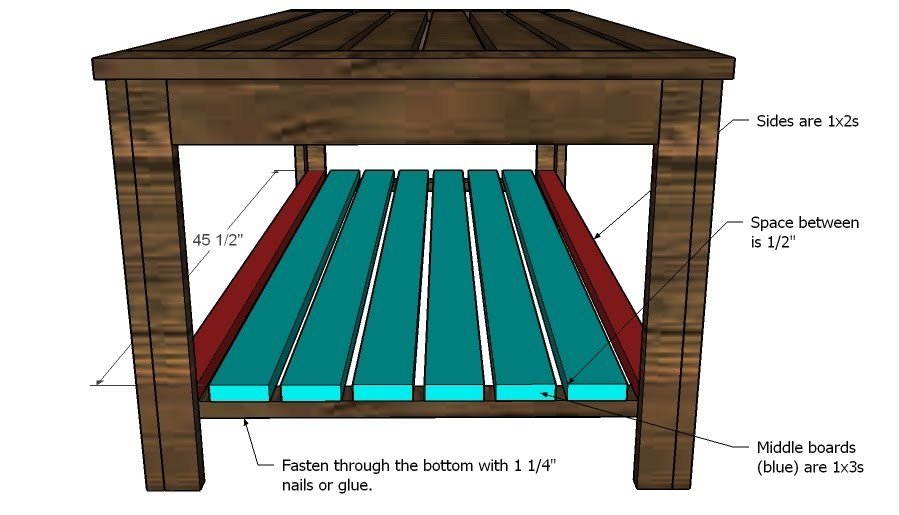
Bottom Shelf Boards. As shown above, fasten the bottom shelf boards to the bottom shelf support. Fasten through the underside using 1 1/4″ screws or nails and glue.
Step 9
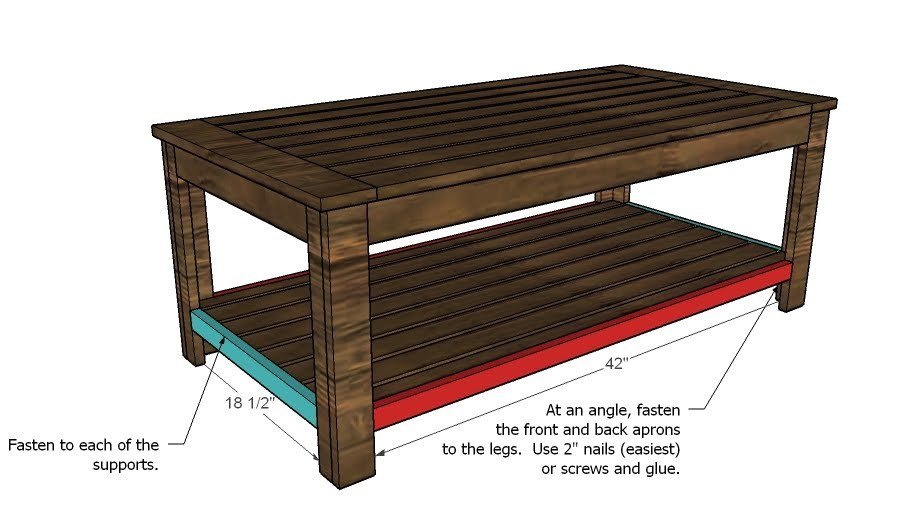
Bottom Shelf Aprons. Cut and fasten the bottom shelf aprons as shown above. Use glue and 2″ nails or screws.
Finishing
Sand all surfaces, starting with a medium grit and finishing with fine. Wipe off the dust, fill any holes or gaps with wood filler, and sand smooth once dry. Apply primer if you're painting, then finish with your choice of paint or stain and seal with a durable clear topcoat. For outdoor projects, use exterior-rated primer, paint or stain, and sealer so the piece stands up to the weather.
Source (temporary): https://www.ana-white.com/woodworking-projects/slatted-outdoor-coffee-table