Slide Out Pot Rack
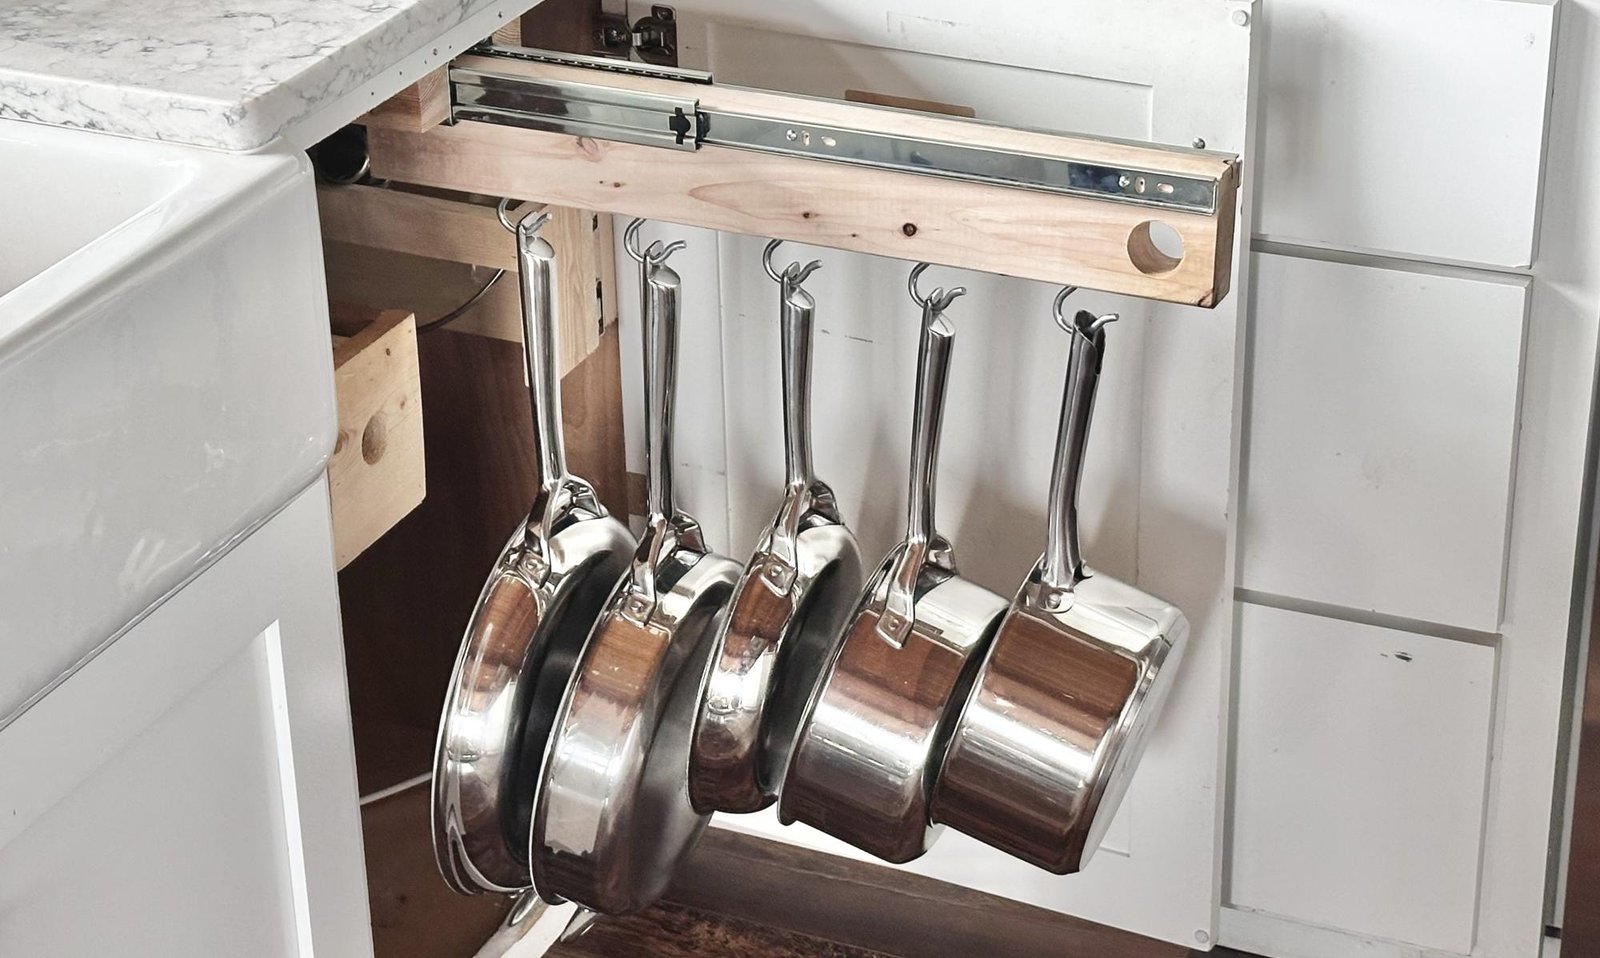
DIY your own pull out pot and pan organizer! We built this organizer to reduce bending over and to stop stacking and unstacking heavy pans (because the one you want is always on the bottom). We've been using it for several weeks now and love it more each day! If you have the room in your kitchen, this slide out pot rack is a must make. from
Specifications
| Project type | Kitchen Cabinet Plan, Accessories and Serving |
|---|---|
| Room | kitchen |
| Difficulty | Intermediate |
Dimensions
Use the size-specific shopping and cut lists below.
Shopping List
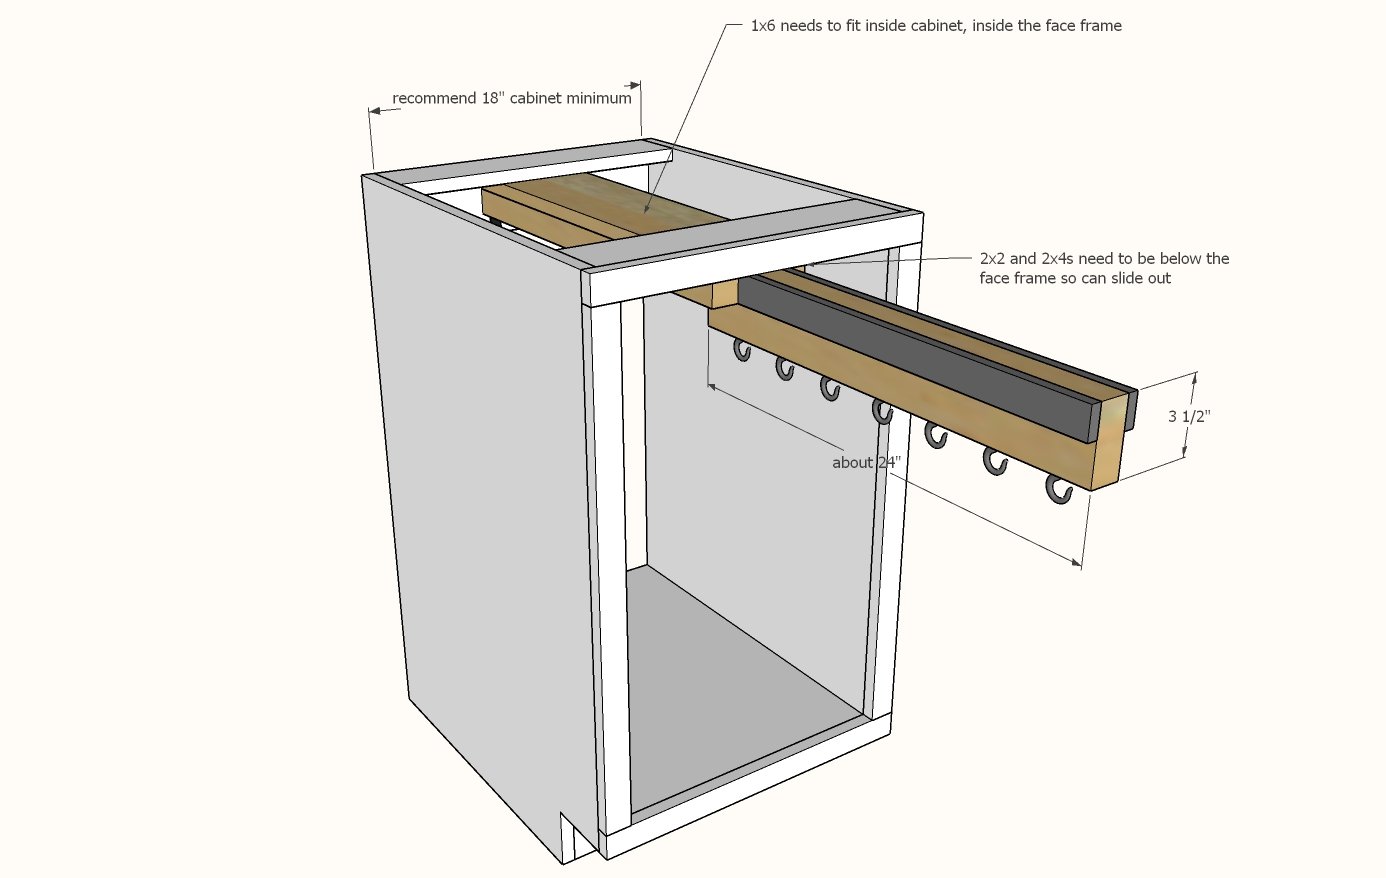
- About 4 feet of 2x2
- About 2 feet of 2x4
- About 2 feet of 1x6 board (can also use 1x8, 1x10, 1x12 or 3/4" plywood)
- 1 - 22" or 24" full extension heavy duty drawer slide (buy the biggest one that will fit inside your cabinet)
- Heavy duty screw in screw hooks (we used 6)
- 2" and 1-1/4" cabinet screws
- 2 - L brackets for supporting the back
Tools
- measuring tape
- pencil
- safety glasses
- hearing protection
- drill
- compound miter saw
Step-by-step Instructions
Step 1
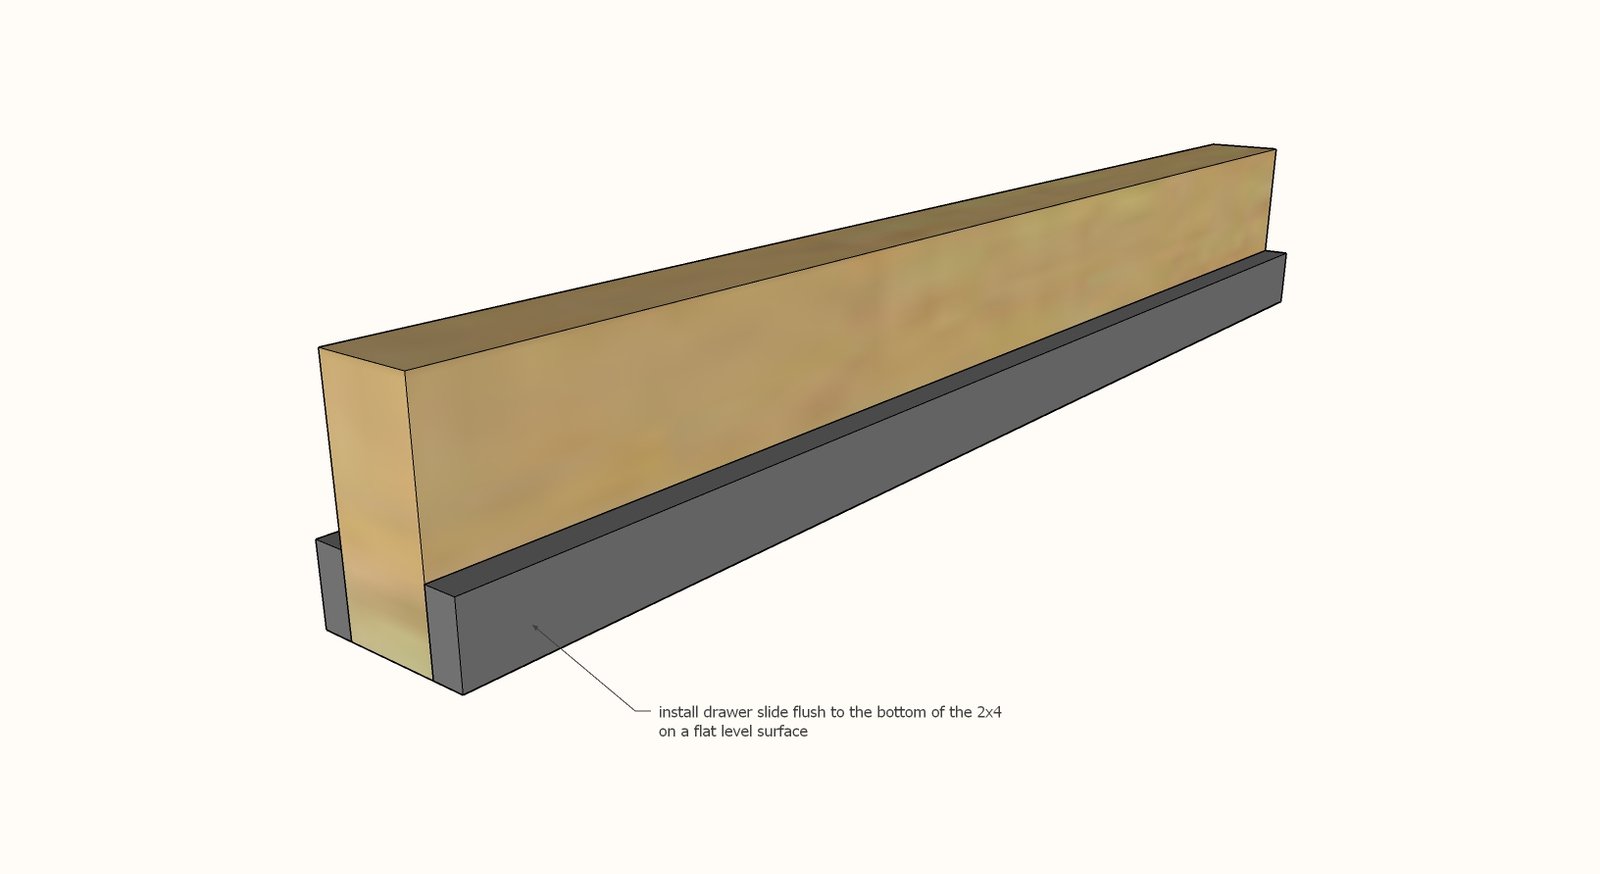
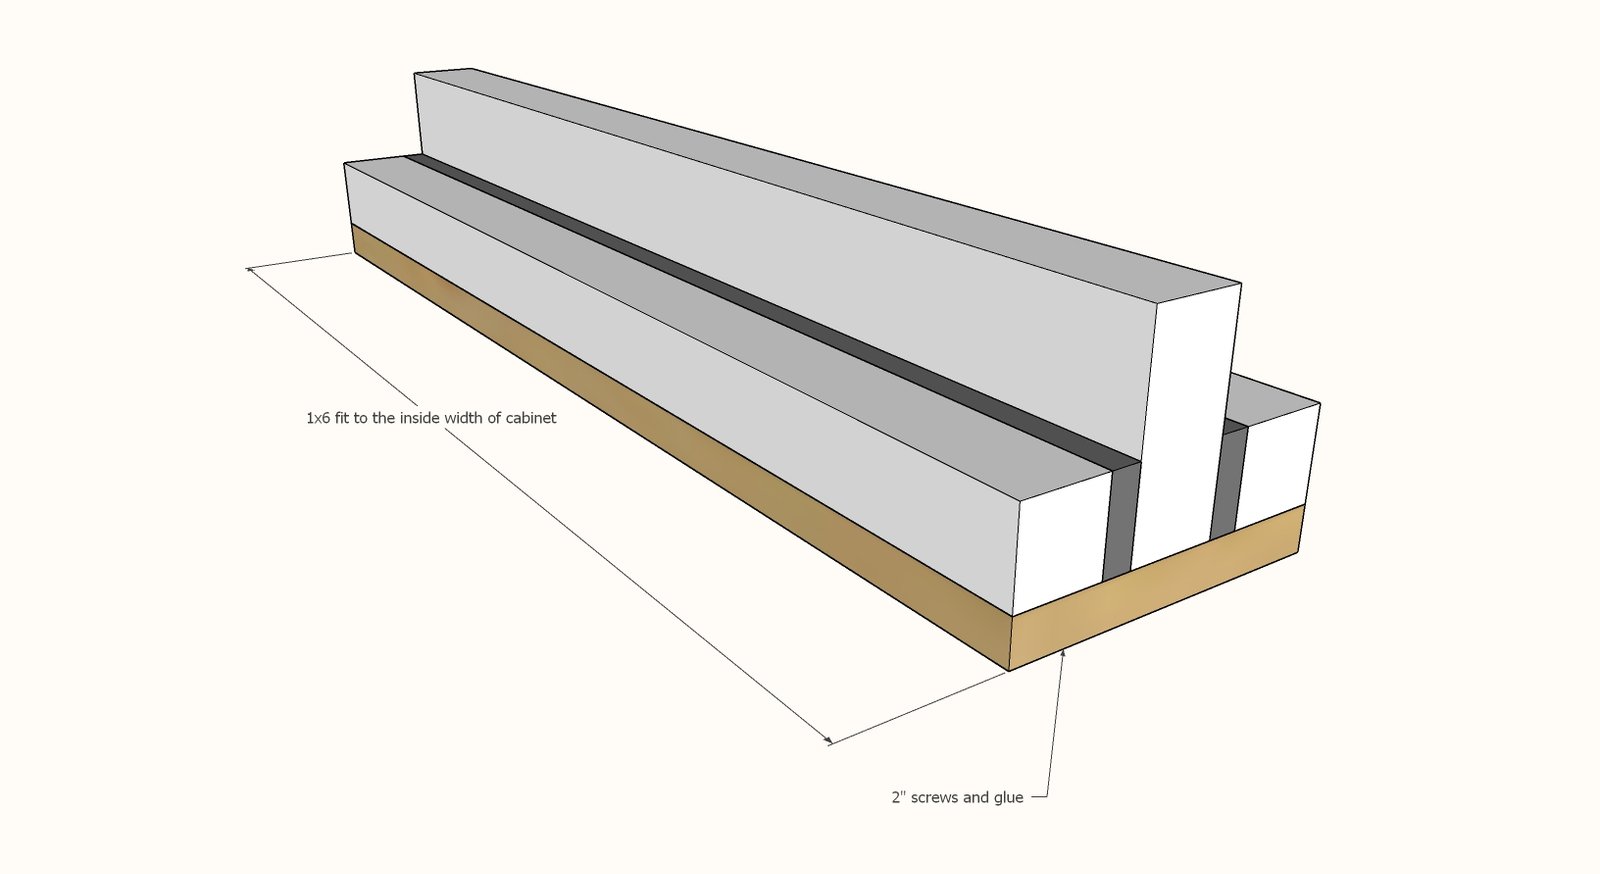
Attach the drawer slides to the 2x4, flush to the bottom, attaching the larger part of the drawer slide with screws. Keep front edge of drawer slide flush to front edge of 2x4.
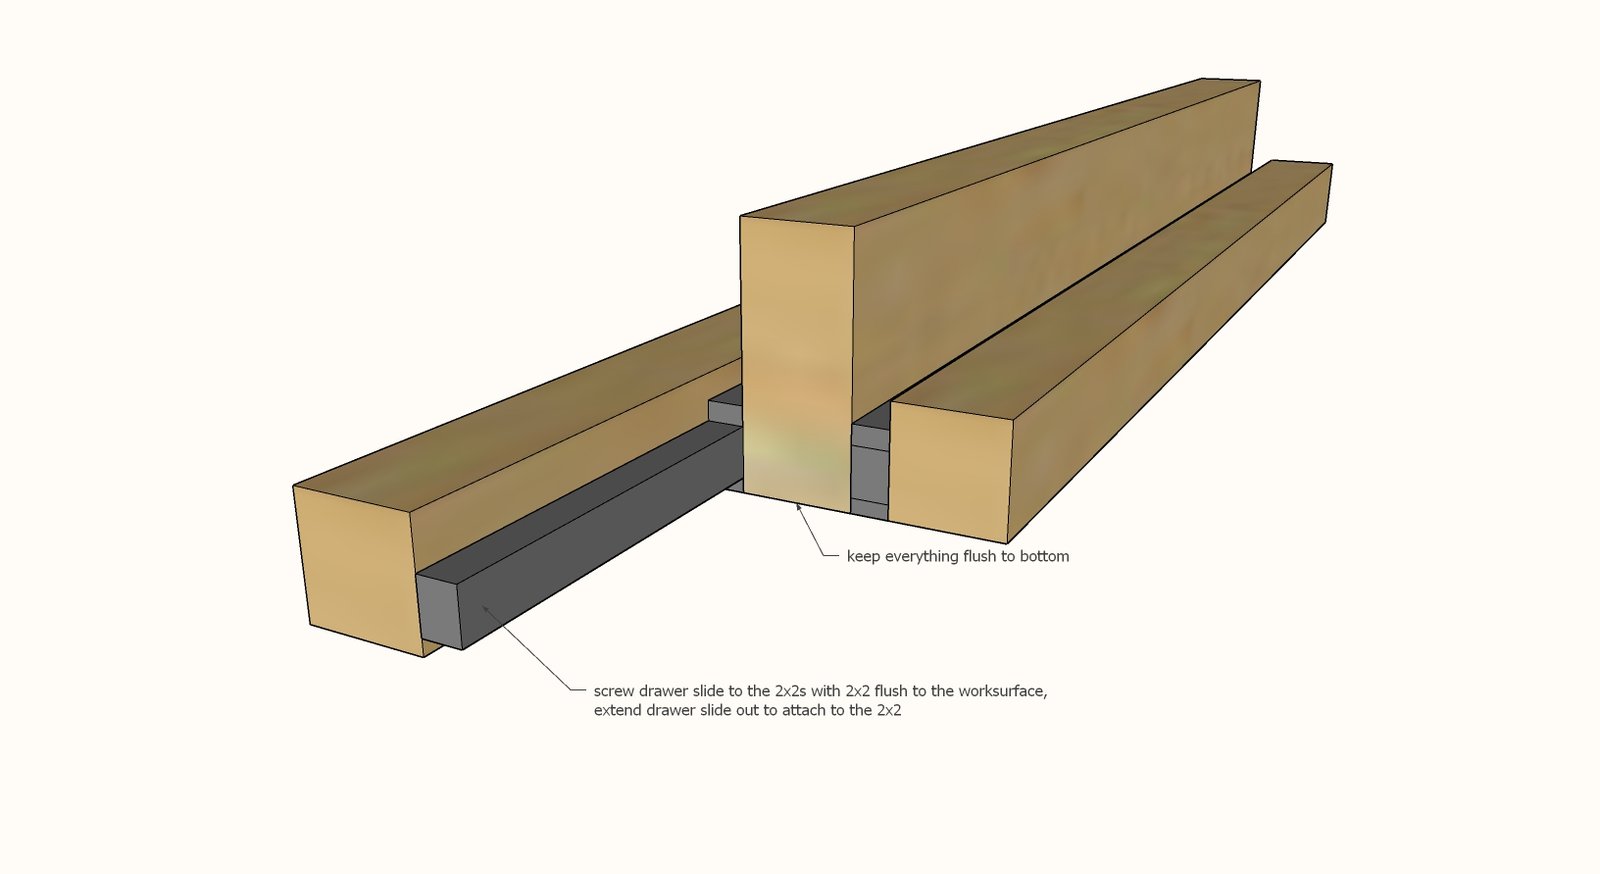
Extending the inside of the drawer slide out and attach to the 2x2, all edges flush to bottom.
Front edge of inside of drawer slide is flush to front of 2x2. Repeat for second side.
Place project on top of the 1x6 board.
Make sure the drawer slide slides smoothly. Attach with glue and 2" screws from underneath. Test drawer slide before glue dries to make sure everything is still sliding smoothly.
Step 4
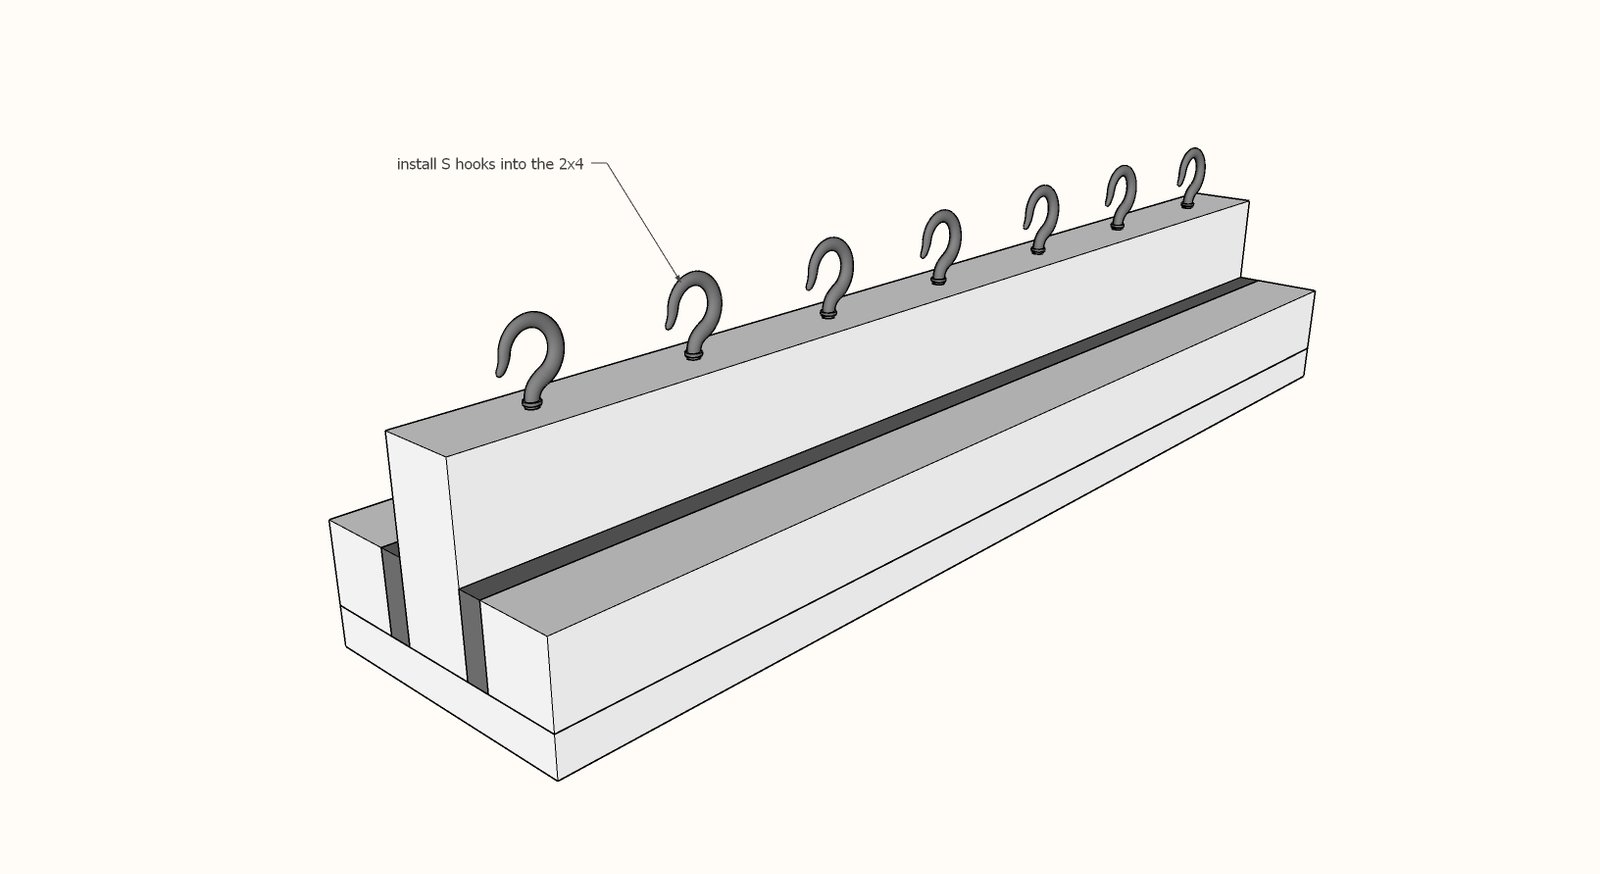
Install screw hooks by predrilling holes and tightening the screw hooks into the 2x4.
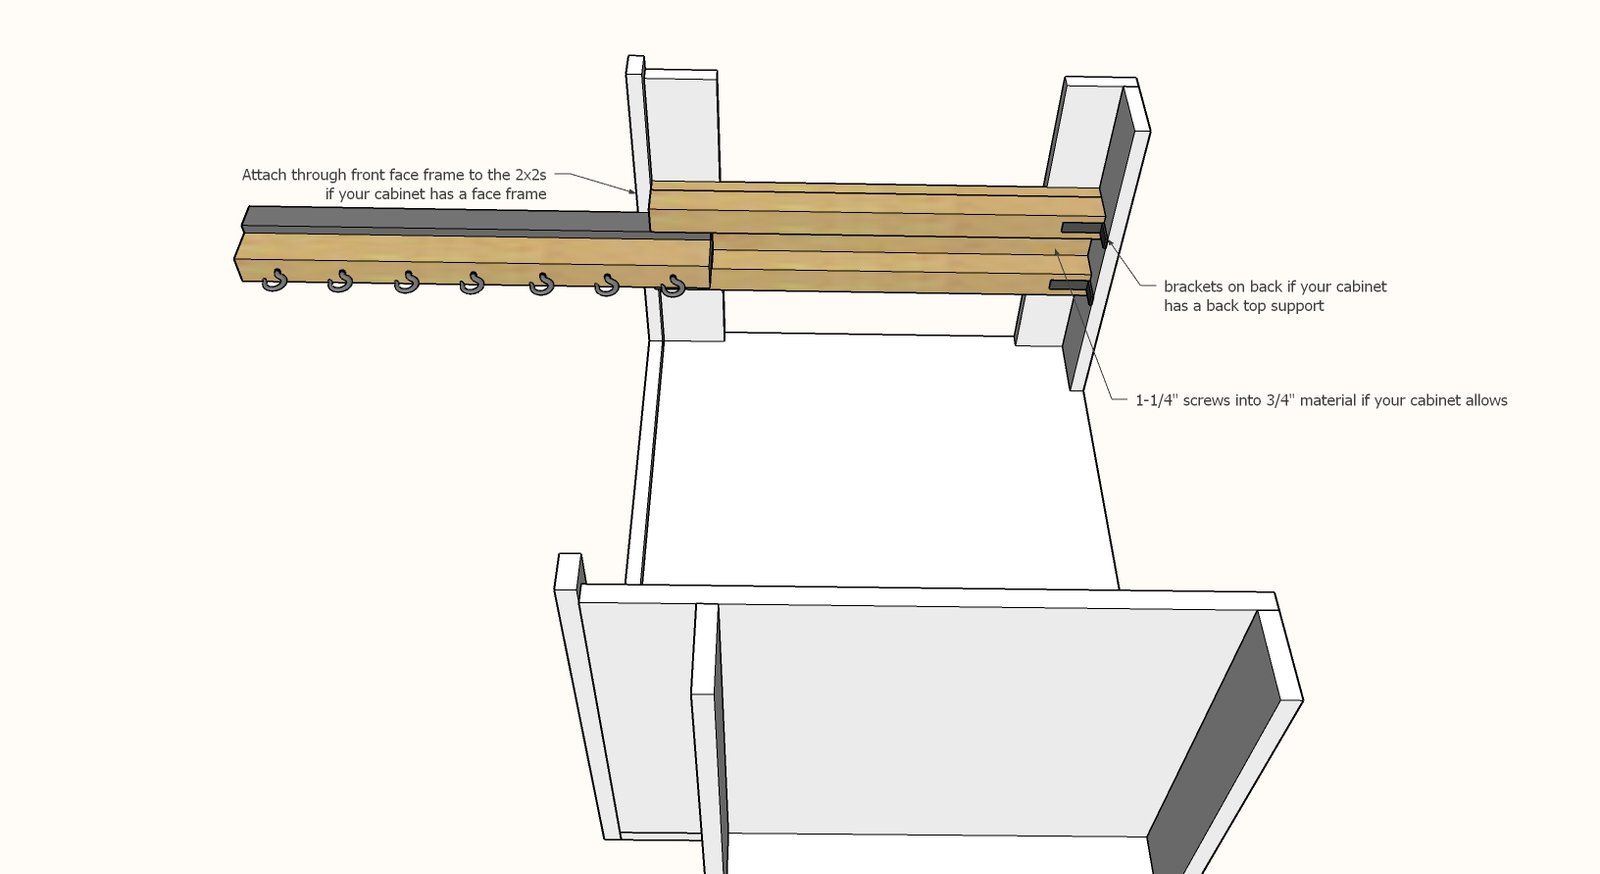
Install the pull out pot and pan organizer centered in the cabinet.
Depending on your cabinet construction, you may need to adjust the installation method. As shown is how we installed ours.
Finishing
Sand all surfaces, starting with a medium grit and finishing with fine. Wipe off the dust, fill any holes or gaps with wood filler, and sand smooth once dry. Apply primer if you're painting, then finish with your choice of paint or stain and seal with a durable clear topcoat. For outdoor projects, use exterior-rated primer, paint or stain, and sealer so the piece stands up to the weather.
Source (temporary): https://www.ana-white.com/woodworking-projects/slide-out-pot-rack