Slipper Chair
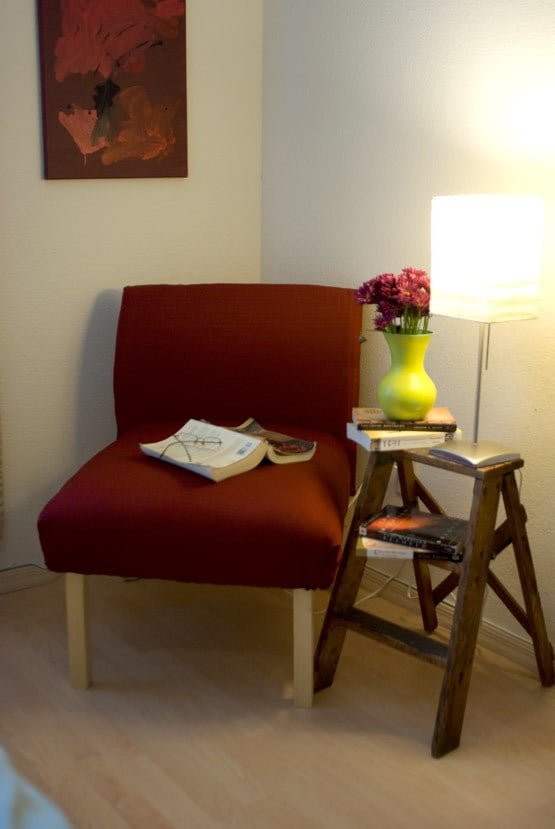
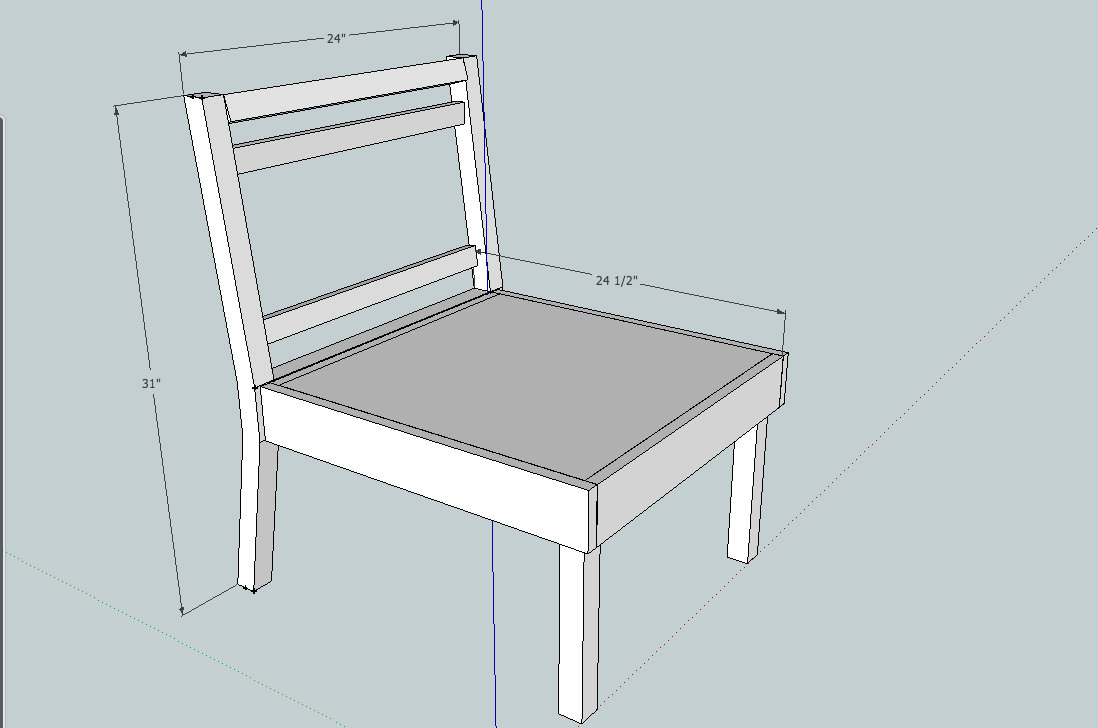
s have been eluding us DIYers for some time, but I sat down and analyzed a set of chairs I bought from Target, and I think I've figured it out! This plan is for BUILDING the slipper chair. I will share how *I* upholstered mine on my blog (will link here when tutorial is complete), but I'm sure you amazing people will know better ways of doing it. I'm having issues listing one of my plans as "intermediate" - because I don't think that I'm an intermediate builder yet - but the front legs on this gave me some issues. You absolutely have the option of screwing the legs in either to the frame using pocket hole joinery, or attaching without the support I'll show in steps 6 & 7, but I NEED all the support I can get with climbing kids (and, I hate to mention this, but very overweight family). *I altered the dimensions of the plan to make cushion-buying easier. There are CHEAP 22" foam cushions at Hobby Lobby (especially if you use the 40% off coupon). So I am giving you a 22" chair instead of a 24" chair (I cannot remove the photo in the
Specifications
| Project type | Chairs |
|---|---|
| Room | Teens |
| Style | Modern Style Furniture Plans |
| Difficulty | Intermediate |
| Estimated cost | Under $20 |
Dimensions
Use the size-specific shopping and cut lists below.
Shopping List
1 - 2 x 4 x 8
1 - 1 x 4 x 8
1 - 2 x 2 x 8
1 - 1 x 2 x 8 (or at least a 40" scrap)
1 - 3/4" MDF or Ply wood @ 24" x 24"
Cut List
(A) 2 - 2 x 4 @ 31" (back legs)
(B) 1 - 2 x 4 @ 19" (back apron)
(C) 1 - 2 x 2 @ 19" (top of back)
(D) 2 - 1 x 2 @ 19 (back supports)
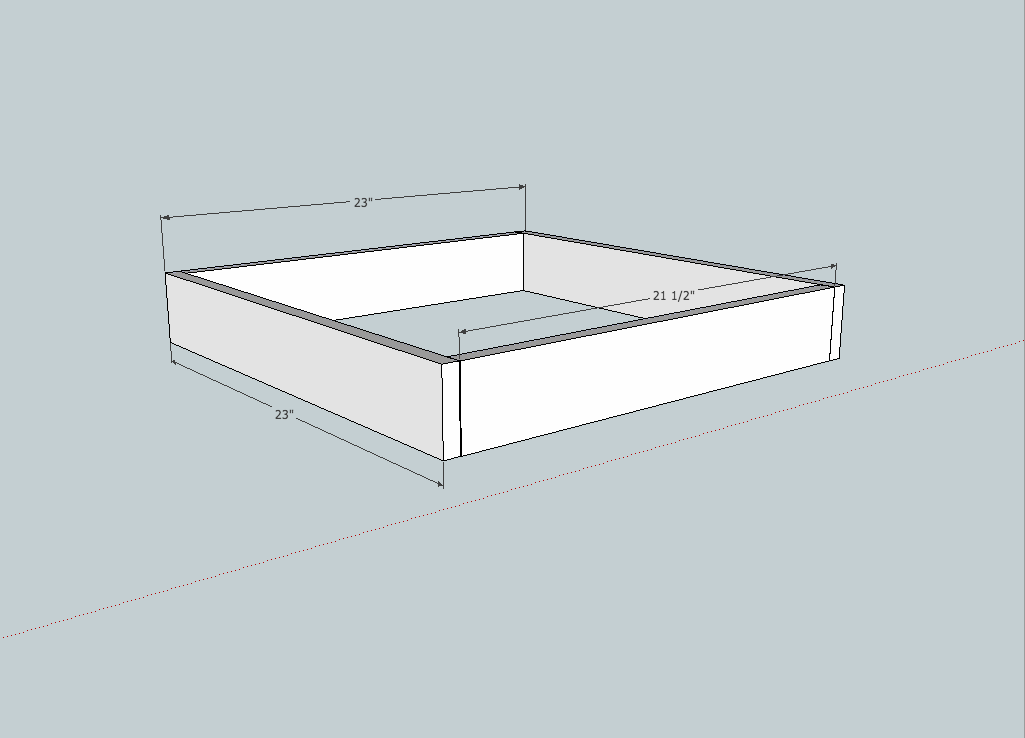
(E) 2 - 1 x 4 @ 20 1/2" (front & back of seat)
(F) 2 - 1 x 4 @ 22" (sides of seat)
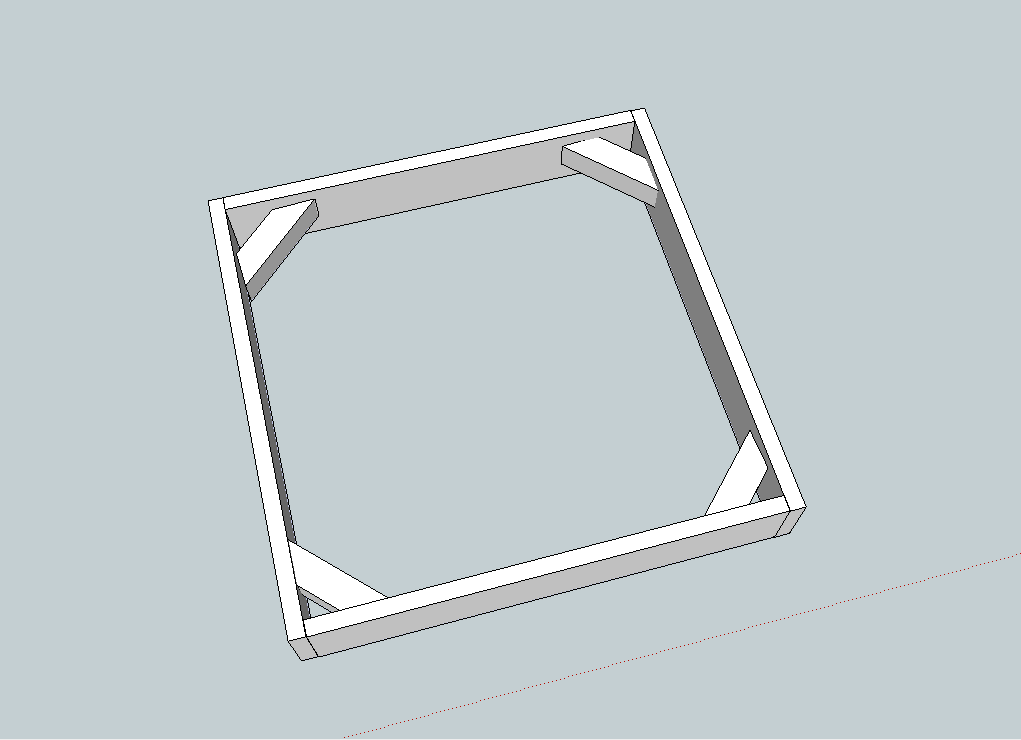
(G) 4 - 2 x 2 @ 6" - ends cut 40 degrees NOT parallel (seat supports)
(H) 2 - 2 x 2 @ 13 1/2 (Front legs)
(I) 1 - 3/4" MDF or ply wood @ 20 1/2" x 20 1/2"
Tools
- measuring tape
- square
- circular saw
- jigsaw
- compound miter saw
Step-by-step Instructions
Step 1
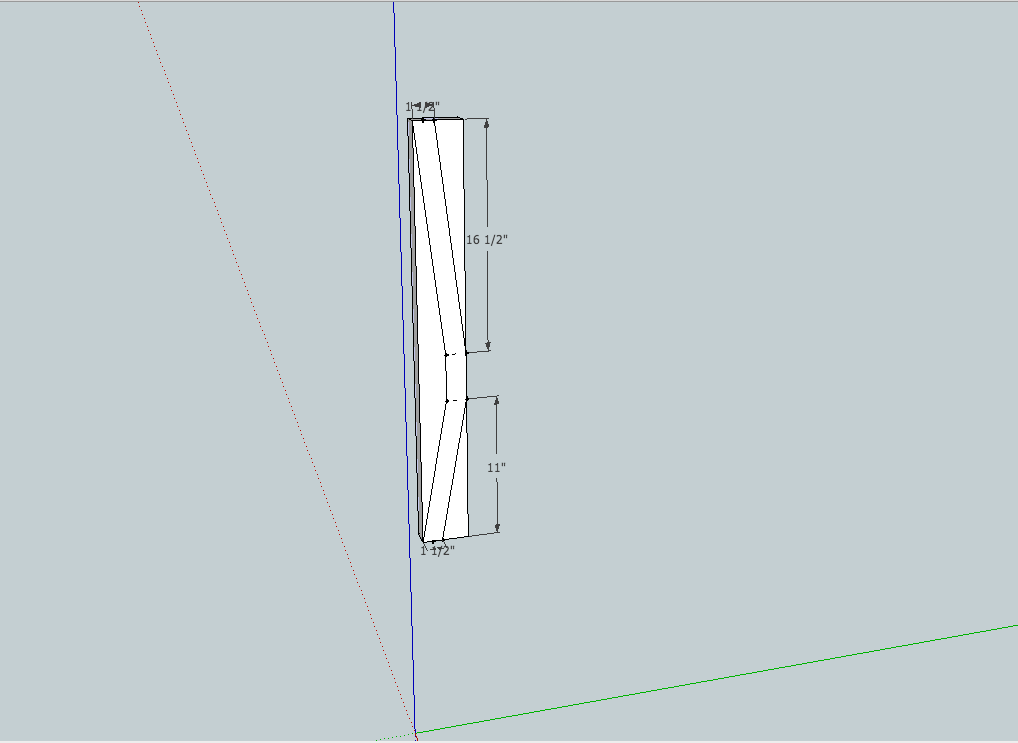
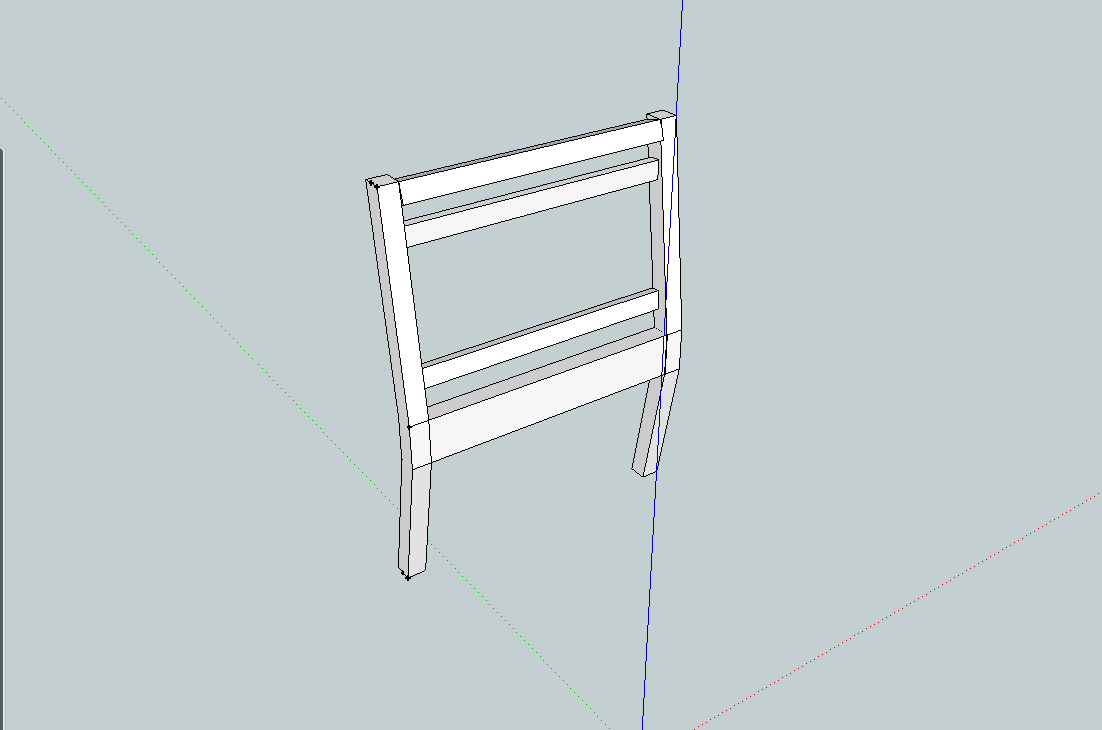
Draw the above pattern onto your legs (A). It's best to draw it onto one leg, cut out, and trace onto the other. Then clamp them together and sand until they're perfectly matched. Cut out with either a jig saw or circular saw.
Step 2
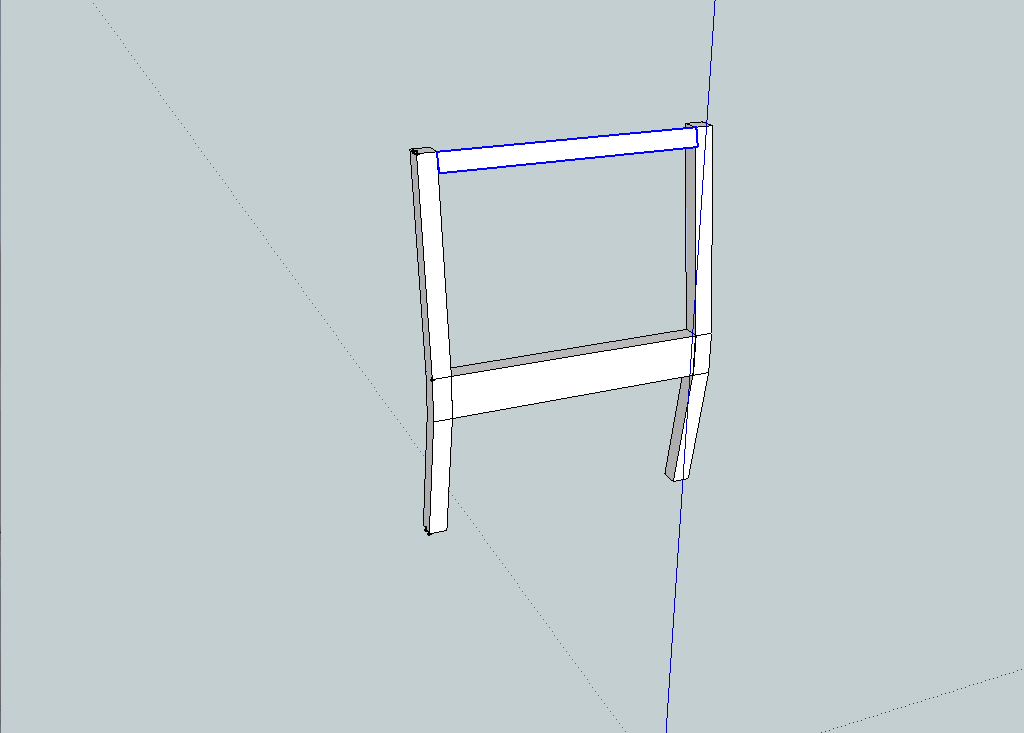
Attach (B) and (C) to the legs (A) using either pocket holes or pre drilling through the sides. The top (C) should be angled to match the angle of the chair. You can sand or cut off the excess at the top of the legs (A).
Step 3
Add your back supports (D). I didn't measure mine, but make sure you space them where somewhat evenly so that they'll support your cushion (OPTIONAL: You can add a piece of 1/4" plywood if you feel that your cushion may not have all the support needed - I didn't find it necessary, but you may).
Step 4
Created a box using your (E) and (F) boards, as shown above. The (F) boards should be on the OUTSIDE of the (E) boards, as pictured. You can either drill through your (F) board or use pocket hole screws through your (E) board.
Step 5
Step 6
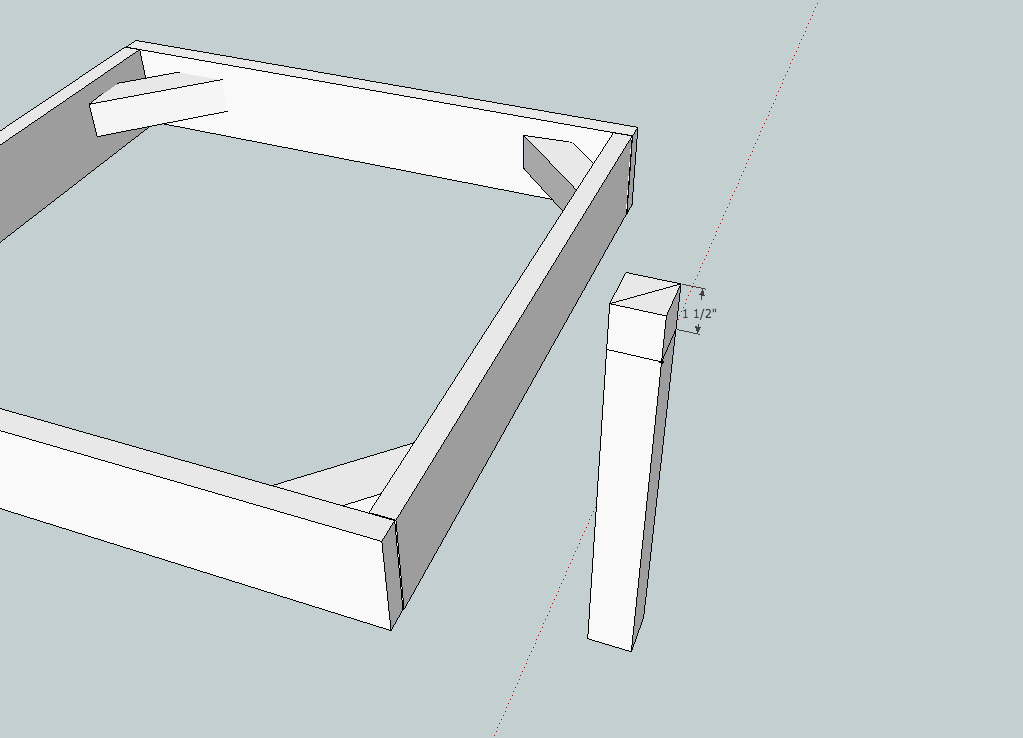
Mark your front legs 1 1/2" down from the top. Now place in the corner of the chair and trace the opening. You'll cut out the area that is NOT in the opening. What you're doing is creating a notch in the front leg that will fit in the triangle opening between the seat supports and the seat. (This part gave me some grief. Let me tell you, if you have a circular saw or a table saw, USE IT! I was able to do this part with a jig saw, but I would not recommend it!)
Step 7
This is what your leg should look like once you've cut the area that does NOT fit in the opening between the seat support and the seat.
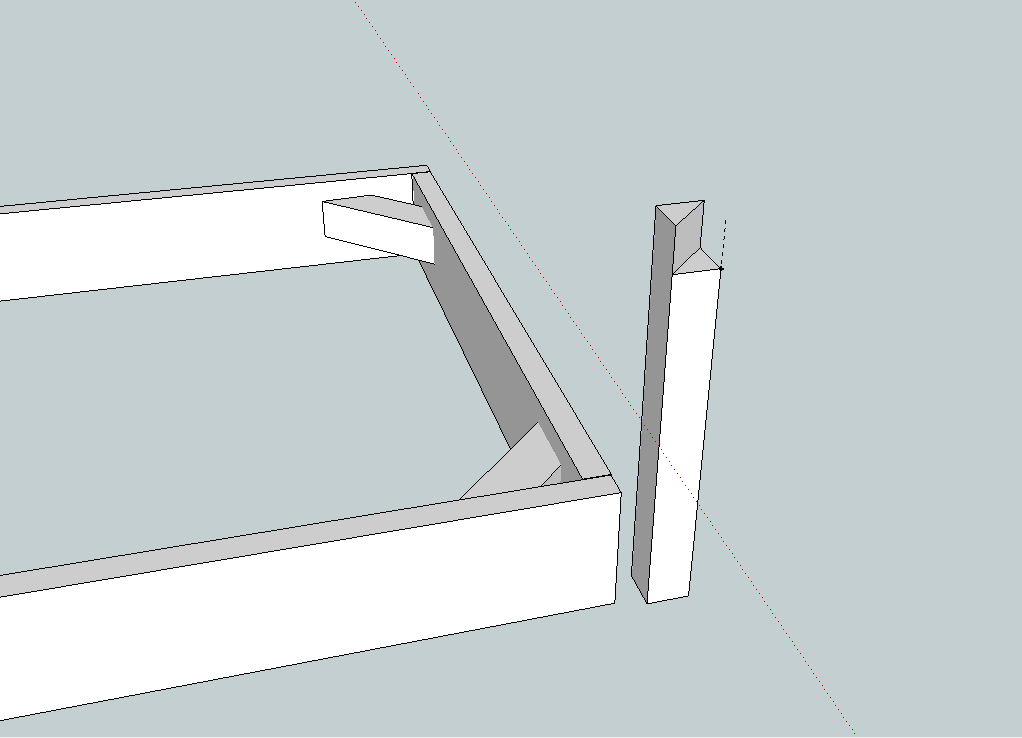
Step 8
Insert the notch that you just cut out into the gap between the seat supports and the seat, and drill. I drilled from the outside of the seat and through the seat support (using 5 screws, total)
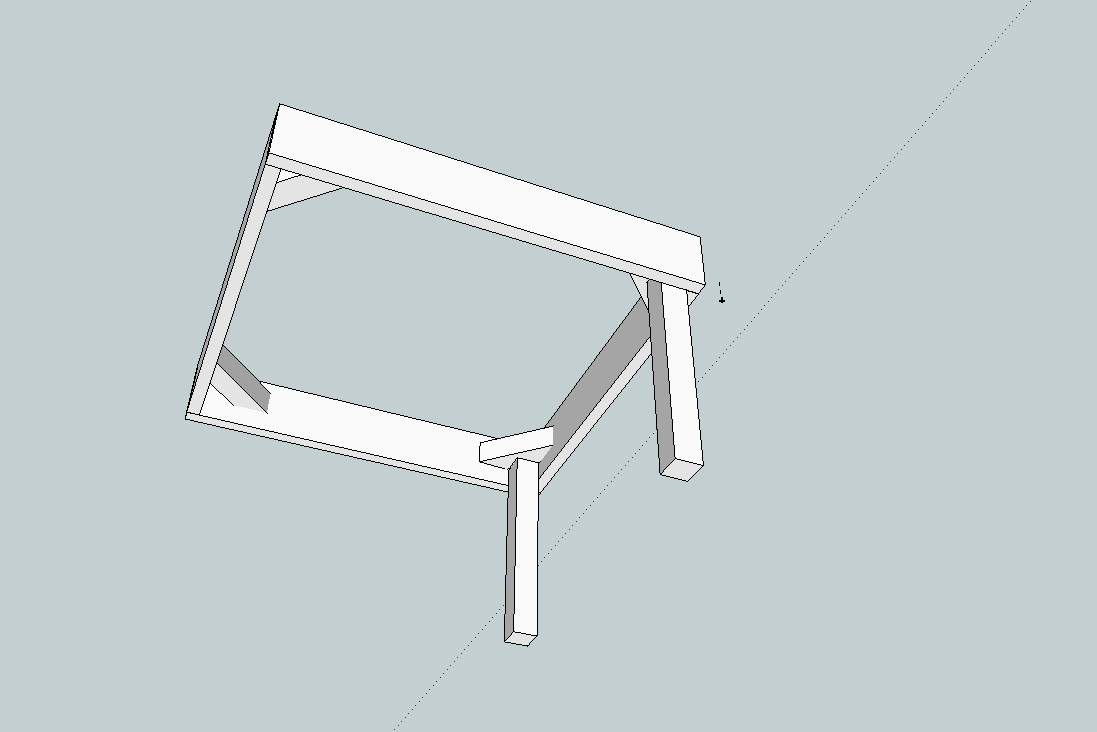
Step 9
Now's a good time to dry fit both of your components. DO NOT GLUE! Screw from the inside of the seat, measuring 11" up from the bottom of the back legs. If everything is level here, move on to the next step.
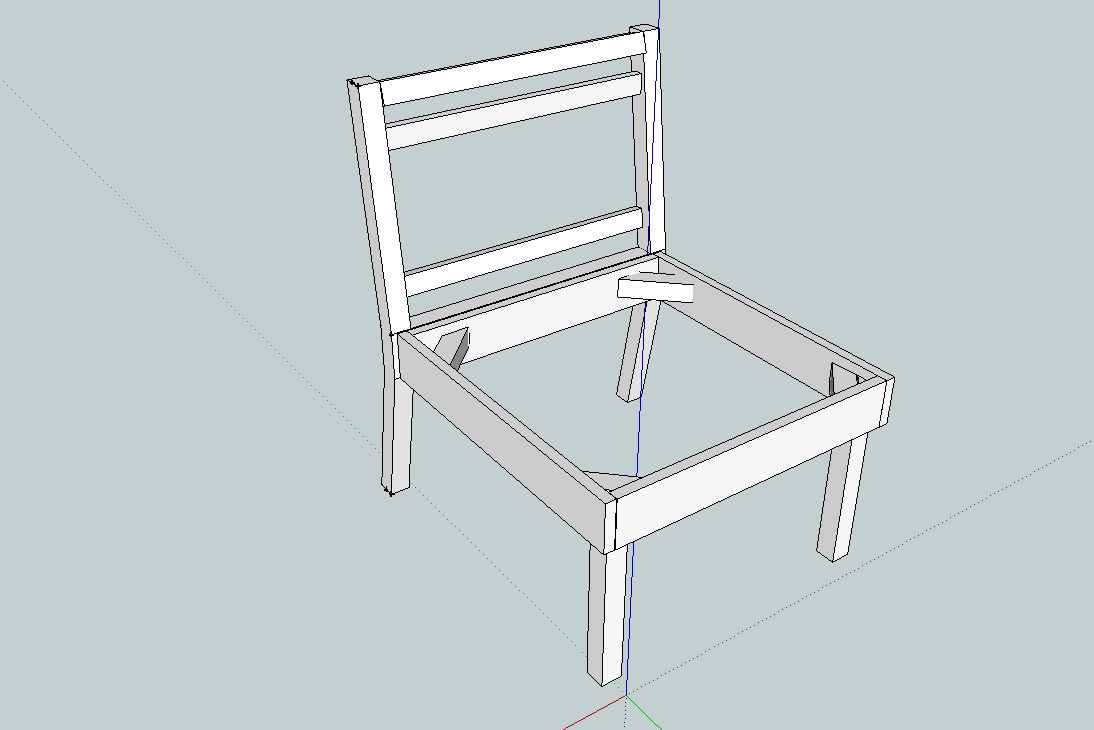
Step 10
Attach your 3/4" Ply or MDF. You can do so by using pocket holes along the perimeter, or by screwing it to your seat supports. I found this easier to do while the chair was still assembled.
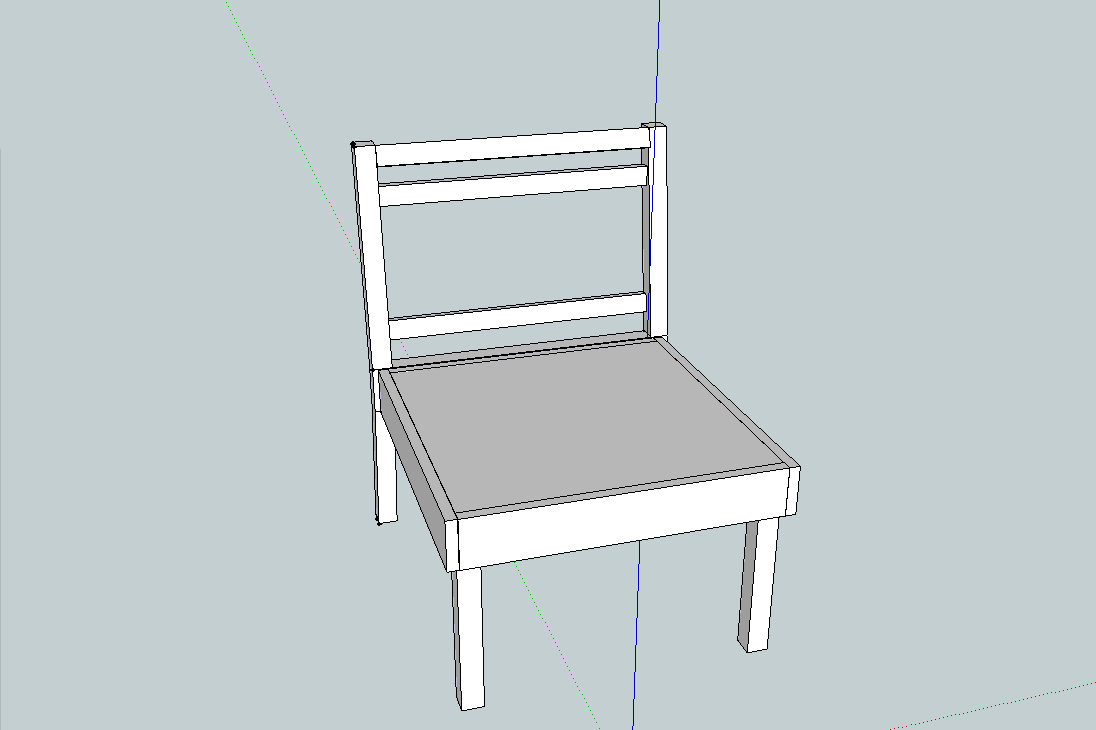
Step 11
Disassemble your chair, and cut your foam to fit. You will be upholstering the pieces separately. I was able to upholster the entire chair using a single 84" long curtain panel. Some things to note: - Upholster the seat first, use that as a reference for where to cut the foam on the back (since the seat will take up a couple more inches, you can't use foam down the entire back) - bring the fabric on the back all the way down to 11" from the bottom of the leg. That's where the seat is going to start, and you want it to start uniformly. - there should be no fabric where the seat will be screwed together. Upholster the seat and back completely, then cut the fabric from the area you will be screwing through.
Finishing
Sand all surfaces, starting with a medium grit and finishing with fine. Wipe off the dust, fill any holes or gaps with wood filler, and sand smooth once dry. Apply primer if you're painting, then finish with your choice of paint or stain and seal with a durable clear topcoat. For outdoor projects, use exterior-rated primer, paint or stain, and sealer so the piece stands up to the weather.
Source (temporary): https://www.ana-white.com/woodworking-projects/slipper-chair