Small Cedar Shed
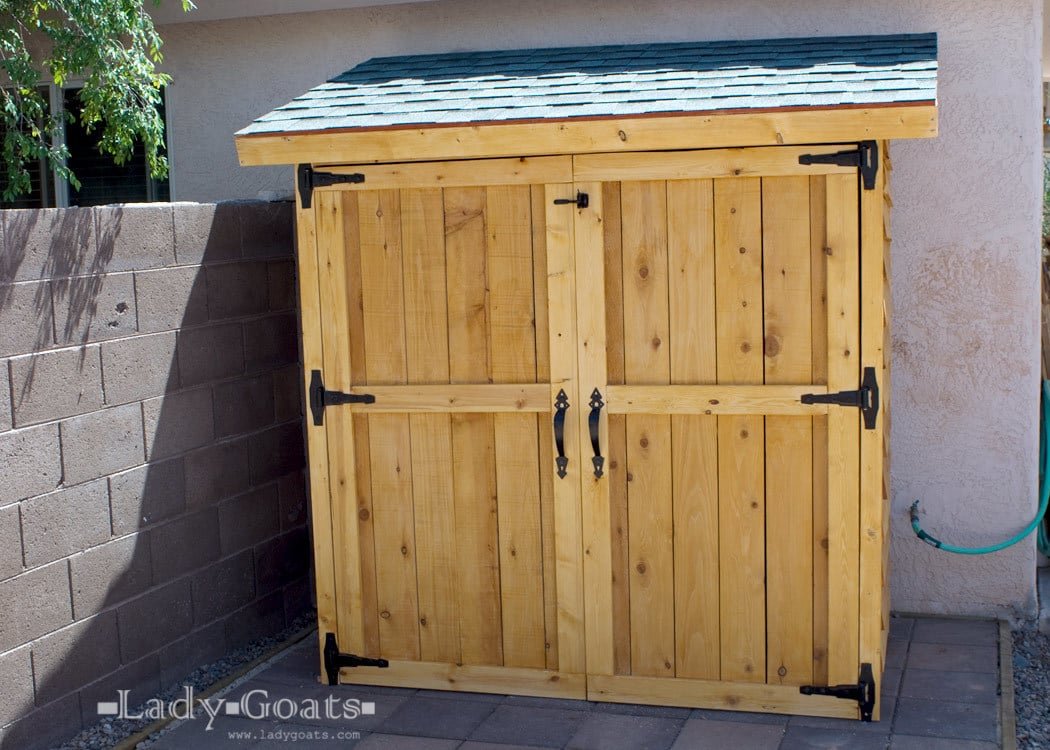
Build your own cedar shed to store lawn mowers, tools, trash cans, or just extra things. We love that it's like an outdoor closet. This cedar shed plan uses fence pickets - so it's much less expensive. The simple design can be built by most anyone. Step by step plans with diagrams and shopping and cut list from Small Cedar Shed – Premium Plan Build your own compact backyard shed with our easy-to-follow premium plan. Includes diagrams, materials list, and step-by-step instructions. Download the Premium Plan
Specifications
| Project type | Buildings |
|---|---|
| Room | Outdoor |
| Style | Tradditional Style Furniture Plans |
| Difficulty | Intermediate |
Dimensions
Use the size-specific shopping and cut lists below.
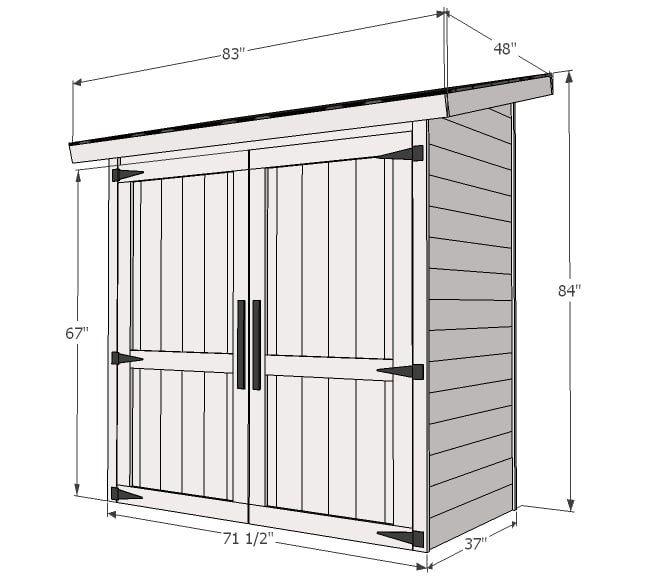
Shopping List
- 18 – 2x2 @ 8 feet long
- 44 – 5 1/2" wide cedar fence pickets
- 1 – 2x4 @ 8 feet or stud length
- 4 – 1x3 @ 8 feet long
- 8 – 1x4 @ 8 feet long
- 1 – 4x8 sheet of plywood for attaching roofing shingles (check what your shingles manufacturer recommends)
- 30 square feet of roofing shingles
- Roofing nails or glue
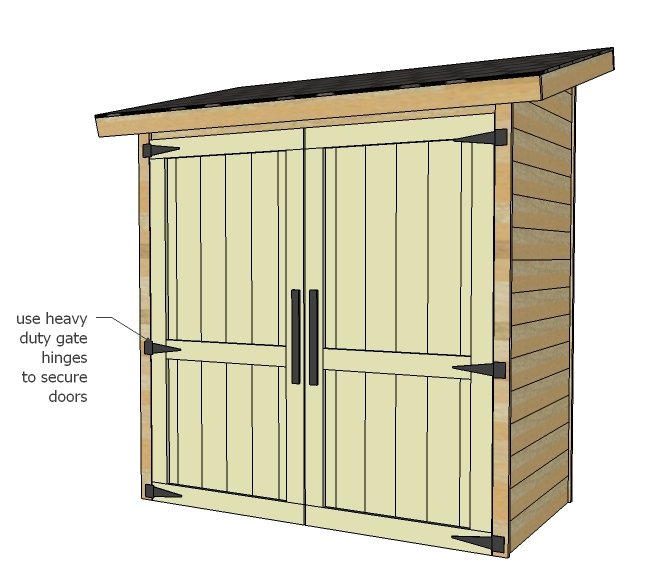
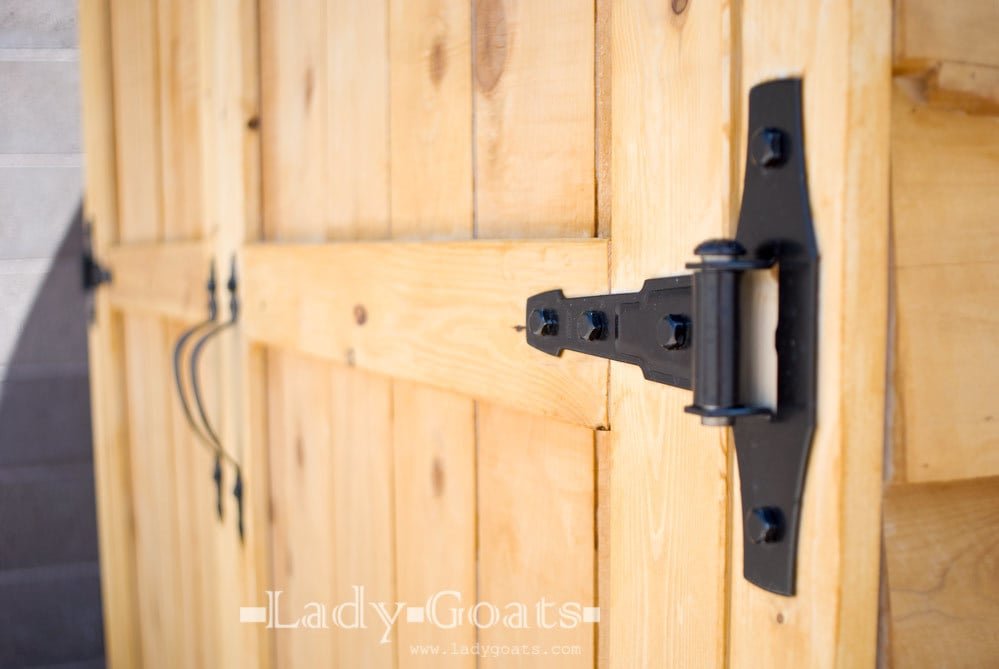
- Heavy duty gate hinges, Handles, Lock or Catch
Cut List
BACK WALL
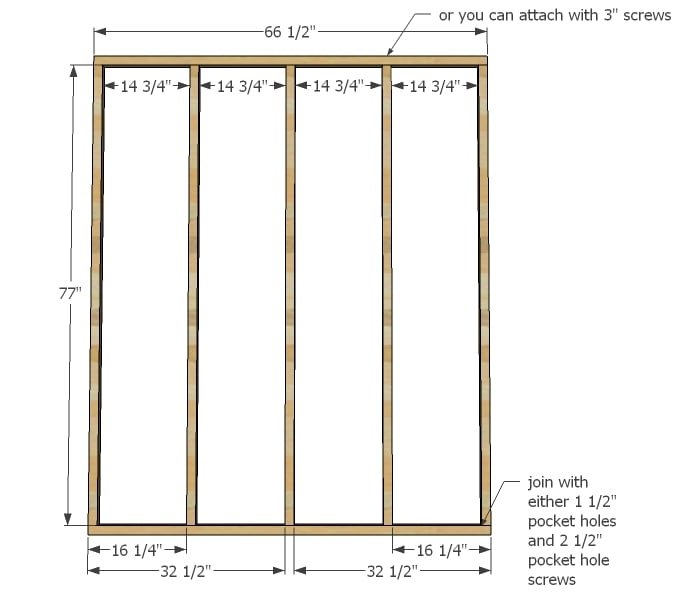
- 2 – 2x2 @ 66 1/2"
- 5 – 2x2 @ 77”
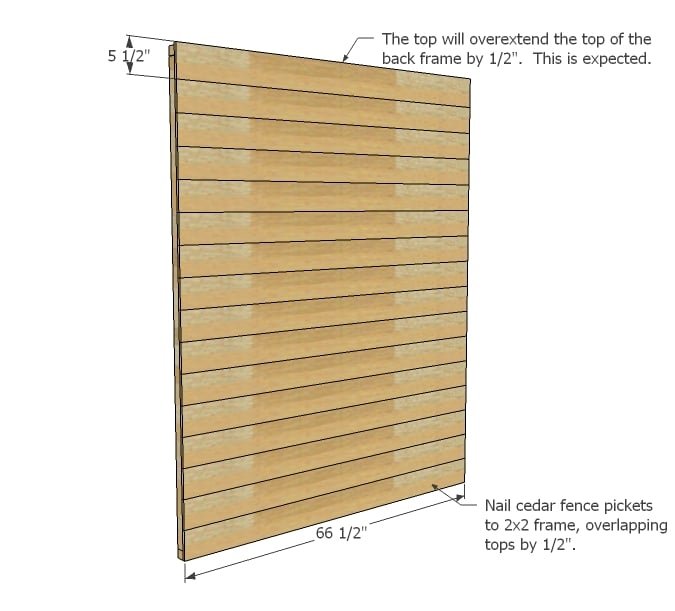
- 16 – 5 1/2" wide x 1/2" thick fence pickets @ 66 1/2" long
SIDE WALLS
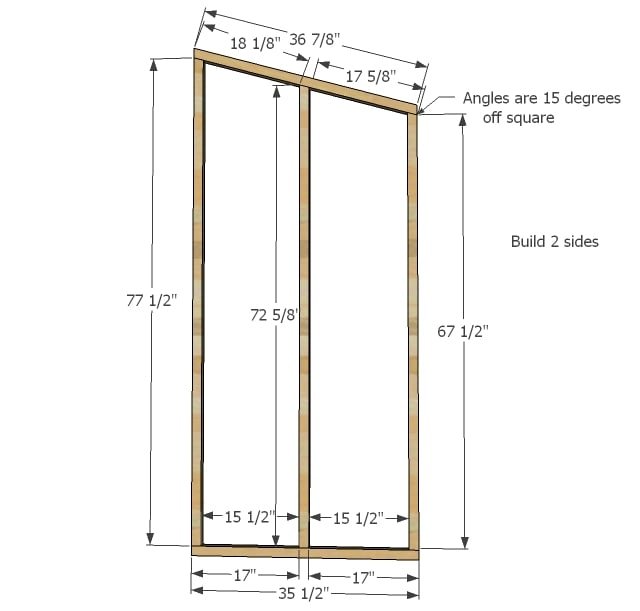
- 2 – 2x2 @ 35 1/2"
- 2 – 2x2 @ 77 1/2" (longest point, top end cut at 15 degrees off square)
- 2 – 2x2 @ 72 5/8" (longest point, top end cut at 15 degrees off square)
- 2 – 2x2 @ 67 1/2" (shortest point, top end cut at 15 degrees off square)
- 2 – 2x2 @ 36 7/8” (long point to short point, both ends cut at 15 degrees off square, parallel to each other)
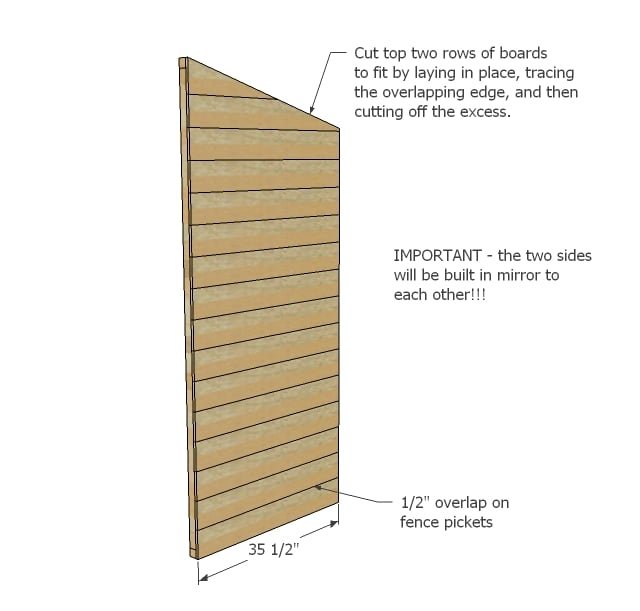
- 32 – 5 1/2" wide x 1/2" thick fence pickets @ 35 1/2" long
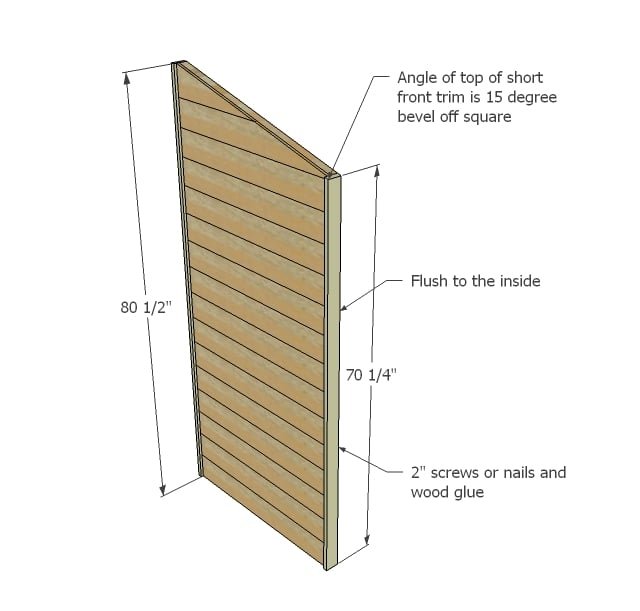
- 2 – 1x3 @ 80 1/2"
- 2 – 1x3 @ 70 1/4" (short point measurement, top edge beveled at 15 degrees off square)
FRONT HEADER
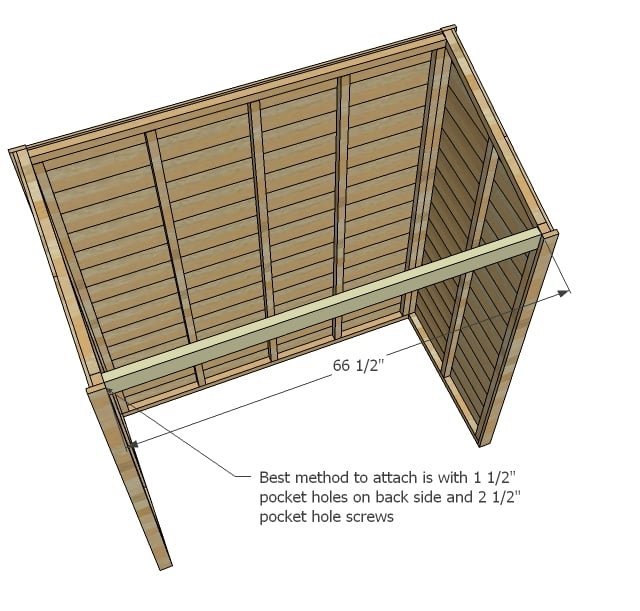
- 1 – 2x4 @ 66 1/2"
ROOF
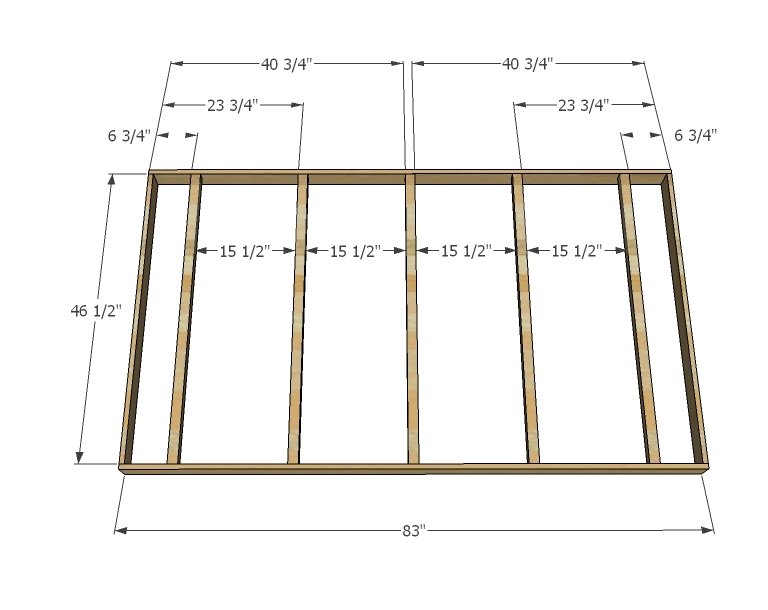
- 2 – 1x4 @ 83”
- 2 – 1x4 @ 46 1/2"
- 5 – 2x2 @ 46 1/2"
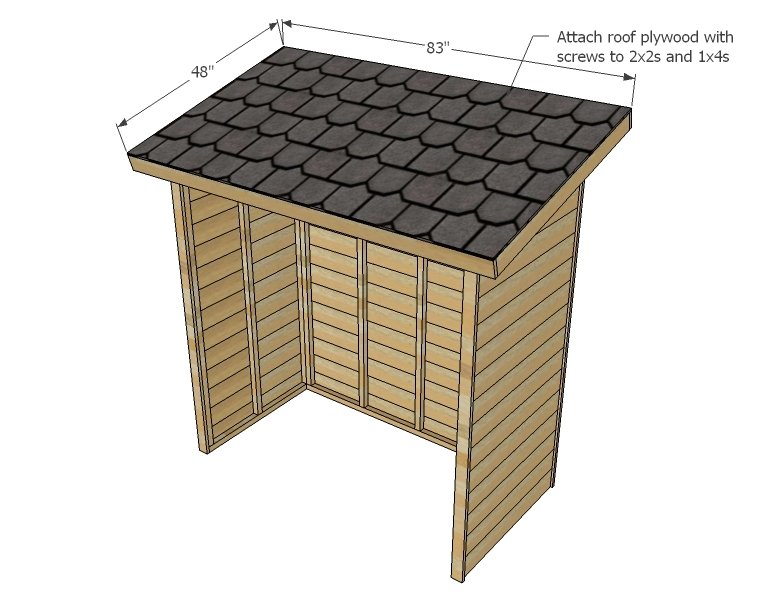
- 1 – roofing plywood @ 83” x 48”
DOORS*
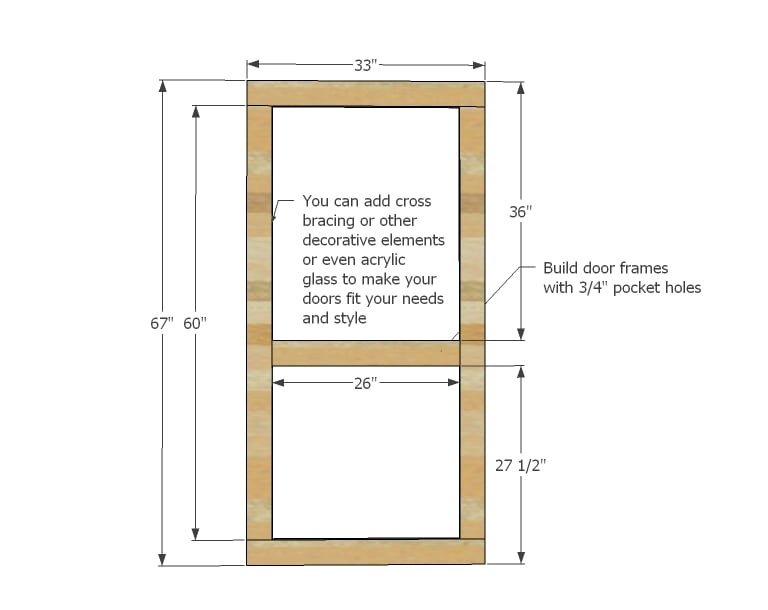
- 4 – 1x4 @ 60”
- 4 – 1x4 @ 33”
- 2 – 1x4 @ 26”
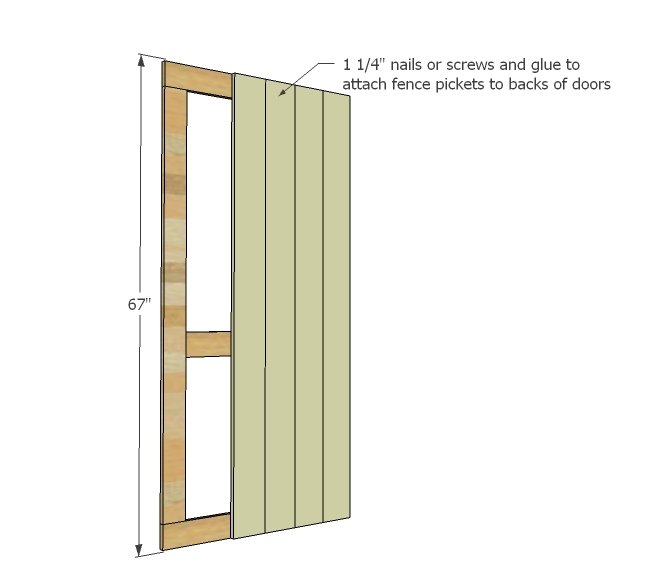
- 12 – 5 1/2" wide x 1/2” thick fence pickets @ 67”
*You may wish to build doors slightly shorter to enable easier opening and closing - recommended to build doors to fit finished opening.
Tools
- measuring tape
- square
- pencil
- hammer
- safety glasses
- hearing protection
- kreg-jig
- drill
- circular saw
- nailer
- sander
- level
- countersink drill bit
Step-by-step Instructions
Step 1
Frame you your back walls. You can use the Kreg Jig or 2 1/2" screws here.
Step 2
Starting at the bottom and working upward, attach the cedar fence pickets, overlapping 1/2" as you go up. Screw or nail and glue on.
Step 3
Frame side walls as shown in diagram as you did the back wall. You will need two side walls.
Step 4
And add the cedar siding to back wall as shown in diagram. Do not forget that the sides need to be done in mirror!
Step 5
Build the side walls and attach cedar fence pickets to the side wall.
Step 6
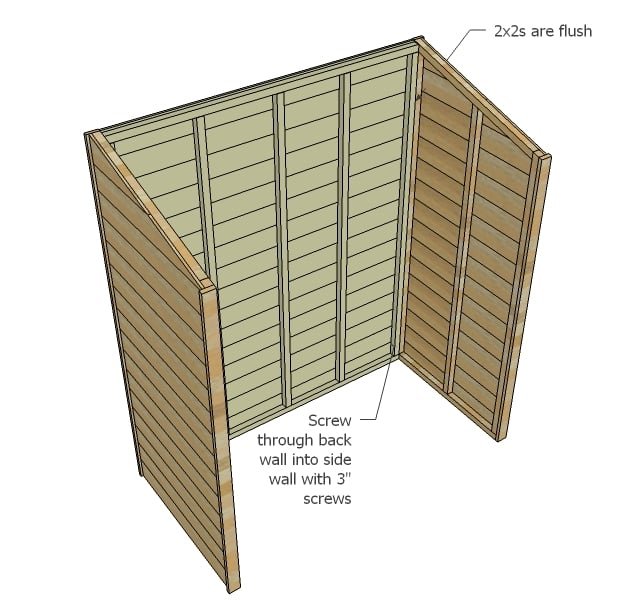
Once your side walls are complete, you can attach back walls. Use 2 1/2" screws or brackets for easy disassembly.
Step 7
Add header to front of shed. Take a minute here to make sure your project is square. The door area especially needs to be square.
Step 8
Frame up roof as shown above.
Step 9
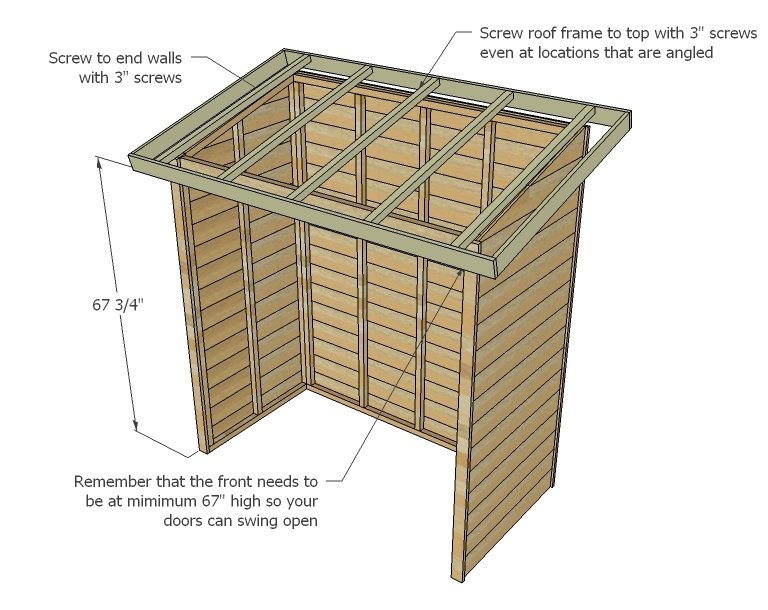
And attach roof to top of storage shed.
Step 10
Add plywood and roofing to top of shed.
Step 11
Frame doors up with pocket holes. Build doors to fit your openings. I like to leave 1/8" gaps.
Step 12
Attach cedar fence pickets to back of doors.
Step 13
And then install doors to shed.
Step 14
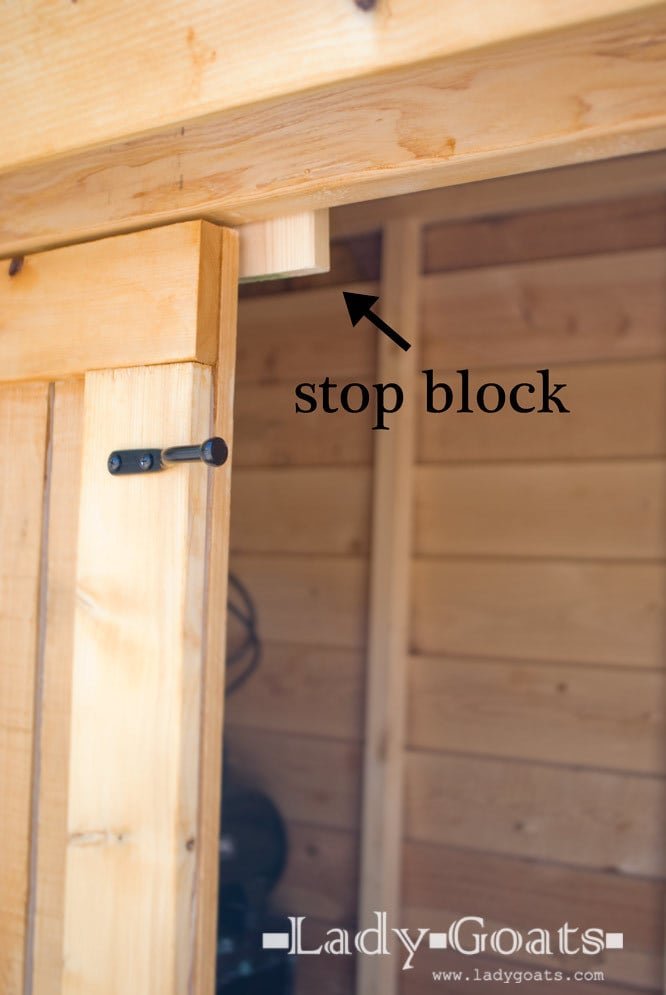
I love how Gina added the stop block to keep doors closed. Isn't this shed beautiful!
Step 15
Don't forget the pretty hardware!
Finishing
Sand all surfaces, starting with a medium grit and finishing with fine. Wipe off the dust, fill any holes or gaps with wood filler, and sand smooth once dry. Apply primer if you're painting, then finish with your choice of paint or stain and seal with a durable clear topcoat. For outdoor projects, use exterior-rated primer, paint or stain, and sealer so the piece stands up to the weather.
Source (temporary): https://www.ana-white.com/woodworking-projects/small-cedar-shed