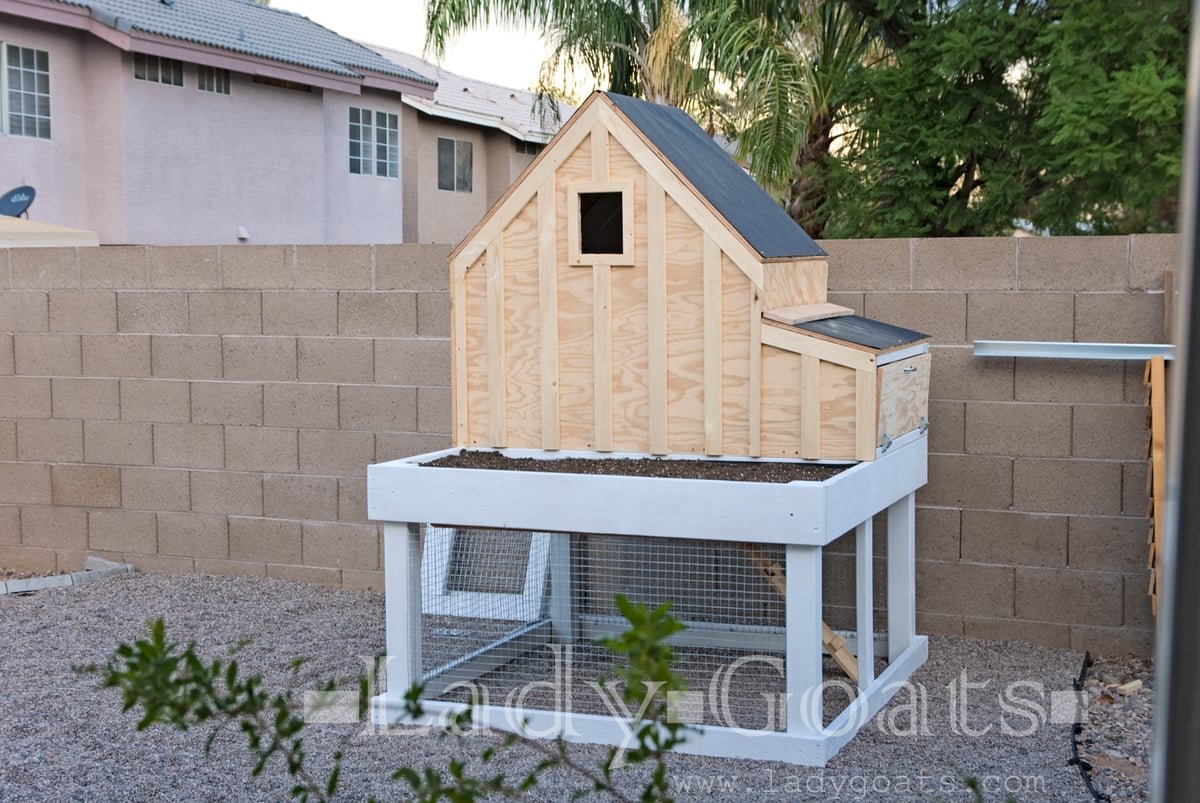
Small Chicken Coop with Planter, Clean Out Tray and Nesting Box
for small chicken coop with clean out tray and nesting box. Step by step tutorial by
Specifications
| Project type | Chicken Coop Plans |
|---|---|
| Room | Outdoor |
| Style | Cottage Style Furniture Plans |
| Difficulty | Advanced |
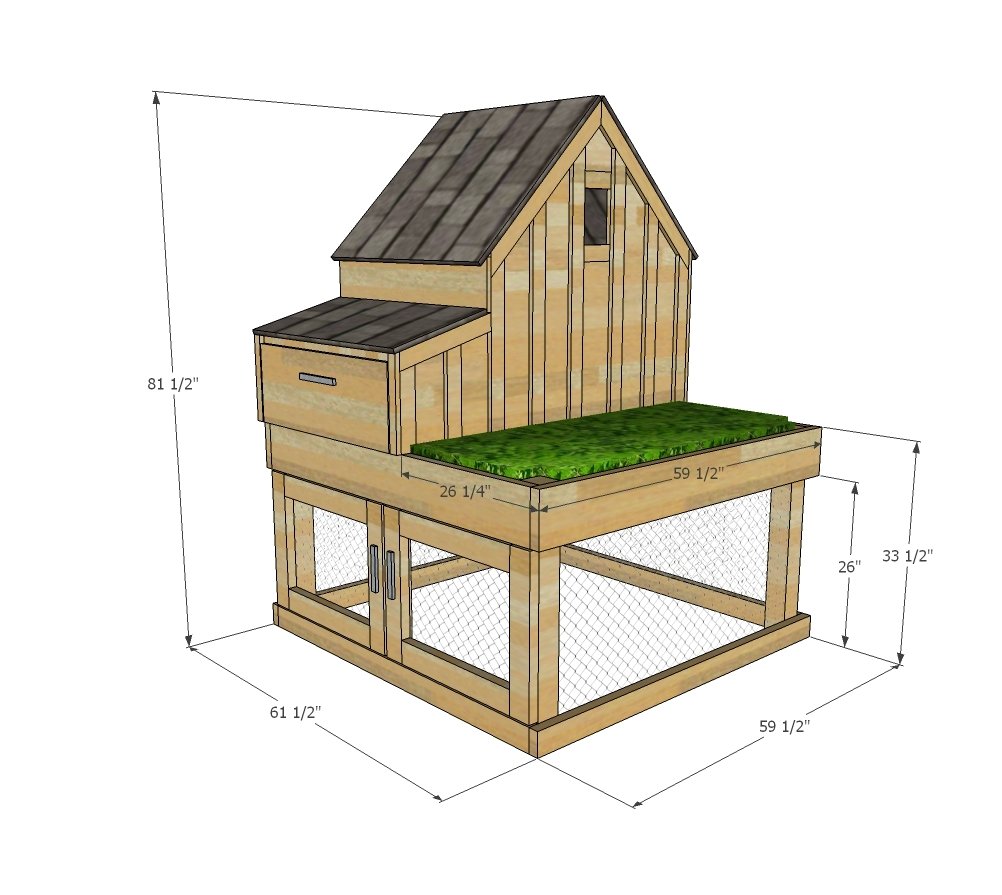
Dimensions
Use the size-specific shopping and cut lists below.
Shopping List
- 2 – 4x4 @ 6 feet long (cedar or treated)
- 2 – 2x4 @ 10 feet long (cedar or treated)
- 2 – 2x8 @ 10 feet long (cedar or treated)
- 1 – 2x8 @ 8 feet long (cedar or treated)
- 2 – 2x4 @ 8 feet long (cedar or treated for base doors)
- 7 – 2x4 @ 8 feet long (inside coop so does not have to be treated or cedar)
- 2 – 2x2 @ 8 feet long
- 2 – sheets ¾” plywood, exterior grade
- 1x3s or cedar fence pickets ripped to 2-1/2” and 1-1/2” width for siding and trim
- 1 sheet of ½” plywood, exterior grade (for coop bottom)
- 20’ of 24” wide chicken wire and staples
- 5 sets of exterior hinges
- Latches
- 80” x 36” of roofing – pieces are cut to match roof plywood
Cut List
BASE
- 4 – 4x4 @ 33-1/2” (legs)
- 2 – 2x8 @ 58-1/2”
- 2 – 2x4 @ 58-1/2”
- 2 – 2x8 @ 59-1/2”
- 2 – 2x4 @ 59-1/2”
- 1 – 2x8 @ 56-1/2”
- 1 – 2x4 @ 33-1/2” (divider between doors)
- 8 – 2x4 @ 22” (doors)
- 5 – 2x4 @ 33” (floor supports)
COOP
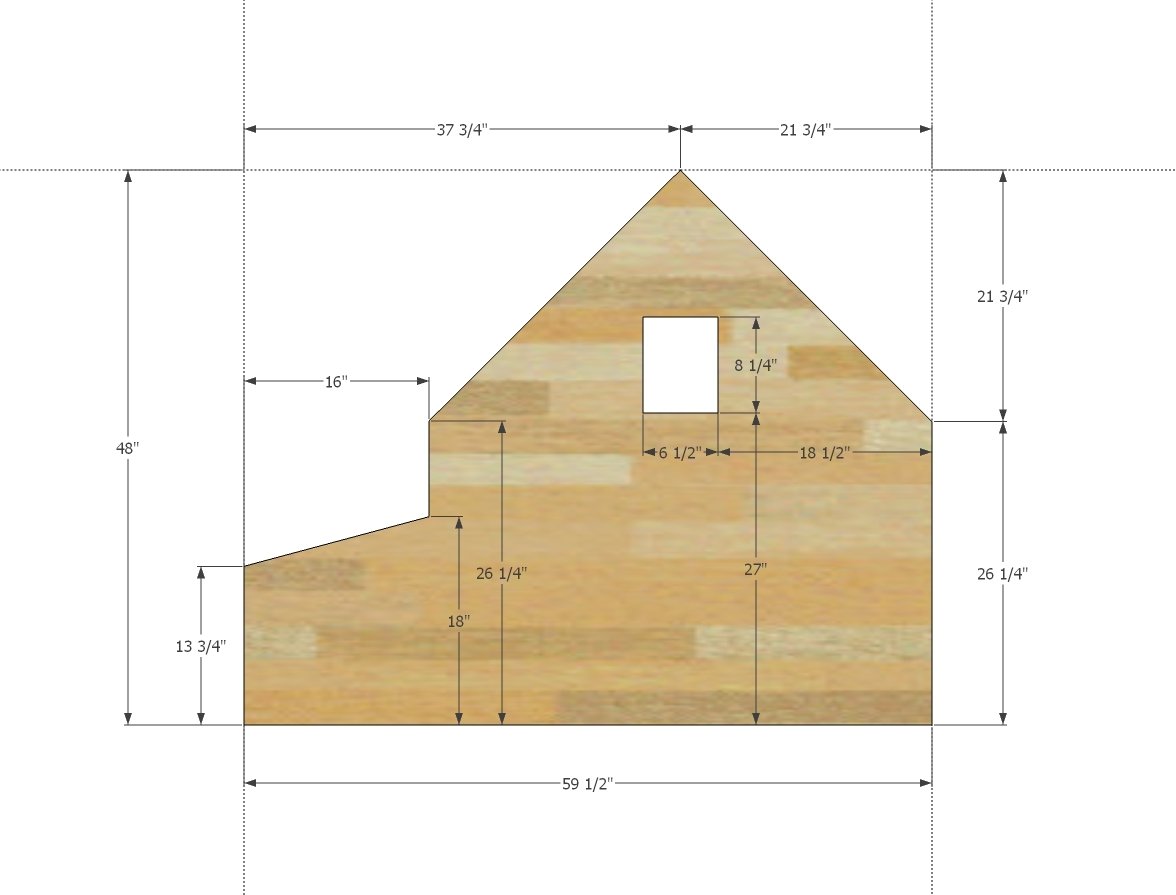
- 2 – ¾” plywood @ 48” x 59-1/2” (sides)
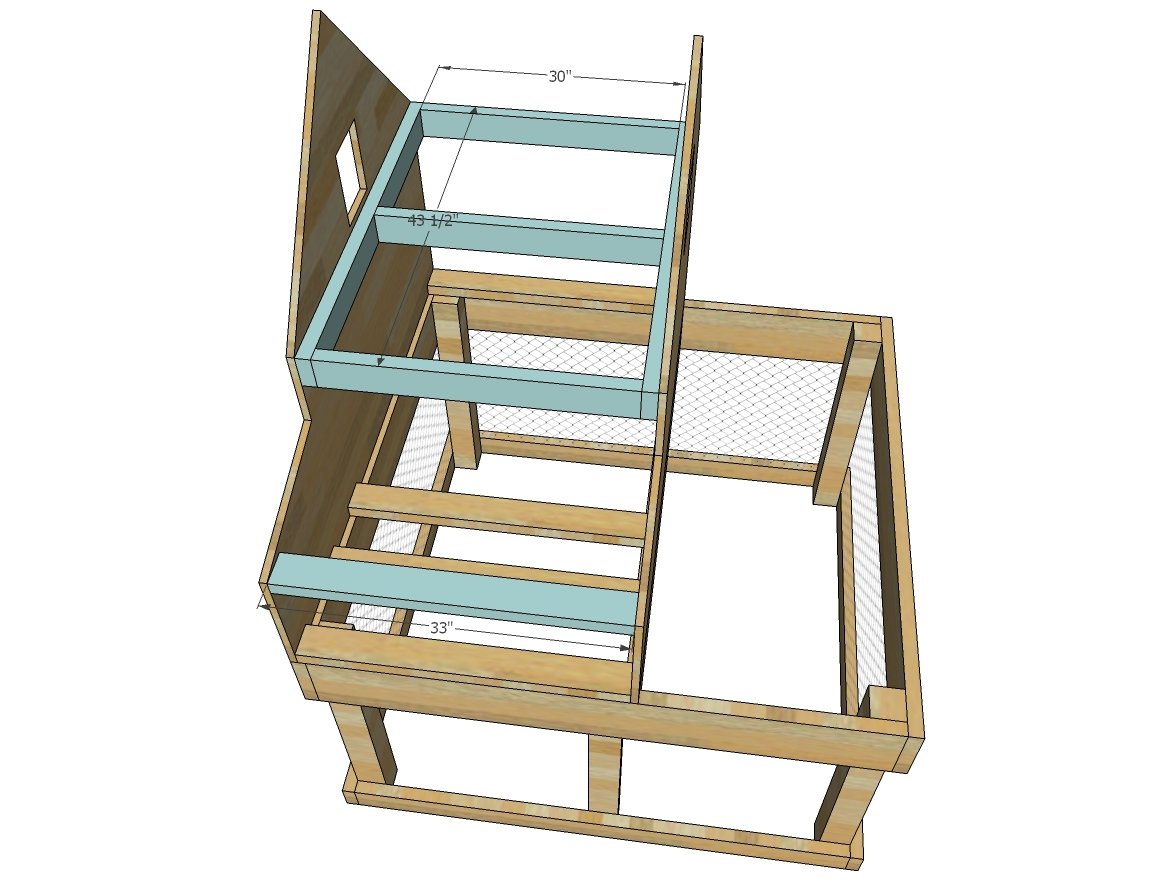
- 2 – 2x4 @ 33”
- 3 – 2x4 @ 30”
- 2 – 2x4 @ 43-1/2”
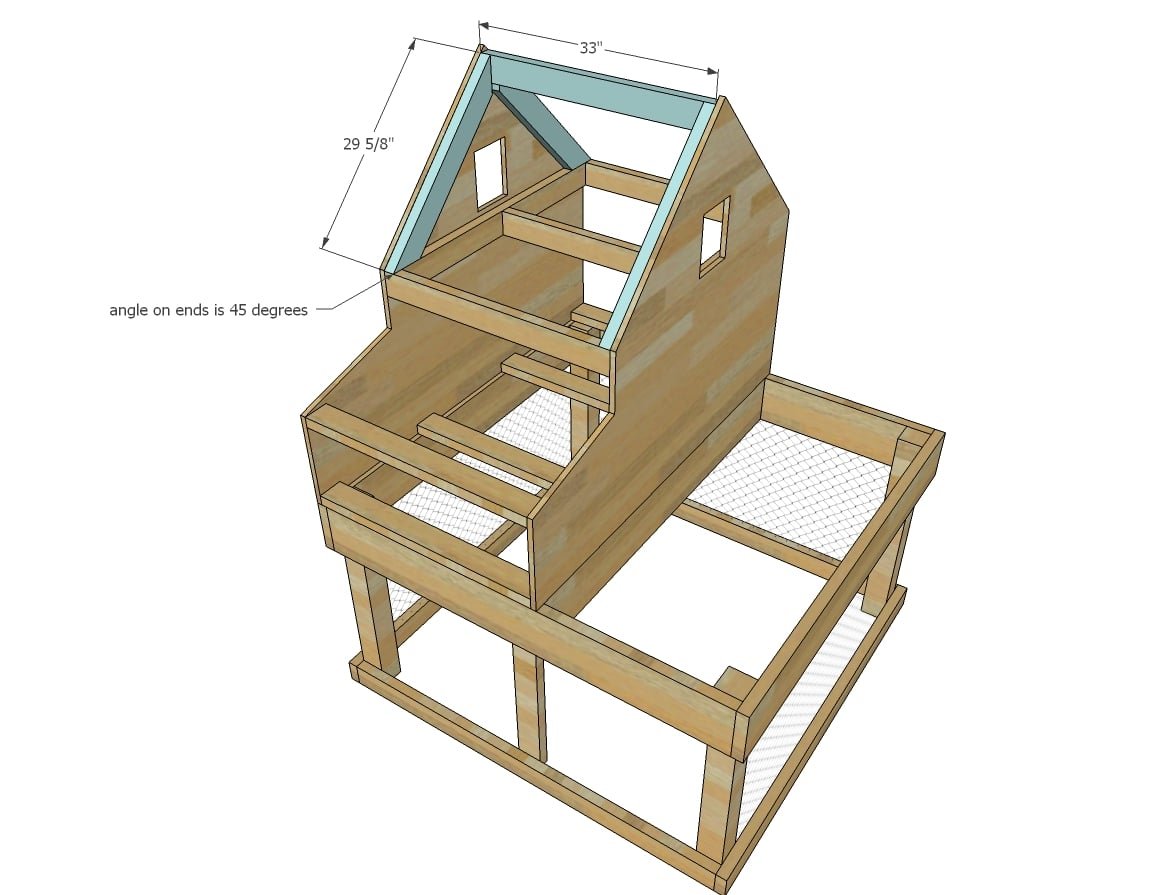
- 4 – 2x4 @ 29-5/8” long point to long point, 45 degrees angles, ends not parallel
- Trim pieces are cut to fit
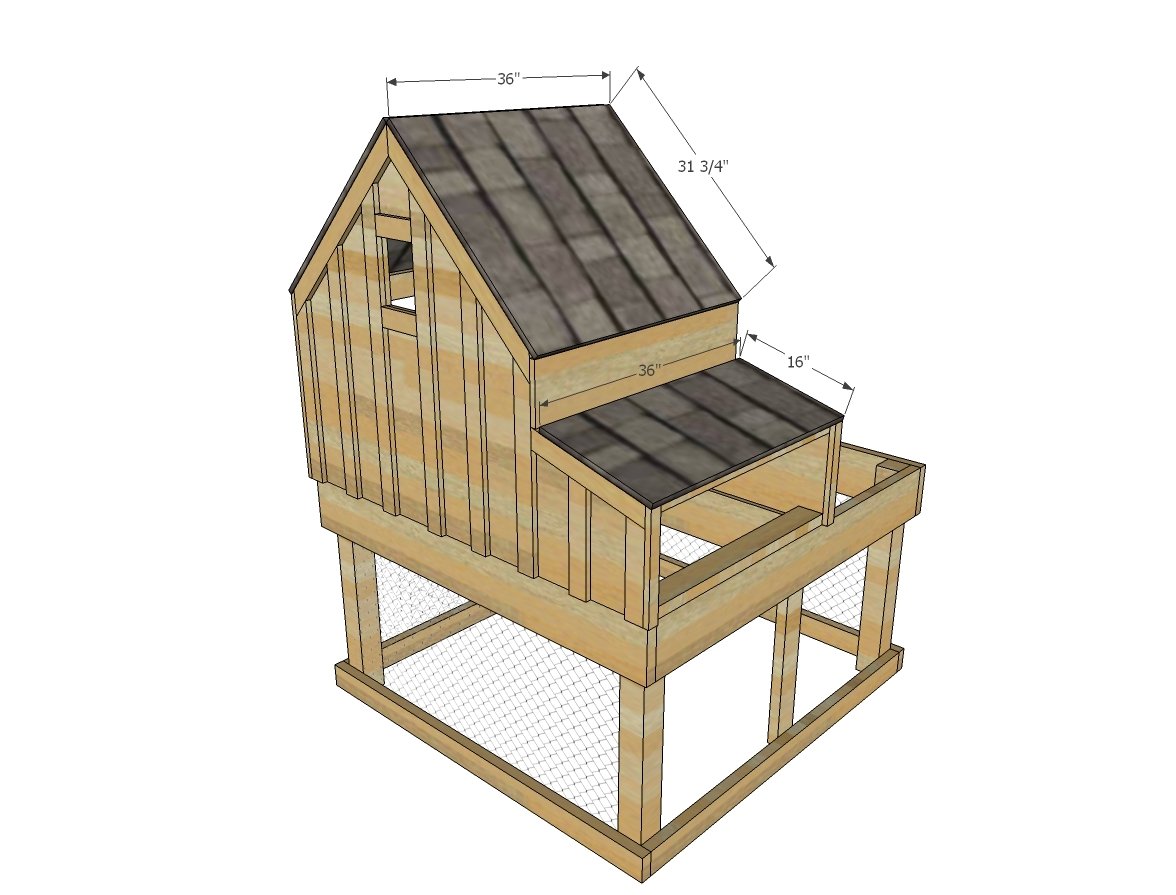
- 2 – ¾” plywood @ 36” x 31-3/4” – larger roof
- 1 – ¾” plywood @ 36” x 16” – smaller roof
- 1 – 2/3” plywood @ 36” x 7-5/8” (small wall)
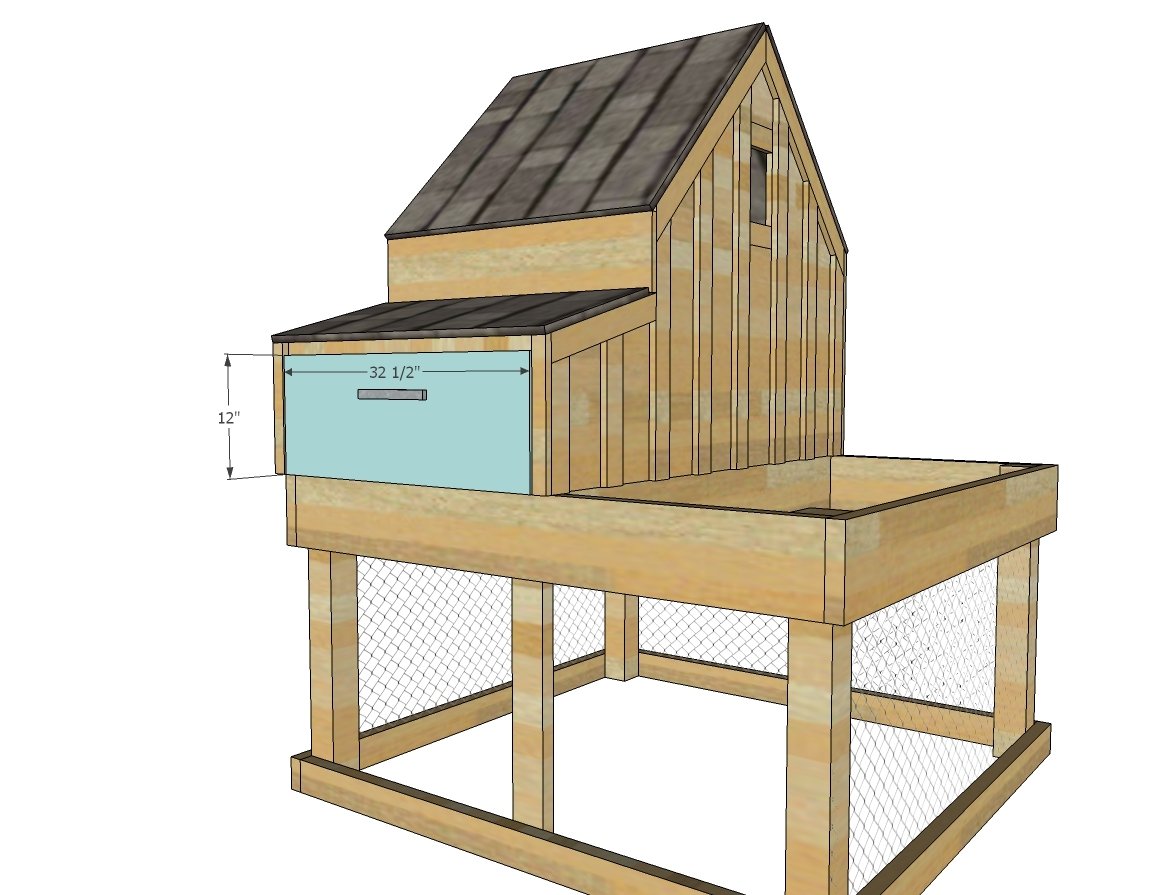
- 1 – ¾” plywood @ 32-1/2” x 12” – nesting box door
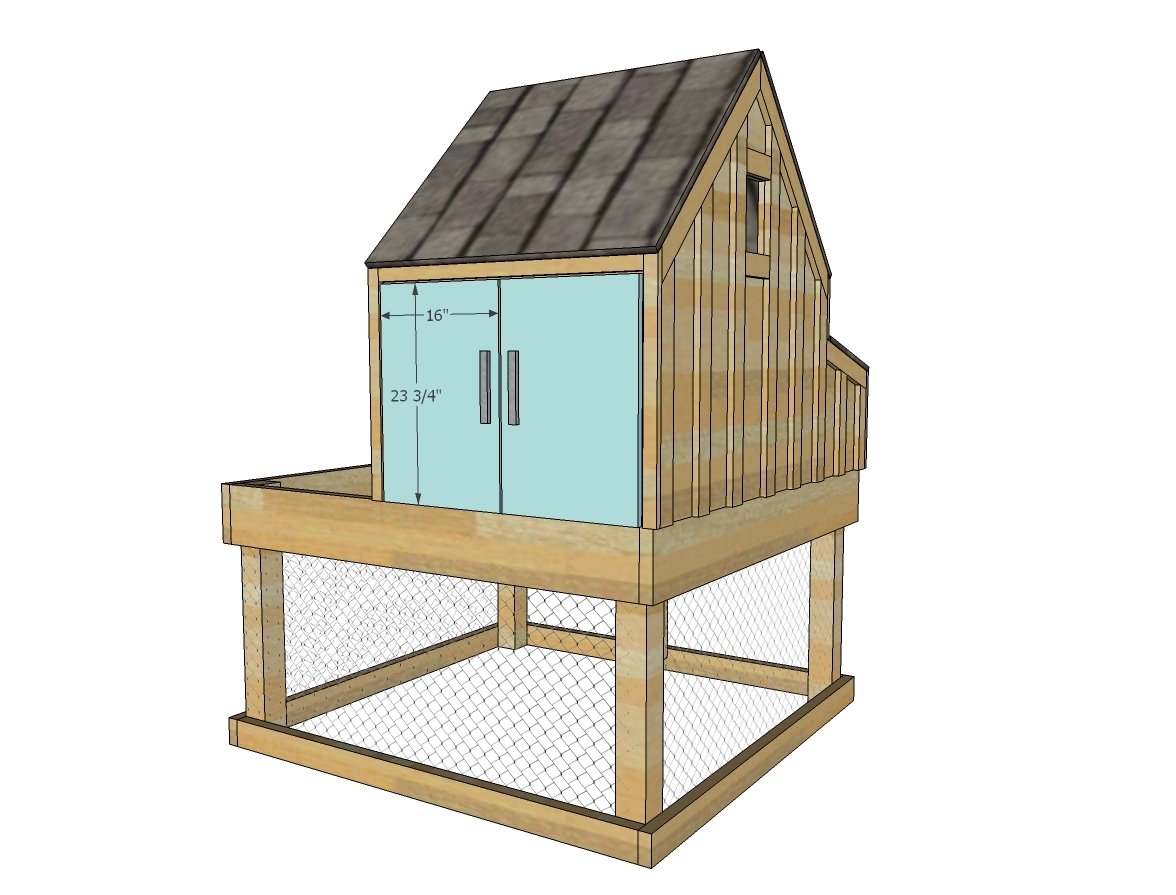
- Clean out doors are 16-1/4” x 23-3/4” – measure and cut to fit
CLEAN OUT TRAY
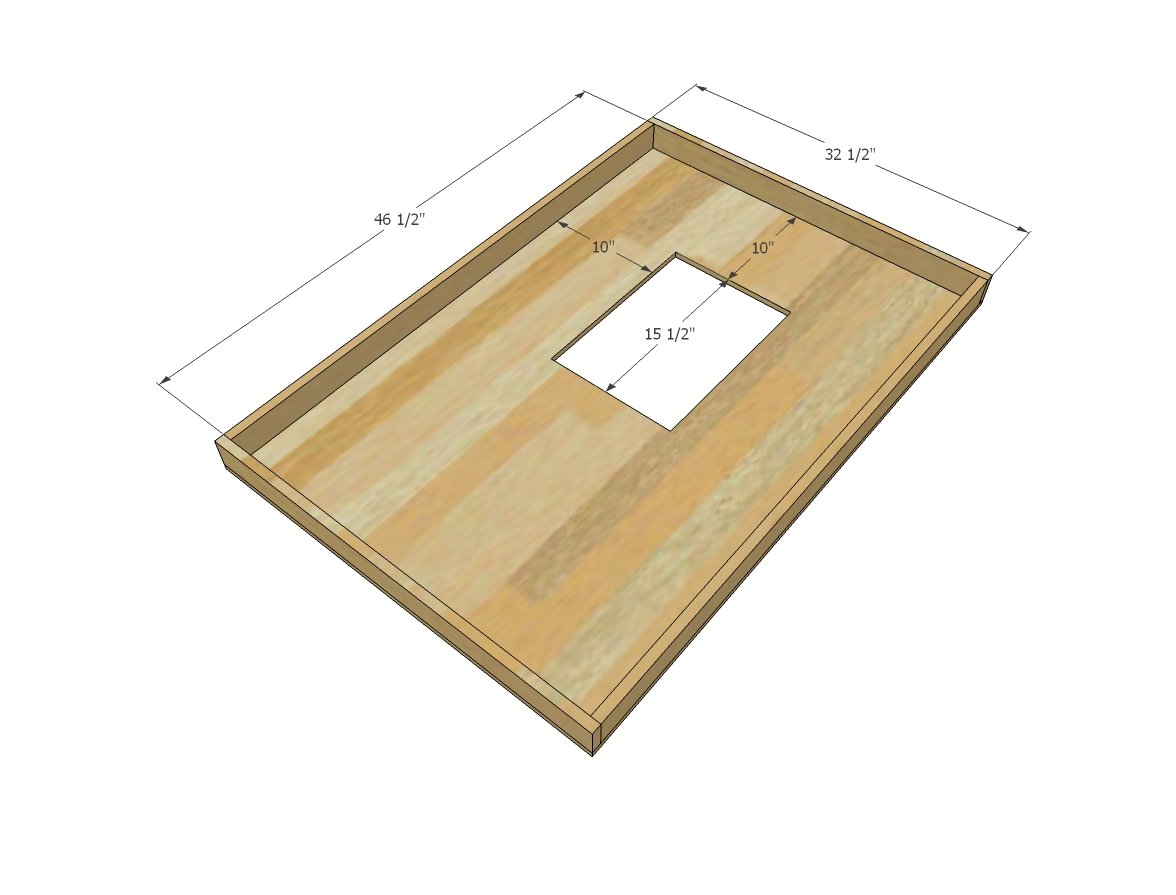
- 2 – 1x3 @ 46-1/2”
- 2 – 1x3 @ 32-1/2”
- 1 – ½” plywood @ 48” x 32-1/2”
PLANTER BOX
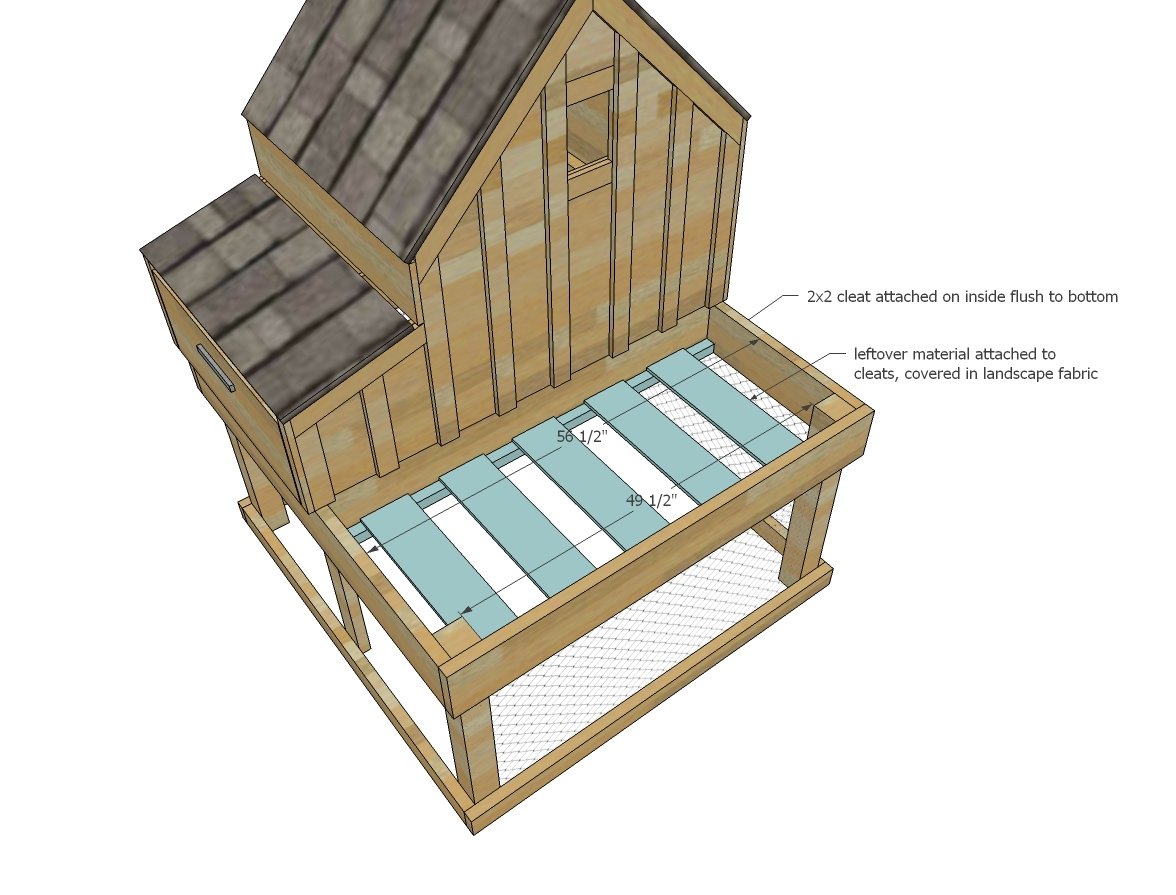
- 1 – 2x2 @ 49-1/2”
- 1 – 2x2 @ 56-1/2”
- Scrap wood for planter bottom
Tools
- measuring tape
- square
- pencil
- hammer
- safety glasses
- hearing protection
- kreg-jig
- drill
- circular saw
- jigsaw
- compound miter saw
- nailer
- sander
- staple gun
- level
Step-by-step Instructions
Step 1
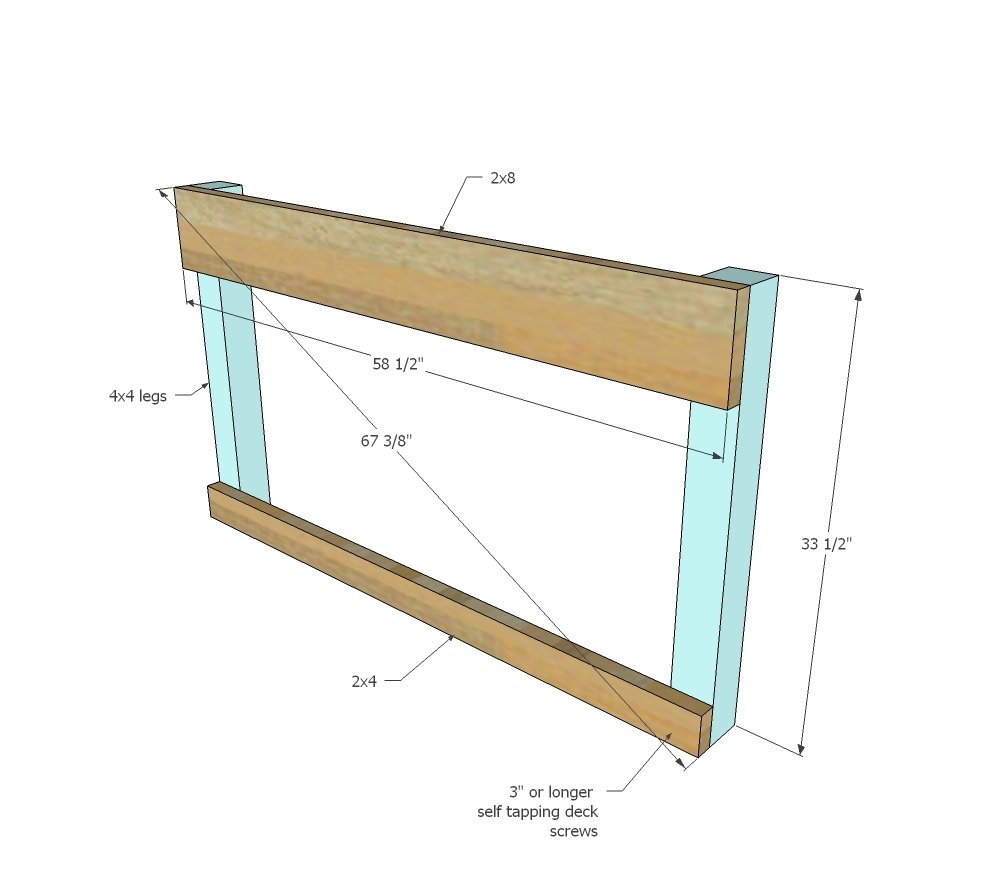
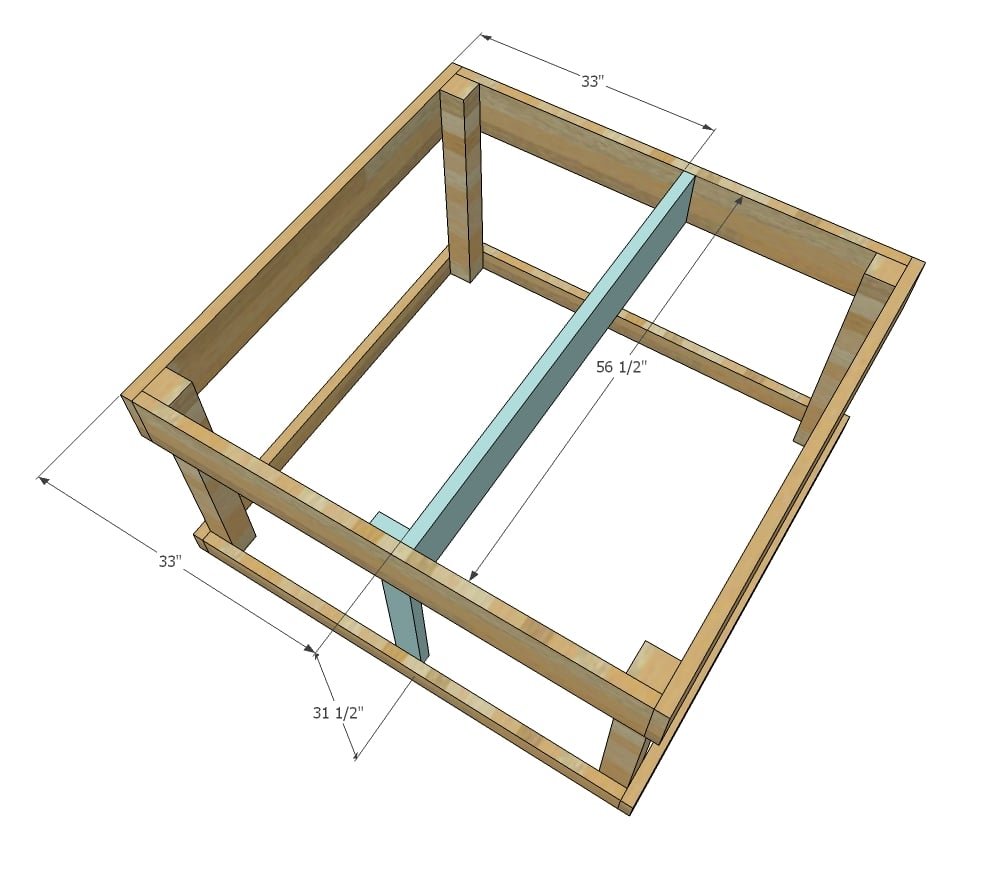
Attach 2x4 and 2x8 pieces to the 4x4 legs with 3" or longer self tapping deck screws. Measure diagonally from both corners to check for square, adjusting for square. Repeat to build the second side.
Step 2
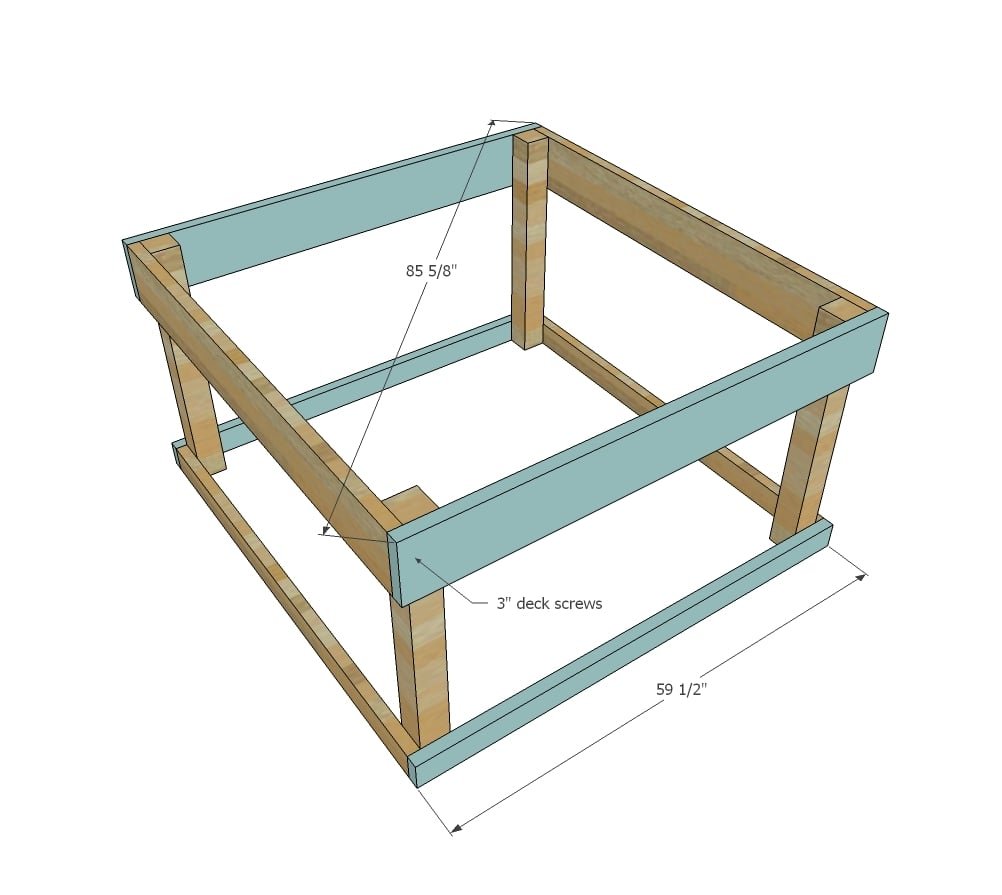
Attach remaining side pieces to complete the run framing. Adjust for square.
Step 3
Attach center 2x8 and door support with the 3" decking screws. NOTE: Door support is 33-1/2" long.
Step 4
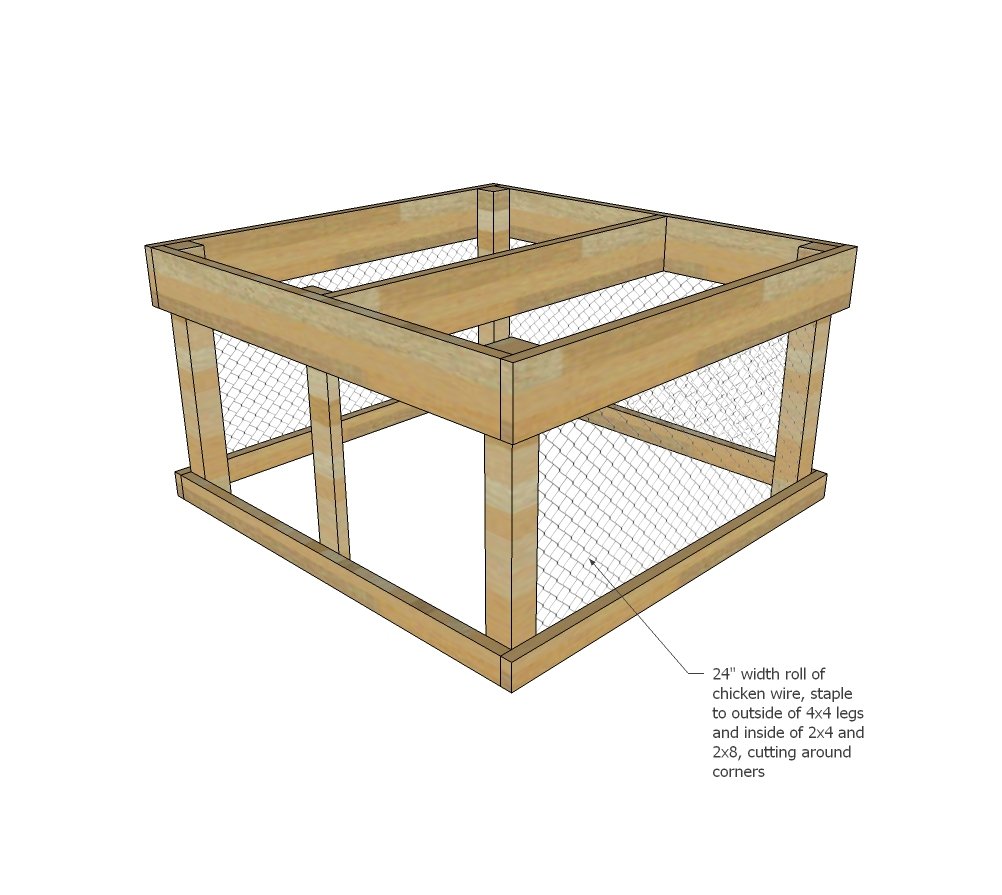
Staple chicken wire to inside, wrapping around legs on outside.
Step 5
Step 6
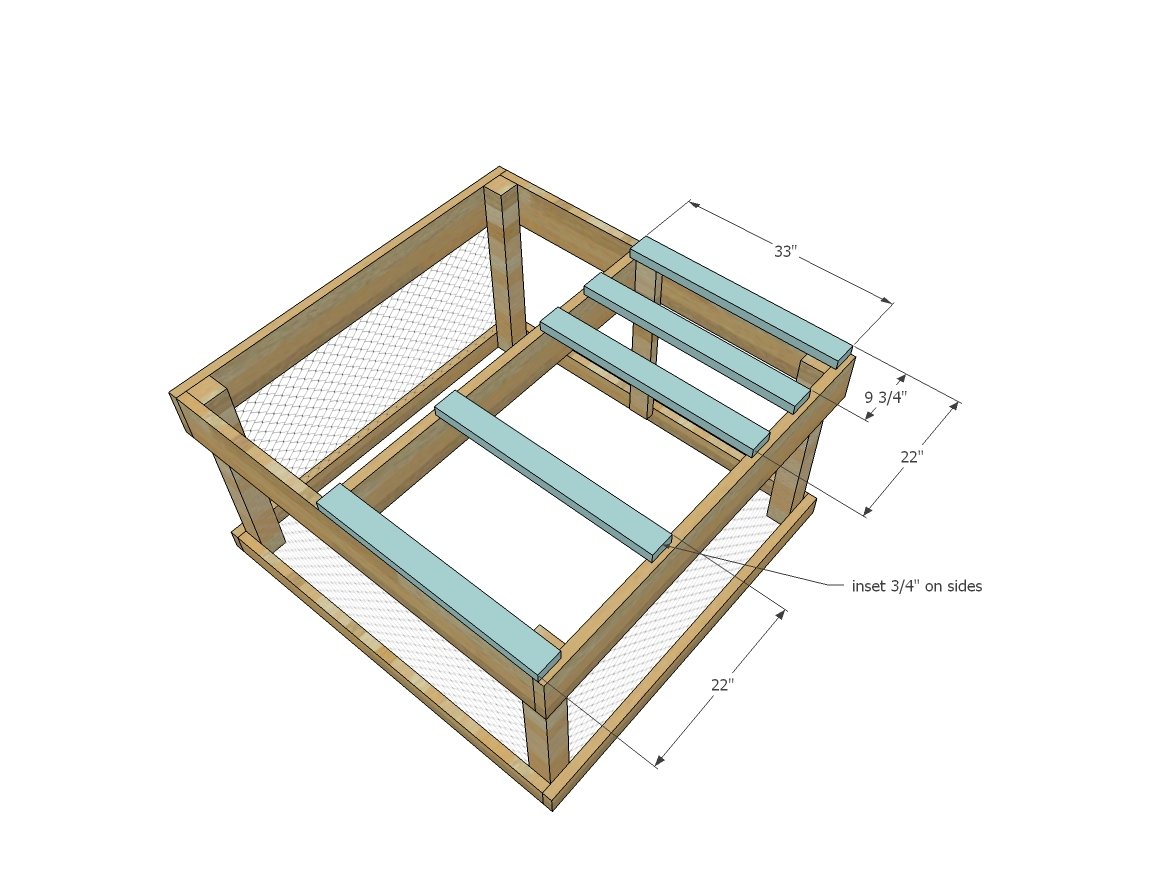
Attach Floor support boards to decking, using the 3" screws.
Step 7
Mark and cut out from 3/4" plywood the side panels using a jigsaw. Conserve plywood for roofing panels by carefully cutting out side pieces to minimize waste,
Step 8
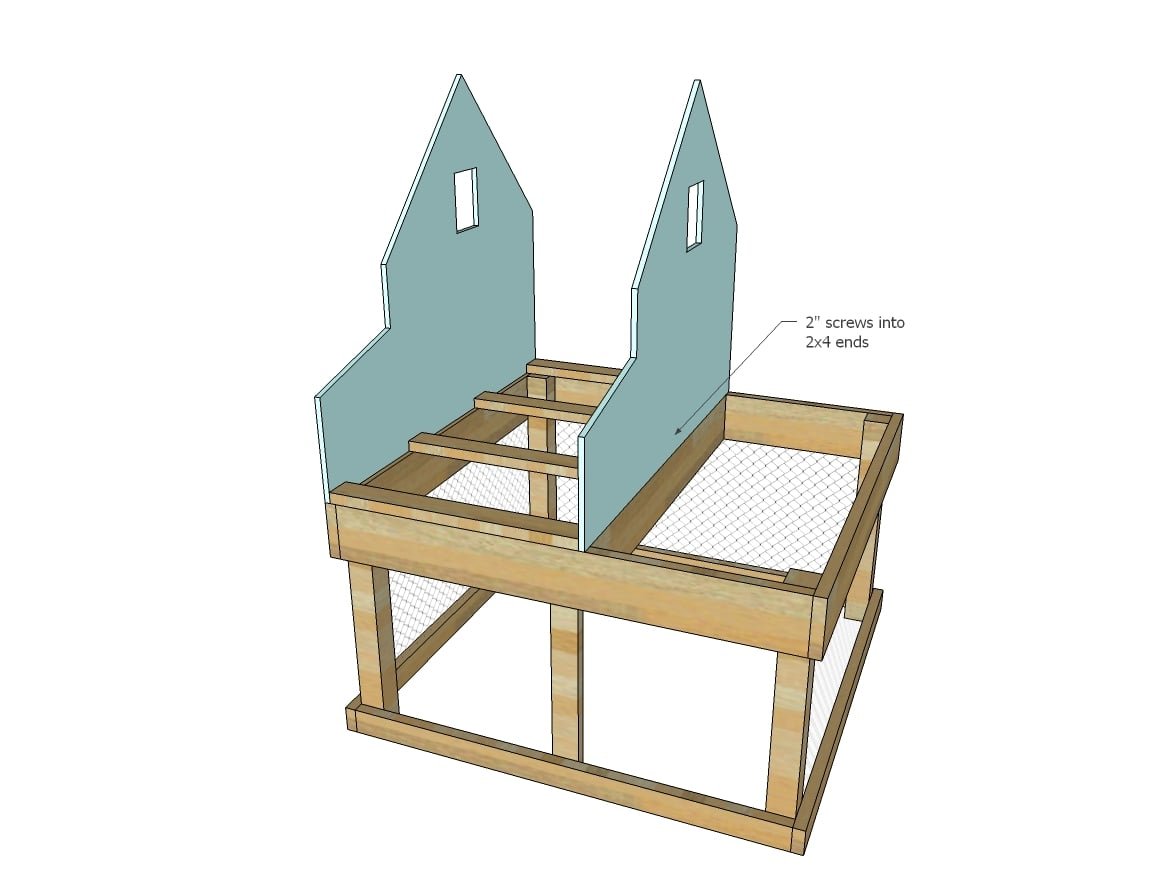
Attach side panels to the floor supports.
Step 9
Build the upper floor framing section on the ground using 3" screws. Then attach inside coop at top. Also attach nesting box piece. 2" screws through the 3/4" plywood into the 2x4s.
Step 10
Add the remaining roof framing supports with 2" screws to complete the framing.
Step 11
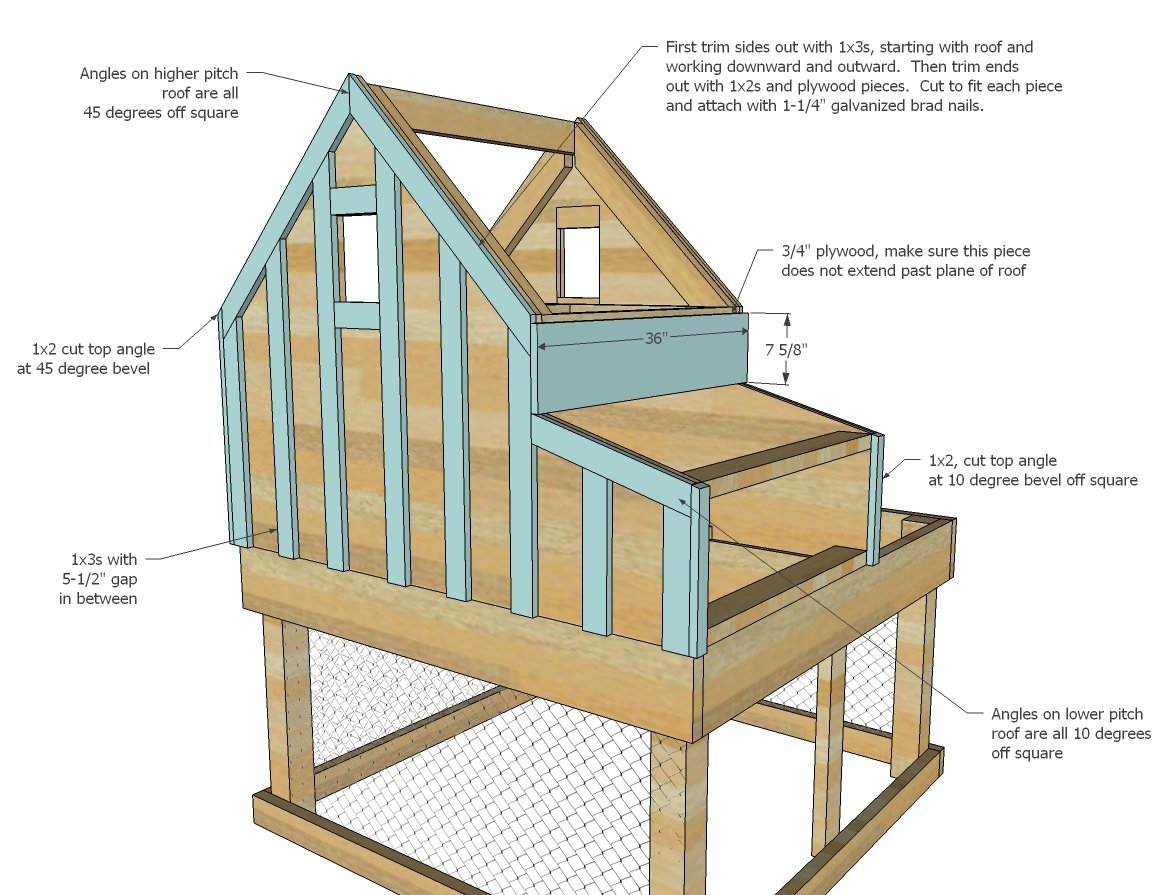
Use galvanized staples or brad nails to add decorative trim to outsides, or 1-1/4" exterior screws.
Step 12
Use the 3/4" plywood scraps to cover roof areas. Attach with 2" screws to the 2x4 framing. Add roofing on top.
Step 13
Hinge nesting box door in opeing and use latch to secure.
Step 14
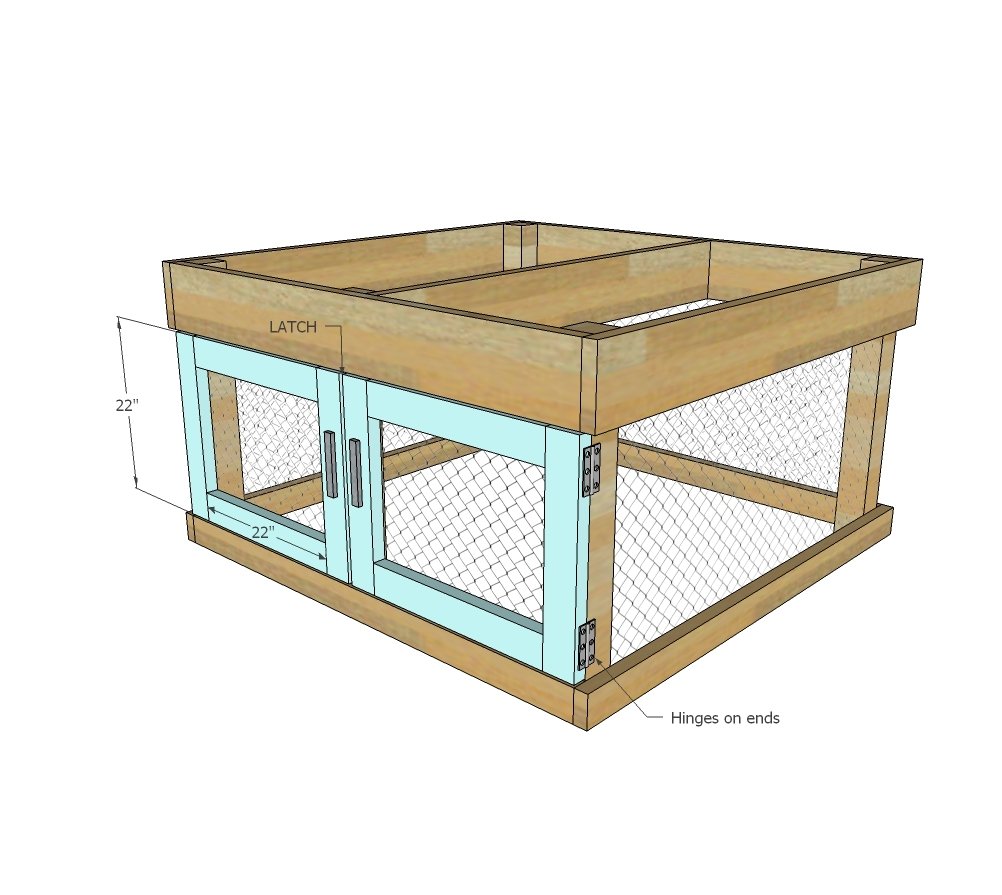
Use 3/4" plywood to build doors to fit the openings. Attach with hinges and latch.
Step 15
Attach 2x2 cleats inside planter box to 2x8 sides at bottoms with 3" screws. Place any scrap 3/4" material inside and screw down with 2" screws. Add landscaping fabric or other waterproof material to line planter box, with proper drainage holes, stapling to sides. Fill with soil.
Step 16
Cut the clean out tray hole to fit the chicken coop, between the floor supports. Add sides and attach with 2" screws.
Step 17
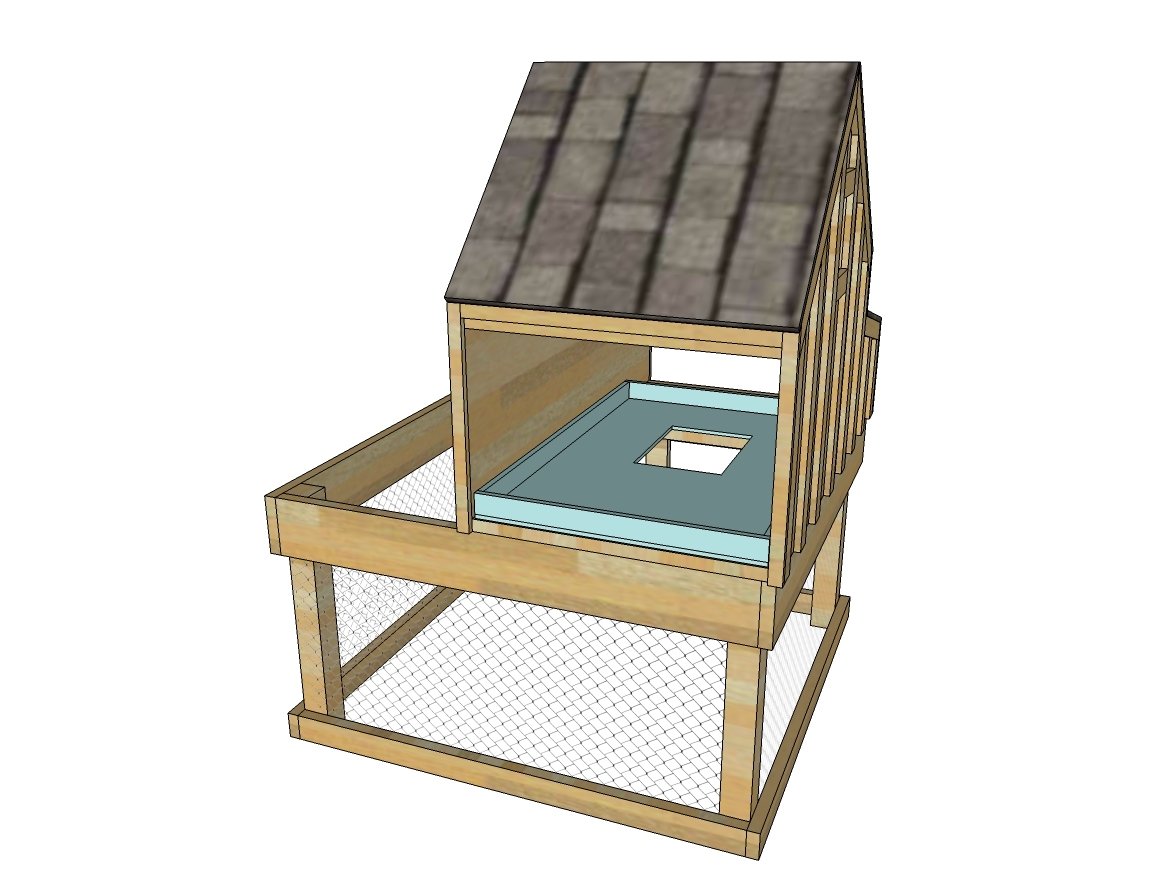
Place clean out tray inside coop.
Finishing
Sand all surfaces, starting with a medium grit and finishing with fine. Wipe off the dust, fill any holes or gaps with wood filler, and sand smooth once dry. Apply primer if you're painting, then finish with your choice of paint or stain and seal with a durable clear topcoat. For outdoor projects, use exterior-rated primer, paint or stain, and sealer so the piece stands up to the weather.
Source (temporary): https://www.ana-white.com/woodworking-projects/small-chicken-coop-planter-clean-out-tray-and-nesting-box