Small Console Table Made from 1x Whitewood Boards
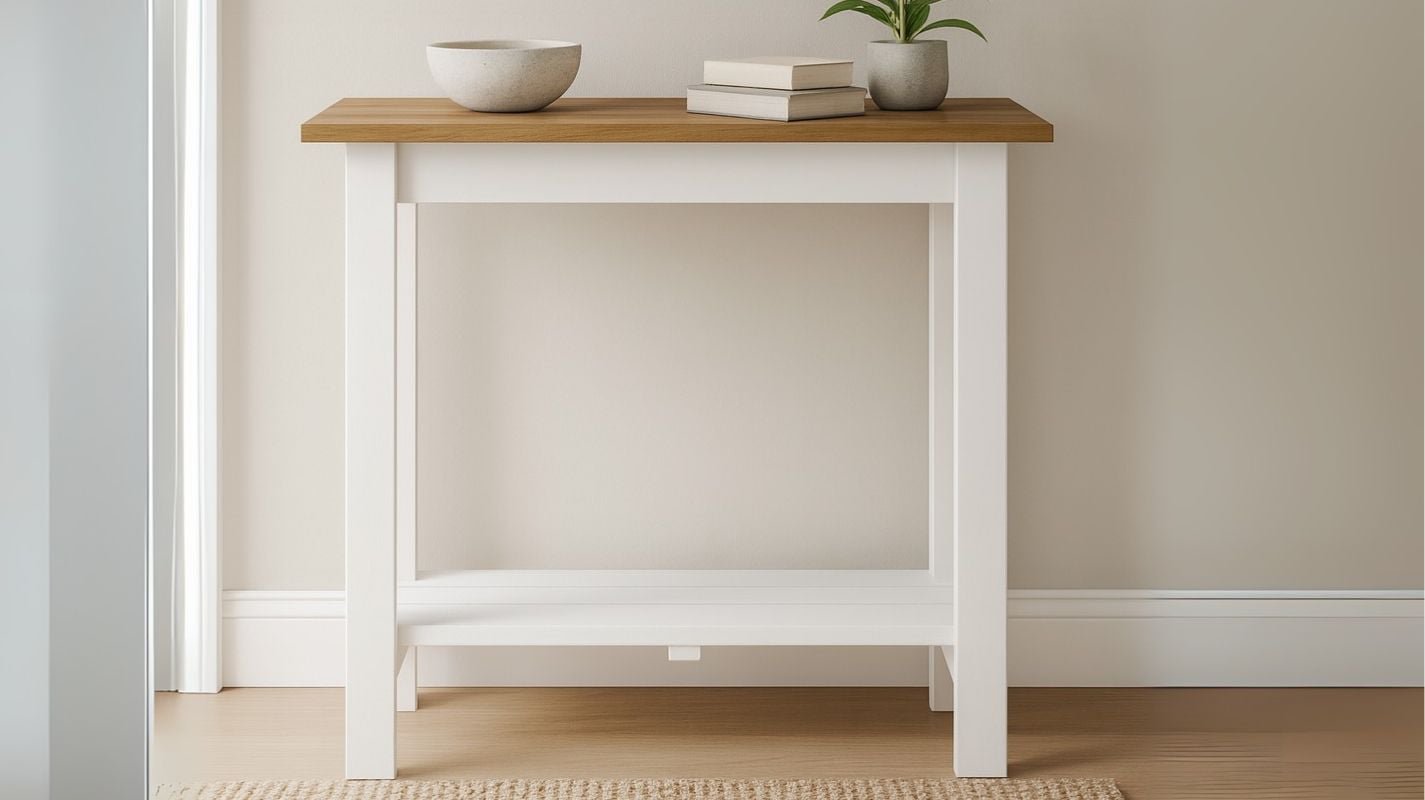
Make your own entryway or living room console table the easy way. This project features step-by-step diagrams, plenty of real reader photos, and a simple, beginner-friendly build process—just nail 1x boards together! The design has a narrow profile and a handy bottom shelf for extra storage. Finish with your choice of paint or stain to match any decor. Get the now and create a beautiful, functional console table in just a few hours!
Specifications
| Project type | Console Table Plans |
|---|---|
| Room | dining room |
| Style | Primitive or Early American Style Furniture Plans |
| Difficulty | Starter Projects |
| Estimated cost | Under $20 |
Dimensions
Use the size-specific shopping and cut lists below.
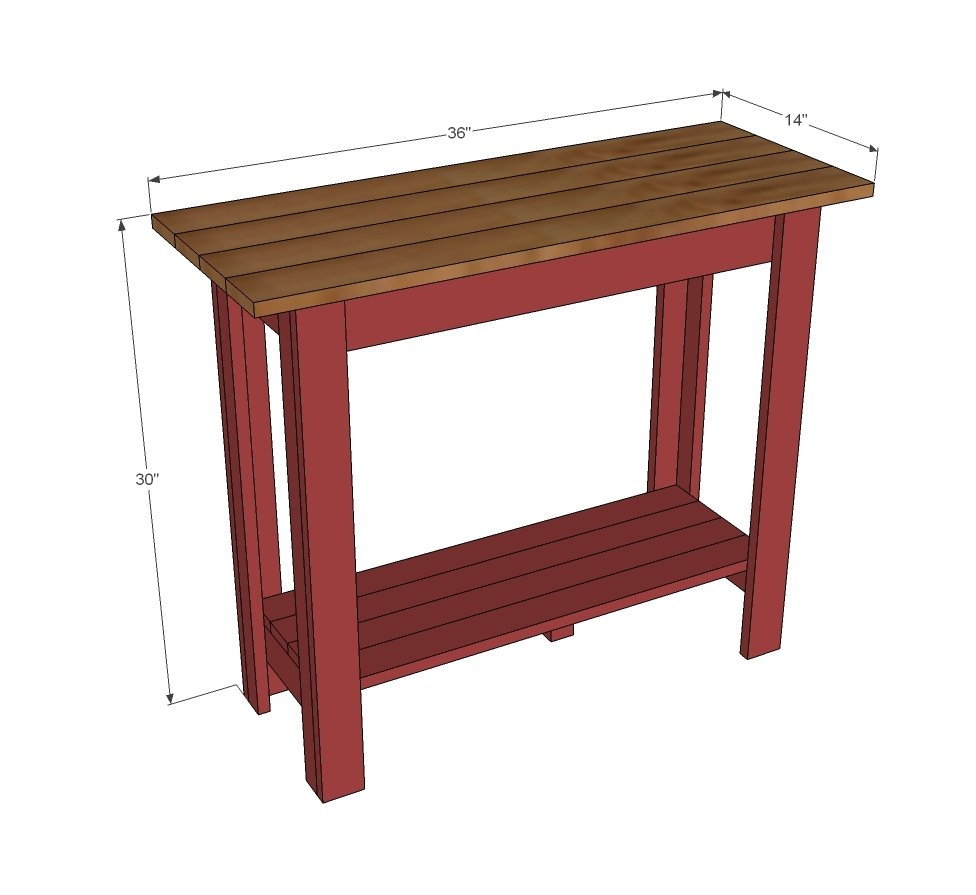
Shopping List
- 3 - 1x3 @ 8 feet long
- 2 - 1x2 @ 8 feet long
- 3 - 1x4 @ 8 feet long
- 1 1/4" and 2" brad nails (can also use screws or pocket hole screws)
Cut List
- 4 - 1x3 @ 29 1/4" (legs)
- 4 - 1x2 @ 29 1/4" (legs)
- 2 - 1x4 @ 10" (top aprons - ends)
- 2 - 1x3 @ 10" (bottom aprons - ends)
- 2 - 1x4 @ 28" (top aprons - front/back)
- 4 - 1x3 @ 29 1/2" (bottom shelf)
- 1 - 1x2 @ 10" (bottom shelf support)
- 3 - 1x2 @ 8 1/2" (top support)
- 4 - 1x4 @ 36" (top)
Tools
- measuring tape
- square
- pencil
- safety glasses
- hearing protection
- nailer
Step-by-step Instructions
Step 1
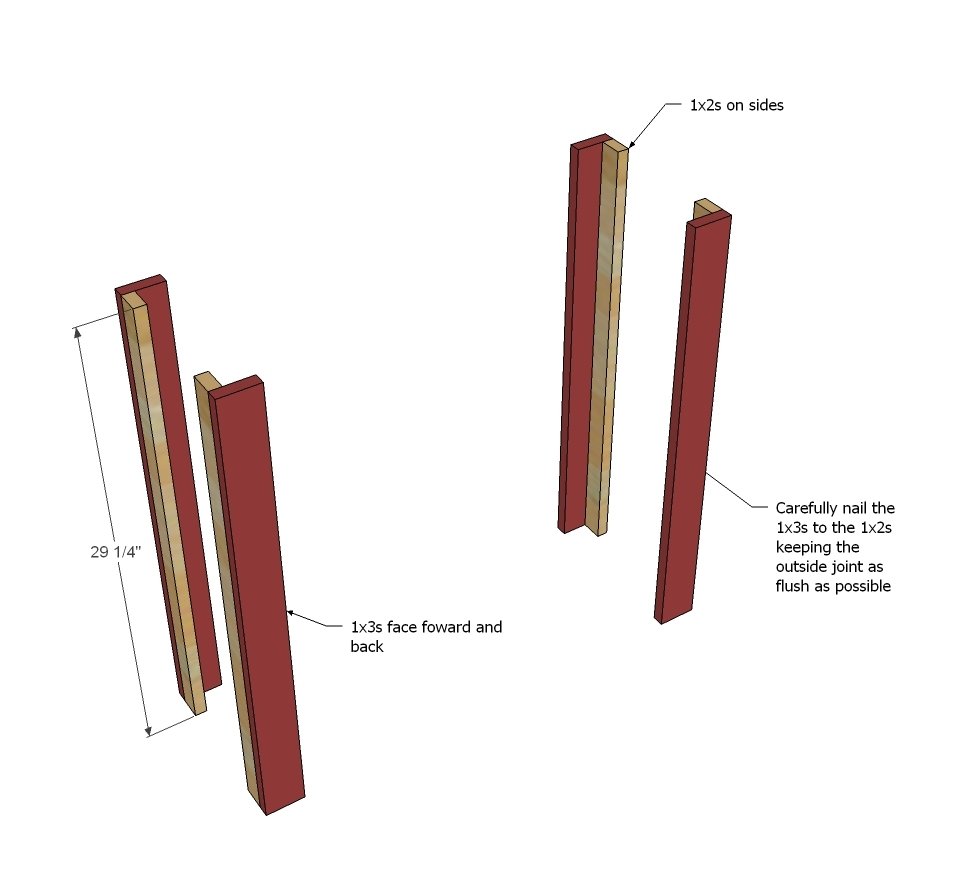
Start by building the four legs. Keep the outside edges as flush as possilbe as you nail the 1x3 to the 1x2. TIP: I place a 1 1/2" thick block under the 1x3 to help support the 1x3 as I nail to the 1x2, and will use clamps to hold everything in place. Wood will move as you go down the joint - make it do what you tell it to!
Step 2
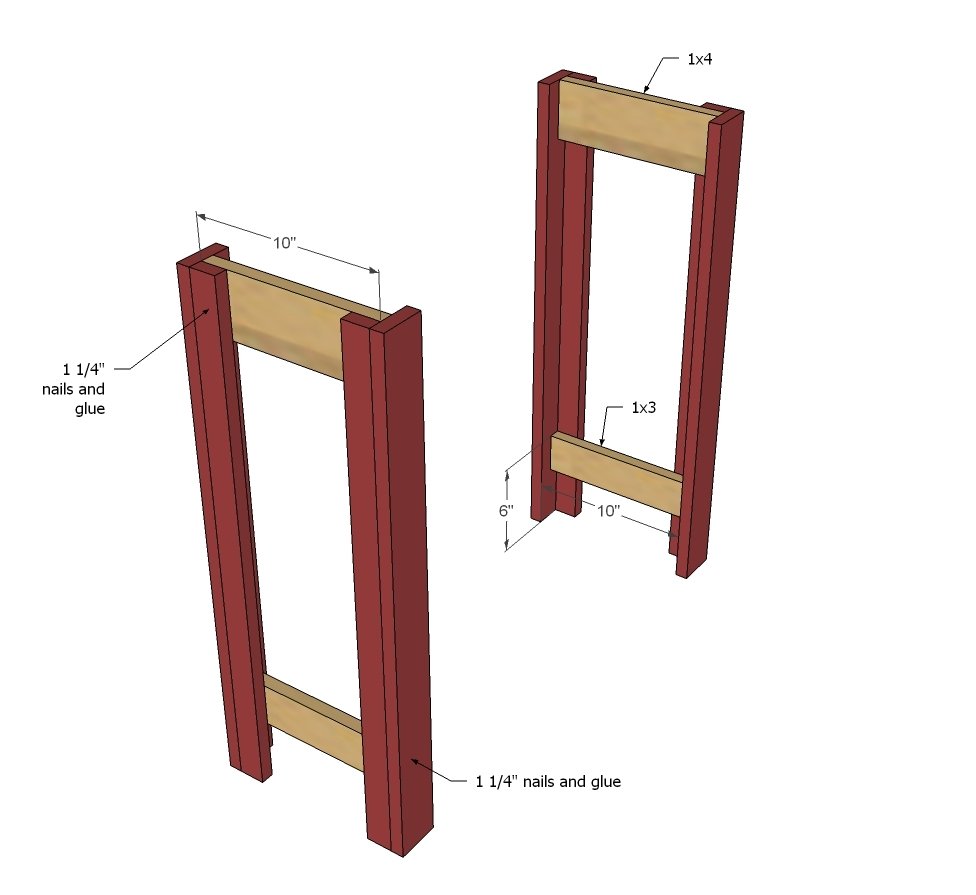
With the legs done, position them so the 1x3s are to the front and back, and the 1x2s are to the ends. Then attach aprons and bottom stretcher to the legs.
Step 3
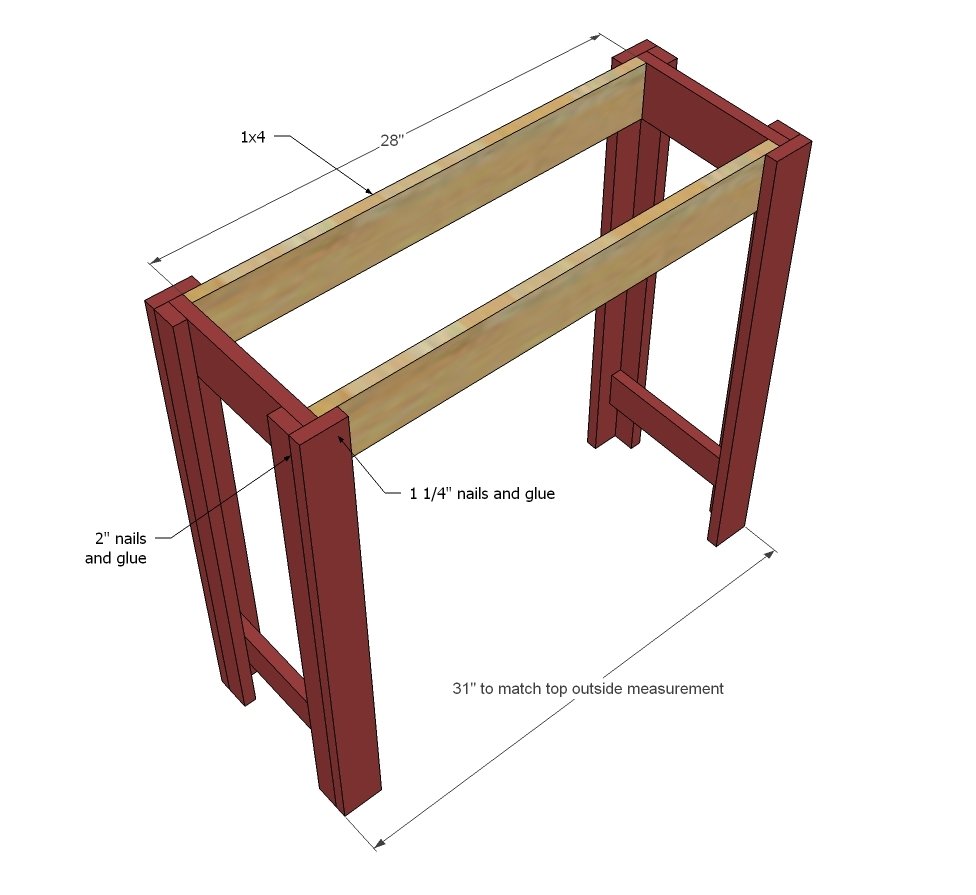
Next, add the top aprons. Remember, when you use nails, you MUST use glue.
Step 4
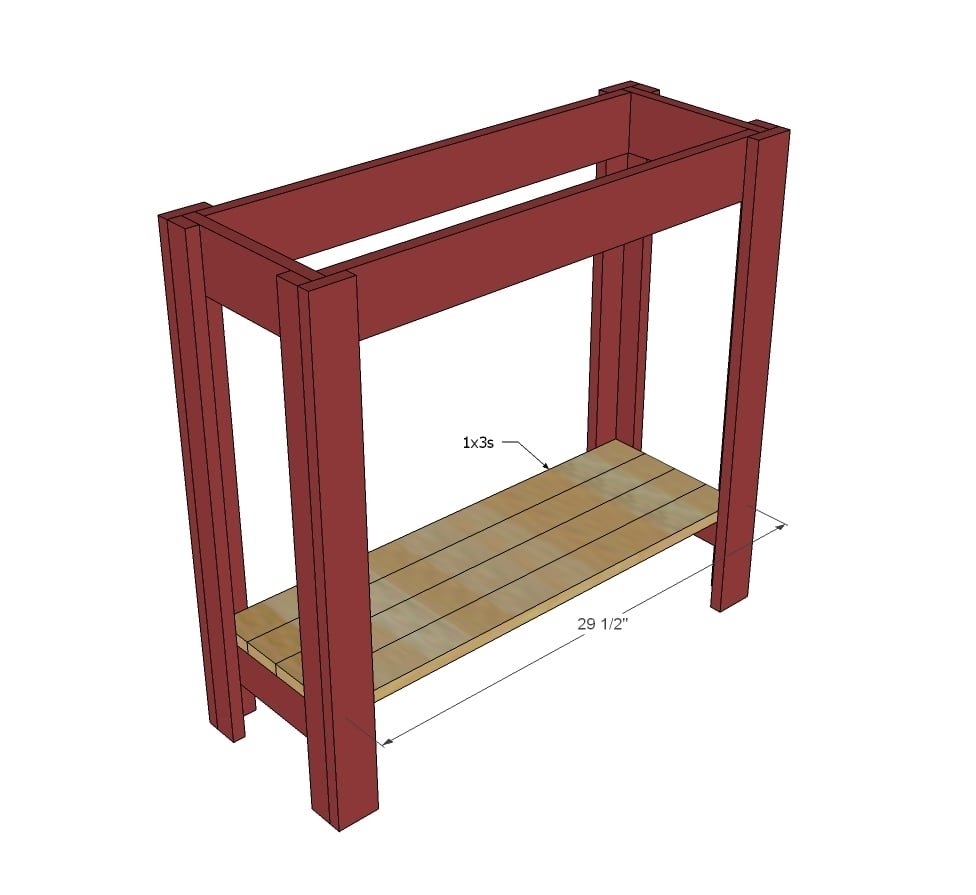
Postition your 1x3 bottoms helf boards on the bottom shelf and nail to the bottom stretcher. Apply glue between each of the bottom shelf boards and clamp or hurry up and do step 5. NOTE: Pocket hole users will want to build the bottom shelf first with pocket holes and then attach the completed shelf to the bottom.
Step 5
Step 6
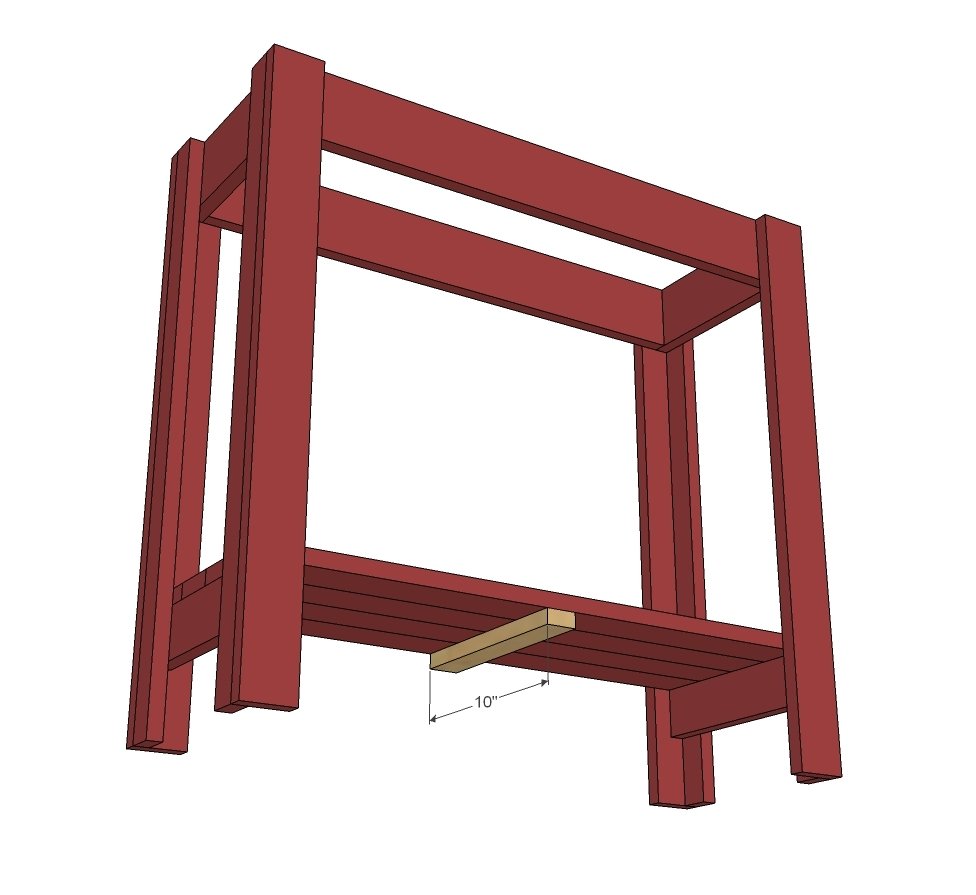
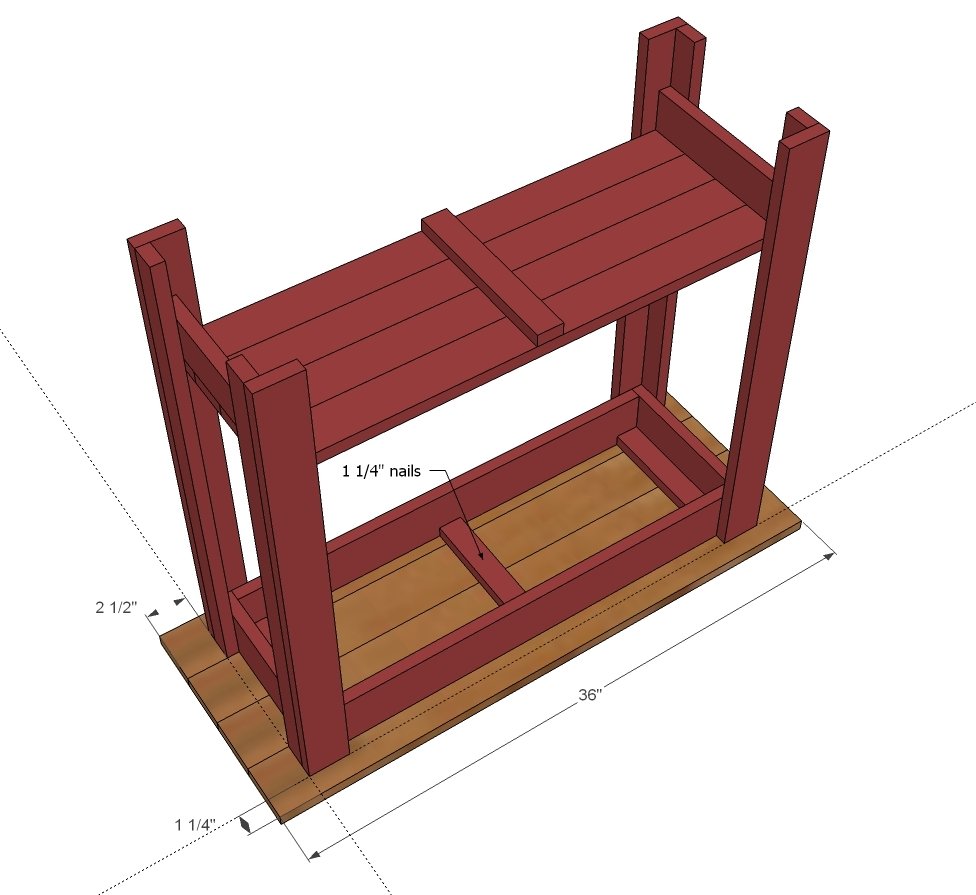
These supports will help you attach the top. Nail in place with 1 1/4" finish nails and glue.
Step 7
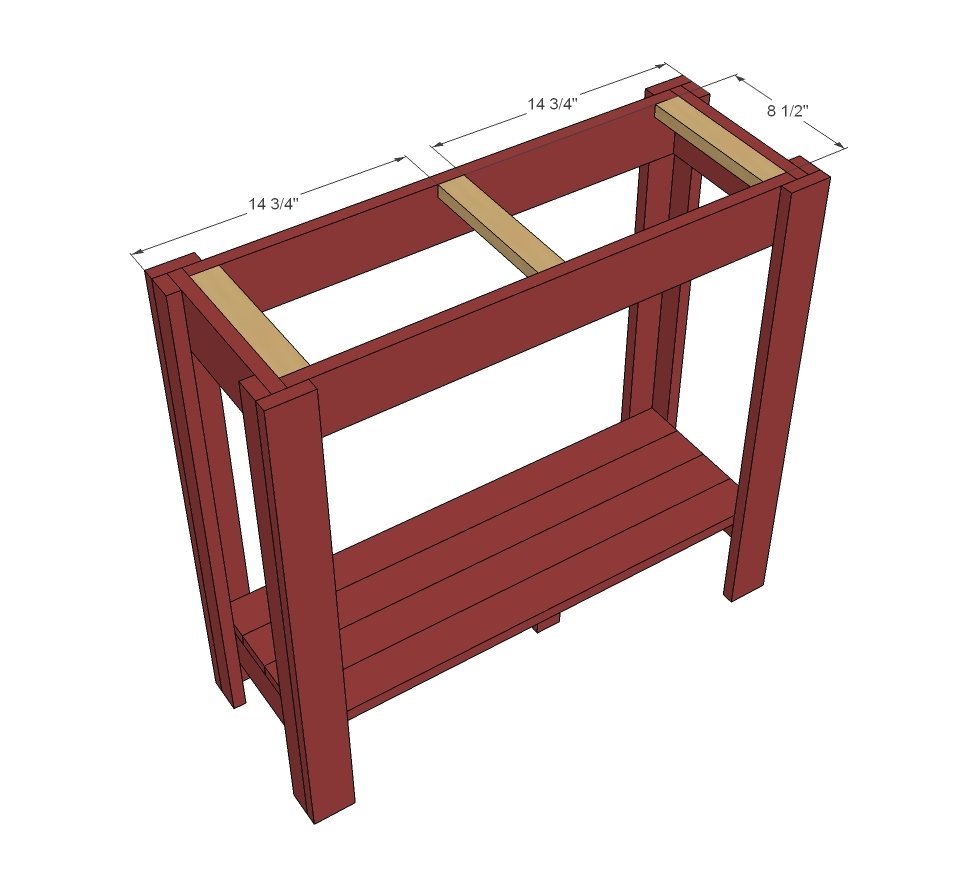
Start with the center 1x4s and attach from underneath, with equal overhangs on the ends. Then work outsare and attach the outer 1x4s, keeping ends flush. Flip console over and nail through top into legs and aprons. Make sure you apply glue to all joints if using nails. Pocket hole users: build top first with 3/4" pocket holes and 1 1/4" pocket hole screws.
Finishing
Sand all surfaces, starting with a medium grit and finishing with fine. Wipe off the dust, fill any holes or gaps with wood filler, and sand smooth once dry. Apply primer if you're painting, then finish with your choice of paint or stain and seal with a durable clear topcoat. For outdoor projects, use exterior-rated primer, paint or stain, and sealer so the piece stands up to the weather.
Source (temporary): https://www.ana-white.com/woodworking-projects/small-console-table-made-1x-whitewood-boards-free-plans