Small Locker Cabinet
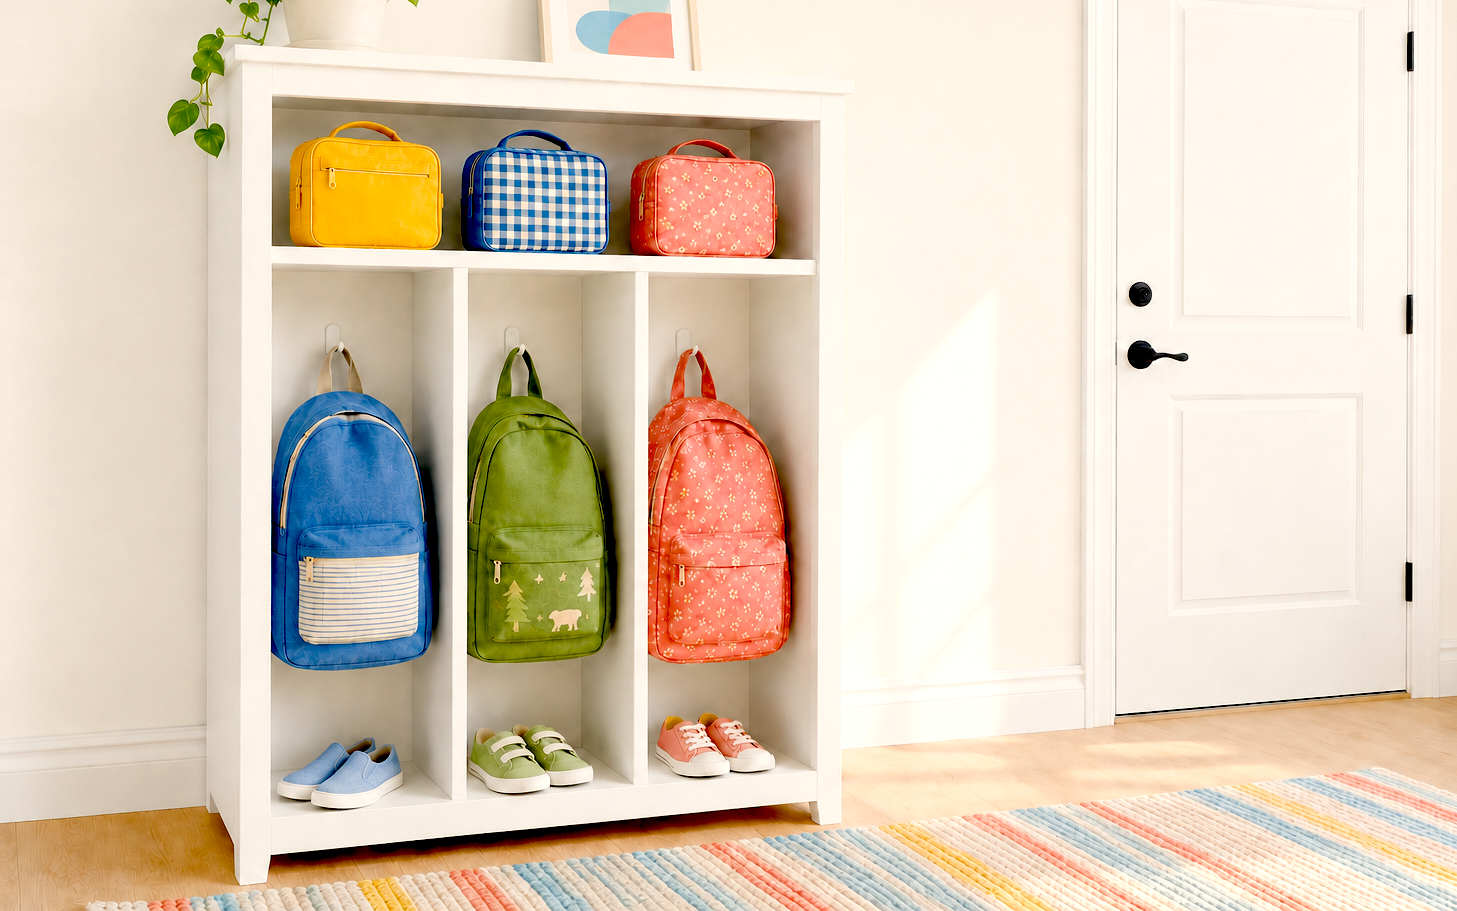
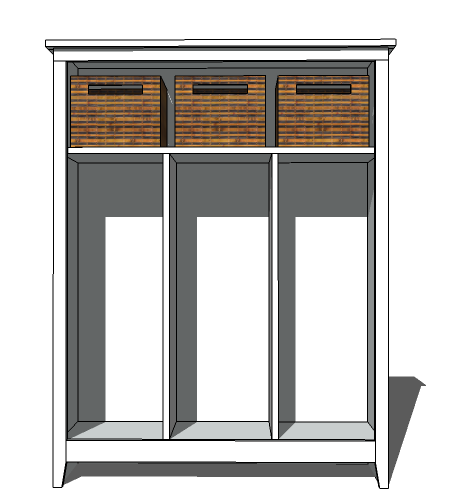
Free DIY Entryway Locker Plan – Compact, Functional, and Perfect for Small Spaces Build your own instant mudroom with this for a compact entryway locker. Designed with a narrow profile, it’s the ideal solution for organizing tight spaces like hallways, apartment entryways, or laundry room nooks. At just 52" tall, this locker includes three vertical cubbies with hook space, a top storage shelf with space for bins or baskets, and an open lower section for shoes or gear. The clean, freestanding design creates a polished drop zone— no wall mounting required. Whether you're a beginner woodworker or weekend DIYer, this project is both approachable and impactful. It brings structure and style to your home, adding the everyday convenience of a mudroom without the need for built-ins. Download the today and turn even the smallest space into a hardworking, beautiful storage solution.
Specifications
| Project type | Lockers |
|---|---|
| Room | Entryway and Mudroom |
| Style | Cottage Style Furniture Plans |
| Difficulty | Beginner Projects |
| Estimated cost | $50 - $100 |
Dimensions
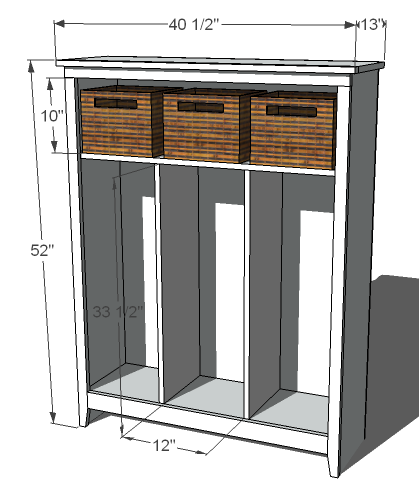
Use the size-specific shopping and cut lists below.
Shopping List
- 2 - 1x12 @ 8 feet long
- 1 - 1x12 @ 10 feet long
- 1 - 1x2 @ 8 feet long
- 1 - 1x3 @ 14 feet long
- 1 - 1/4" Plywood or Beadboard 48" x 48" piece
Cut List
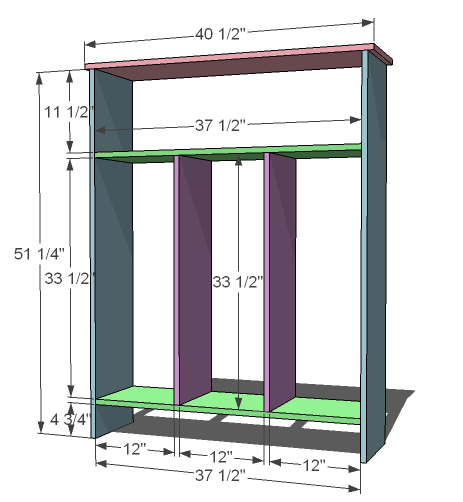
- 2 - 1x12 @ 51 1/4" (Sides)
- 1 - 1x12 @ 40 1/2" (Top)
- 2 - 1x12 @ 37 1/2" (Shelves)
- 2 - 1x12 @ 33 1/2" (Dividers)
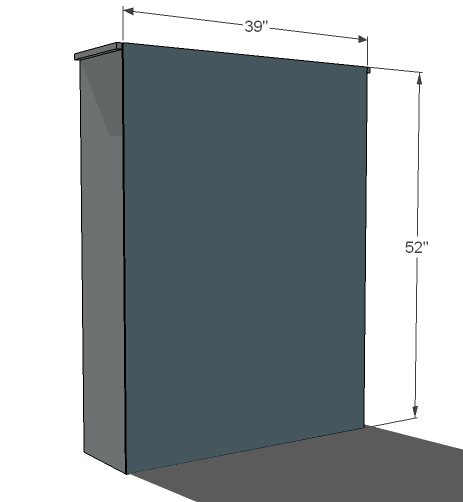
- 1 - 1/4" Plywood @ 39" x 52" (Back - 48" would work.)
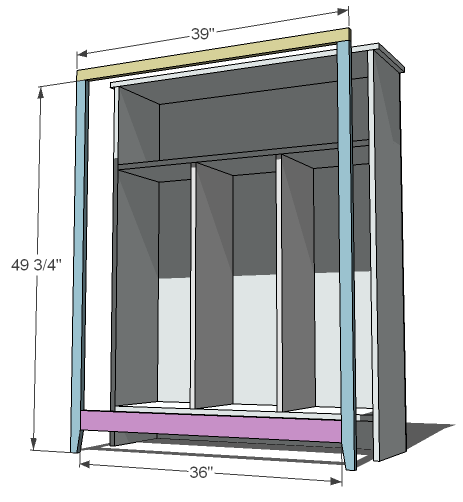
- 2 - 1x2 @ 49 3/4" (Sides)
- 1 - 1x3 @ 36" (Footer)
- 1 - 1x2 @ 39" (Header)
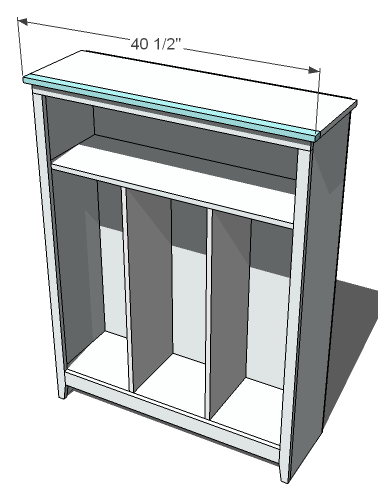
- 1 - 1x2 @ 40 1/2" (Crown)
Tools
- measuring tape
- square
- pencil
- safety glasses
- hearing protection
- drill
- circular saw
- sander
- countersink drill bit
Step-by-step Instructions
Step 1
Start by cutting all your boards. I used my Kreg Jig™ to drill pocket holes into the inside tops of the blue boards, both ends on the underside of the green boards, and on both ends of the purple boards. I drilled three pocket holes per end. Then I measured and marked out all of my joints. Don’t forget that a 1x is actually only 3/4″ thick.
Step 2
After squaring everything up, I tacked the back on with 1″ finish nails and glue. By also nailing into shelves and the locker sides, you add strength to the piece.
Step 3
Then I built the face frame by drilling pocket holes in both ends of the purple board, and the top ends of the blue boards. I marked the side boards and joined all the boards with screws through the pocket holes. Super easy. Finally, I used 2″ finish nails and glue to attach the face frame to the front of the locker cabinet.
Step 4
Finally, I used glue and 2″ nails to attach the crown to the top of the face frame and the top of the locker cabinet.
Step 5
Add hardware to complete.
Finishing
Sand all surfaces, starting with a medium grit and finishing with fine. Wipe off the dust, fill any holes or gaps with wood filler, and sand smooth once dry. Apply primer if you're painting, then finish with your choice of paint or stain and seal with a durable clear topcoat. For outdoor projects, use exterior-rated primer, paint or stain, and sealer so the piece stands up to the weather.
Source (temporary): https://www.ana-white.com/woodworking-projects/small-locker-cabinet-freestanding-mudroom-shelf-free-build-plans