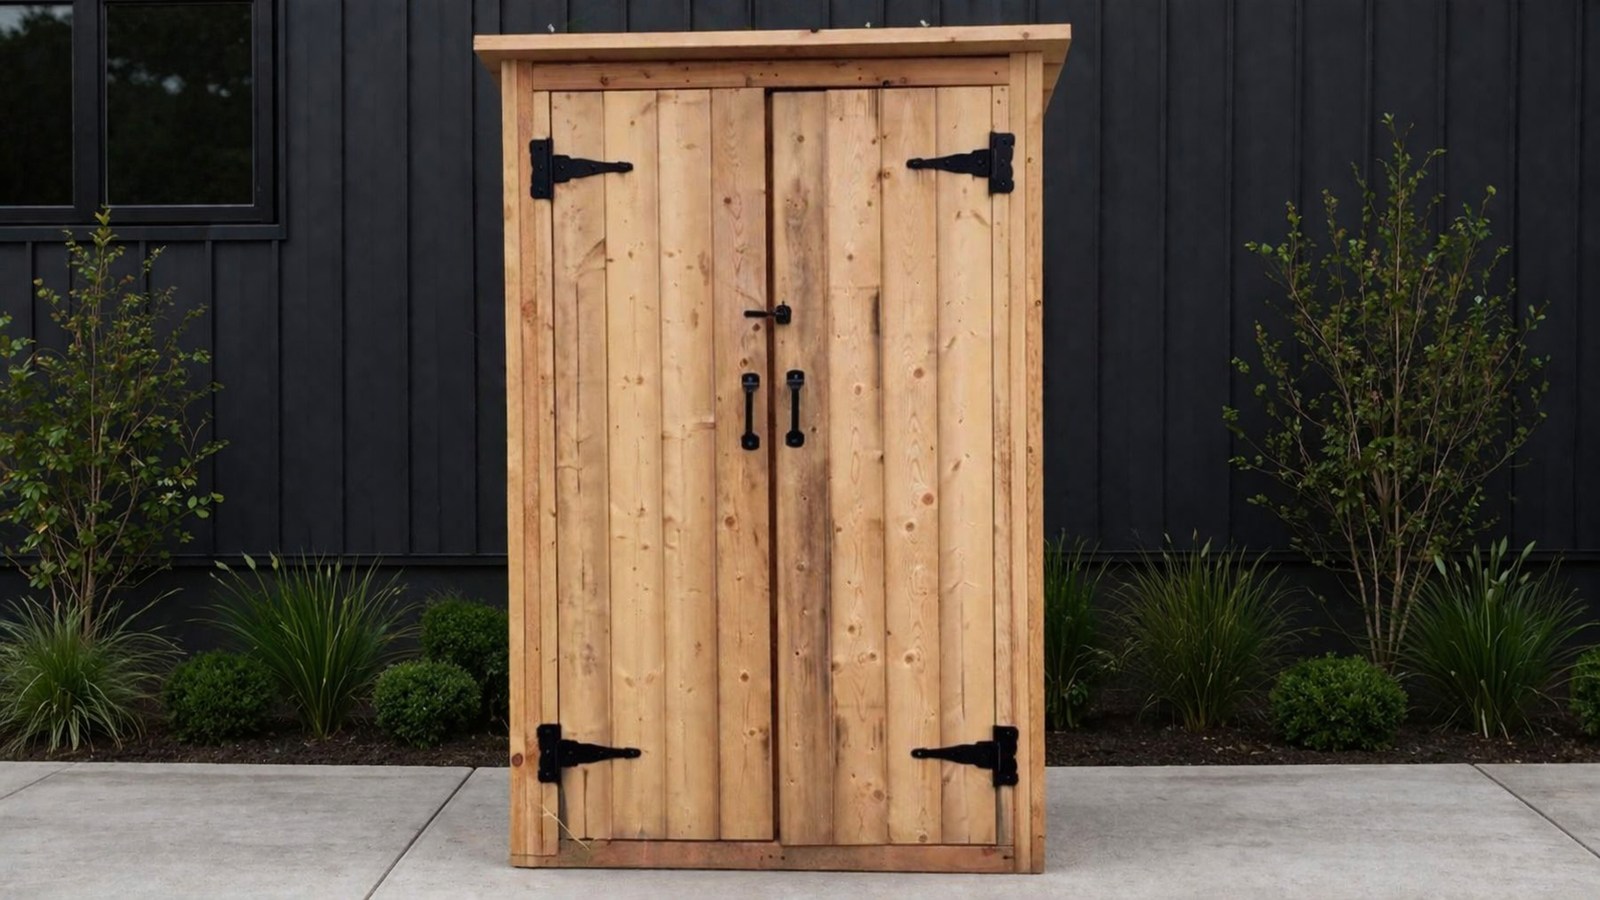
Small Outdoor Shed or Closet Converted into Smokehouse
Build your own outdoor storage closet! Add some extra space to your outdoor storage with this. Free
Specifications
| Project type | Other Projects |
|---|---|
| Room | Outdoor |
| Difficulty | Intermediate |
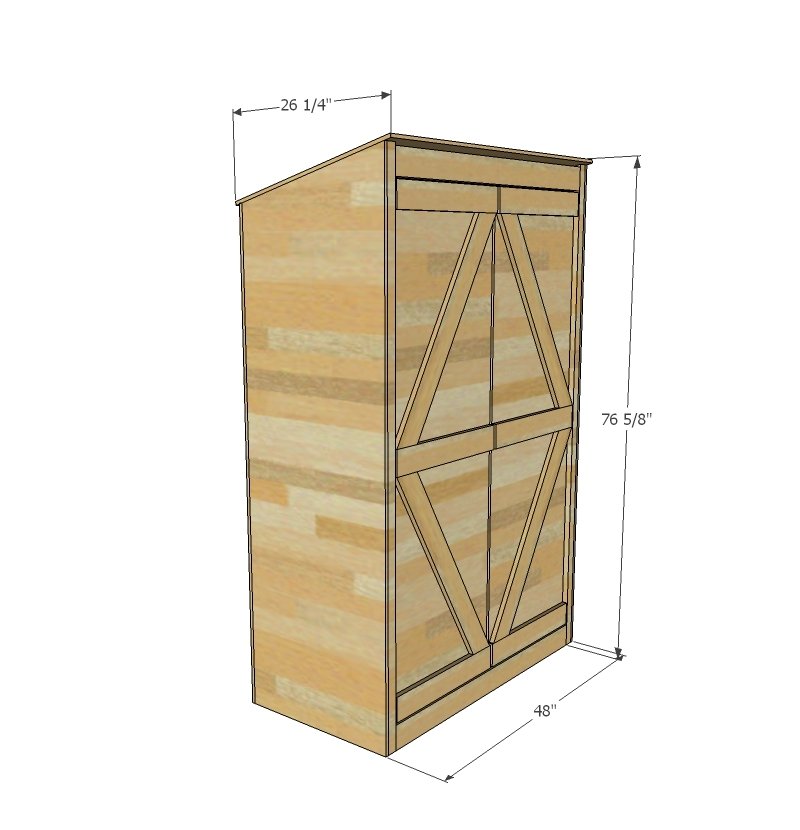
Dimensions
Use the size-specific shopping and cut lists below.
Shopping List
- 2 - sheets of 1/2" plywood (does NOT include material for doors)
- Doors can be made of boards (like we did) or a frame with 1/2" plywood on back.
- 12 - 2x4 @ 8 feet long
- 6 - Gate style hinges
- 2 handles and latch
- Galvanized nails for attaching plywood or exterior screws
- Roofing for 48" x 26-1/2" roof
- Additional material needed for doors and shelving
Cut List
SIDE PANELS
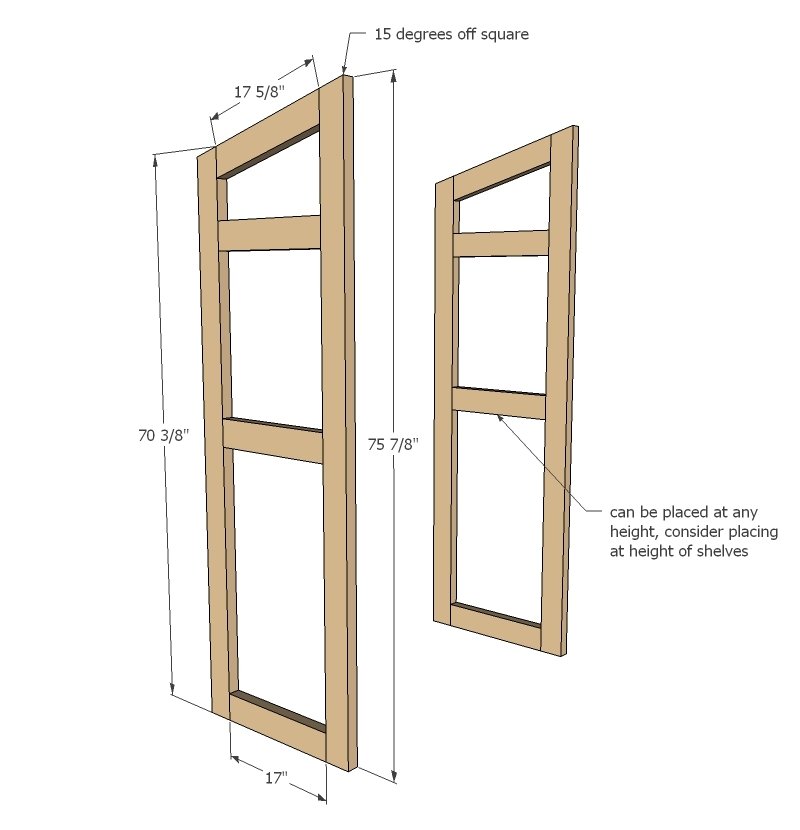
- 2 - 2x4 @ 70-3/8" longest point measurement, one end cut at 15 degrees off square
- 2 - 2x4 @ 75-7/8" longest point measurement, one end cut at 15 degrees off square
- 2 - 2x4 @ 17-5/8" long point to short point measurement, both ends cut at 15 degrees off square
- 6 - 2x4 @ 17"
FRAME PIECES
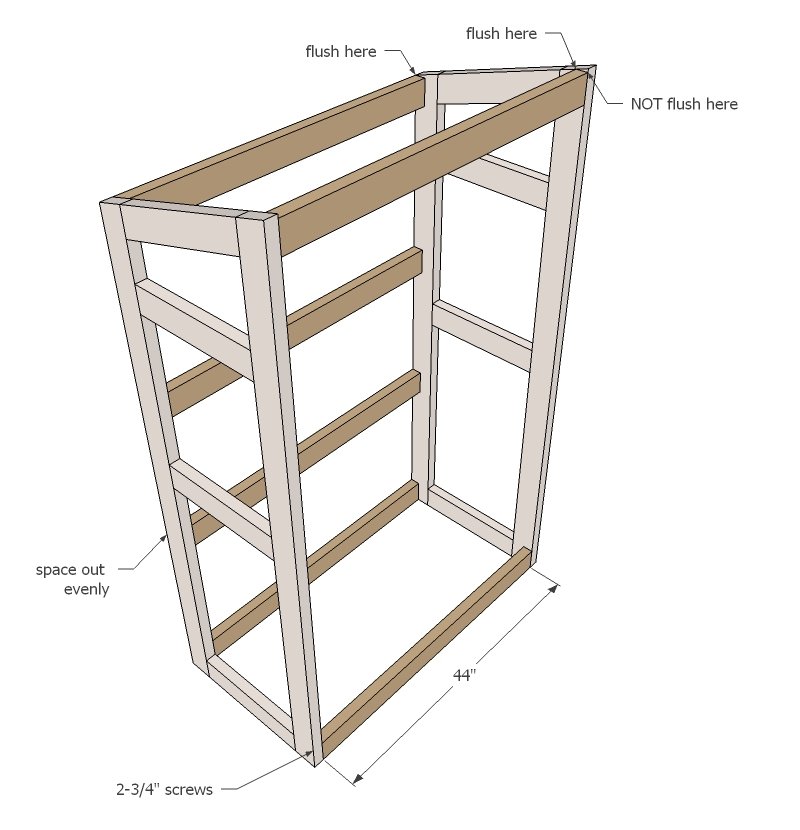
- 6 - 2x4 @ 44"
- 2 - 2x4 @ 21-3/4" long point to short point measurement, both ends cut at 15 degrees off square (rafters)
- 3 - 2x4 @ 75" (door supports)
PLYWOOD
- 2 - 1/2" plywood @ 24" x 75-7/8" (cut down on one end to 69-1/2")*
- 1 - 1/2" plywood @ 48" x 69-1/2"
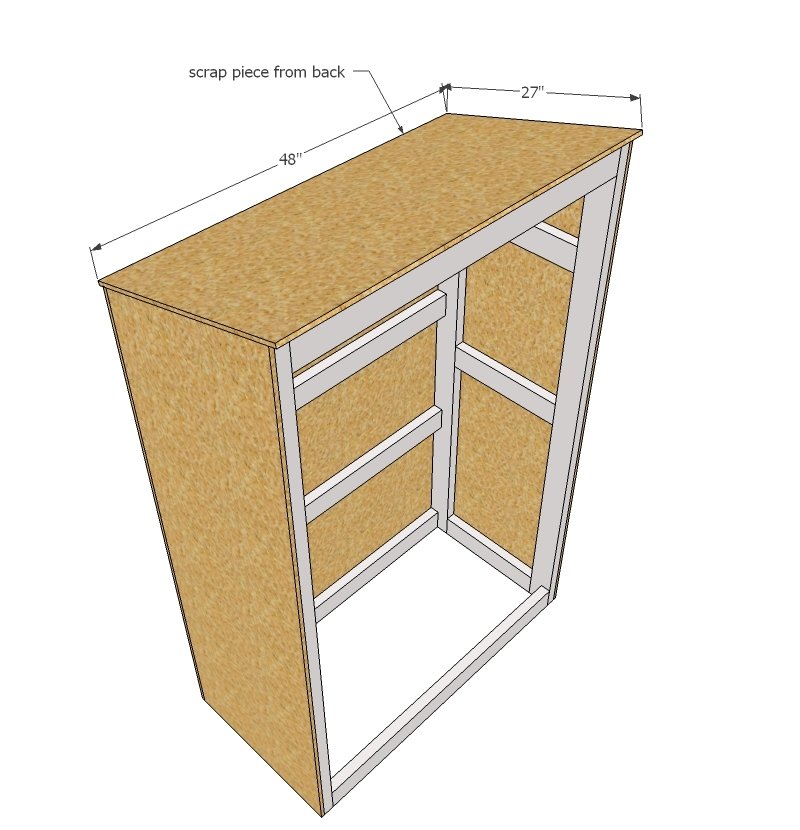
- 1- 1/2" plywood @ 48" 26-1/2" (use scrap from back)
DOORS -
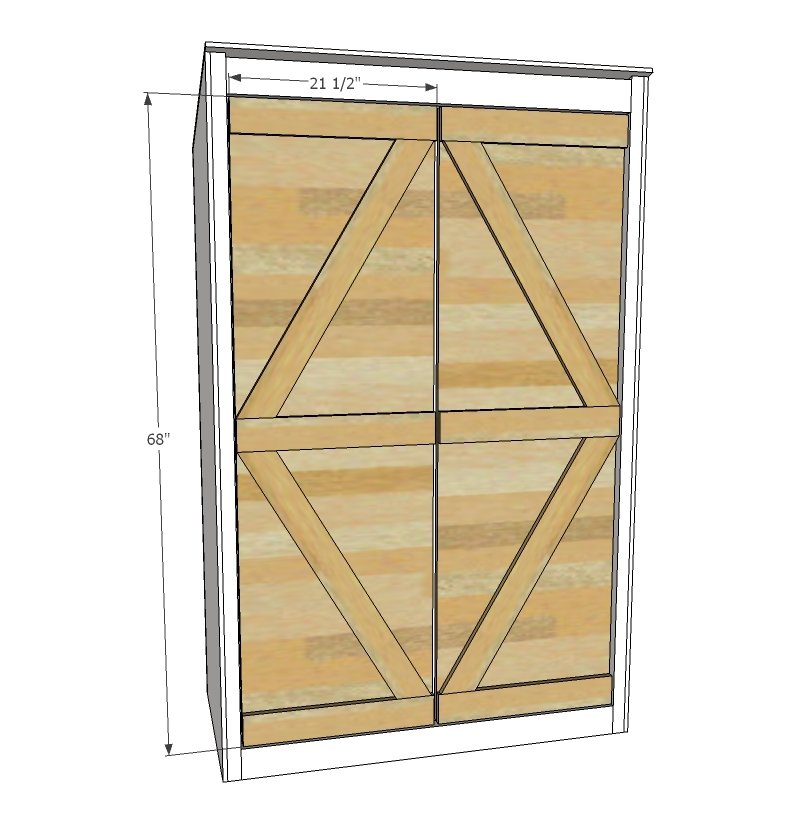
- ~21-1/2" x ~68" - Make 1-1/2" thick overall where hinges are placed. Should be cut to fit.
*Cut full sheet of plywood in half the lengthwise, than cut the two side panels from those pieces. Pieces should be cut in mirror for finished side out.
Tools
- measuring tape
- square
- pencil
- safety glasses
- hearing protection
- kreg-jig
- drill
- circular saw
- compound miter saw
- nailer
Step-by-step Instructions
Step 1
Build two of the side panels with 1-1/2" pocket holes and 2-1/2" pocket hole screws. Place pocket holes on outsides. Build in mirror so that the pocket holes are on outsides on both frame pieces. Additional supports can be added for more shelving.
Step 2
Attach the two frame pieces together with the 2x4s @ 44" long. Can be attached with pocket holes or screws from outsides. Note that the top frame boards should never extend above the side frame pieces. Otherwise outside edges are all flush.
Step 3
Add rafters, either with pocket holes or wood screws. Rafters should run at the same height as the side pieces.
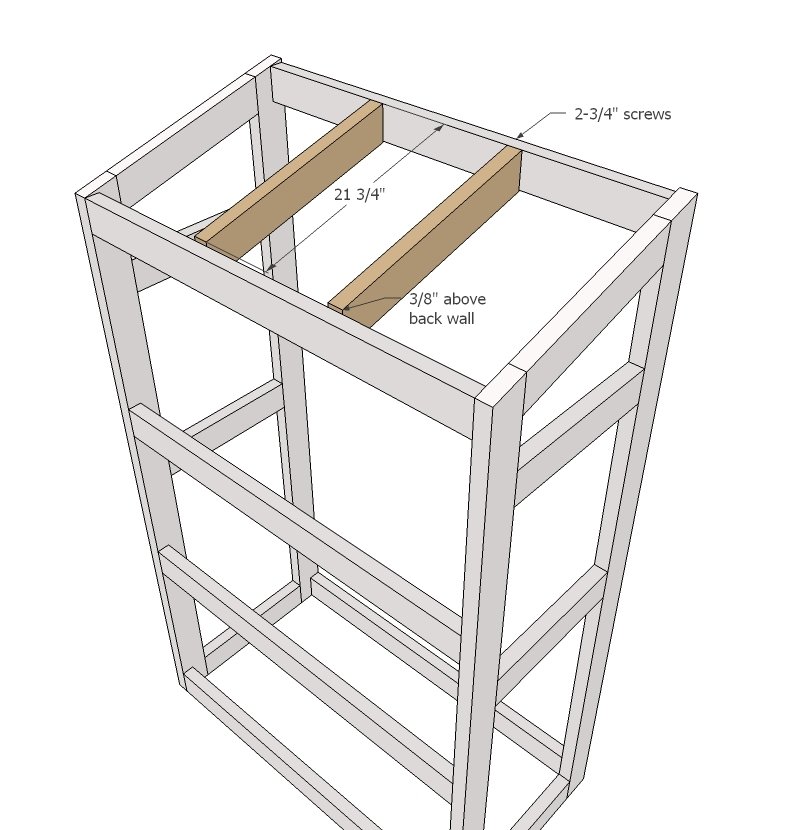
Step 4
The boards will be used to support the doors. A center board is not required, but it does give the doors something to shut against (this could also be achieved by a board at the top and bottom or shelving.
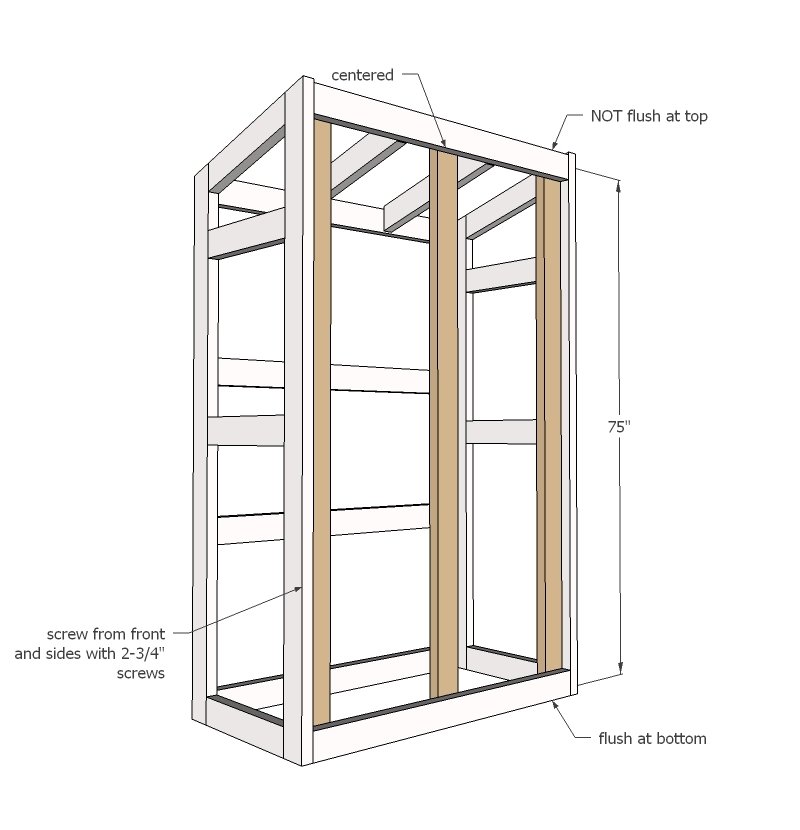
Step 5
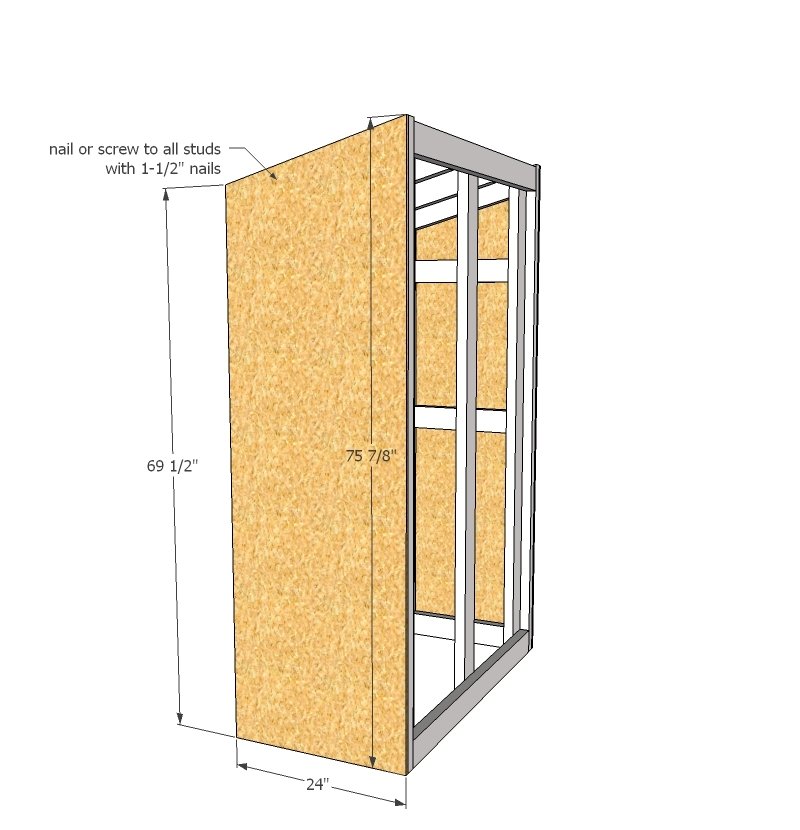
Step 6
Add plywood to the back, covering the sides. Nail on.
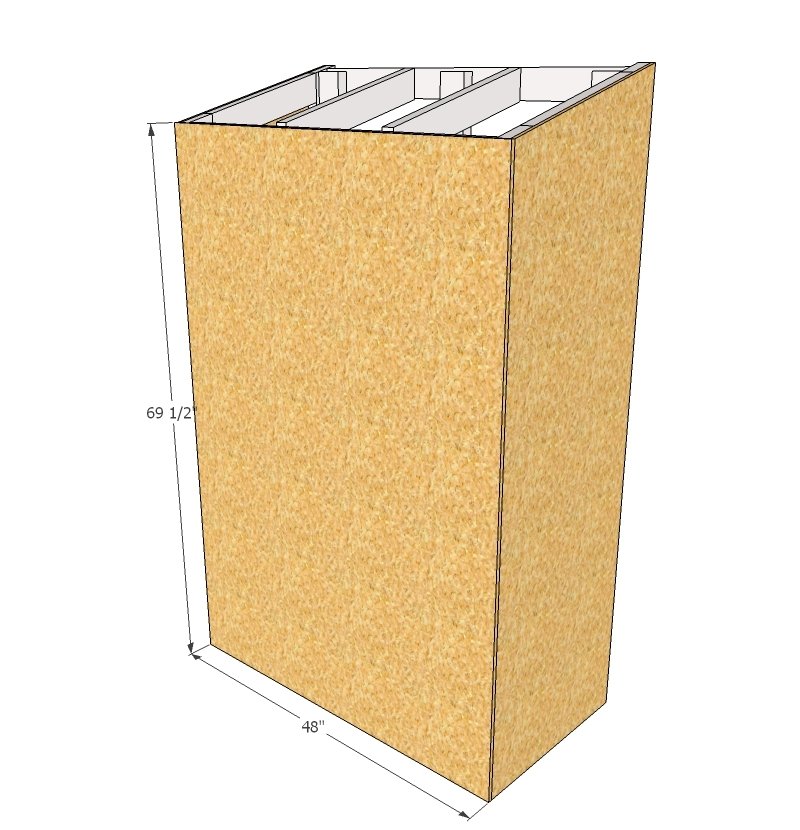
Step 7
Use the scrap from the back of the project to cover the top of the project. For added durability, roofing is recommended.
Step 8
Doors should be built to fit openings, and should be 1-1/2" thick where hinges are placed. Use three hinges per door for hanging.
Finishing
Sand all surfaces, starting with a medium grit and finishing with fine. Wipe off the dust, fill any holes or gaps with wood filler, and sand smooth once dry. Apply primer if you're painting, then finish with your choice of paint or stain and seal with a durable clear topcoat. For outdoor projects, use exterior-rated primer, paint or stain, and sealer so the piece stands up to the weather.
Source (temporary): https://www.ana-white.com/woodworking-projects/small-outdoor-shed-or-closet-converted-smokehouse