Small Raised Planter Stands
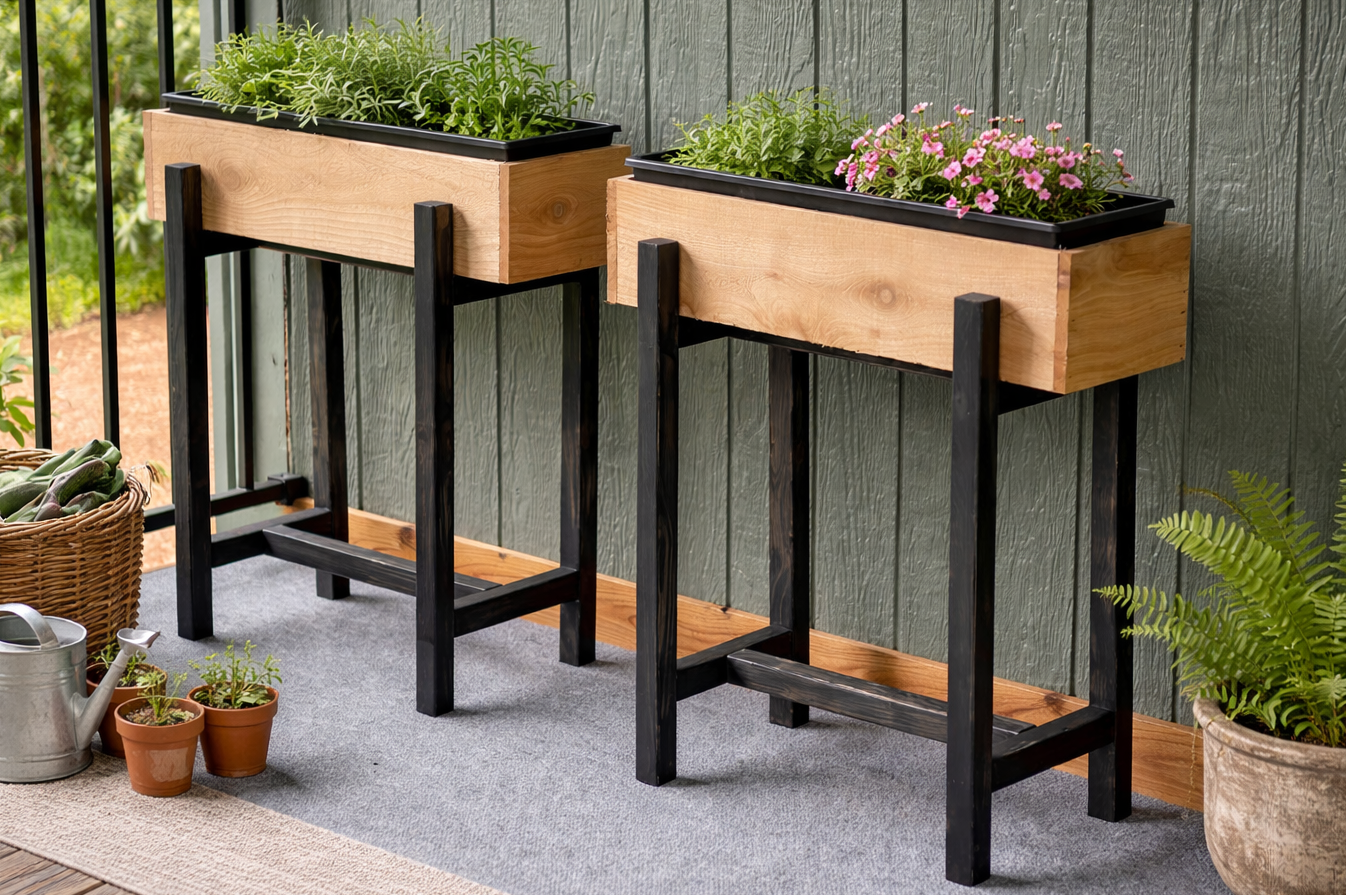
to build your own plant stands! These plant stands are easy to make and have a modern look. The plants are elevated, so easier to care for. It's perfect for cascading plants too.
Specifications
| Project type | Planters, Garden Beds, and Greenhouses |
|---|---|
| Room | Outdoor |
| Difficulty | Beginner Projects |
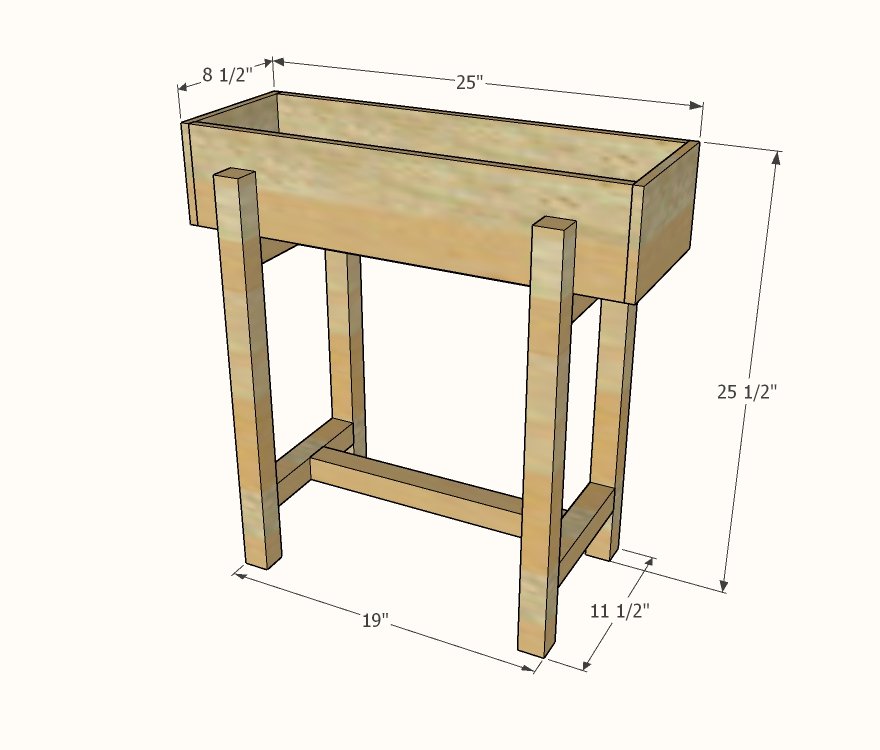
Dimensions
Use the size-specific shopping and cut lists below.
Shopping List
- 2 - 2x2 @ 8 feet long
- 1 - 5-1/2" wide cedar fence picket, 6 feet long
- 1 - planter liner (size may vary) find liner first and build to fit
- 2-1/2" screws (pocket hole screws for Kreg Jig or self tapping wood screws (star bit))
- 1-1/4" brad nails or 1-5/8" trim screws
Tools
- measuring tape
- pencil
- safety glasses
- drill
- circular saw
- nailer
- sander
Step-by-step Instructions
Step 1
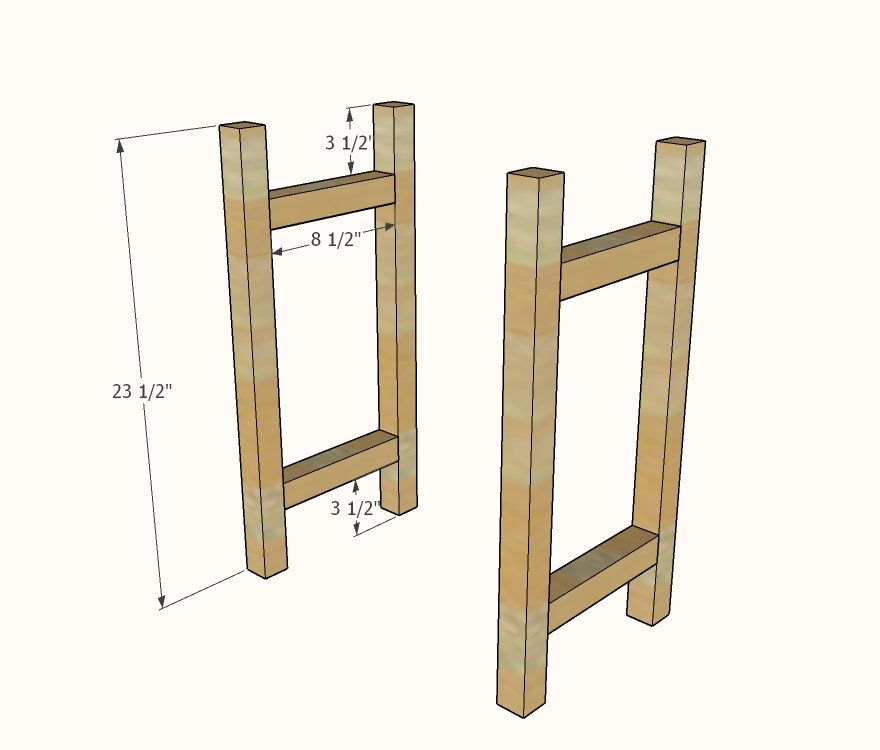
Build two identical leg sets as shown, using either 1-1/2" pocket holes and 2-1/2" pocket hole screws, or you can use 2-1/2" self tapping wood screws (star bit). Use glue and two screws per joint.
Step 2
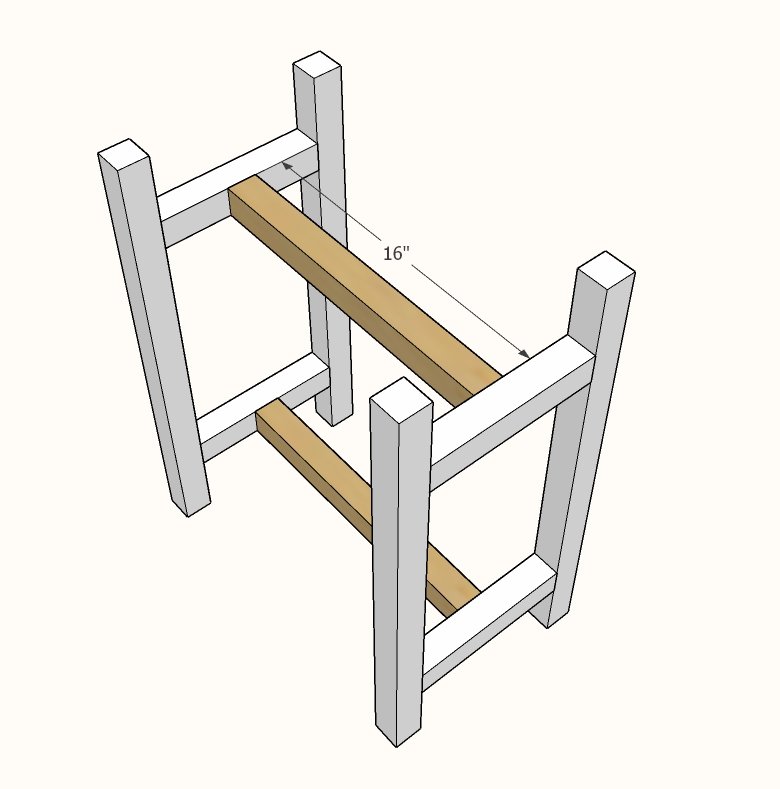
Attach the center supports in the same manner, centered on the cross supports.
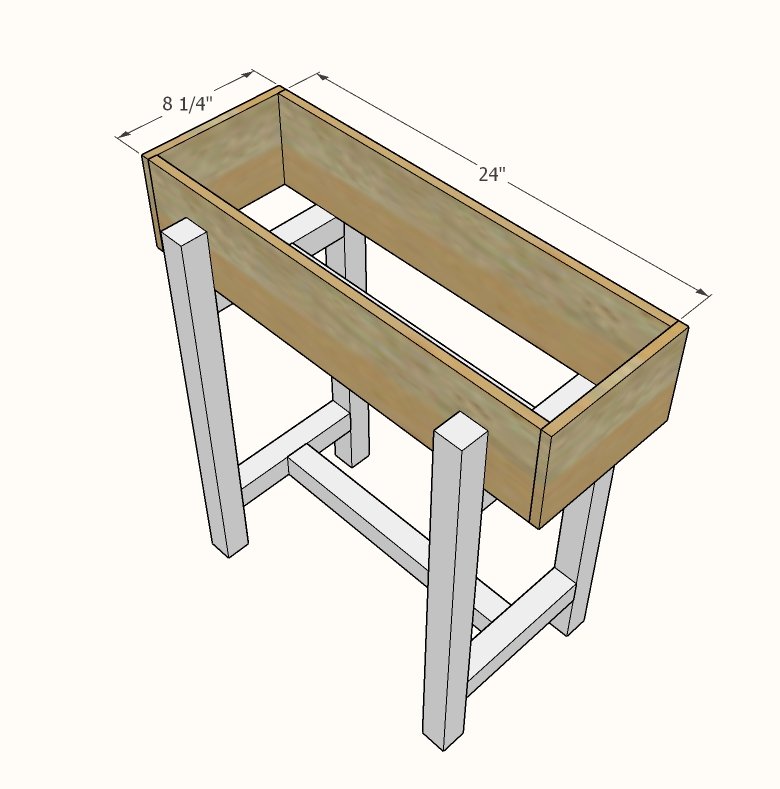
Build the planter box with 1-1/4" brad nails and glue (or use a 1-5/8" trim screw).
The box is designed to be removeable and dress up the plastic liner. It does not need to be attached to the stand. Place the liner and the cedar fence picket cover on the stand and fill with soil.
Finishing
Sand all surfaces, starting with a medium grit and finishing with fine. Wipe off the dust, fill any holes or gaps with wood filler, and sand smooth once dry. Apply primer if you're painting, then finish with your choice of paint or stain and seal with a durable clear topcoat. For outdoor projects, use exterior-rated primer, paint or stain, and sealer so the piece stands up to the weather.
Source (temporary): https://www.ana-white.com/woodworking-projects/small-raised-planter-stands