Small Rustic Bench
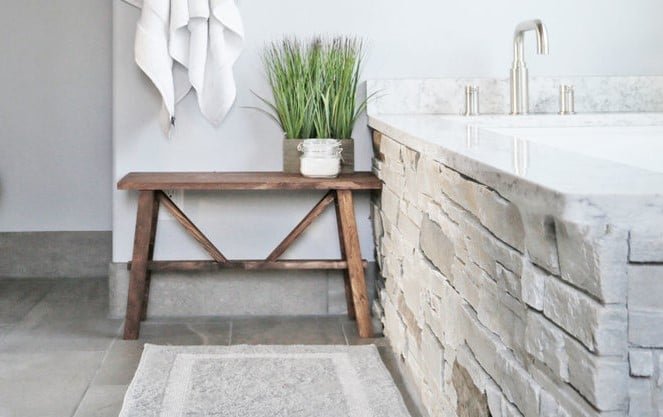
to build a sturdy, simple bench that can be used for seating or as an accent table or nightstand. I built this bench several years ago, and we use it daily - it is still just as strong and sturdy as ever. It's lightweight and easy to move, the cross bracing gives it a little detailing to make it interesting. We've had this bench indoors and out, it's a strong, sturdy bench that has lasted many years with high use. This is a great project to burn up scrap wood. with diagrams from
Specifications
| Project type | Nightstands |
|---|---|
| Room | Bathroom |
| Style | Cottage Style Furniture Plans |
| Difficulty | Intermediate |
Dimensions
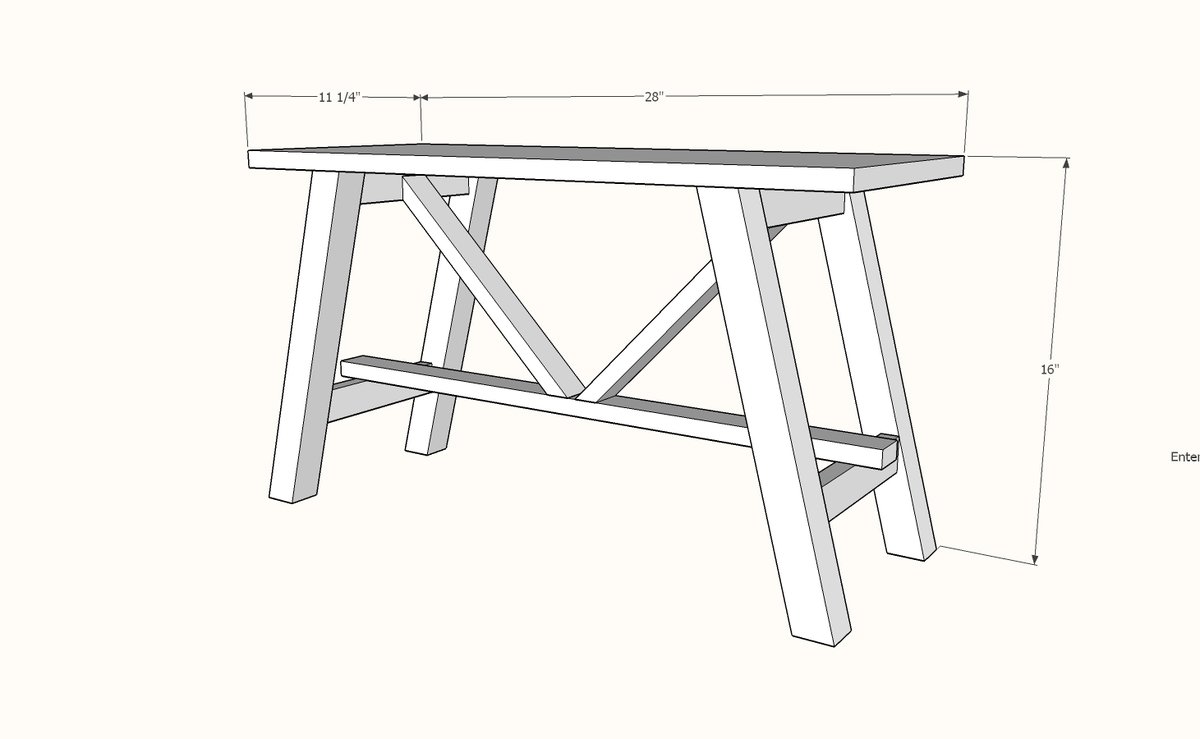
Use the size-specific shopping and cut lists below.
Shopping List
- 1 - 1x2 @ 8 feet long
- 1 - 1x12 @ 28" long
- 1 - 2x2 @ 6 feet long
Cut List
- 4 - 2x2 @ 15-3/4" - long point to short point, both ends cut at 15 degrees off square
- 4 - 1x2 @ 7-3/4"
- 1 - 1x12 @ 28"
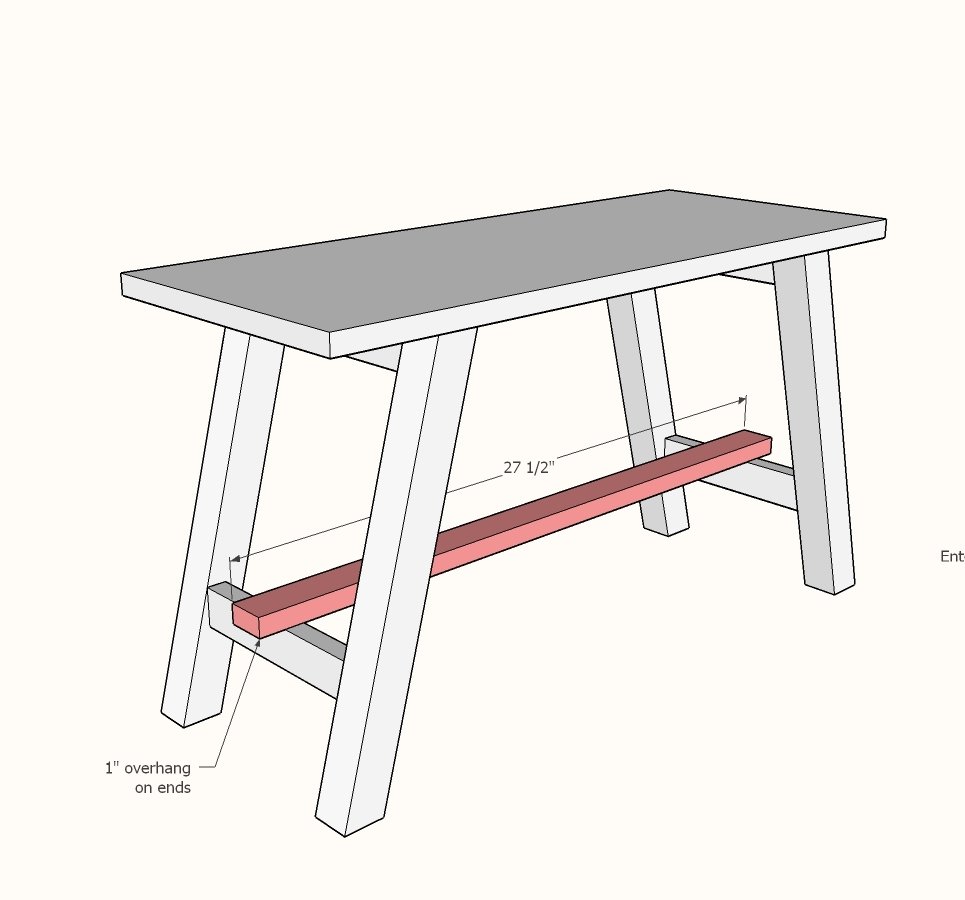
- 1 - 1x2 @ 27-1/2"
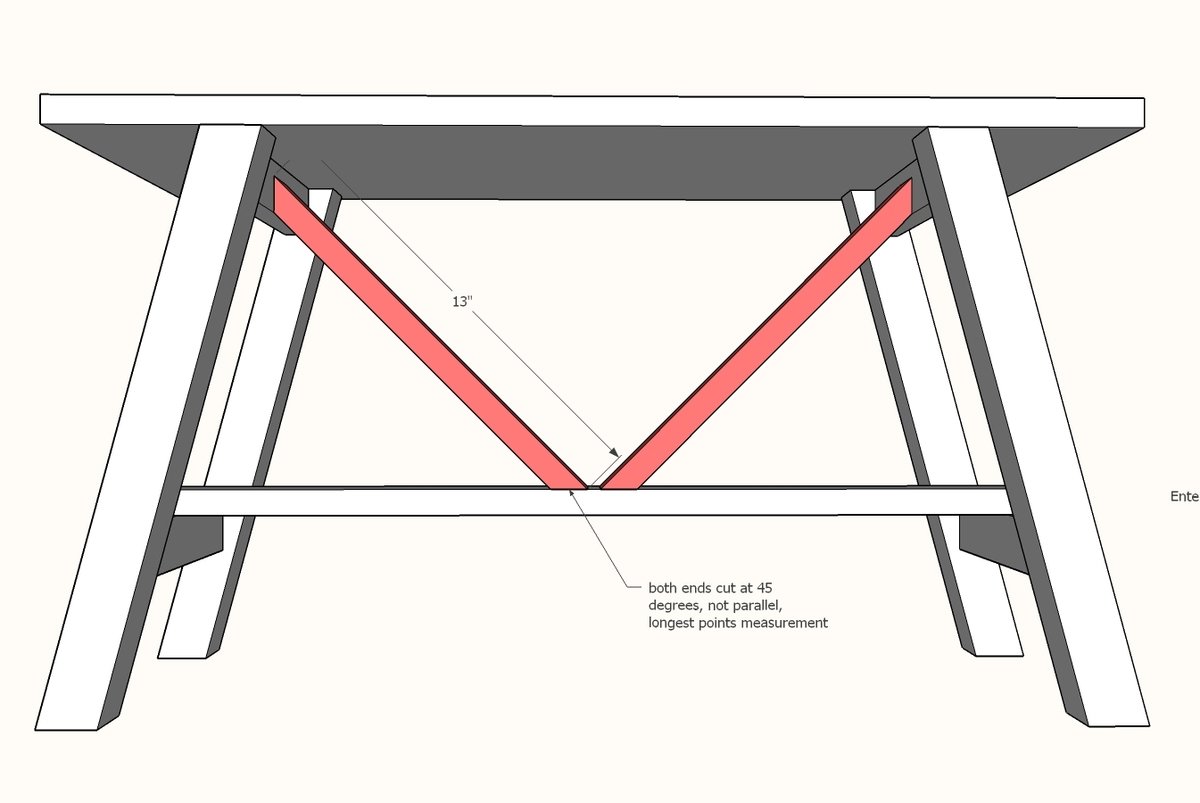
- 2 - 1x2 @ 13" - long point to long point, both ends BEVELED at 45 degrees off square, ends NOT parallel
Tools
- measuring tape
- square
- pencil
- safety glasses
- hearing protection
- kreg-jig
- drill
- compound miter saw
- sander
- countersink drill bit
Step-by-step Instructions
Step 1
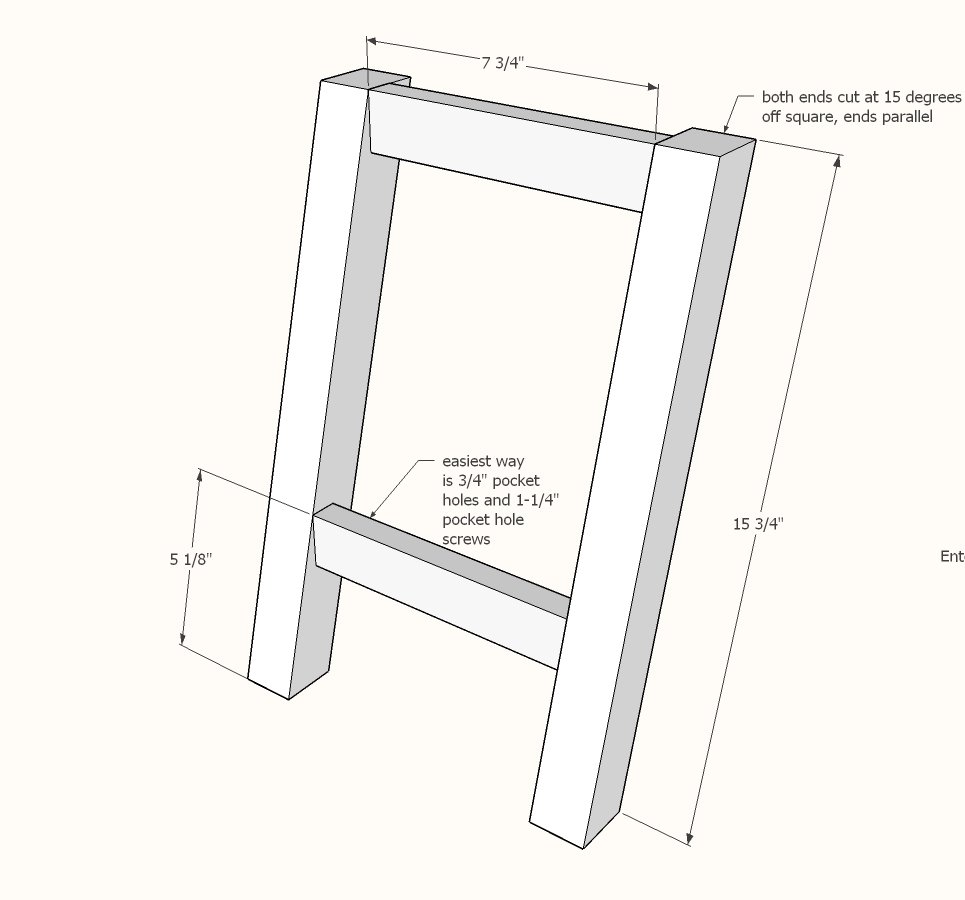
Attach 1x2s to legs, so top corner of 1x2 is on edge of leg, but 1x2 remains parallel to ground. This will be easy to do on top but a little tricker for the lower stretcher support. You can use a speed square to mark out the bottom stretcher at 15 degrees. Build two.
Step 2
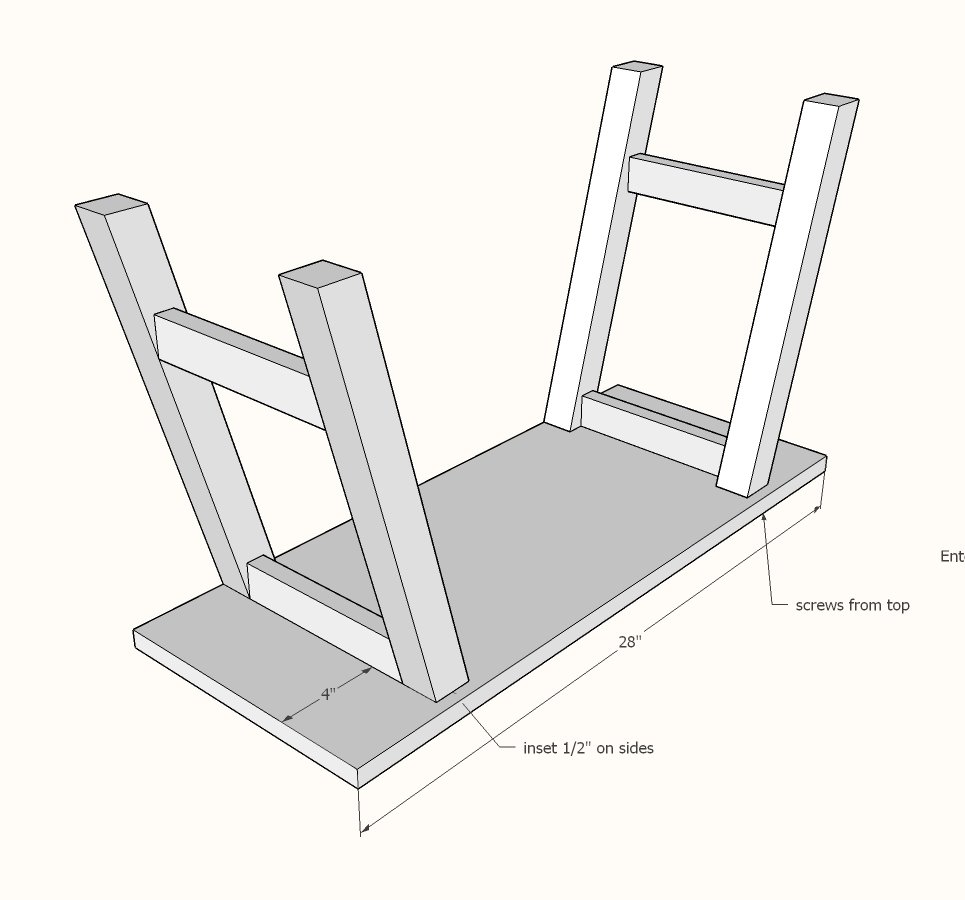
Attach legs to underside of top with 2" screws from top.
Step 3
Attach stretcher to base of legs with 2" screws.
Step 4
Attach cross bracing to the stretcher and top aprons with 2" screws.
Finishing
Sand all surfaces, starting with a medium grit and finishing with fine. Wipe off the dust, fill any holes or gaps with wood filler, and sand smooth once dry. Apply primer if you're painting, then finish with your choice of paint or stain and seal with a durable clear topcoat. For outdoor projects, use exterior-rated primer, paint or stain, and sealer so the piece stands up to the weather.
Source (temporary): https://www.ana-white.com/woodworking-projects/small-rustic-bench