Small Wall Shelf with Hooks
Free DIY Wall Shelf with Hooks Plans Add storage and style to your home with this DIY wall shelf with hooks – included! This easy project is perfect for bathrooms, entryways, mudrooms, or even kitchens. Use it as a bathroom towel shelf, an entryway organizer, or a place to hang coats, bathrobes, and bags. Built with common wood boards, this shelf is affordable, beginner-friendly, and easy to customize with paint or stain. The open shelf provides room for towels or décor, while sturdy hooks below add convenient hanging space. Features: • with diagrams and cut list • Simple build using standard lumber and basic tools • Works great for bathroom towel storage, bathrobes, coats, bags, or keys • Perfect for small spaces like bathrooms and entryways With just an afternoon and a few boards, you’ll create a functional, stylish wall shelf that looks custom built – all for a fraction of the cost of store-bought.
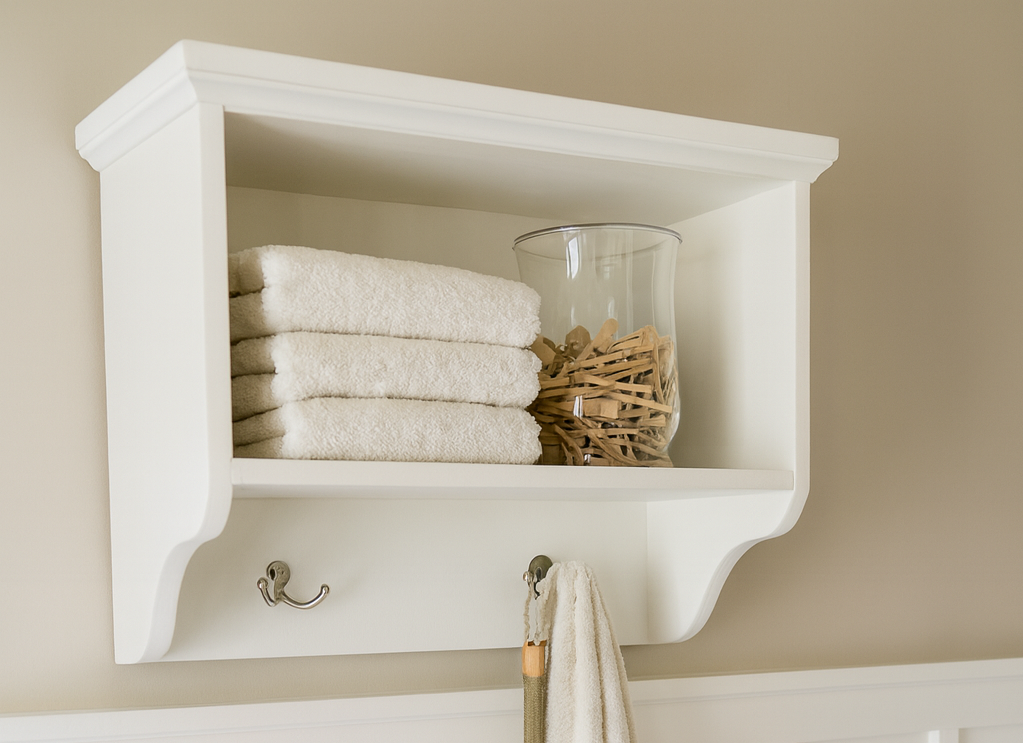
Specifications
| Project type | shelves |
|---|---|
| Room | Bathroom |
| Style | Cottage Style Furniture Plans |
| Difficulty | Beginner Projects |
| Estimated cost | Under $20 |
Dimensions
Use the size-specific shopping and cut lists below.
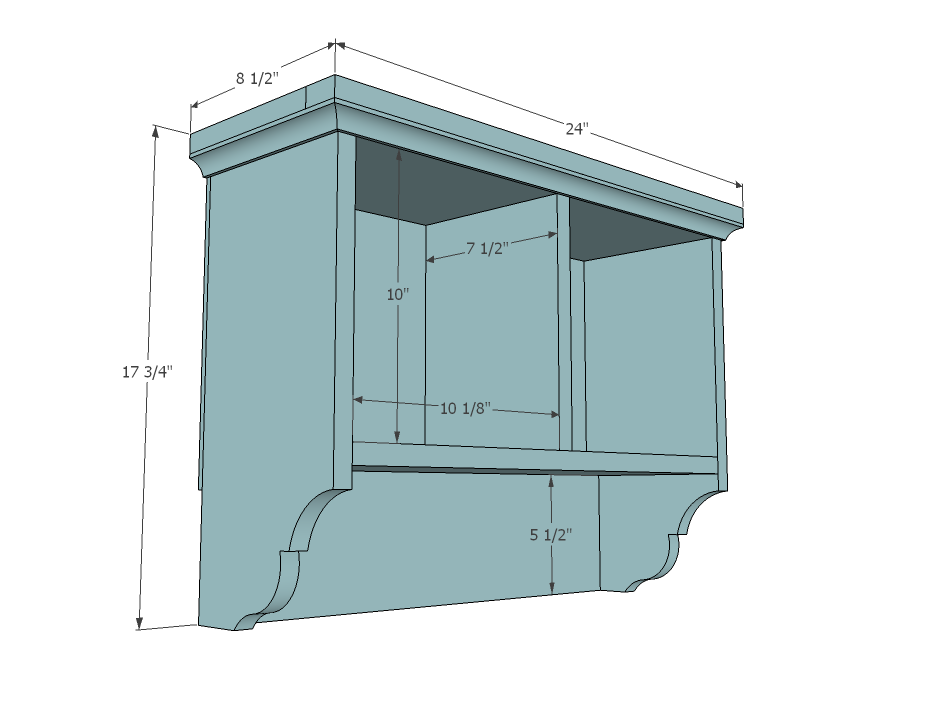
Shopping List
- 1 - 1x6 @ 2 feet long
- 1 - 1x8 @ 8 feet long
- 1 - 1x2 @ 4 feet long
- 1 - 3/4" x 3/4" cove base moulding
Cut List
- 2 - 1x8 @ 17" (Sides)
- 2 - 1x8 @ 21" (Shelves)
- 1 - 1x8 @ 10" (Center Divider - Optional)
- 1 - 1x6 @ 21" (Base)
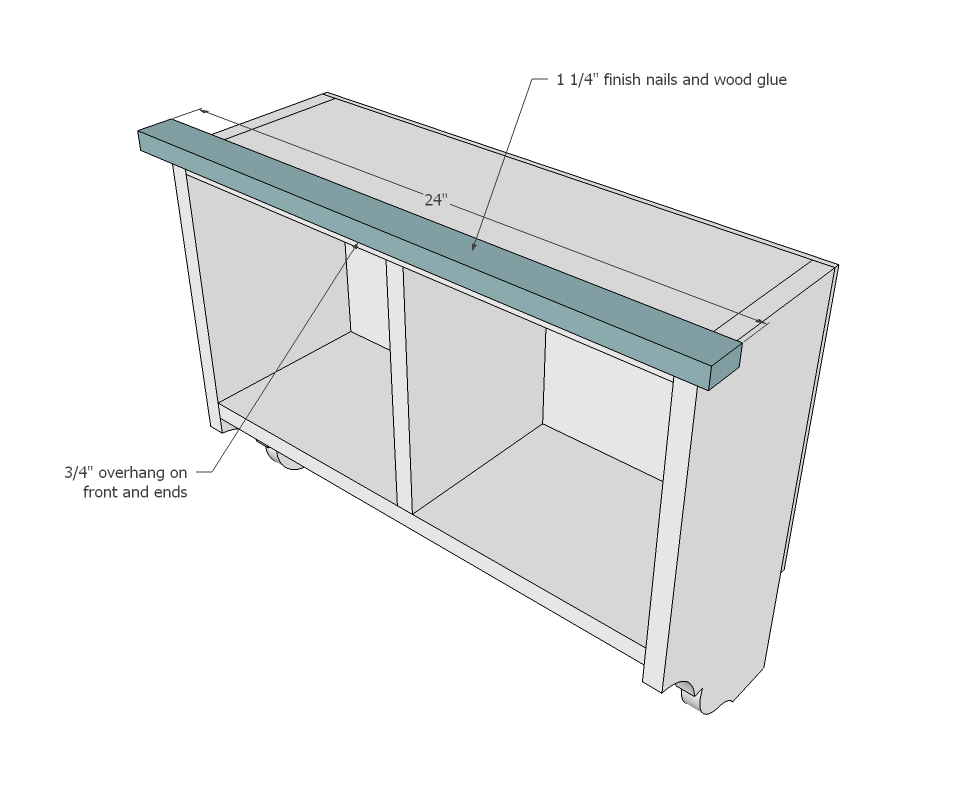
- 1 - 1x2 @ 24" (Crown)
- 2 - 1x2 @ 6 3/4" (Cut to fit - Side Crown)
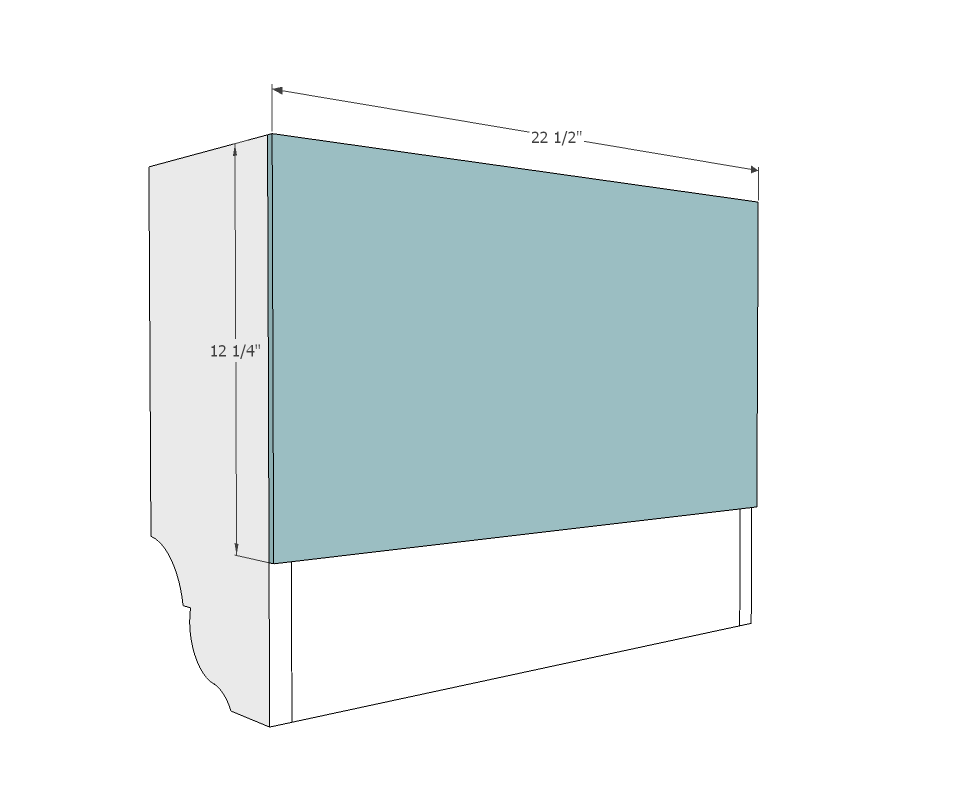
- 1 - 1/4" Plywood @ 22 1/2" x 12 1/4" (Back)
- Cove Moulding to fit
Tools
- measuring tape
- square
- pencil
- hammer
- hearing protection
- kreg-jig
- drill
- circular saw
- jigsaw
- nailer
- sander
- level
- countersink drill bit
Step-by-step Instructions
Step 1
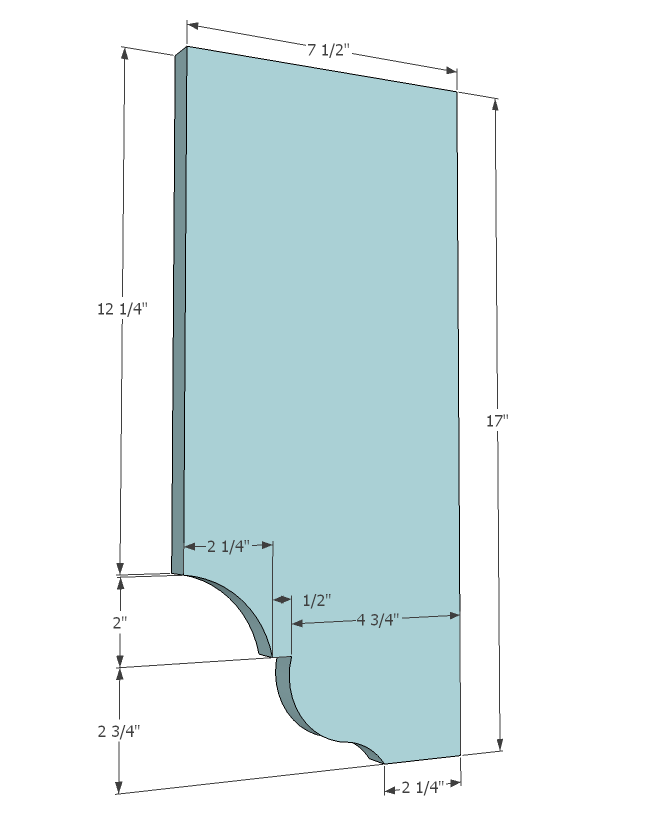
From the ends cut a scroll pattern as shown above with a jigsaw. Make sure both ends match and sand any rough areas. Your 1x8s may be a vary slightly in width, adjust accordingly.
Step 2
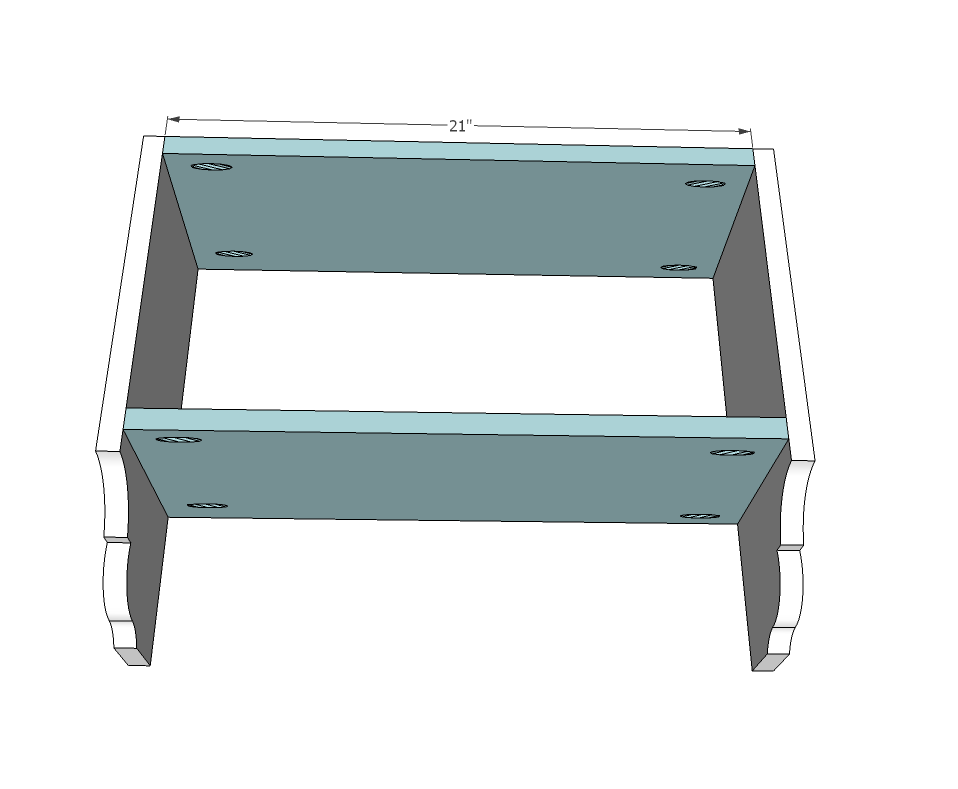
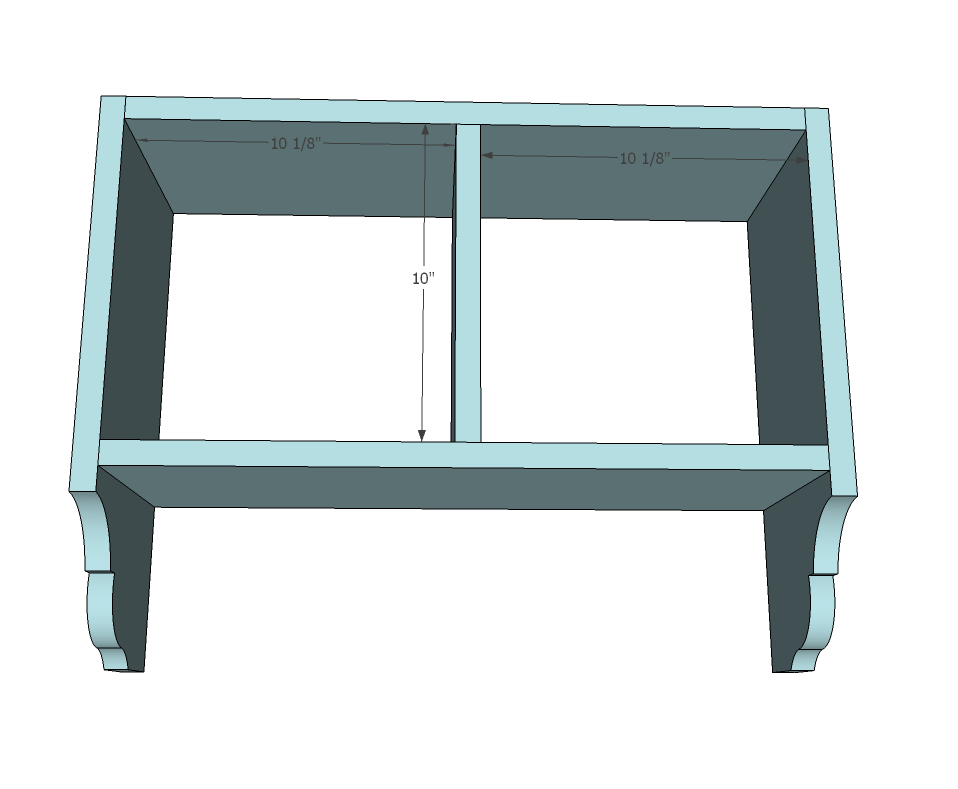
If you use a Kreg Jig, attach shelves as shown above. Otherwise, use 2" finish nails and wood glue to attach - or you could use 2" screws. Leave a 10" space between the shelves for the shelf partition - see next step.
Step 3
We choose not to add the center partition, but if you want, fasten in place. Use 2" finish nails and glue. You won't be able to do pocket holes because of the clearance here.
Step 4
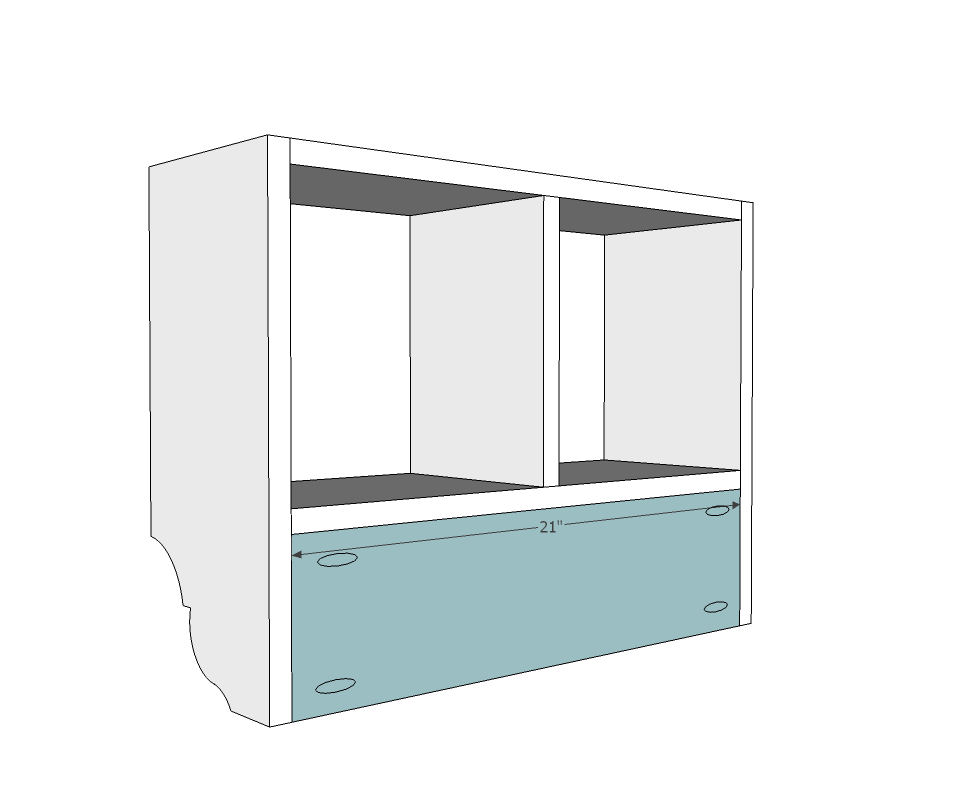
Attach base as shown above. Make sure you also attach to the bottom shelf too.
Step 5
Step 6
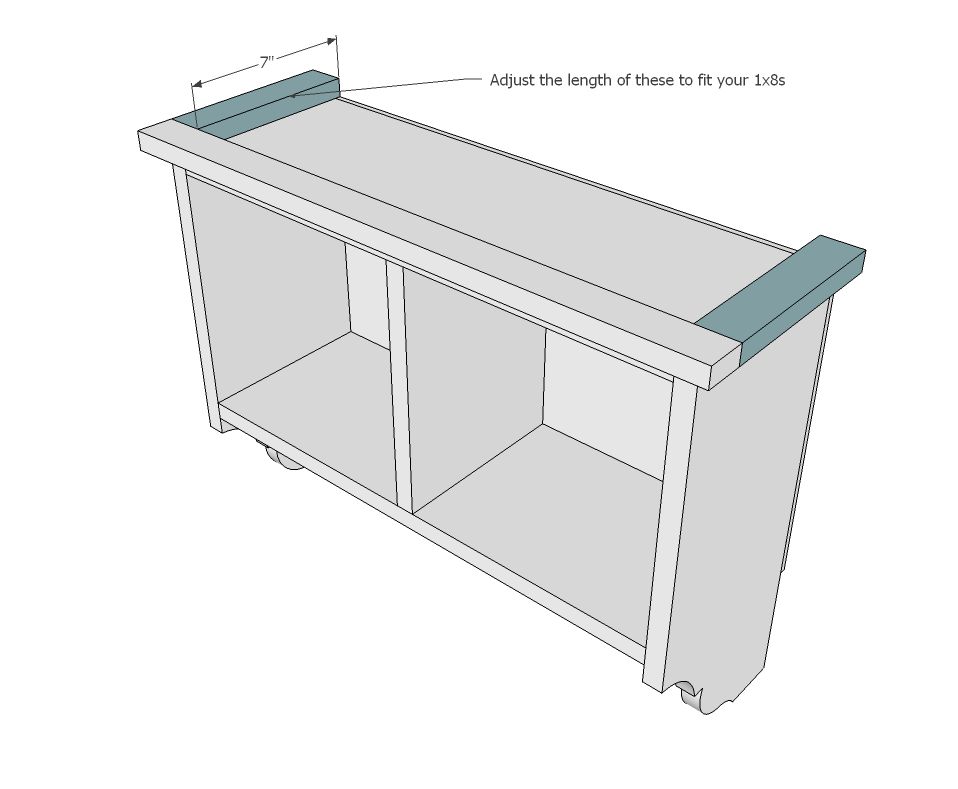
Now the front crown. 1 1/4" finish nails and glue as directed in the diagram.
Step 7
And the ends. Cut to fit, as your 1x8s can vary in width.
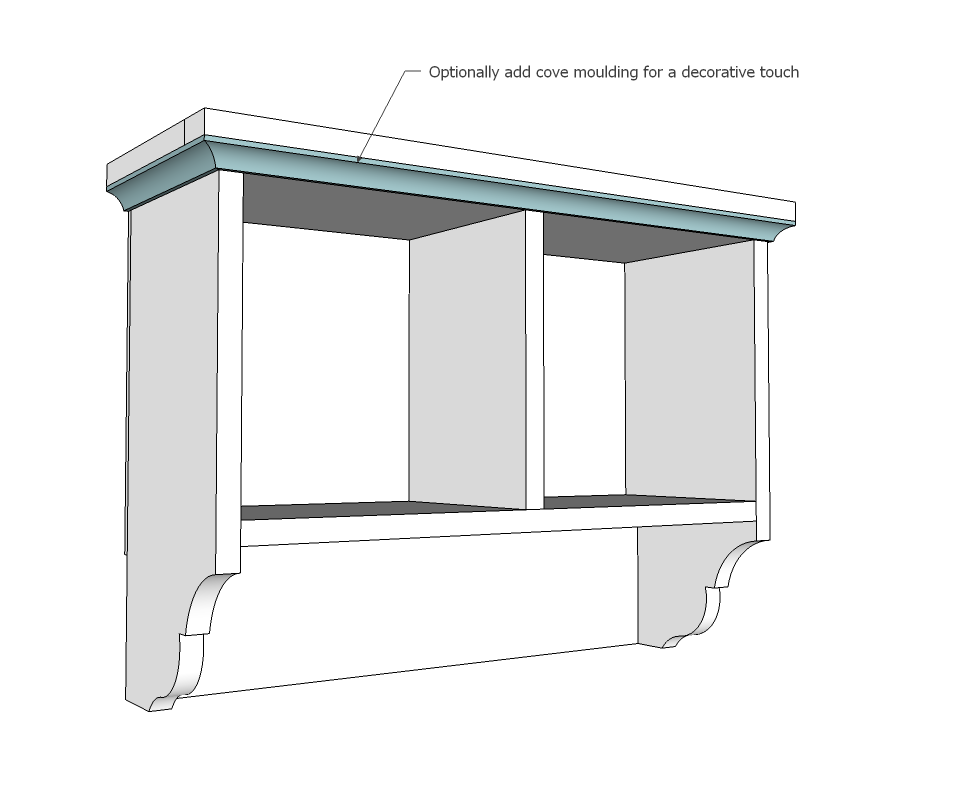
Cove moulding should be no more than 3/4" wide x 3/4" tall, like this Cove Moulding from Lowes
Miter the corners at 45 degrees and glue and tack on with 1 1/4" finish nails.
Step 9
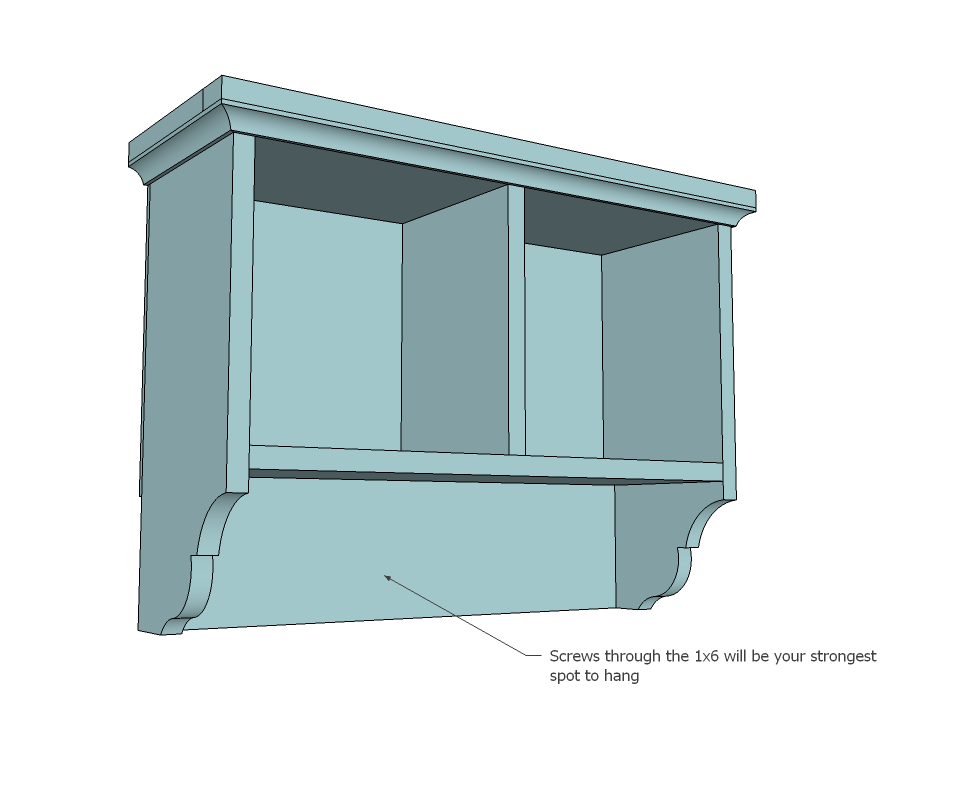
The best way to hang is through the 1x6 into a stud in the wall behind.
Finishing
Sand all surfaces, starting with a medium grit and finishing with fine. Wipe off the dust, fill any holes or gaps with wood filler, and sand smooth once dry. Apply primer if you're painting, then finish with your choice of paint or stain and seal with a durable clear topcoat. For outdoor projects, use exterior-rated primer, paint or stain, and sealer so the piece stands up to the weather.
Source (temporary): https://www.ana-white.com/woodworking-projects/small-wall-shelf-hooks-free-plans