Smith Media Wall: Center Media Hutch
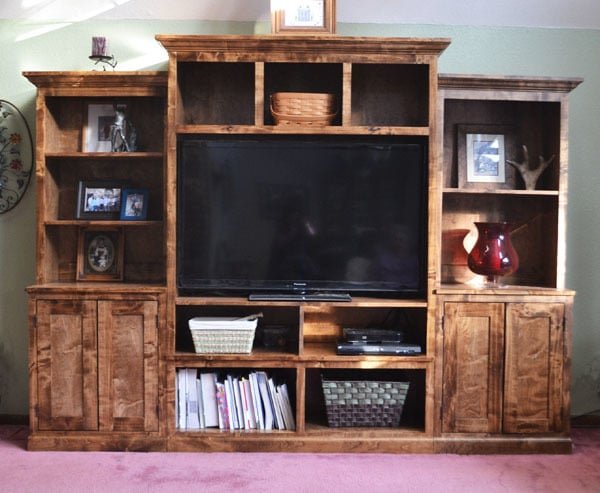
to build a media hutch from Features crown moulding and three top cubby shelves and one adjustable shelf.
Specifications
| Project type | Media and Entertainment Centers |
|---|---|
| Room | living room |
| Style | Farmhouse Furniture |
| Difficulty | Intermediate |
Dimensions
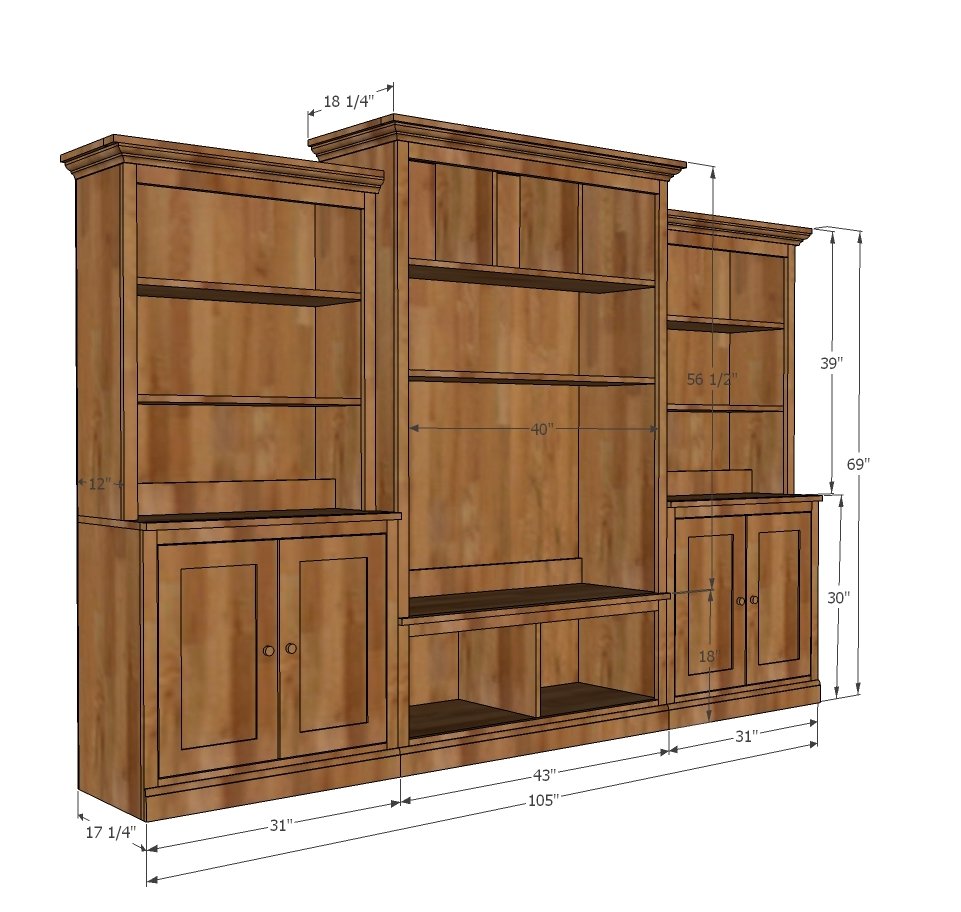
Use the size-specific shopping and cut lists below.
Shopping List
1 sheet of 3/4” plywood ripped into strips 15 3/4” wide (referred to as 1x16 in this plan)
3/4 sheet of 1/4” plywood
1 - 1x3 @ 4 feet long
1 - 1x4 @ 8 feet long
1 - 1x2 @ 10 feet long
Recommend 1 1/4" pocket hole screws and 1 1/4" finish nails
Cut List
1 - 1x16 @ 46 1/2” (Top)
2 - 1X16 @ 55 3/4” (Sides)
2 - 1X16 @ 14 3/4” (Dividers)
2 - 1X16 @ 41 1/2” (Shelves)
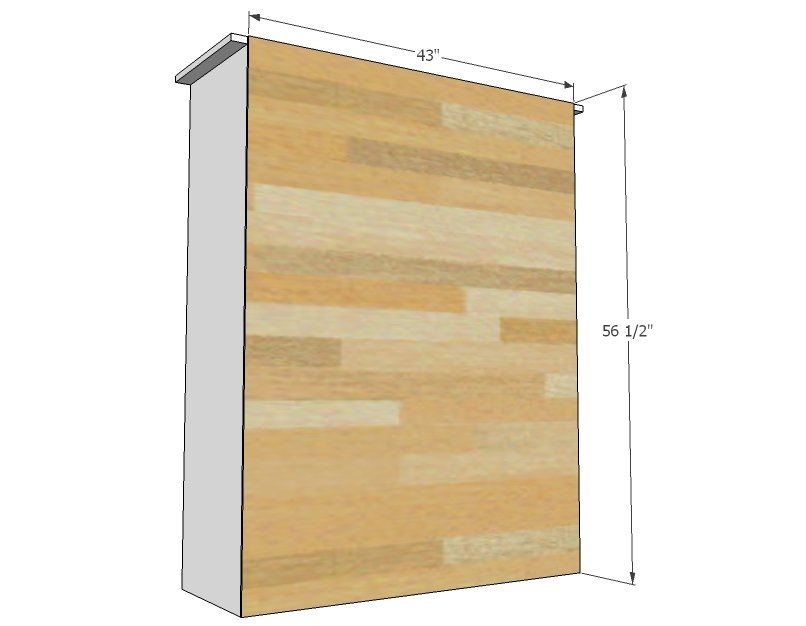
1/4” PLYWOOD 56 1/2” x 43” (Back)
1 - 1x4 @ 41 1/2” (Base support)
FACE FRAME
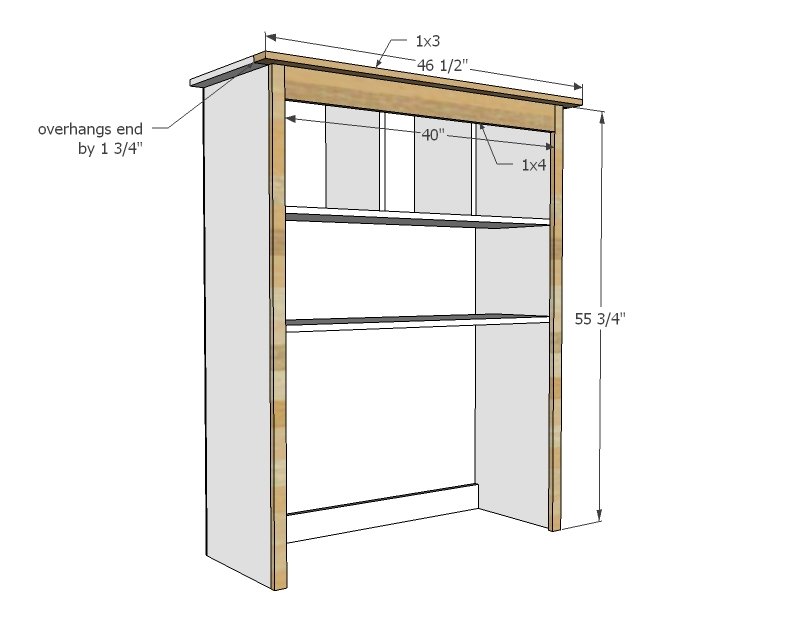
1 - 1x3 @ 46 1/2”
1 - 1x4 @ 40”
2 - 1x2 @ 55 3/4”
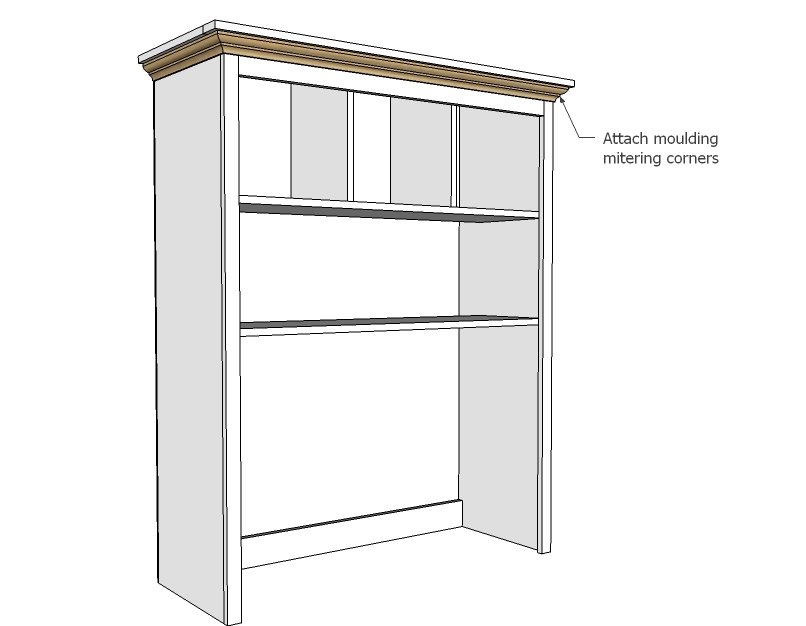
Crown moulding cut to fit. Crown must be no wider installed than 1-3/4” and no taller installed than 3”.
Tools
- measuring tape
- square
- pencil
- safety glasses
- hearing protection
- kreg-jig
- drill
- circular saw
- compound miter saw
- nailer
- sander
Step-by-step Instructions
Step 1
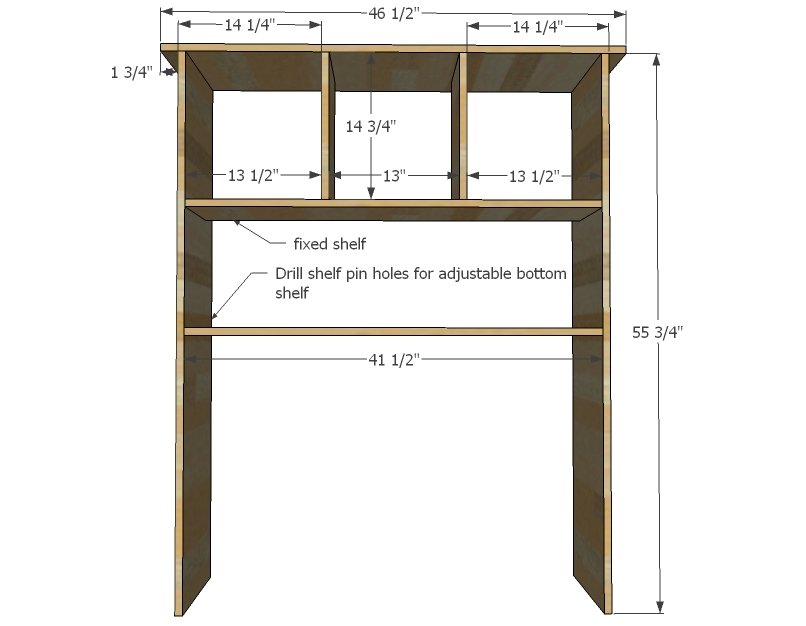
Start by building the main box. Note that the top overhangs the sides for the crown. We do this so the top is solid for extra storage up there as well. I recommend drilling adjustable shelf pin holes now on the insides. Another option is to drill 3/4" pocket holes on the underside of the adjustable shelf and then just finish it as a shelf. When you install your tv, you can attach the shelf at the desired height with pocket hole screws.
Step 2
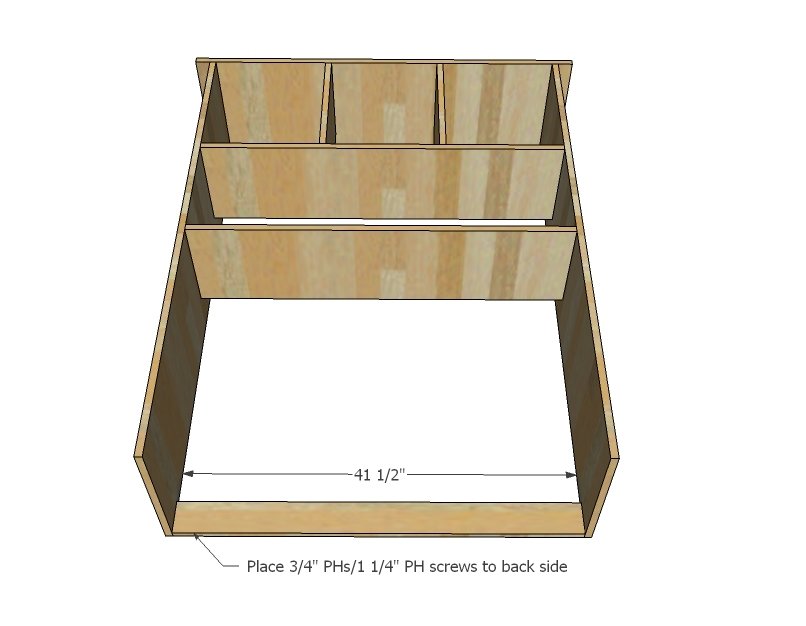
You'll need something at the bottom base to keep the sides from splaying out.
Step 3
Next, attach the back. Use 1 1/4" finish nails to attach to the side boards. To attach to the base board, you'll need to use nails less than 1" long or they will poke through the other side.
Next, build your face frame. Then attach face frame to front of cabinet.
Uncle Bill also ripped 1x board down and used them to trim out fronts of shelves and dividers, just to give it that finishing touch and for consistency. Painters, you could probably fill the plywood edge and sand well and paint.
Step 5
Finishing
Sand all surfaces, starting with a medium grit and finishing with fine. Wipe off the dust, fill any holes or gaps with wood filler, and sand smooth once dry. Apply primer if you're painting, then finish with your choice of paint or stain and seal with a durable clear topcoat. For outdoor projects, use exterior-rated primer, paint or stain, and sealer so the piece stands up to the weather.
Source (temporary): https://www.ana-white.com/woodworking-projects/smith-media-wall-center-media-hutch